MoxieManager how-to guides
Om this section, you get to learn abit about some of the more powerfull features that are offered in MoxieManager.
File storage
How to configure for AmazonS3
| Amazon S3 support is only available for Enterprise License customers. |
-
Make sure you have added AmazonS3 to the plugins list like this:
Example for PHP integrations$moxieManagerConfig['general.plugins'] = 'Favorites,History,Uploaded,AmazonS3';Example for .NET integrations<!-- Make sure the AmazonS3 plugin is present in your web.config --> <plugins> <plugin type="MoxieManager.Plugins.AmazonS3.Plugin" /> <!-- more plugins here --> </plugins> -
Configure your bucket information in config file.
Example for PHP integrations$moxieManagerConfig['amazons3.buckets'] = array( 'mybucketname' => array( 'publickey' => '', 'secretkey' => '' ) );Example for .NET integrations<add key="amazons3.buckets"> <bucket name="mybucketname" publickey="" secretkey="" /> </add>Optional: You might also need to configure 'urlprefix' in your bucket, it should be "http://s3.amazonaws.com" or similar, without the bucket name. Get your publickey and secretkey from Amazon S3 admin interface.
-
Add your bucket to the rootpath configuration. Please note that bucketnames can only be a-z 0-9 and lowercase chars.
Example for PHP integrations$moxieManagerConfig['filesystem.rootpath'] = 's3://mybucketname';Example for .NET integrations<add key="filesystem.rootpath" value="s3://mybucketname" />Note that the name must match with what you called your bucket in the buckets config in Step 2. It is also possible to have many rootpath, if you wish to list local folder as well as Amazon S3. Check out filesystem.rootpath config for more information about that.
List of bucket options
| Option | Description |
|---|---|
|
The public key that you get from the Amazon S3 service. |
|
The secret key that you get from the Amazon S3 service. |
|
Url prefix to add infront of the urls when selecting files this can for example be https://www.example.com or //www.example.com. If you do not have a custom domain, you will need to configure the bucketname into the normal s3 url. |
|
Enables you to control how the files are to be cached in the users browser when the request the file. The values that can be specified for this option can be found in the HTTP RFC. |
|
Enables you to configure a specific endpoint for the API calls this can be an URL to a specific region or a custom domain. |
Example of EU region bucket with custom domain
'<your bucket>' => array(
   'publickey' => '<your public key>',
   'secretkey' => '<your secret key>',
   'urlprefix' => 'http://mycustomdomain/',
   'endpoint' => 's3-eu-west-1.amazonaws.com'
)<bucket name="<your bucket>"
publickey="<your public key>"
secretkey="<your secret key>"
urlprefix="http://mycustomdomain/"
endpoint="s3-eu-west-1.amazonaws.com"
/>How to configure for Azure
| Azure Blob Storage support is only available for Enterprise License customers. |
-
Make sure you have added Azure to the plugins list like this:
Example for PHP integrations$moxieManagerConfig['general.plugins'] = 'Favorites,History,Uploaded,Azure';Example for .NET integrations<!-- Make sure the Azure plugin is present in your web.config in the plugins element --> <plugin type="MoxieManager.Plugins.Azure.Plugin" /> -
Configure your container information in config file.
Example for PHP integrations$moxieManagerConfig['azure.containers'] = array( 'containername' => array( 'account' => 'yourazureaccount', 'sharedkey' => 'yoursharedkey' ) );Example for .NET integrations<add key="azure.containers"> <container name="containername" account="yourazureaccount" sharedkey="yoursharedkey" /> </add>Optional: You can also set development to true to run against the local Azure Storage Emulator. Get your account and sharedkey from the Azure admin interface.
-
Add your container to the rootpath configuration.
Example for PHP integrations$moxieManagerConfig['filesystem.rootpath'] = 'azure://containername';Example for .NET integrations<add key="filesystem.rootpath" value="azure://containername" />Note that the name must match with what you called your container in the container config in Step 2. It is also possible to have many rootpath, if you wish to list local folder as well as Azure. Check out filesystem.rootpath config for more information about that.
Optional, setting config by sessions
If you wish to configure for settings, do not forget to use the prefix for the azure settings as well.
$_SESSION["moxiemanager.azure.containers.myazureclient.container"] = "containername";
$_SESSION["moxiemanager.azure.containers.myazureclient.account"] = "accountname";
$_SESSION["moxiemanager.azure.containers.myazureclient.sharedkey"] = "accountsecretkey";

$_SESSION["moxiemanager.filesystem.rootpath"] = "azure://myazureclient";Session["moxiemanager.azure.containers.myazureclient.container"] = "containername";
Session["moxiemanager.azure.containers.myazureclient.account"] = "accountname";
Session["moxiemanager.azure.containers.myazureclient.sharedkey"] = "accountsecretkey";
Session["moxiemanager.filesystem.rootpath"] = "azure://myazureclient";If your session prefix is configured to "moxiemanager".
How to use Ftp
| FTP support is only available in the Professional and Enterprise License package |
-
Add FTP to the plugins list in the config file.
Example for PHP integrations$moxieManagerConfig['general.plugins'] = 'Favorites,History,Uploaded,Ftp';Example for .NET integrations<!-- Make sure the plugin is added in the web.config --> <plugin type="MoxieManager.Plugins.Ftp.Plugin" /> <!--- Add to plugins --> <add key="general.plugins" value="Favorites,History,Uploaded,Ftp" /> -
Add the FTP configuration to config file.
Example for PHP integrations$moxieManagerConfig['ftp.accounts'] = array( 'FTPServer' => array( 'host' => 'www.domain.with.ftp', 'user' => 'username', 'password' => 'password', 'rootpath' => '/public_html/wwwroot/images', 'wwwroot' => '/public_html/wwwroot', 'passive' => true, 'urlprefix' => '{proto}://{host}' ) );Example for .NET integrations<add key="ftp.sites"> <site name="FTPServer" host="hostname" user="username" password="pass" rootpath="/public_html/wwwroot/images" wwwroot="/public_html/wwwroot" urlprefix="{proto}://{host}" passive="true" /> </add>-
rootpath is the path you want listed as root folder of your FTP.
-
wwwroot is the public folder of remote site, see example above.
-
urlprefix is optional, by default it sets to the same domain as the hostname.
-
-
Add your FTP to the rootpath config in config file.
Example for PHP integrations$moxieManagerConfig['filesystem.rootpath'] = 'ftp://FTPServer';Example for .NET integrations<add key="filesystem.rootpath" value="ftp://FTPServer" />Note that the name must match with what you called your site in the ftp config in Step 2. It is also possible to have many rootpath, if you wish to list local folder as well as some ftp server. Check out filesystem.rootpath config for more information about that.
|
Note, problems with paths
If your not getting a proper return path from the FTP plugin, you might need to fiddle with urlprefix setting and configure the correct domain for a public url to the file, if the file is possible to access publicly.
|
How to use Dropbox
| Dropbox is only available for Professional/Enterprise License customers. |
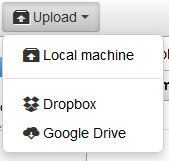
The Dropbox integration works like this, you can select files using the Dropbox Chooser, those files will be downloaded locally to MoxieManager.
-
Open dropbox create app page
-
Click Create App
-
Choose Dropbox API in the "Choose API" section.
-
Choose Full Dropbox in the "Choose the type of access you need" section.
-
Name your app.
-
Select Enable additional users
-
Add your domains to Chooser/Saver domains for example localhost
-
Copy the "App key" and paste it into the dropbox.app_id settings on config.php or Web.config.
Here are some examples of the lines you need to change in the config
// Add to plugins list
$moxieManagerConfig['general.plugins'] = "Favorites,History,Uploaded,Dropbox";

// Config the app_id
$moxieManagerConfig['dropbox.app_id'] = "";<!-- Make sure the plugin is added in the web.config -->
<plugin type="MoxieManager.Plugins.DropBox.Plugin" />
<!-- Add to plugins list -->
<add key="general.plugins" value="Favorites,History,Uploaded,DropBox" />
<!-- Config the app_id -->
<add key="dropbox.app_id" value="" />And you are done, you should now be able to choose files from your Dropbox account.
Authentication and user paths
How to make your own authenticator
If you need more control over user rights, we suggest making your own authenticator. They are fairly simple, and you should be able to construct one with basic knowledge in either PHP or .NET.
PHP
In PHP, you can copy one of the existing Authenticators, for example, copy the "/moxiemanager/plugins/SessionAuthenticator" folder into a new folder called "CustomAuthenticator". In that folder is a single Plugin.php file that checks authentication, add checks against your system, and return true if the user is verified, otherwise false. You can also fiddle with the config etc.
<?php
/**
 * Plugin.php
 *
 * Copyright 2003-2013, Moxiecode Systems AB, All rights reserved.
 */
class MOXMAN_CustomAuthenticator_Plugin implements MOXMAN_Auth_IAuthenticator {
    public function authenticate(MOXMAN_Auth_User $user) {
    // CHECK AGAINST YOUR SYSTEM IF USER CAN ACCESS MOXIEMANAGER OR NOT, COULD BE VIA SESSION, LOADING SOME LIB AND RUNNING A FUNCTION ETC.
    // IF HE CAN NOT, RETURN FALSE HERE
    return false;

    // IF USER HAS ACCESS, PROCEED THROUGH AND SETUP SOME CUSTOM CONFIG
        $config = MOXMAN::getConfig();
        // Lets overwrite some settings.
        $myConfig = array();
        $myConfig["filesystem.rootpath"] = "c:\inetpub\wwwroot";
        // Extend the config with the session config
        $config->extend($myConfig);

        // The user is authenticated so let them though
        return true;
    }
}
MOXMAN::getAuthManager()->add("CustomAuthenticator", new MOXMAN_CustomAuthenticator_Plugin());
.NET
It is a bit more complicated in .NET, since you need to compile a plugin. Create a bare base project called "MoxieManager.Plugins.CustomAuthenticator", put a single file called Plugin.cs in it, and compile it, add it to the server Bin folder and config it into web.config. If you are familiar with .NET you should be able to use this to empower your integration.
using System;
using System.Security.Cryptography;
using System.Text;
using System.Web;
using System.IO;
using System.Xml;
using MoxieManager.Core;
using MoxieManager.Core.Auth;
using MoxieManager.Core.Util;

namespace MoxieManager.Plugins.CustomAuthenticator {
    public class Plugin : IPlugin, IAuthenticator {
        public void Init() {
        }

        public bool Authenticate(User user) {
            var config = ManagerContext.Current.Config;
            // You can access session context here if needed.
            //var session = ManagerContext.Current.HttpContextBase.Session;

            // THIS WOULD BE WHEN YOU RUN CHECKS TO SEE IF USER LOGGED INTO YOUR SYSTEM CAN ACCESS MOXIEMANAGER
            // COULD BE VIA CHECKING A SESSION, OR IMPLEMENTING SOMETHING TO CHECK AGAINST, JUST INCLUDE LIB ABOVE.
            return false;

            // PUT SOME CUSTOM CONFIG OPTIONS
            config.Put("filesystem.rootpath", "c:\inetpub\wwwroot");

            // The user is authenticated so let them though
            return true;
        }

        public string Name {
            get { return "CustomAuthenticator"; }
        }
    }
}
Return true after you check if the user is authenticated in your system, otherwise return false.
How to implement user specific paths
The easiest way to do this, is by using the SessionAuthenticator, read more about it in the integration section.
Using the session authenticator, you can set specific paths depending on who logs into your system, this is a simple example on how to use this feature.
// Setup sessions on login of your CMS (or the example login page that comes with the software)
session_start();
$user = $_SESSION["userid"]; // Get a userid or name from your system
$_SESSION['isLoggedIn']=true; // Set the state for the Session Authenticator

// Override the rootpath
$_SESSION['filesystem.rootpath']="/var/www/htdocs/mysite.com/". $user ."/files/";
Sanitize the $user variable, MoxieManager does have checks against hack attempts, but its always a good idea to sanitize the input.
Alternative
There is an alternative that is supported by a few of our authenticators, the ${user} replacement.
First, you need to make sure you set the "user key" for that authenticator, so for the SessionAuthenticator that would be whatever you configure the sessionauthenticator.user_key to be. If you configure that to "username" and then set a session called "username" to the name of that user (or ID), it will make that part of the path.
You can configure your config.php/Web.config rootpath to something like c:/Inetpub/wwwroot/project/${user}/images and the ${user} will be replaced with the user key.
Be sure to sanitize this as much as possible before setting it.
This feature is supported by the Externalauthenticator, SessionAuthenticator and for .NET we also have support for it in the AspNetAuthenticator.
Installing in other systems
How to install in CKEditor
Installing the MoxieManager in CKEditor is pretty easy. Simply copy the moxiemanager to the ckeditor plugin directory and add the "moxiemanager" to the list of extra plugins. Then the "browse server" buttons in the link/image dialogs will be replaced with the MoxieManager.
// Editor config
CKEDITOR.editorConfig = function(config) {
    config.extraPlugins = 'moxiemanager';
});
CDN version
If you are using the CDN version of CKEditor, you can use something like this to load MoxieManager.
CKEDITOR.plugins.addExternal('moxiemanager', '/moxiemanager/', 'plugin.js');
CKEDITOR.replace('ckeditor', {
    extraPlugins : 'moxiemanager'
});
Where "/moxiemanager/" is the path where your local moxiemanager is installed. (End slash required)
How to install in Joomla
Installation in Joomla 3.2 is fairly simple. All you need to do is follow these simple steps and it should work. If you stuggle with any of these steps feel free to contact out support.
-
Copy "moxiemanager" to <joomla installation dir>/media/editors/tinymce/plugins/moxiemanager
-
Select "Extended" the select list "Functionality" in Extensions → Plugin Manager → Editor - TinyMCE.
-
Enter "moxiemanager" in the "Custom plugin" field under the "Advanced" tab under Extensions → Plugin Manager → Editor - TinyMCE.
-
Add a new article and click on "insert/edit link" icon in the TinyMCE rich text editor field.
-
Click on the new "Browse" button in this dialog and an installation dialog should appear.
-
Paste the license key and select "Joomla Authenticator" from this installation dialog.
How to install on Godaddy
If you are running the .NET version on Godaddy, first make sure you are running the 4.5 version of the .NET framework.
Then you need to add a snipplet into your web.config file.
<configuration>
     <system.web>
         <trust level="Full" />
     </system.web>
 </configuration
See this Godaddy support page for more information.
File management
How to use autorename
The Autorename plugin is made to normalize filenames, remove spaces and convert non a-z0-9 characters to the closest possible char.
To use this plugin, add "AutoRename" to your plugins configuration.
$moxieManagerConfig['general.plugins'] = 'Favorites,History,Uploaded,AutoRename';<add key="general.plugins" value="Favorites,History,Uploaded,AutoRename" />Then enable the feature but configuring it enabled.
$moxieManagerConfig['autorename.enabled'] = true;<add key="autorename.enabled" value="true" />These are some of the options available.
autorename.enabled |
Boolean value, false by default, can be set in mc_access files. |
autorename.space |
Character to replace space with, default is underscore _ |
autorename.lowercase |
Boolean value, force lowercase characters. Default is false. |
autorename.pattern |
Custom RegEx pattern, default is [^0-9a-z-_] |
| Note that AutoRename plugins also follow upload.overwrite value, if upload.overwrite is true, renamed files will replace files in the same folder. |
How to use mc access
mc_access is a very powerfull feature of the MoxieManager.
Create a simple text file called mc_access file and put it in whatever folder you wish to control in more detail.
Simple trick
Do you have a problem with your users uploading files in the root folder of your site?
Well, here is a trick to disable upload and any modifications at all in the root folder only.
_filesystem.writable=false
_general.disabled_tools=upload
The _ underscore in front of the option indicates that it is only applied locally and not to subdirectories.
Templates
Lets say you have a system and wish to allow users to create their own pages based on a template, with mc_access you can force certain templates to be used specifically for that folder.
createdoc.templates=Dokument=${rootpath}/templates/content_page.req.php,Lightbox=${rootpath}Almost all configuration options can be set per-directory using mc_access, check out the configuration options on what powerfull things you can do with this.
| Notice that mc_access support doesn’t work on remote file systems like Azure or Amazon due to performance issues. We recommend using the filesystem.directories setting for as an alternative. |
How to use Quota
| Note that this plugins is only available for Enterprise and Professional license customers. |
If you wish to enable the quota plugin, add it to your plugins config.
$moxieManagerConfig['general.plugins'] = 'Favorites,History,Uploaded,Quota';<!-- Make sure the plugin is added in the web.config -->
<plugin type="MoxieManager.Plugins.Quota.Plugin" />
<add key="general.plugins" value="Favorites,History,Uploaded,Quota" />You can configure the quota limit using this option in config.php.
$moxieManagerConfig['quota.max_size'] = "10m";<add key="quota.max_size" value="10m" />First time the file listing is made, an initial index is made of all subfolders, this can take some time if you have huge amounts of folders/files. After the initial listing, an update to the list is only made for the current folder you are in.
This is not suitable for thousands of files and folders setups.
Customization
How to install a custom skin
Uncompress the custom skin zip file into the moxiemanger/skin folder, the folder should already contain a subfolder named lightgray, the default skin.
moxman.browse({
    ...
    skin: 'charcoal'
});tinymce.init({
...
moxiemanager_skin: 'charcoal'
});
Please note that the name of the skin is the name of the folder you created in moxiemanager/skin.
|
If you encounter and problems, please use the ticket system to get support.
moxman.browse({
  fields: 'url',
  skin: 'charcoal'
});