


PHP’s a reliable problem solving language. And because of that, despite being more than 25 years old at the time of writing this article, it’s remained an essential for servers that support websites across the world.
For instance, its flexibility when entering content, centers on two steps:
- Registering content entered into a text editor for PHP to parse
- Updating that content on the server for reuse later on
These are essential website behaviors that text editors for PHP perform everyday. And usually websites need more than just simple text editors for PHP – they also need to have WYSIWYG capability (What You See Is What You Get).
You may also need a WYSIWYG that provides more specific features – that are tailored to what your users need in their content work. If that's the case, you can use the TinyMCE rich text editor as a PHP WYSIWYG editor, and it requires a minimal time commitment.
TinyMCE is a flexible rich text editor that works for a variety of use cases. This article explains how to get started, using TinyMCE as your website’s PHP WYSIWYG editor.
Text editor for PHP website prerequisites
There are a few prerequisites to check on to before trying the demo:
- PHP installed on your development workstation
- A free TinyMCE API key. This key gives you free access to TinyMCE Premium plugins for 14 days. Get a free TinyMCE WYSIWYG editor API key.
- A text editor for PHP editing, such as VS Code or Sublime text.
You can verify if PHP is already installed, and what version you are using, by running the following command inside the command line terminal:
php - v;
You should receive something like the following response if you have it installed:
PHP V.V.V (cli) (built: MON  D YYYY HH:MM:SS) (NTS)
Copyright (c) The PHP Group
Zend Engine vX.X.X, Copyright (c) Zend Technologies with Zend OPcache vY.Y.Y, Copyright (c), by Zend TechnologiesHow to add TinyMCE as your PHP WYSIWYG editor
-
Create a new project folder, and change into the new project:
mkdir phpWYSIWYGcd phpWYSIWYG-
Create a new file in the project folder called index.php
touch index.php-
Open your PHP file, and copy the following HTML for the demo:
<!DOCTYPE html>
<html lang="en">
<head>
<meta charset="utf-8">
<title>TinyMCE PHP Editor</title>
<link rel="stylesheet" href="https://stackpath.bootstrapcdn.com/bootstrap/4.3.1/css/bootstrap.min.css" integrity="sha384-ggOyR0iXCbMQv3Xipma34MD+dH/1fQ784/j6cY/iJTQUOhcWr7x9JvoRxT2MZw1T" crossorigin="anonymous">
</head>
<body>
<div class="container mt-3 mb-3">
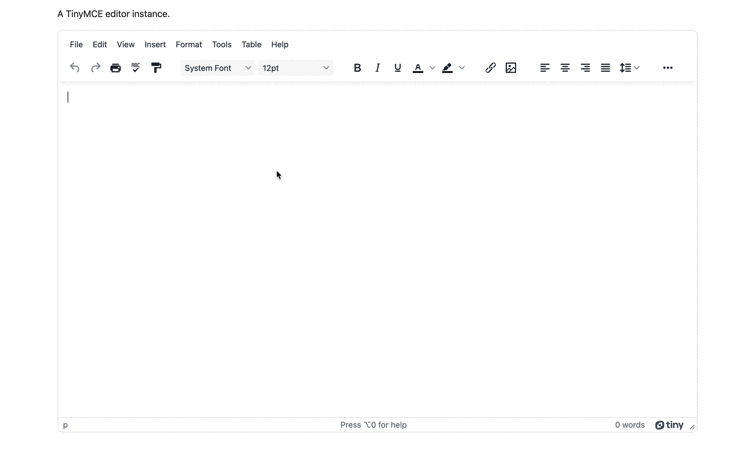
<p>A TinyMCE editor instance.</p>
<textarea></textarea>
</div>
<script src="https://cloud.tinymce.com/6/tinymce.min.js?apiKey=<?php echo $config["apiKey"]; ?>"></script>
<script src="init.js"></script>
</body>
</html>NOTE: For the Tiny Cloud connection, creating an account with TinyMCE gets you a FREE API key. When you use this key, you get access to Premium TinyMCE plugins for 14 days, as well as no warning messages concerning API keys in the text area.
-
Copy the following PHP, and add it after the closing div tag in the demo
</div>

<script>

<?php
   $config = array();
   $config["apiKey"] = "your-api-key";
  ?></script>

<script src="https://cloud.tinymce.com/6/tinymce.min.js?apiKey=<?php echo $config["apiKey"]; ?>"></script>
<script src="init.js"></script>

</body>
</html>The second script tag references a JavaScript file called “init.js”. This resource for the web page is where the specific TinyMCE configuration lives, and you can find the steps on writing the script in the next steps.
Adding the editor to your PHP website
-
In the same directory as your PHP editor project, create a new JavaScript file called “init.js”:
touch init.js-
Open the file in your text editor, and add the following TinyMCE configuration:
tinymce.init({
  selector: "textarea",
  plugins:
    "advcode advlist anchor autosave autolink casechange charmap checklist codesample directionality editimage emoticons export formatpainter help image insertdatetime link linkchecker lists media mediaembed nonbreaking pagebreak permanentpen powerpaste save searchreplace table tableofcontents tinymcespellchecker visualblocks visualchars wordcount",
  toolbar:
    "undo redo print spellcheckdialog formatpainter | blocks fontfamily fontsize | bold italic underline forecolor backcolor | link image | alignleft aligncenter alignright alignjustify lineheight | checklist bullist numlist indent outdent | removeformat",
  height: "700px",
  spellchecker_language: "en",
  spellchecker_active: false,
});
-
Save the changes
-
Test run the index.html file with on your workstation as a local project using the PHP command:
How to get the TinyMCE editor value as a PHP WYSIWYG
Make use of the TinyMCE getContent API to collect up the text area content when running TinyMCE as a PHP WYSIWYG editor:
To get started, a method to quickly include content in the TinyMCE textarea is to set up a static template with the Advanced Templates (Premium) plugin. This can be done by:
-
Add the advtemplate item to the plugins list, and inserttemplate into the TinyMCE toolbar list:
   plugins:
      "advcode advlist advtemplate anchor autosave autolink casechange charmap checklist codesample directionality editimage emoticons export formatpainter help image insertdatetime link linkchecker lists media mediaembed nonbreaking pagebreak permanentpen powerpaste save searchreplace table tableofcontents tinymcespellchecker visualblocks visualchars wordcount",

    toolbar:
"undo redo print spellcheckdialog formatpainter | fontfamily fontsize | bold italic underline forecolor backcolor | link image | alignleft aligncenter alignright alignjustify lineheight | checklist bullist numlist indent outdent | removeformat inserttemplate",-
Copy the advtemplate_templates option and associated static template into the TinyMCE init script:
spellchecker_language: 'en',
    spellchecker_active: false,
    advtemplate_templates: [
        {
            title: 'Category 1',
            items: [
                {
                    title: 'template 1.1',
                    content: '<h1>Introduction</h1><p>Content building starts with the first words</p>'
                }
            ],
        }
],-
Save the change
With reusable content, testing the editor configuration becomes much quicker and easier. Next up is collecting the editor content rapidly using TinyMCE’s built-in API.
Getting the TinyMCE editor value in PHP
-
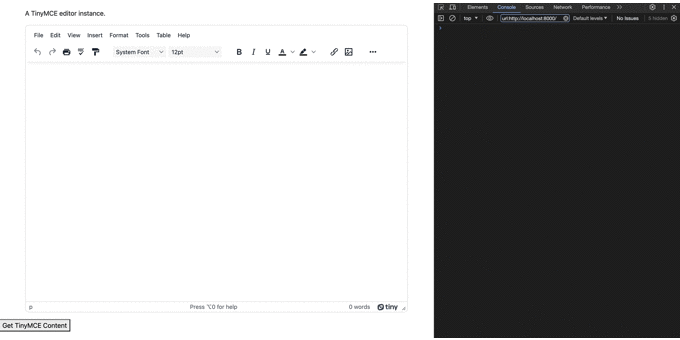
Inside the index.php file, add a button element, which will provide a ‘click’ event to trigger the TinyMCE API:
  <div class="container mt-3 mb-3">
    <p>A TinyMCE editor instance.</p>
    <textarea></textarea>
  </div>

<button id="button0a1b">Get TinyMCE Content</button>-
Add a new script tag, and include the following function:
<script src="https://cdn.tiny.cloud/1/<?php echo $config["apiKey"]; ?>/tinymce/6-dev/tinymce.min.js"></script>
<script src="init.js"></script>
<script type="text/javascript">
  function getContent() {
    const getTinyMCEContents = tinymce.activeEditor.getContent();
    console.log(getTinyMCEContents);
}-
Add the following event listener to the new script tag:
<script type="text/javascript">
  function getContent() {
    const getTinyMCEContents = tinymce.activeEditor.getContent();
    console.log(getTinyMCEContents);
  }

  var getRequest = document.getElementById('button0a1b')
  getRequest.addEventListener('click', getContent, false);
</script>-
Save the changes, and then click on the new button to run the TinyMCE API and get the TinyMCE editor value:

How to save TinyMCE content in database PHP?
Saving content to a database when TinyMCE is running as a PHP WYSIWYG editor is a matter of managing the editor data in the front or user-facing end with TinyMCE’s options and APIs for getting the editor content, and then handing that data over to PHP to manage on the server-end.
As an example, the following is drawn directly from the guide on how to save TinyMCE content to a database, an article that explains the steps in more detail.
-
Inside the index.php file, add the jQuery CDN link into the head section so that the AJAX statement will work:
<head>
  <meta charset="utf-8">
  <title>TinyMCE PHP Editor</title>
  <link rel="stylesheet" href="https://stackpath.bootstrapcdn.com/bootstrap/4.3.1/css/bootstrap.min.css" integrity="sha384-ggOyR0iXCbMQv3Xipma34MD+dH/1fQ784/j6cY/iJTQUOhcWr7x9JvoRxT2MZw1T" crossorigin="anonymous">
<script src="https://code.jquery.com/jquery-3.7.0.js"></script>-
In the init.js file, add the setup option to the TinyMCE init script, including the editor event listener, which will run the script on the blur event (when clicking outside of the editor area, and the PHP WYSIWYG loses focus):
    setup: (editor) => {
        editor.on('blur', (e) => {         })
     },
});-
Copy the following AJAX statement, and add it to the setup option:
editor.on("blur", (e) => {
  $.ajax({
    type: "POST",
    url: "save.php",
    data: {
      editor: tinymce.activeEditor.getContent(),
    },

    success: function (data) {
      $("#editor").val("");
      console.log(data);
    },
  });
});
-
Create a new file called save.php and include the following PHP to handle the incoming data from TinyMCE, and organize it for the demo database to use:
touch save.php<?php
require_once 'connect.php';
$editorContent=$_POST['editor'];
$stmt = $connect->prepare("INSERT INTO `Content` (Content) VALUES (:Content)");
$stmt->bindParam(':Content', $editorContent);
$stmt->execute();
echo "Save Data";
?>-
Create another new file called connect.php to manage the actual connection to the database, and include the following statements designed for creating and writing to tables found in an SQLite database:
touch connect.php<?php
$connect=new SQLite3('tinymceContent.db') or die("Could not connect to database, and save TinyMCE content");
$db="CREATE TABLE IF NOT EXISTS `Content`(id INTEGER PRIMARY KEY AUTOINCREMENT NOT NULL, Content TEXT)";
$connect->exec($db);
?>-
Save the changes, and then test run the content building and saving steps within TinyMCE in your browser:
This is only the start of connecting a PHP WYSIWYG to a database. There are other methods to streamline this process, that make use of only PHP, but that’s beyond this article’s scope.
Working further on your PHP WYSIWYG editor
With the editor working, the next steps you can take are to incorporate registering content into the rich text editor, parsing it and then saving it to the database. On Stack Overflow, Shivendra Singh created one solution for this process that you can use, now that you’ve established a demo PHP website that runs TinyMCE as a rich text editor.
For more information on PHP and TinyMCE, check on the following resources:
- The documentation for setting up TinyDrive with PHP
- Adjusting Wordpress PHP files to fix uncaught reference errors
- How to load and post content with Ajax and TinyMCE (using some PHP)
You can also contact us if you have any further questions on TinyMCE in your PHP project.


