


If you're building a web app with a rich text editor, typography is more than a design detail. It’s a crucial part of the UX. Google Fonts is a popular choice for developers because it's free, widely supported, and optimized for the web. This font library is a great addition to your RTE, since it preserves a real WYSIWYG experience on the content creation side that can match the front end of the application.
In this guide, you'll learn how to integrate Google Fonts into TinyMCE in a three-step process for custom font configuration options, with code examples.
What are Google Fonts?
Google Fonts gives any web application a more customized, brand-aligned look with a huge free and open source font library. These web-safe, performance-optimized typefaces give you the freedom to add custom fonts in any RTE without slowing down the UI. Whether you're building a CMS, email builder, or a custom WYSIWYG application, you can load Google Fonts into TinyMCE. They’re a great way to quickly customize your WYSIWYG editor.
How to configure Google Fonts in TinyMCE
Configuring Google Fonts in TinyMCE takes a few steps. Custom fonts need to be implemented in three places:
- The content area: Custom fonts need to be implemented in the content area (
<textarea>) to guarantee that the content in the RTE appears in the custom font. - The head of the page that contains the TinyMCE init: Custom fonts need to be integrated into the head of the page that contains TinyMCE’s init script, so custom font names appear in their font in the toolbar dropdowns.
- The toolbar buttons in the UI: Lastly, custom fonts must be added to the toolbar buttons in the UI to enable custom font names to appear in their font in the toolbar dropdowns.
In this guide, I’ll walk through implementing custom Google Fonts in each of these places. It’s quick, easy to do, and relies on a typography library that has over 96 trillion views from June 2024 to June 2025 alone.
Reference table of TinyMCE options that control font families
|
Option |
Type |
About |
Default Value |
|
String |
Allows CSS styles to be injected in the |
N/A |
|
|
String |
Defines the fonts to be displayed when |
|
|
|
Array |
Changes the default fonts that are considered as the "System Font" stack, when |
|
Prerequisite: Setup a TinyMCE demo
Follow our 2-minute tutorial to set up a TinyMCE instance locally with an index.html file and http-server. When you follow the setup guide, you’ll need a working API key. If you don’t already have one, you can sign up for a free 14-day trial of TinyMCE to get an API key, and try out our RTE with Google Fonts.
As an example for this guide, my beginning index.html looks like this:
<!DOCTYPE html>
<html lang="en">
<head>
  <title>TinyMCE Basic Demo</title>
  <!-- Replace no-api-key below with a real TinyMCE API key  -->
  <script src="https://cdn.tiny.cloud/1/no-api-key/tinymce/8/tinymce.min.js"
    referrerpolicy="origin"></script>
</head>
<body>
  <textarea id="editor">Hello, world!</textarea>
  <script>
    tinymce.init({
      selector: '#editor',
      plugins: 'lists link image table code help wordcount autoresize',
      toolbar: 'undo redo | blocks | bold italic | fontfamily fontsize | alignleft aligncenter alignright alignjustify | outdent indent'
    })
  </script>
</body>
</html>Once you have a working index.html file with TinyMCE, you can try out the code in this guide for yourself by using http-server to run it locally.
Step one: Import custom fonts into TinyMCE with content_style
It’s fairly quick to import Google Fonts into TinyMCE, no matter where your rich text editor instance lives. The Google Fonts will be imported wherever your TinyMCE init is.
It takes three steps to import a font into TinyMCE using the content_style option:
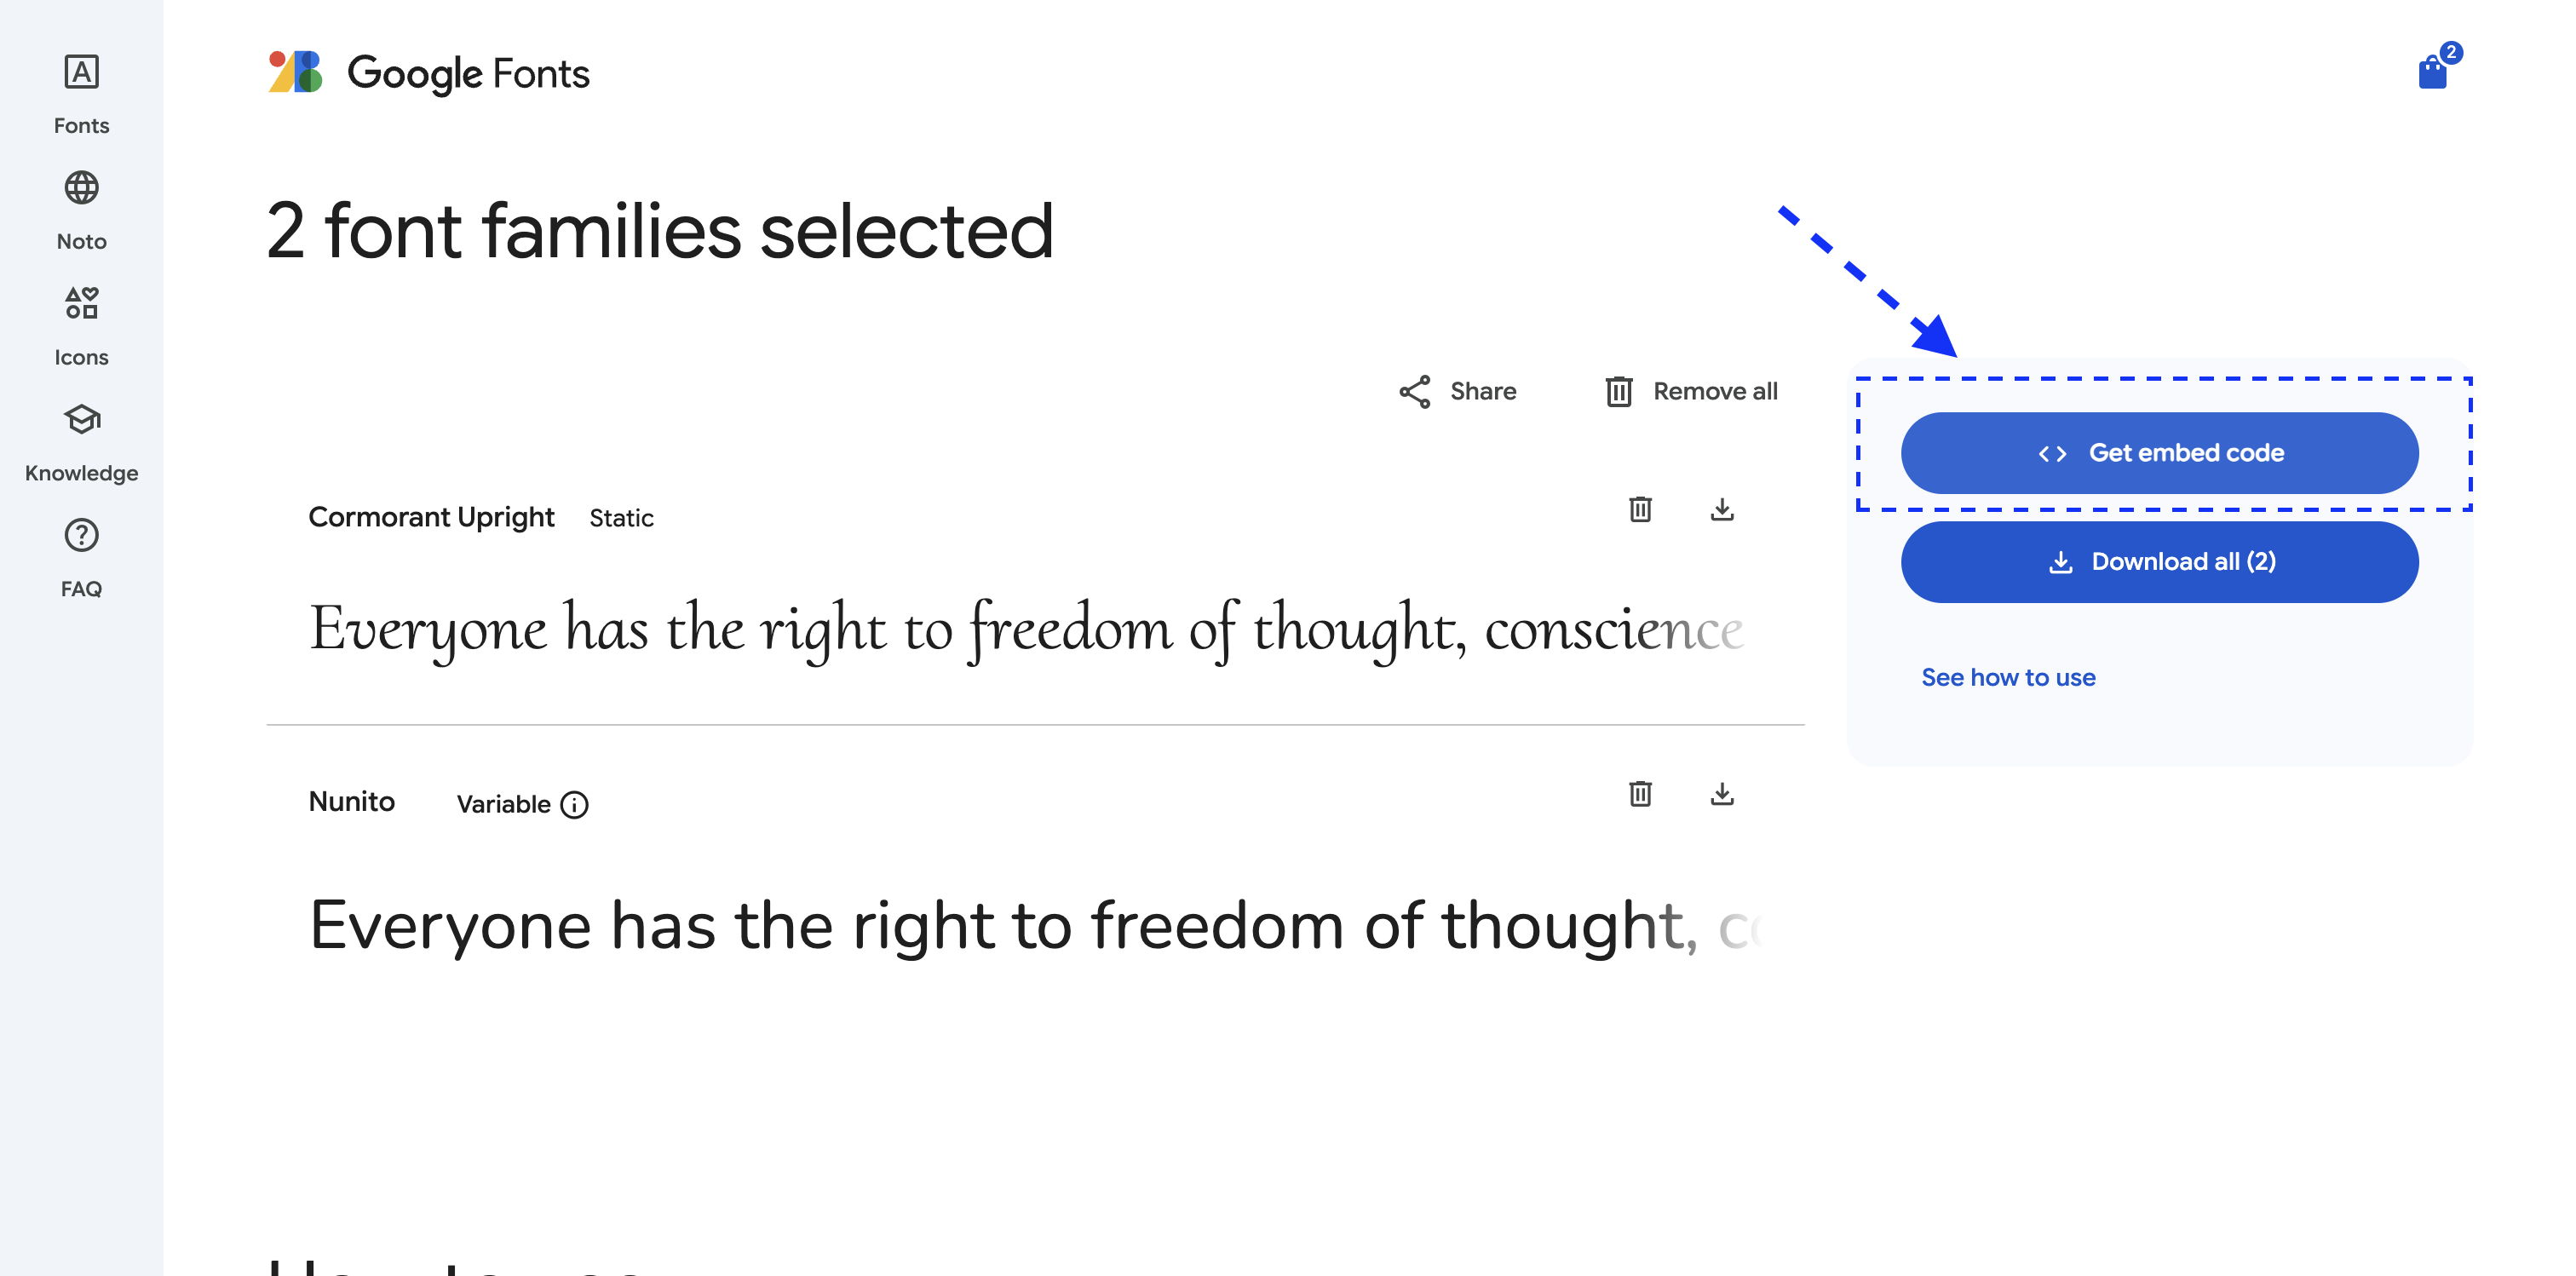
1. Find the font you want to use on Google Fonts, in this case Cormorant Upright, and click Get embed code.
2. On the Embed code Google Fonts page, choose the @import option to get the embed code for CSS.
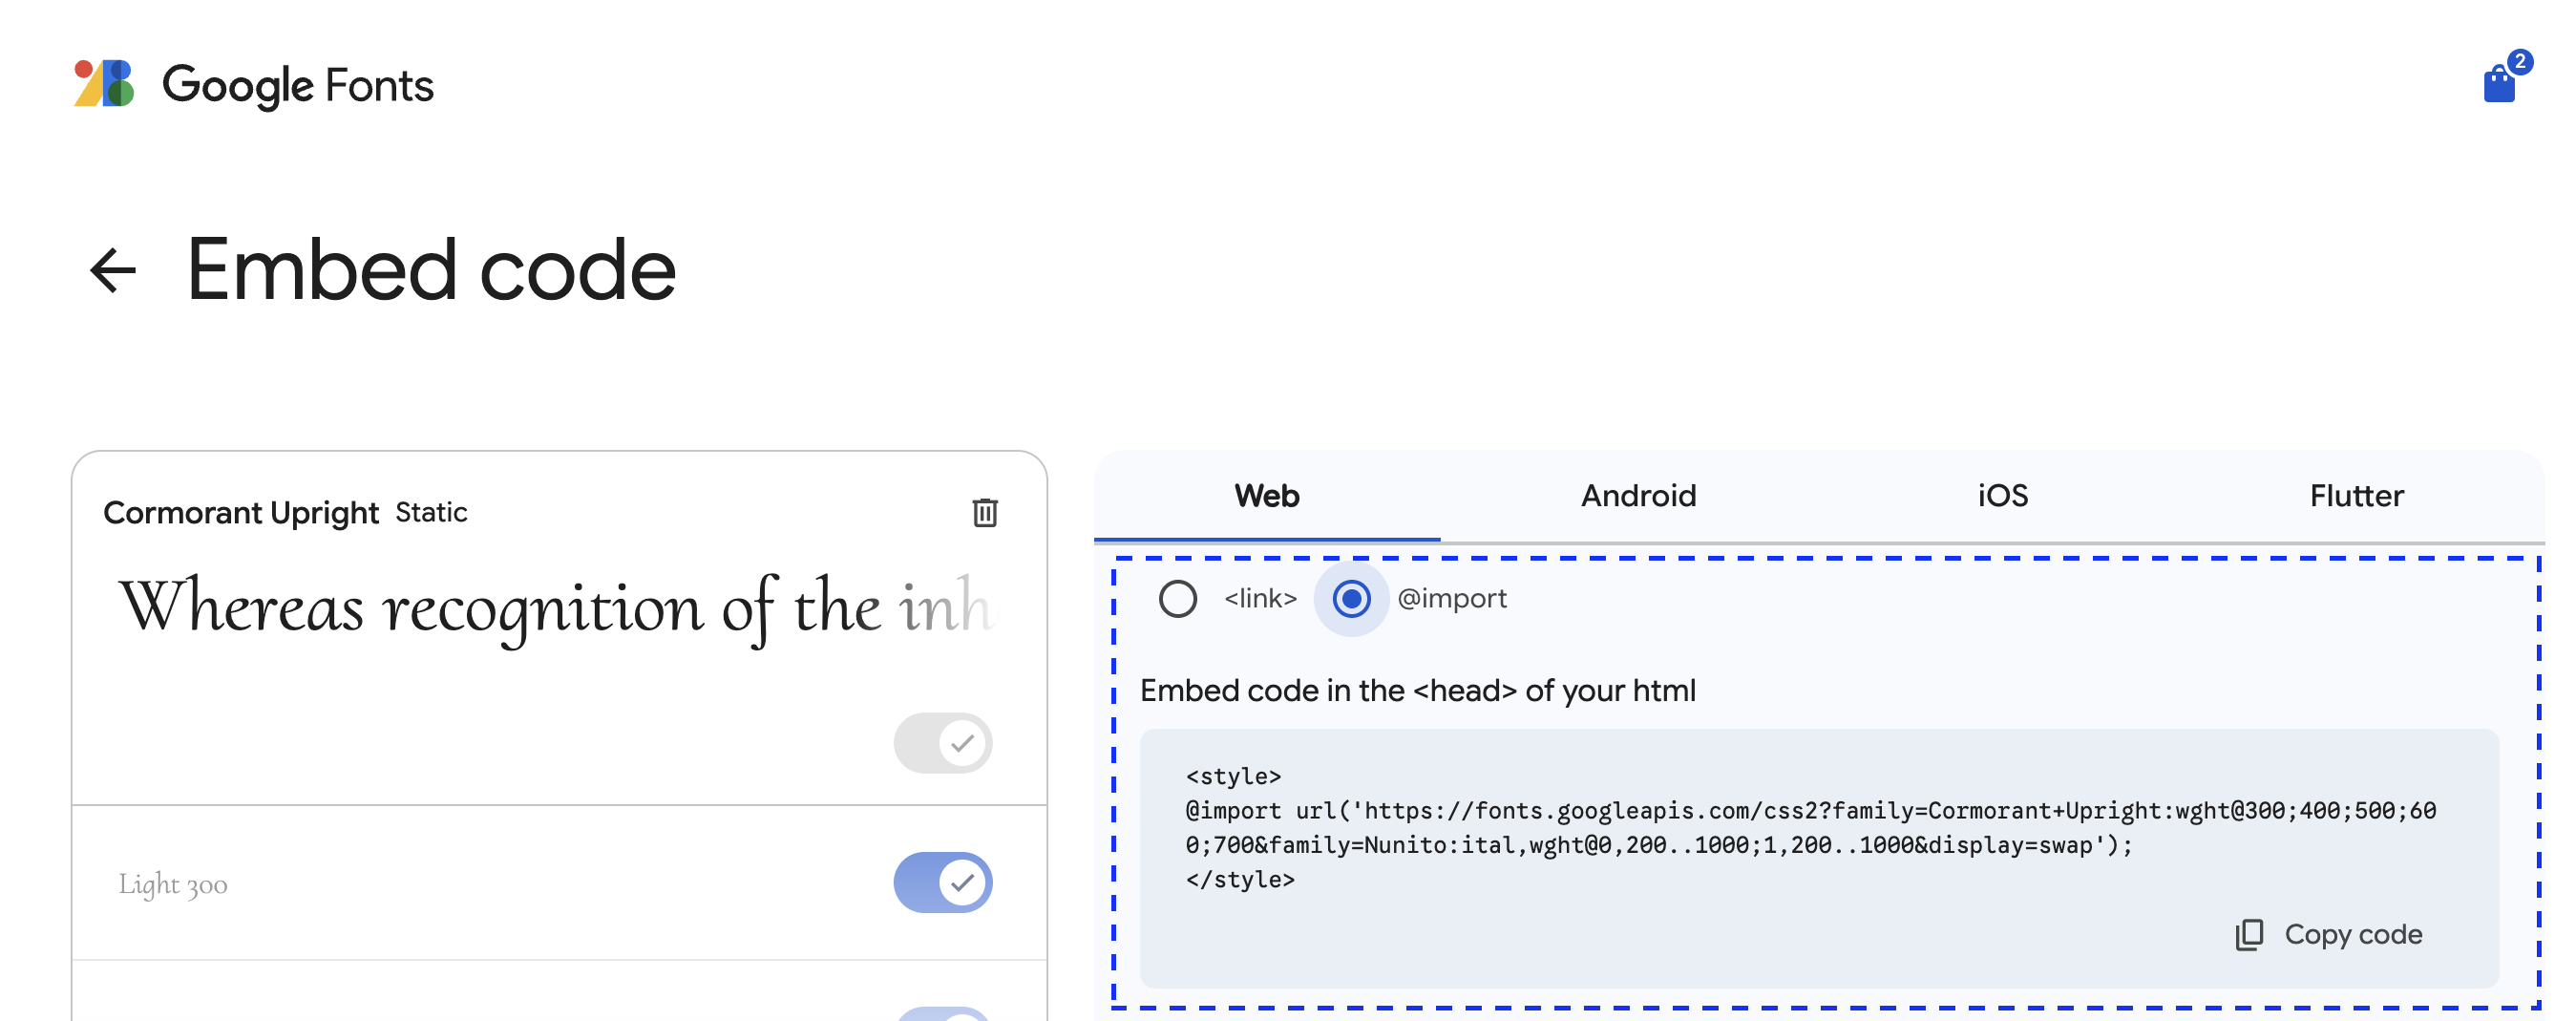
3. In the TinyMCE init, paste the import code snippet into content_style.
Here’s an example:
tinymce.init({
  selector: "#editor",
  plugins: "lists link image table code help wordcount autoresize",
  toolbar:
    "undo redo | fontfamily | fontsize | blocks | bold italic | alignleft aligncenter alignright alignjustify | outdent indent",
  content_style:
    '@import url("https://fonts.googleapis.com/css2?family=Cormorant+Upright:wght@300;400;500;600;700&family=Nunito:ital,wght@0,200..1000;1,200..1000"); body { font-family: "Nunito", sans-serif; } h1,h2,h3,h4,h5,h6 { font-family: "Cormorant Upright", serif; }',
});
⚠️ Note: You’ll need to change the single quotes inside the content_style string to double quotes in order to get the Google Fonts import code to work.
TinyMCE looks like this with the Google Fonts Cormorant Upright and Nunito.
Step two: Import custom Google Fonts in <head>
Though content_style can be used to import Google Fonts into the content area, they don’t appear properly in the blocks dropdown unless the Google Fonts are imported in the <head> of the page that contains the editor. The embed HTML is available on the Google Fonts website:
- Just like for
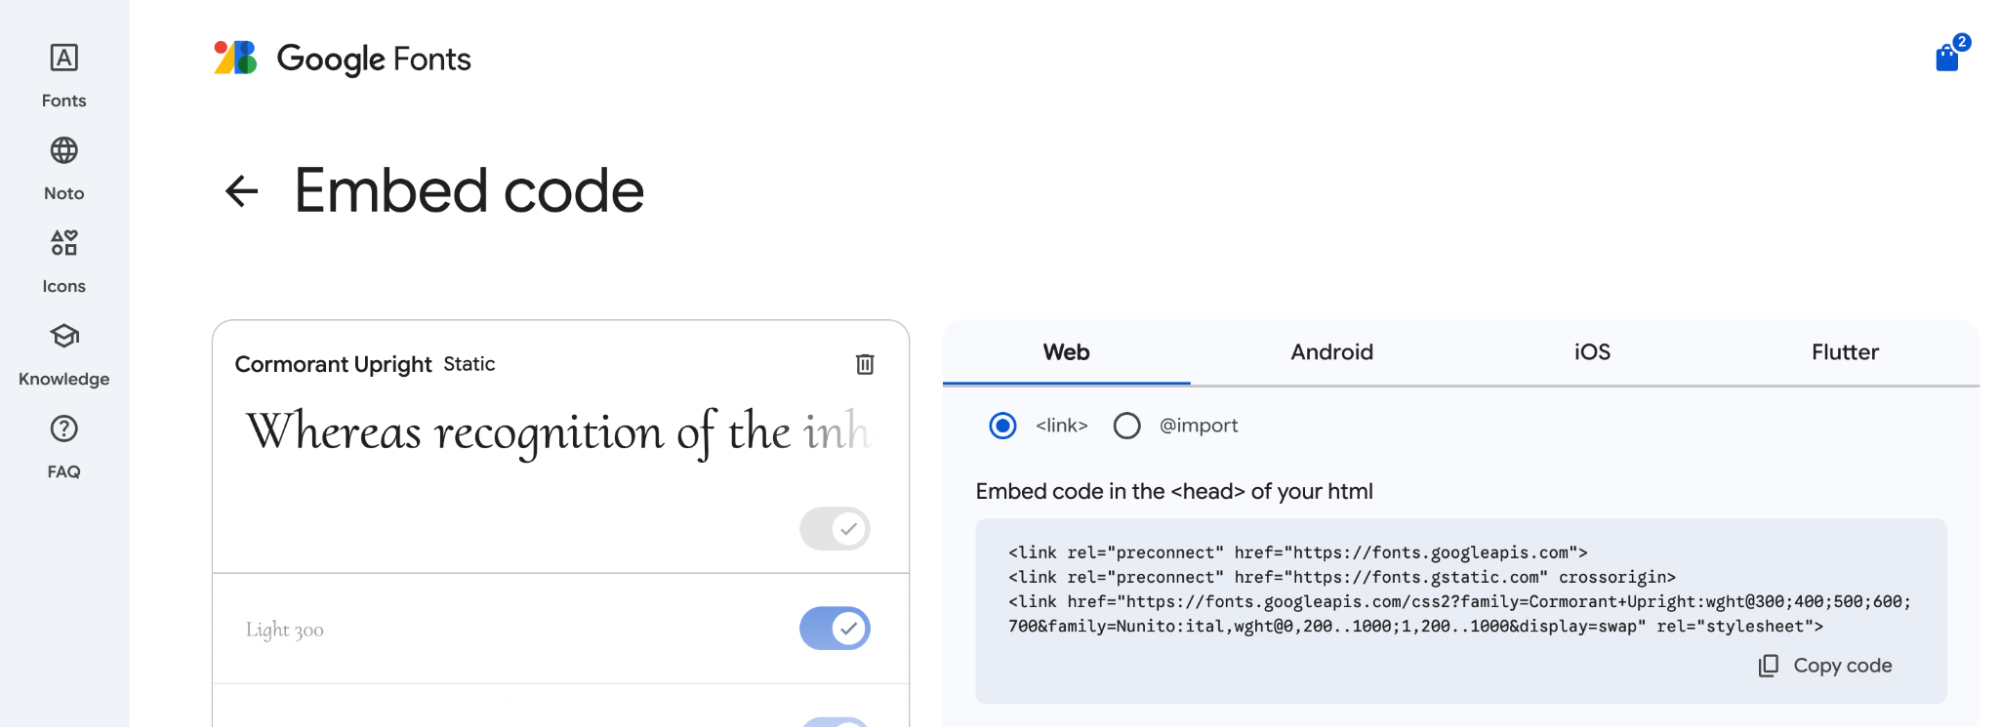
content_style, you’ll go to the Embed code Google Fonts page, but this time you’ll be copying the<link>code. - Paste into the
<head>section of the page that contains your editor.
Here’s what I added to my index.html <head> section for the demo:
<link rel="preconnect" href="https://fonts.googleapis.com">
<link rel="preconnect" href="https://fonts.gstatic.com" crossorigin>
<link href="https://fonts.googleapis.com/css2?family=Cormorant+Upright:wght@300;400;500;600;700&family=Nunito:ital,wght@0,200..1000;1,200..1000&display=swap" rel="stylesheet">Now that there are custom fonts on the page where the editor initializes, and in the content area, I can see both my custom fonts properly showing in the blocks dropdown:
Step three: Show custom Google Fonts in the toolbar with font_family_formats
The final step in the process of integrating Google Fonts into TinyMCE is to add the custom fonts to the fontfamily toolbar dropdown. They already appear in the content area and the blocks dropdown.
To do this, use the default string value for the font_family_formats, and add the name of the custom fonts to the list. Like this:
font_family_formats: "Andale Mono=andale mono,times; Arial=arial,helvetica,sans-serif; Arial Black=arial black,avant garde; Book Antiqua=book antiqua,palatino; Comic Sans MS=comic sans ms,sans-serif; Cormorant Upright=cormorant upright;Courier New=courier new,courier; Georgia=georgia,palatino; Helvetica=helvetica; Impact=impact,chicago; Symbol=symbol; Nunito=Nunito; Tahoma=tahoma,arial,helvetica,sans-serif; Terminal=terminal,monaco; Times New Roman=times new roman,times; Trebuchet MS=trebuchet ms,geneva; Verdana=verdana,geneva; Webdings=webdings; Wingdings=wingdings,zapf dingbats";
Which ends up looking like this:

And that’s it 🎉 It’s three steps to add Google Fonts to TinyMCE. Choose the font that fits your brand or any fun font from this massive, free archive of typography, and get creative!
Take content_style and content_css even further
Two of the most powerful options in TinyMCE are content_style and content_css. Both of these options allow developers to style the RTE’s content to match the front-end and create a consistent WYSIWYG experience for users. From controlling margins and line height in TinyMCE, to putting TinyMCE in Dark Mode, these options have a cornucopia of possibilities for a true WYSIWYG experience. Create a stylish RTE with TinyMCE that’s designed to fit your brand, match established standards for your front end, and offer a consistent UX.
Whether your application is brand new or already has thousands of users, TinyMCE has a solution that’s sized right for your use case. Check out the different TinyMCE options to learn more, or contact us directly to get answers from a human.


