


Databases are all around us, and without them websites and applications wouldn’t work. Since they’re so vital to online applications, why would components included in those applications – components that claim to speed up development – cause more problems and frustration by blocking database connections?
For instance, the rich text editor component of an application lives at the center of content creation apps. A valuable rich text editor provides a fast and easy flow of content from the editor to the database without any roadblocks. Speed and efficiency are a part of best practice for database content management.
TinyMCE is an trusted rich text editor that allows you to save content to a database without obstacles. It’s just one example of the many ways TinyMCE is easy to implement, and this post shows you how to save TinyMCE content to a database.
What is database content management?
Database content management is the ability to store and serve content from the database, to anywhere it’s needed in an application. When database content management is done effectively, it shows at the very least, the following practices:
- Allows for storage of a variety of digital content, including images, text, video, and audio files
- Fast and effective storage and retrieval
- Follows a standardized naming convention
- Connects metadata to each item in the database, providing information to identify content
- Plans for storage that fits the content, such as local storage, or cloud based storage.
Plus, there’s more to consider before testing out a database for content management. Once you’re ready, the following sections explain the steps to save TinyMCE content to a database using an SQLite demo.
How to save TinyMCE content to a database with PHP
The first step is getting TinyMCE working. The following demo is based on the TinyMCE CMS solution. There are some prerequisites to know about before running the demo:
- Experience with HTML and JavaScript
- Familiarity with PHP, including prepared statements
- A text editor to adjust file content
- Access to the command line through bash or another shell
Getting TinyMCE started
-
In your development environment, create a new directory for the demo, create an index.html file in that directory. Also set up two more folders in the new directory, one for scripts, and one for PHP:
mkdir demoApp/

cd demoApp/

touch index.html

mkdir scripts/
mkdir php/-
Change into the scripts folder and create a new JavaScript file for the TinyMCE configuration, which is set up in step 5 of this procedure:
cd scripts/

touch tinymceConfig.js-
Change out of the scripts folder and then in the main directory, open the index.html file. Add the following starter HTML:
<!DOCTYPE html>
<html lang="en">
<head>
<meta charset="utf-8">
<meta name="viewport" content="width=device-width, initial-scale=1">
<script src="https://code.jquery.com/jquery-3.7.0.js"></script>
  <script src="https://cdn.tiny.cloud/1/no-api-key/tinymce/6/tinymce.min.js" referrerpolicy="origin"></script>
  <script src="scripts/tinymceConfig.js"></script>
</head>
<body>
<h1>TinyMCE CMS Starter Config</h1>
<textarea>
<h1>Visiting Norway</h1>
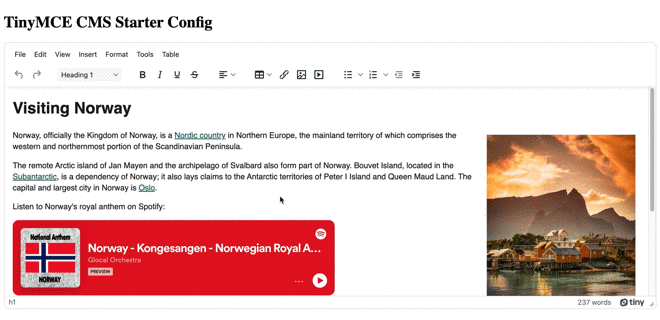
<p><strong><img style="float: right;" src="https://images.pexels.com/photos/1559825/pexels-photo-1559825.jpeg?auto=compress&cs=tinysrgb&dpr=2&h=750&w=1260" alt="Town" width="300" height="375"></strong>Norway, officially the Kingdom of Norway, is a <a href="https://en.wikipedia.org/wiki/Nordic_countries">Nordic country</a> in Northern Europe, the mainland territory of which comprises the western and northernmost portion of the Scandinavian Peninsula.</p>
<p>The remote Arctic island of Jan Mayen and the archipelago of Svalbard also form part of Norway. Bouvet Island, located in the <a href="https://en.wikipedia.org/wiki/Subantarctic">Subantarctic</a>, is a dependency of Norway; it also lays claims to the Antarctic territories of Peter I Island and Queen Maud Land. The capital and largest city in Norway is <a href="https://en.wikipedia.org/wiki/Oslo">Oslo</a>.<strong><br></strong></p>
<p>Listen to Norway's royal anthem on Spotify:</p>
<div style="left: 0px; width: 100%; height: 152px; position: relative; max-width: 650px;" data-ephox-embed-iri="https://open.spotify.com/track/6SPocux2pBpFp3lshAOek1?si=907d52cf2af94efc"><iframe style="top: 0; left: 0; width: 100%; height: 100%; position: absolute; border: 0;" src="https://open.spotify.com/embed/track/6SPocux2pBpFp3lshAOek1?utm_source=oembed" allow="clipboard-write; encrypted-media; fullscreen; picture-in-picture;" allowfullscreen="allowfullscreen"></iframe></div>
<h2>Geography</h2>
<p>Norway has a total area of 385,207 square kilometres (148,729 sq mi) and had a population of 5,425,270 in January 2022. The country shares a long eastern border with Sweden at a length of 1,619 km (1,006 mi). It is bordered by Finland and Russia to the northeast and the Skagerrak strait to the south, on the other side of which are Denmark and the United Kingdom.</p>
<p>Norway has an extensive coastline, facing the North Atlantic Ocean and the Barents Sea. The maritime influence dominates Norway's climate, with mild lowland temperatures on the sea coasts; the interior, while colder, is also significantly milder than areas elsewhere in the world on such northerly latitudes. Even during polar night in the north, temperatures above freezing are commonplace on the coastline. The maritime influence brings high rainfall and snowfall to some areas of the country.</p>
<p><em>Featuring <a href="https://en.wikipedia.org/wiki/Norway">content from Wikipedia</a></em></p>
</textarea>
</body>
</html>-
Add a link to TinyMCE through the CDN in the head section of the document, and a link to the TinyMCE configuration file:
<script src="https://cdn.tiny.cloud/1/no-api-key/tinymce/6/tinymce.min.js" referrerpolicy="origin"></script>
<script src="scripts/tinymceConfig.js"></script>Note: The CMS demo makes use of several Premium plugins. When you sign up for a FREE TinyMCE API key, you get free access to all Premium plugins for 14 days from when you replace the “no-api-key” string with your own TinyMCE API key. Adding the key also removes any domain name related errors appearing in the text area.
-
Change back into the scripts/tinymceConfig.js file, open it, and add the following JavaScript content to get TinyMCE started:
tinymce.init({
  selector: "#editor",
  plugins:
    "a11ychecker advcode advlist advtable anchor autocorrect autosave editimage image link linkchecker lists media mediaembed pageembed powerpaste searchreplace table template tinymcespellchecker typography visualblocks wordcount",
  toolbar:
    "undo redo | styles | bold italic underline strikethrough | align | table link image media pageembed | bullist numlist outdent indent | spellcheckdialog a11ycheck typography code",
  height: 540,
  a11ychecker_level: "aaa",
  typography_langs: ["en-US"],
  typography_default_lang: "en-US",
  advcode_inline: true,
  content_style: `
        body {
          font-family: 'Roboto', sans-serif;
          color: #222;
        }
        img {
          height: auto;
          margin: auto;
          padding: 10px;
          display: block;
        }
        img.medium {
          max-width: 25%;
        }
        a {
          color: #116B59;
        }
        .related-content {
          padding: 0 10px;
          margin: 0 0 15px 15px;
          background: #eee;
          width: 200px;
          float: right;
        }
      `,
});
-
Save the changes, and then change back into the main directory. Test out the demo by opening the index.html file in a browser, or by running a localhost test with the Python command, or PHP command:
Getting the database connection established
-
Change into the scripts folder, and add the following JavaScript to the TinyMCE init script after the content_style option. It uses the TinyMCE setup option to listen for the change event.
The change event registers when the editor loses focus, or the writer presses the Enter key.
When the event happens, the jQuery gets the rich text editor content, and posts it onward to the database handler file. This content is what saves TinyMCE content to the database:
    setup: (editor) => {
        editor.on('change', (e) => {
          $.ajax({
            type: 'POST',
            url: 'php/save.php',
            data: {
              editor: tinymce.get('editor').getContent()
            },
            success: function(data){
              $('#editor').val('');
              console.log(data)
            }
          })
        })
},-
Change back to the main directory, and then change into the php folder. Create a new PHP file for handling interactions with the database:
touch connect.php-
Add the following PHP content to the connection file. This receives the editor content, and then saves the TinyMCE content to a database file:
<?php

$connect=new SQLite3('tinymceContent.db') or die("Could not connect to database, and save TinyMCE content");
$db="CREATE TABLE IF NOT EXISTS `Content`(id INTEGER PRIMARY KEY AUTOINCREMENT NOT NULL, Content TEXT)";

$connect->exec($db);

?>-
Save the changes, and then close the .php file.
-
Create a second .php file to handle the process of inserting and saving TinyMCE content into the database, and then add the following PHP content:
touch save.php

...

<?php

require_once 'connect.php';
$editorContent=$_POST['editor'];

$stmt = $connect->prepare("INSERT INTO `Content` (Content) VALUES (:Content)");

$stmt->bindParam(':Content', $editorContent);

$stmt->execute();

echo "Save Data";

?>-
Save the changes.
Saving TinyMCE content to the database file with PHP and SQLite
-
In the browser, refresh the demo, and try entering some new content into the TinyMCE text area, and then clicking away from the editor or pressing the Enter key. If the PHP content is working, you’ll see a 200 status code on the command line (if you’re running the demo with a localhost for tests with Python or PHP):
[<date and time>] [::1]:60003 [200]: GET /
[<date and time>] [::1]:60003 Closing
[<date and time>] [::1]:60003 [200]: GET /tinymceConfig.js
[<date and time>] [::1]:60003 Closing
[<date and time>] [::1]:60003 Accepted
[<date and time>] [::1]:60003 [200]: POST /php/save.php
[<date and time>] [::1]:60003 ClosingThe successful command line content (code 200) indicates that the database file has been created in the php folder following the steps set in the connect.php file.
-
Navigate into the php folder, and then open the tinymceContent.db database file with the SQLite command:
sqlite3 tinymceContent.db -
Query the database Content table to see the TinyMCE content saved in the database:
SELECT * FROM Content;
…
1|<h1>Visiting Norway</h1>
<p><strong><img style="float: right;" src="https://images.pexels.com/photos/1559825/pexels-photo-1559825.jpeg?auto=compress&cs=tinysrgb&dpr=2&h=750&w=1260" alt="Town" width="300" height="375"></strong>Norway, officially the Kingdom of Norway, is a <a href="https://en.wikipedia.org/wiki/Nordic_countries">Nordic country</a> in Northern Europe, the mainland territory of which comprises the western and northernmost portion of the Scandinavian Peninsula.</p>
...-
Exit the database using the .quit command
Next steps for saving TinyMCE content in a database
You can rapidly get content from the editor, and save TinyMCE content to a database making use of the process explained in the previous sections. In production, the pattern of collecting data with the TinyMCE Get method, and binding parameters in prepared statements represent consistent patterns you can make use of for your project.
For more on getting a CMS ready using TinyMCE, check out the tutorial on creating a CMS with TinyMCE to rival the major content management providers out there!


