


React makes working on complex, front end web applications easier, but it may be a steep learning curve if you’re not used to it. Many developers find React’s patterns technically feasible (despite the challenge), but that’s not the case for everyone. What can help is reliable React components with out-of-the-box capabilities – so you can focus on learning.
TinyMCE is a reliable rich text editor that provides a React integration. It also has useful APIs that give a positive WYSIWYG experience for the user. TinyMCE’s API helps speed React development by providing a way to quickly make a React show hide component.
This can be a small but significant time saver when you’re learning about React.
What you’ll find in this guide is a step-by-step procedure explaining how to configure TinyMCE’s show and hide APIs, specifically for showing and hiding the TinyMCE editor, so you don’t need to create a React show hide component.
What are React show hide components?
A React show hide component reveals or conceals a specific component on the page. They’re usually written with different syntax, depending on the use case and React application. For instance the might be written by.
- Using the AND (&&) operator
- Writing around a conditional or ternary operator
- Including an if statement
When making use of the AND operator, remember the operator is evaluated from right to left, and JavaScript’s type conversion coerces values into a boolean, following the truthy and the falsy conversion.
Can JavaScript hide elements?
The essential JavaScript hide elements usually modify the style attribute, or the display attribute of an HTML element. For a React show hide component, the state of a component is what’s important. You can make use of state hooks to store the state of a component as customers interact with your React application.
A React show hide component with TinyMCE APIs
Creating a show and hide button that targets TinyMCE through the show() and hide() APIs allows you to add show hide capability to your React application.
✏️NOTE: For a complete guide on using the show() and hide() APIs, check on the guide that explains how to create show and hide buttons using these TinyMCE APIs.
To get started, you’ll need the following prerequisites:
- Command line access in your development environment, through Terminal or Shell software
- Some previous experience with JavaScript
- A package manager set up, such as npm
- Your TinyMCE API key from your TinyMCE dashboard
💡Getting your API Key: You can access your FREE TinyMCE API key on the TinyMCE dashboard using Google or GitHub credentials to log in. Using your API key prevents the TinyMCE editor from changing to read-only mode when using Tiny Cloud through the CDN. Your key also comes with a 14-day FREE Trial of TinyMCE advanced features.
1. Configuring React with TinyMCE
The demo makes use of the TinyMCE Content Management System (CMS) solution. You can find the complete example on the Tiny CMS solutions page.
Create a new React application, change into the new application, and then install TinyMCE’s React integration:
npx create-react-app show-hide-tinymce-react

cd show-hide-tinymce-react

npm install --save @tinymce/tinymce-reactChange into the source directory, and create a new components directory. Then create a TinyMCE.js file within the components directory:
cd src/

touch components/

cd components/

touch TinyMCE.js Copy the TinyMCE CMS configuration into the TinyMCE.js file:
import { Editor } from "@tinymce/tinymce-react";
export default function TinymceEditor() {
return (
<>
<Editor
apiKey="no-api-key"
initialValue='<div class="tiny-editable">
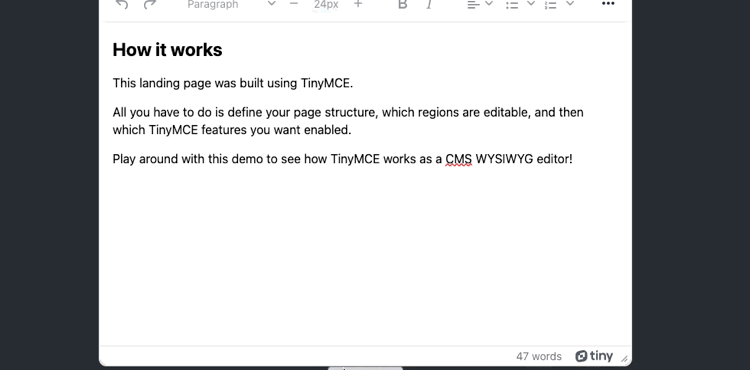
<h2>How it works</h2>
<p>This landing page was built using TinyMCE.</p>
<p>All you have to do is define your page structure, which regions are editable, and then which TinyMCE features you want enabled.</p>
<p>Play around with this demo to see how TinyMCE works as a CMS WYSIWYG editor!</p>
</div>'
init={{
height: 500,
menubar: false,
plugins:
"a11ychecker advcode advtemplate advlist advtable anchor autocorrect autosave editimage image link linkchecker lists media mediaembed pageembed powerpaste searchreplace table tinymcespellchecker typography visualblocks wordcount",
toolbar:
"undo redo | aidialog aishortcuts | styles fontsizeinput | bold italic | align bullist numlist | table link image media pageembed | spellcheckdialog a11ycheck code | inserttemplate",
editable_root: false,
editable_class: "tiny-editable",
content_style: `
:root {
--bs-primary-rgb: 62, 92, 210;
--bs-border-radius: 0;
--bs-border-radius-lg: 0;
}
html {
font-size: 16px;
}
h1 {
font-size: 2.75rem;
}
h1,
h2,
h3 {
margin-bottom: .5em;
}
ul.fancy li {
margin-bottom: .5em;
}
ul.fancy li::marker {
content: '✅ ';
}
@media screen and (min-width: 768px) {
.register-form {
margin-bottom: -200px;
}
}
form {
pointer-events: none;
}
.tiny-editable {
position: relative;
}
.tiny-editable:hover:not(:focus),
.tiny-editable:focus {
outline: 3px solid #b4d7ff;
outline-offset: 4px;
}
.tiny-editable:empty::before,
.tiny-editable:has(> br[data-mce-bogus]:first-child)::before {
content: "Write here...";
position: absolute;
top: 0;
left: 0;
color: #999;
`,
}}
/>
</>
);
}
Save the change to the new file.
2. Setting up the React show hide component
To configure the TinyMCE show() and hide() APIs, add the following functions to the top of the TinymceEditor() function:
const show = () => {
var textareaId = document.getElementsByTagName('textarea')[0].id document.getElementById(textareaId).style.visibility = ""

window.tinymce.activeEditor.show() }; const hide = () => {
var textareaId = document.getElementsByTagName('textarea')[0].id

document.getElementById(textareaId).style.visibility = "hidden"
window.tinymce.activeEditor.hide() };Include two buttons to activate the show and hide functions:
}}
 />
<button onClick={hide}>Hide TinyMCE</button>
<button onClick={show}>Show TinyMCE</button>
Save the changes.
How the TinyMCE show hide script works
TinyMCE usually requires a textarea element with a predefined id for initialization. However, within React components, this process differs slightly due to TinyMCE's React integration. Each time TinyMCE mounts in a React environment, it generates a new id along with the textarea element.
Here's a breakdown of the script's functionality, and how it handles the dynamic id:
- The line var textareaId = document.getElementsByTagName('textarea')[0].id inspects the DOM for the dynamically created textarea element within the TinyMCE React setup. Since our demo app features a single textarea, this line efficiently grabs the id associated with it.
- When hiding the textarea, document.getElementById(textareaId).style.visibility = "hidden" is integral to the hide() function, and ensures that while hiding the TinyMCE editor from view, the underlying textarea element remains hidden as well (enhancing the user experience).
- Before running window.tinymce.activeEditor.show() to show TinyMCE, the visibility attribute value changes to an empty string, making it visible again.
The script offers one straightforward method to show or hide the editor. When invoked, the script provides seamless toggling between the editor and raw text input, saving you the time needed to extend the TinyMCE component.
3. Testing the component
To finish the demo, import the TinyMCE component into the React application’s App.js file:
import TinymceEditor from './components/TinyMCE.js';

function App() {
    return (
        <div className="App">
        <header className="App-header">
        <img src={logo} className="App-logo" alt="logo" />
<TinymceEditor />Save this change, and now you can activate the demo with the npm run start command. You can then test out the React show hide component using TinyMCE’s APIs:
Other React integration options with TinyMCE
There’s more options available that TinyMCE is capable of, which can combine to make your React experience easier. For example, you can:
- Configure React with TinyMCE for image upload
- Set up TinyMCE to provide an emoji picker in React
- Build an email editor in React with TinyMCE
Contact us if you’d like to find out more about how TinyMCE’s dedicated React integration can support you.


