


Using your Python skills and the Django framework means you can quickly create all the views, models, and components needed for your web app project. The ease with which the project can progress, also helps keep your focus on customer’s needs instead of getting stuck in HTML and CSS points of design. Python font management is one area that delivers useful capabilities to your customers without too much work on your part.
For instance, when building web applications with Python, fonts configured for the Django app design itself could be managed using a Python template file and some added CSS to enforce style. However, Django font options for text entry components is another story. Customer’s building content in your app need different font choices, and there’s a rich text editor that can help.
Setting up TinyMCE as your Django editor allows you to streamline Django fonts for your customers – by utilizing TinyMCE’s font management capabilities. Read on to find out how TinyMCE can support your Django font options, and help you stay on track with your Python plans.
What Django font options are there?
To use the available Django font options, first create a static folder within your Django app directory, and then best practice is to “namespace” the directory:
ProjectName/
manage.py
other.files.py
AppName/
|_____models.py
      views.py
      other-files.py
      static/
	    |_____AppName/
|_____style.cssThe structure must be AppName/static/AppName/styles.css to prevent Django accidentally reading the incorrect style file, which can happen if you have Dango apps in your Django project with similar or matched names.
With the static folder configured, you can then go about managing Django fonts by including them in CSS format. Check your CSS references here, as Stack Overflow contributor grisuu points out when answering a question on Django font errors.
Django font TinyMCE configuration guide
When configuring TinyMCE as your Django editor solution, you can configure fonts alongside the editor, without the need to add them to your static file.
It’s one example of TinyMCE’s flexibility to fit seamlessly around the project you’re building with Python. Font customization capabilities are configured in TinyMCE with these options:
- The font_css option: used to reference the fonts in CSS files by name
- The font_family_formats option: added to make the fonts appear in the TinyMCE menubar once they’re added into the font_css option
✏️NOTE: You can also use the content_css option to load CSS directly into TinyMCE’s configuration for efficient styling.
You can use these options to set up access to web safe fonts available in the browser or with custom fonts downloaded from an available collection, or design specifically for your Django application.
1. Configuring Django
There are some prerequisites to know about before getting started with the Django font demo:
- Command line access in your development environment, such as PowerShell or Bash
- Some experience with Python, including creating virtual environments, and installing packages with pip
- A text editor such as VS Code, Zed, or Sublime text for editing the Python files
- A TinyMCE API key, which is FREE and available on your TinyMCE dashboard
Your TinyMCE API key: You can log into your TinyMCE dashboard with Google or GitHub account credentials to access your TinyMCE API key, which comes with a free trial of all TinyMCE’s advanced plugins and features. Add your API key into the Tiny Cloud CDN link (as shown in the below demo) to prevent the editor changing into read-only mode.
Setting up the Python virtual environment and installing Django
You’ll need to create a new project file, and then activate the Python virtual environment to get started. The following demo is based on the TinyMCE Learning Management System (LMS) solution, so the Django Project and App are named accordingly:
python3 -m venv LMS0a✏️NOTE: You may need to run the python3 or just python command without a number depending on your environment, operating system, and python version.
Activate the virtual environment:
source LMS0a/bin/activateThe virtual environment is now created, and activated, and the prompt in your command line shell changes to reflect this. You can now install Django, and create your project:
python -m pip install Django

django-admin startproject LearningSystemChange into the Project directory and set up your Django App:
cd LearningSystem

python manage.py startapp criteriaNow that everything is ready, it’s time to make a Django demo app, and include TinyMCE so you can set up some fonts.
2. Configuring Django with TinyMCE
The TinyMCE Django integration is maintained in partnership between Tiny, and independent developers, and you can find out more in the project GitHub. Change into the criteria/ app directory, and then install the Django TinyMCE integration:
cd criteria

python -m pip install django-tinymceOpen the models.py file, and add the following content to set up a page for the LMS customers to build their criteria. It includes a criteria title character entry field, and TinyMCE for LMS content building:
from django.db import models
from tinymce.models import HTMLField

# Create your models here. class Description(models.Model):

criteria_title = models.CharField(max_length = 120)
criteria_description = HTMLField()Save the change, and then open the admin.py file, and include the following, which places the criteria building screen into the demo project:
from django.contrib import admin

# Register your models here.

from .models import Description
admin.site.register(Description)Save the change, and then change back up into the top level project directory. Then change into the LearningSystem directory, and open the settings.py file.
cd ..

cd LearningSystem/Add the criteria app and tinymce integration into the INSTALLED_APPS list:
INSTALLED_APPS = [
  "django.contrib.admin",
  "django.contrib.auth",
  "django.contrib.contenttypes",
  "django.contrib.sessions",
  "django.contrib.messages",
  "django.contrib.staticfiles",
  "criteria",
  "tinymce",
];
Save the additions to the list, and then change back up to the top level of the project. Run the following two commands to make sure that the new criteria building screen appears in the demo:
cd ..

python manage.py makemigrations criteria

python manage.py migrateWith these steps done, it’s time to manage Django fonts with TinyMCE
3. Configuring Django fonts with TinyMCE
Change back up into the LearningSystem/ directory, and then open the settings.py file again, this time to add the TinyMCE configuration. Navigate down to the end of the settings.py file, and add the TinyMCE configuration:
# TinyMCE Configuration

TINYMCE_JS_URL = 'https://cdn.tiny.cloud/1/add-your-api-key-here/tinymce/6/tinymce.min.js'

TINYMCE_COMPRESSOR = False
TINYMCE_DEFAULT_CONFIG = {
"theme": "silver",
"height": 700,
"menubar": True,
"plugins": "a11ychecker advcode autocorrect autolink autoresize autosave charmap checklist code editimage emoticons footnotes fullscreen image link linkchecker lists media mediaembed powerpaste preview table tableofcontents tinycomments tinymcespellchecker typography wordcount",
"toolbar": "undo redo | blocks | bold italic underline strikethrough forecolor backcolor | align checklist bullist numlist | link image media table | subscript superscript charmap blockquote | tokens | spellchecker | fullscreen preview",
"a11y_advanced_options": True,
"a11ychecker_html_version": "html5",
"a11ychecker_level": "aa",
}To configure Django font options with TinyMCE, add in the following options, and then save the changes:
# TinyMCE Configuration

TINYMCE_JS_URL = 'https://cdn.tiny.cloud/1/add-your-api-key-here/tinymce/6/tinymce.min.js'

TINYMCE_COMPRESSOR = False
TINYMCE_DEFAULT_CONFIG = {
"theme": "silver",
"height": 700,
"menubar": True,
"plugins": "a11ychecker advcode autocorrect autolink autoresize autosave charmap checklist code editimage emoticons footnotes fullscreen image link linkchecker lists media mediaembed powerpaste preview table tableofcontents tinycomments tinymcespellchecker typography wordcount",
"toolbar": "undo redo | blocks | bold italic underline strikethrough forecolor backcolor | align checklist bullist numlist | link image media table | subscript superscript charmap blockquote | tokens | spellchecker | fullscreen preview",
"a11y_advanced_options": True,
"a11ychecker_html_version": "html5",
"a11ychecker_level": "aa",
"font_family_formats": "Andale Mono=andale mono,times; Arial=arial,helvetica,sans-serif; Arial Black=arial black,avant garde;"
"Book Antiqua=book antiqua,palatino; Baskerville=baskerville,serif; Courier New=courier new,courier;"
"Georgia=georgia,palatino; Helvetica=helvetica; Impact=impact,chicago; Symbol=symbol; Tahoma=tahoma,arial,helvetica,sans-serif;"
"Terminal=terminal,monaco; Times New Roman=times new roman,times; Trebuchet MS=trebuchet ms,geneva; Verdana=verdana,geneva;"
"Webdings=webdings; Wingdings=wingdings,zapf dingbats; Afacad=afacad,sans-serif; Marcellus=marcellus,serif; Poppins=poppins,sans-serif; Raleway=raleway,sans-serif;",
"font_css": "https://fonts.googleapis.com/css2?family=Afacad:wght@500&family=Marcellus&family=Poppins:wght@300&family=Raleway:wght@100&display=swap",
}✏️NOTE: The TinyMCE font_css option in the demo makes use of a Google Font link to access a number of specific fonts hosted by Google. You can use the script to locate a specific downloaded font file instead if you are hosting your own fonts.
Testing the Django font demo
To test out the LMS demo, set up a Django superuser so you can log into the admin application. Run the following command to set up an application superuser:
python manage.py createsuperuserThe command will prompt you to set the following:
- A username
- An email address
- A secure password, with a minimum of 8 characters
With that done, you can now run the command to test out the application in your browser:
python manage.py runserver
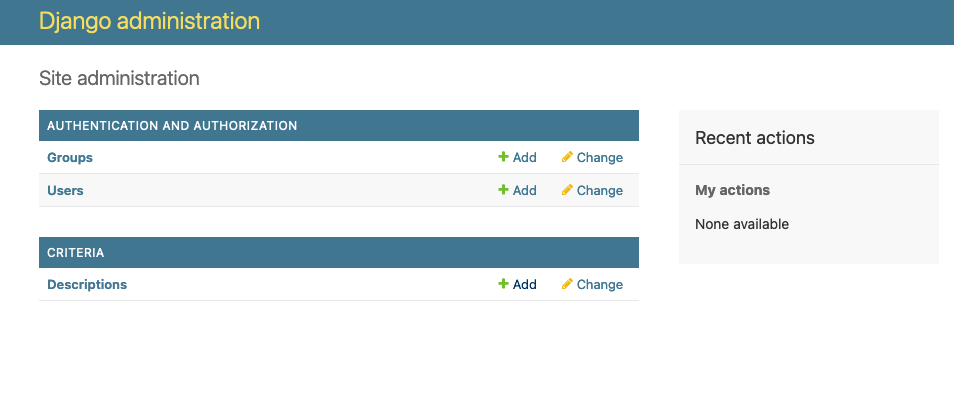
With the admin credentials set up, you can log into the demo LMS, and then access the criteria description option configured in the criteria app:
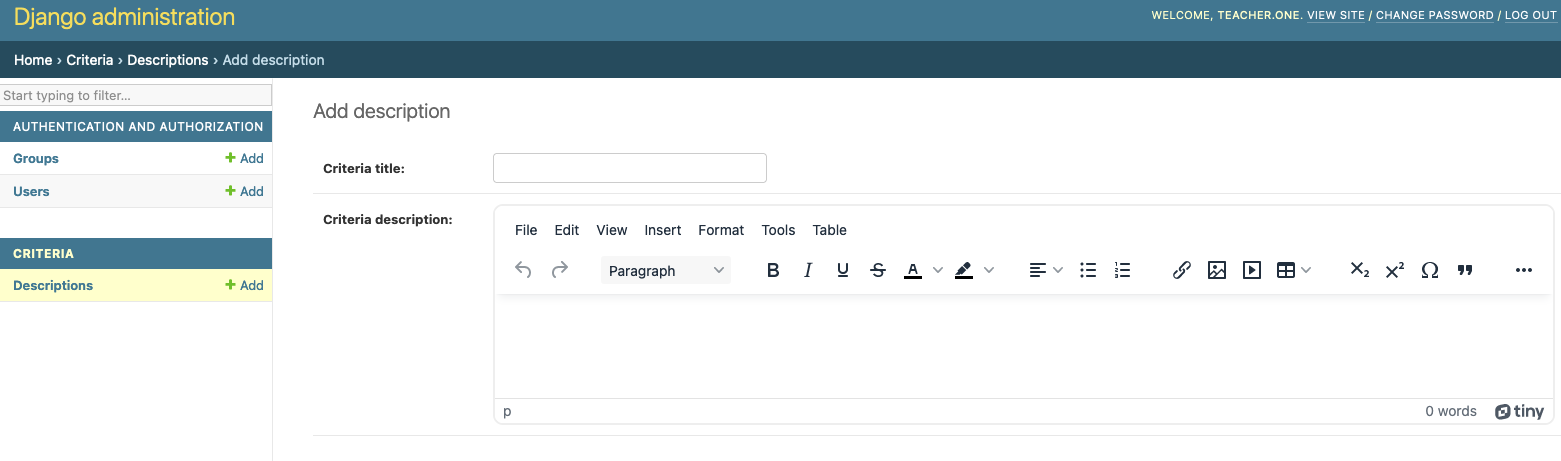
TinyMCE is now available for creating LMS criteria:
And customers can now access the fonts configured in TinyMCE. No static folders required to configure these font options:
TinyMCE font options beyond Django
For more guides and information on customizing the font options available for your customers beyond Django font management, check on the following guides:
- Customizing font sizes with TinyMCE
- Creating gold and silver font effects in TinyMCE
- Managing Fonts with TinyMCE and Angular
Contact us for more information on how TinyMCE’s range of capabilities can best support your Python and Django projects.


