


While Angular’s age might seem like a drawback, a long-standing web development frameworks also means stability. With enough time, a community can confront and solve any problems that arise, and this adds up to creating stable software. That means any projects built with Angular are reliable, and can solve edge cases like managing Angular font options, which can slow down development if fonts are incorrectly configured.
The configuration of different Angular fonts becomes easier when managed by your app’s WYSIWYG. With the right WYSIWYG editor, you can easily set up different font files and have them ready for your customers. Read on for a guide on how to manage Angular fonts when making use of the TinyMCE Angular integration as a WYSIWYG. The result is a familiar interface built on an easy-to-configure set of JavaScript options.
Angular font configurations you can use
The two Angular font configuration options that stand out as effective for content building applications are:
- Installing font files alongside your app’s other design assets
- Linking your style sheet to a font URL hosted elsewhere
There are benefits and tradeoffs surrounding both approaches. Depending on your storage space, installing font files yourself is an option that gives greater control over Angular fonts. For testing, placing a URL can be much faster compared to adding font files.
Angular font configuration steps
The following steps explain how to configure an Angular demo project, integrate TinyMCE as the WYSIWYG, and use TinyMCE to manage font options.
The prerequisites you’ll need:
- Knowledge of JavaScript essentials
- Command line access
- Text editor software to change Angular’s TypeScript files
1. Setting up Angular and integrating TinyMCE
To get started with managing Angular fonts, create the Angular app, and install TinyMCE through NPM:
- Create a new Angular app in your development environment:
ng new --defaults --skip-git enrich-angular-demo- Change into the new project directory:
cd angular-font-demo- Install TinyMCE
npm install --save tinymce @tinymce/tinymce-angular- Change into the src/app/ directory, and open the app.module.ts file with your text editor.
- Add TinyMCE to the contents, importing the EditorModule from TinyMCE, and save the changes:
import { NgModule } from "@angular/core";
import { BrowserModule } from "@angular/platform-browser";
import { EditorModule } from "@tinymce/tinymce-angular";
import { AppComponent } from "./app.component";

@NgModule({
  declarations: [AppComponent],
  imports: [BrowserModule, EditorModule],
  providers: [],
  bootstrap: [AppComponent],
})
export class AppModule {}
- Open the app.component.html file with your text editor, and include the following configuration for TinyMCE. You can replace the existing, Angular HTML content, or place TinyMCE within the existing content:
<!-- TinyMCE Fonts Setup -->
<div>
  <editor
   apiKey="add-your-api-key-here-!"
   [init]="{ plugins: 'advcode code help image lists link powerpaste table wordcount importcss',
             toolbar: 'undo redo | blocks fontfamily | bold italic underline | alignleft aligncenter alignright alignjustify | outdent indent | code',
      }"
   >
  </editor>
</div>💡NOTE: Add your TinyMCE API key to your Angular configuration. You can sign up for a FREE API key using your GitHub or Google credentials, and your API key comes with a 14-day free trial of TinyMCE Premium plugins. Adding your API key to the init configuration also prevents warning messages about domain names and read-only mode.
-
Save the changes, and then start the Angular app with the ng serve --open command

2. Angular font integration steps
You can include font files by installing them directly into your Angular assets folder, or link to a specific font file hosted elsewhere. Both methods make use of the CSS url function to reference the location of the font, and you can use an absolute or relative URL structure.
✏️NOTE: For testing purposes, fonts for this demo are imported from the Google Fonts collection. They are linked by URL. The fonts selected for the demo are Afacad, Poppins, Raleway, and Marcellus. You don’t need to select these specific fonts when testing Angular font configurations.
- In the Angular app.component.ts file, modify the TinyMCE init object to include the following options:
plugins: 'advcode code help image lists link powerpaste table wordcount importcss',
toolbar: 'undo redo | blocks fontfamily | bold italic underline | alignleft aligncenter alignright alignjustify | outdent indent | code',
font_css: [''],
font_family_formats: '',The font_css option is designed specifically for loading fonts into the TinyMCE editor. The fonts must be in a CSS file, and make use of the font_face CSS rule.
- Configure the font_css option to reference the Google Font URL:
font_css: ['https://fonts.googleapis.com/css2?family=Afacad:wght@500&family=Marcellus&family=Poppins:wght@300&family=Raleway:wght@100&display=swap'],- Ensure the fonts are available in the TinyMCE toolbar by adding the list of fonts in the font_family_formats option:
font_family_formats: 'Andale Mono=andale mono,times; Arial=arial,helvetica,sans-serif; Arial Black=arial black,avant garde; Book Antiqua=book antiqua,palatino; Comic Sans MS=comic sans ms,sans-serif; Courier New=courier new,courier; Georgia=georgia,palatino; Helvetica=helvetica; Impact=impact,chicago; Symbol=symbol; Tahoma=tahoma,arial,helvetica,sans-serif; Terminal=terminal,monaco; Times New Roman=times new roman,times; Trebuchet MS=trebuchet ms,geneva; Verdana=verdana,geneva; Webdings=webdings; Wingdings=wingdings,zapf dingbats; Afacad=afacad,sans-serif; Marcellus=marcellus,serif; Poppins=poppins,sans-serif; Raleway=raleway,sans-serif;',The format required for TinyMCE to recognize the font and add it to the font family drop down menu is: Font name=font name,serif-or-sans;.
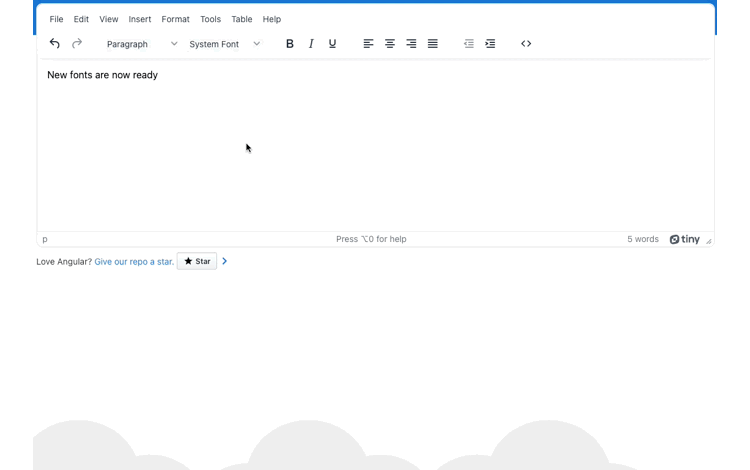
If your demo app is still running from the previous step, you can check on the new fonts configured in the TinyMCE interface. If not, start the Angular app using the ng serve --open command.
With these steps complete, you’ve successfully set up Angular font choices for your customers using TinyMCE:
Managing CSS styles alongside Angular fonts
If your content builder app needs to provide specific styles, you can combine this formatting requirement with TinyMCE’s font management capability. To do this, you can make use of the TinyMCE Import CSS plugin. This option allows for any style selectors configured in your CSS files to be added to the editor as formatting rules. They can then be selected from the menu bar. To set this up:
- In the TinyMCE init script from the previous section, add the following option:
             importcss_append: true
          }"
      >
</editor>This essential option allows the Import CSS plugin to check any CSS files for style rules, and add them to the TinyMCE Format menu.
- Add the content_css option:
             importcss_append: true
          content_css: ''
          }"
      >
</editor>- Use a relative URL to reference the “styles.css” file. The URL format is the local host address and port the demo Angular app is using in your development environment:
content_css: "http://localhost:4200/styles.css";
- Change into the src/ directory of your demo Angular app, and locate the styles file referenced in step 3. Angular generates this file by default. You can also create the file if needed:
cd src/
touch styles.css- Open the styles.css file with your rich text editor, and copy the following CSS content into the file:
@import url('https://fonts.googleapis.com/css2?family=Afacad:wght@500&family=Marcellus&family=Poppins:wght@300&family=Raleway:wght@100&display=swap');
body {
    font-family: 'Afacad', sans-serif;
    font-family: 'Marcellus', serif;
    font-family: 'Poppins', sans-serif;
    font-family: 'Raleway', sans-serif;
  }

.intricate01ab {
  background: #f5eae4;
  padding: 1em;
  margin: .5em 0;
  overflow: auto;
  white-space: pre;
  word-spacing: normal;
  word-break: normal;
  word-wrap: normal;
  line-height: 1.5;
}- Save the change
- Check the UI of your Angular demo app, specifically the Format > formats drop down. You’ll find the class specified in the CSS available as a format option your customers can select.

The fonts configured earlier are also available, and you can adjust the TinyMCE configuration to make use of the styles.css file for Angular font management rather than the font_css option configured earlier. If you remove the font_css option, the content_css option maintains the font configuration:
  <editor
      apiKey="add-your-api-key-here-!"
      [init]="{ plugins: 'advcode code help image lists link powerpaste table wordcount importcss',
        toolbar: 'undo redo | blocks fontfamily | bold italic underline | alignleft aligncenter alignright alignjustify | outdent indent | code',
           font_family_formats: 'Andale Mono=andale mono,times; Arial=arial,helvetica,sans-serif; Arial Black=arial black,avant garde; Book Antiqua=book antiqua,palatino; Comic Sans MS=comic sans ms,sans-serif; Courier New=courier new,courier; Georgia=georgia,palatino; Helvetica=helvetica; Impact=impact,chicago; Symbol=symbol; Tahoma=tahoma,arial,helvetica,sans-serif; Terminal=terminal,monaco; Times New Roman=times new roman,times; Trebuchet MS=trebuchet ms,geneva; Verdana=verdana,geneva; Webdings=webdings; Wingdings=wingdings,zapf dingbats; Afacad=afacad,sans-serif; Marcellus=marcellus,serif; Poppins=poppins,sans-serif; Raleway=raleway,sans-serif;',
           importcss_append: true,
           content_css: 'http://localhost:4200/styles.css',
         }"
  >
</editor>It’s another example of TinyMCE’s effortlessly customizable capabilities!
Angular font awesome options
There is an NPM option available to access the library. Configuring it does require using the SVG+JS method of Font Awesome with Angular. You can install it using your package manager. For instance, with NPM:
npm install @fortawesome/fontawesome-svg-core
npm install @fortawesome/free-solid-svg-icons
npm install @fortawesome/angular-fontawesome@<version>Projects beyond Angular font management
TinyMCE works well with Angular in other use cases – for example, check on the guide on how to add TinyMCE to forms within your Angular App.
If you need more information on how TinyMCE integrates with different frameworks, or how it can make managing fonts easier, contact us, and we can help match TinyMCE’s capabilities to your needs, and help your customers create more engaging articles.


