


You’ve just finished filling out a form online, and when you’re about to submit, there’s a timeout, or your browser blocks a script, and your content is lost…your customers find this deeply frustrating as well. Why not integrate a web app component that has trigger save ready to go, and hold onto your customer’s form responses while they’re still working? You can set this up with the TinyMCE triggerSave() functionality, available out-of-the-box.
TinyMCE is a reliable and effortlessly customizable rich text editor, and the following guide explains how you can set up TinyMCE trigger save, and hold onto content in the text area, even after a refresh.
TL;DR
- Add the TinyMCE triggerSave() method to your TinyMCE init script to save the editor content by triggering a ‘save’ in response to customer’s action
- When you set up TinyMCE trigger save, the triggerSave() method adds the contents of the editor into the textarea or div elements that TinyMCE replaces when it loads on the page, temporarily holding onto their responses while they work
- The most expedient way to do this: add triggerSave() to the TinyMCE init script with an event listener
The following sections show TinyMCE’s various save solutions, but if you just need the how-to steps, check on the section ‘Setting up TinyMCE trigger save’.
How to save a page with TinyMCE?
TinyMCE trigger save is one way to save page content with TinyMCE. When you need a User Interface (UI) solution, the Save plugin is the main method for saving content.
The TinyMCE Save plugin
For a solution to saving content in the User Interface, the Save plugin adds a button to the TinyMCE toolbar. You can also configure several different options to modify the Save plugin’s behavior.
For example, the save_onsavecallback option allows you to change what functions or methods run when customers click the save button.This is useful if you need a graphical element for managing saved content.
  save_onsavecallback: () => {

console.log('Saved');
            alert(‘This is definitely saved, and everything is now highlighted’);

            tinymce.activeEditor.dom.addStyle("p { background-color: yellow; }")

}The TinyMCE save() method
The save() method adds the same save support brought by the Save plugin. Add it to a function, and you can save the editor content as part of another function. It’s the main method for saving the TinyMCE text area content when you want to guide your customer to buttons or other controls outside the editor toolbar, for example, a button element on the page:
  <script>
    function saveEditor0a() {
        tinymce.activeEditor.save();
        console.log("save just happened");
    }
    const saveButton = document.getElementById("save-description-btn")

    saveButton.addEventListener("click", saveEditor0a);
   </script>
✏️NOTE: The “save-description-btn” id would be added to the HTML button element.
If triggerSave() or save() are not working
You might have tested out these API methods previously and found the methods aren’t as expected, or are wondering if these two methods are interchangeable.
The first point to know is that the methods are designed for two different actions:
- The triggerSave() method triggers the save() method on every TinyMCE editor instance on a web app page. It’s designed for capturing forms where the inputs are TinyMCE instances.
- The save() method can target a single editor. As mentioned previously, you can include the method within other functions that work on the web app page content to save the editor content.
Stack Overflow member Stobor explains this distinction effectively when helping to resolve this question. If you find that the trigger save methods are not working, as found in this trigger save issue, make sure you check where the TinyMCE editor init script is located.
How to trigger an event in javascript to save TinyMCE content
The following demo makes use of the TinyMCE Workflow Management solution. It draws from the same demo, demonstrating TinyMCE’s flexibility. It shows how you can make use of an event listener in Javascript to trigger save in response to the blur event. Blur triggers when the customer clicks away from the TinyMCE editor, and the editor loses focus.
Setting up TinyMCE trigger save
- In your development environment, create a new index.html file
- Add the following HTML to get started:
<!DOCTYPE html>
<html>
<head>
<meta charset="utf-8">
<title>Workflow style demo</title>
<meta name="viewport" content="width=device-width, initial-scale=1">
<style>
body {
margin: 2rem .5rem;
font-family: -apple-system, BlinkMacSystemFont, 'Segoe UI', Roboto, Oxygen-Sans, Ubuntu, Cantarell, 'Helvetica Neue', Helvetica, Arial, sans-serif;
}
main {
max-width: 720px;
margin: auto;
}
.editor-wrap.enabled {
border-radius: 3px;
border: 1px solid #ccc;
}
</style>
</head>
<body>
<main>
<label>Description</label>
<div class="editor-wrap" id="editor-description-wrap">
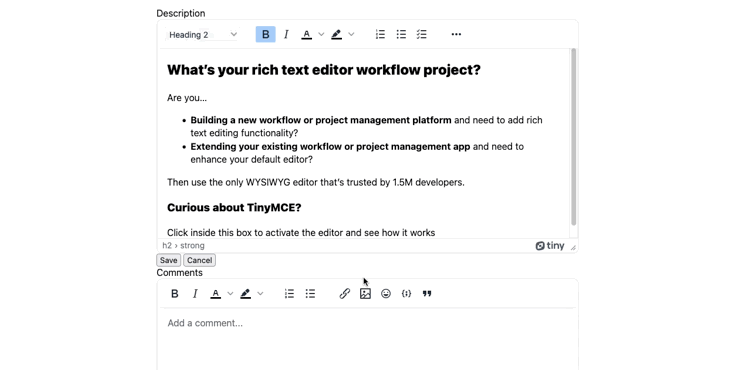
<textarea class="editor-content" id="editor-description-content">
<h2><strong>What’s your rich text editor </strong><strong>workflow</strong><strong> project? </strong></h2>
<p>Are you…</p>
<ul>
<li><strong>Building a new workflow or project management platform</strong> and need to add rich text editing functionality?</li>
<li><strong>Extending your existing workflow or project management app</strong> and need to enhance your default editor?</li>
</ul>
<p>Then use the only WYSIWYG editor that’s trusted by 1.5M developers.</p>
<h3><strong>Curious about TinyMCE?</strong></h3>
<p>Click inside this box to activate the editor and see how it works!</p>
</textarea>
<button type="button" id="save-description-btn" onclick="save('editor-description-wrap')"
class="editor-save-btn">Save</button>
<button type="button" class="editor-cancel-btn">Cancel</button>
</div>
<label>Comments</label>
<div class="comment">
<textarea class="editor-content" id="editor-comment-content"></textarea>
<button type="button" id="save-description-btn" onclick="alert('Your own custom save function')"
class="editor-save-btn">Save</button>
<button type="button" class="editor-cancel-btn">Cancel</button>
</div>
</main>
</body>
</html>- Include the following TinyMCE configuration into the HTML head section adapted from the TinyMCE Workflow Management Solution:
<script src="https://cdn.tiny.cloud/1/add-your-api-key/tinymce/6/tinymce.min.js" referrerpolicy="origin"></script>
<script>
     let commonConfig = {
         plugins: "advcode advtable autocorrect autolink checklist codesample editimage emoticons image link linkchecker lists media mediaembed powerpaste table tinymcespellchecker",
         menubar: false,
         toolbar_persist: true,
         object_resizing: false,
         mobile: {
             toolbar_mode: 'floating'
         },
         ai_shortcuts: [
             { title: 'Summarize content', prompt: 'Provide the key points and concepts in this content in a succinct summary.' },
             { title: 'Improve writing', prompt: 'Rewrite this content with no spelling mistakes, proper grammar, and with more descriptive language, using best writing practices without losing the original meaning.' }
         ],
         spellchecker_language: 'en',
         spellchecker_active: true,
     }
     tinymce.init({
         selector: "#editor-description-content",
         toolbar: "blocks | aidialog aishortcuts | bold italic forecolor backcolor | numlist bullist checklist | link image emoticons table codesample hr blockquote | code ",
         fixed_toolbar_container: '#editor-description-toolbar',
         placeholder: "Add a description",
         setup: (editor) => {
             editor.on('focus', () => {
                 document.getElementById('editor-description-wrap').classList.add('enabled');
             });
         },
         ...commonConfig,
     });
     tinymce.init({
         selector: "#editor-comment-content",
         toolbar: "bold italic forecolor backcolor | aidialog aishortcuts | numlist bullist | link image emoticons codesample blockquote ",
         placeholder: "Add a comment...",
         fixed_toolbar_container: '#editor-comment-toolbar',
         setup: (editor) => {
             editor.on('focus', () => {
                 document.getElementById('editor-comment-wrap').classList.add('enabled');
             });
         },
         ...commonConfig,
     });

     function save(id) {
         document.getElementById(id).classList.remove('enabled');
     }
</script>💡NOTE: The demo accesses TinyMCE through Tiny Cloud, which requires a TinyMCE API key. Without an API key, the editor changes into read-only mode.
An API key is FREE, and comes with a 14-day free trial of TinyMCE Premium plugins. And, you can sign into the TinyMCE dashboard to get your key with your Google or GitHub credentials.
- Add the following setup option to the TinyMCE common config:
   setup: (editor) => {
},- Include the TinyMCE trigger save method to the setup option:
editor.on("blur", function (e) {
  tinymce.triggerSave();
  console.log("Trigger save working");
});
-
Save the changes
You can now test out the TinyMCE trigger save, by adding some additional information, and clicking away. You can then refresh the page, and the new addition to the editor stays right there:
A hard refresh will clear the content, however, so the TinyMCE trigger save provides a safety net, but is not a complete solution to potential content loss.
Other resources of saving content
Auto save is also available using the Autosave Plugin. There are also other guides available that explain different ways to expand on saving content with TinyMCE:
- Ajax: Using Ajax to load and post content in TinyMCE
- PHP: Saving content to a database using PHP scripts with TinyMCE
Contact us if you need more information, or have questions on how TinyMCE can help you create a strong content creation experience for your customers.


