


Unsurprisingly, 88% of online shoppers say they’d leave a website and not return, if they have a bad user experience. So, when you ask me how important user experience (UX) and user interfaces (UI) are…the answer is, they’re critical.
UX and UI mean everything to your users, and can make or break a product. Therefore, they should be an important consideration – regardless of whether you’re building from scratch or upgrading your existing product. However, tackling such a big area can be overwhelming, so breaking it down into smaller tasks – like just focusing on one part of the overall UI – is a great place to start.. For instance, you could look at the rich text editor in your app and see where that can be upgraded to improve the UI for users – you could try using an inline editor design.
An inline editor is the preferred UX for applications built for users who create engaging, informative, or conversion-driving content. The TinyMCE rich text editor has that inline ability and our docs provide a wealth of information on its inline editor capabilities.
This article explains how to set up inline editing. It takes only a few lines of code to change TinyMCE from a standard rich text editor into an inline editor.
What is inline editing?
Inline editing changes the way you edit text in the textarea of an editor. When using inline editing, you don’t have to switch between a “view” mode and an “edit” mode. There's also changes to the toolbar.
Typically when you edit text, the toolbar presents itself and along the toolbar, there are editing and formatting options. When using inline editing mode, the toolbar is minimal, or can be hidden altogether from view.
What is inline editing useful for?
The most useful part of inline editing is the time saved by not switching between editing and viewing mode, and the simplified interface with a toolbar that is minimal, or out of the way altogether.
An Email marketing application, is one example of useful inline editing. In an email application, inline editing saves time, and helps you get directly to writing your message. The email toolbar is kept at the end of the email message (usually) and is smaller than a standard rich text editor toolbar.
Inline editing is also useful for its versatility.
When TinyMCE’s inline editing mode activates, it can work on any HTML element on the page. Do you need headings, text boxes, input elements, or something else as a textarea? Activate inline editing mode, and you can directly edit text or write content.
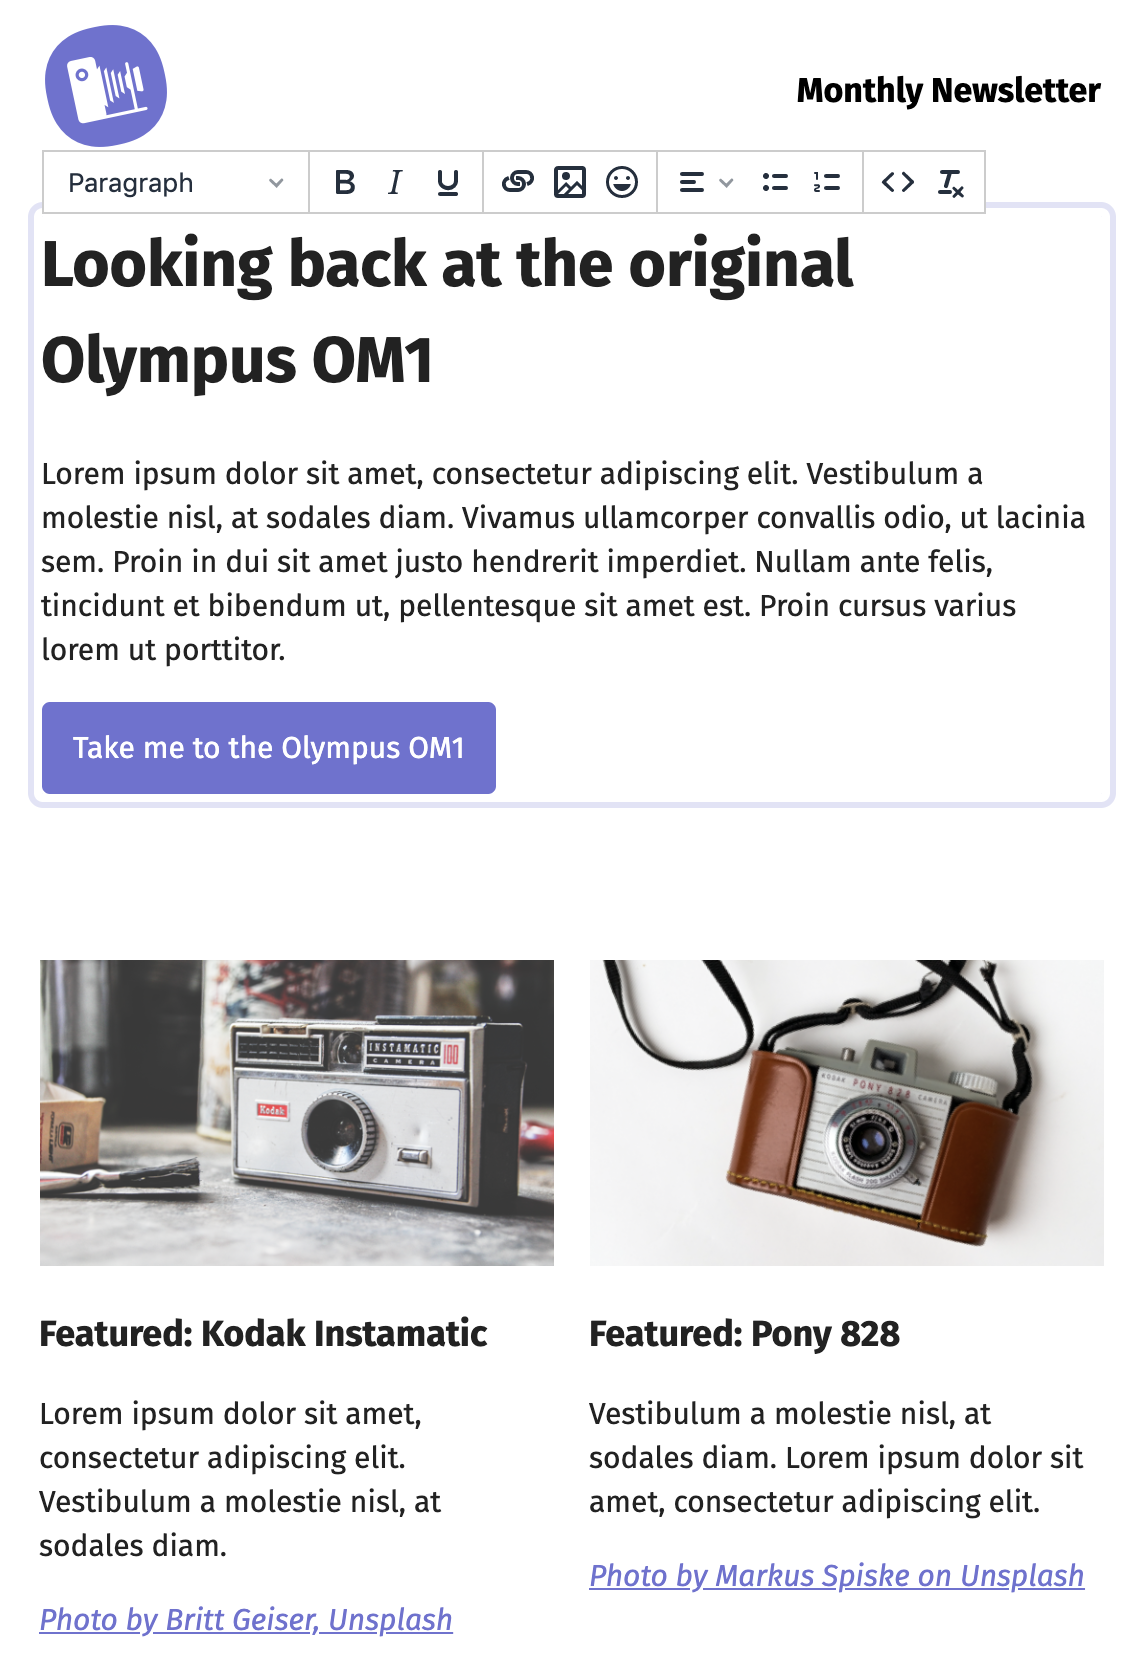
Inline editing example
Here’s how inline editing looks in action. The following is a marketing email tool built with TinyMCE inline editor activated:
And the following is a still image of the demo:
How to enable the inline editor in your app
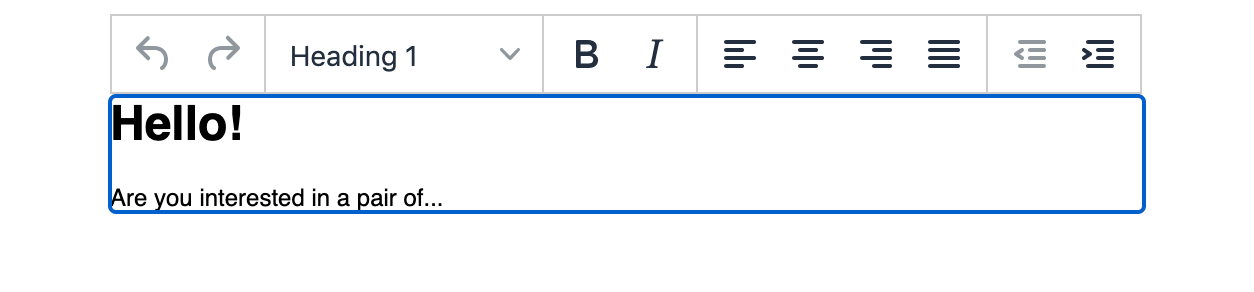
You might already have an HTML page you want to add inline editing to, but for the purpose of this tutorial, start out with a simple HTML file.
-
On your developer workstation, create a new folder and add an index.html file inside the folder
-
Copy and paste the following HTML into the file:
<!DOCTYPE html>
<html lang="en">
 <head>
   <meta charset="utf-8">
   <meta name="viewport" content="width=device-width, initial-scale=1">
 </head>
 <body>
   <div id="mydiv" style="margin: 50px">
     <h1>Hello!</h1>
     <p>Are you interested in a pair of...</p>
   <div>
 </body>
</html>-
Save the changes
Add HTML inline editor with TinyMCE
-
Sign up for a TinyMCE account to get your API key.
When you use this key, you get access to Premium TinyMCE plugins for 14 days, as well as no warning messages concerning API keys in the text area.
-
Import and initialize the editor on your page by adding the following code within the head section
<head>...</head>of the file, replacing no-api-key with your own Tiny API key:
<script src="https://cdn.tiny.cloud/1/no-api-key/tinymce/6/tinymce.min.js" referrerpolicy="origin"></script>
<script>
 tinymce.init({
   selector: "#mydiv",
   inline: true,
   menubar: true
 });
</script>-
Remove the menu bar by setting it to “false”.
Also note that the value provided for selector matches the id of the div added in the previous procedure.
Note: Although TinyMCE initializes on any element, inline editing can only be initialized on a div. You may need to add one to your HTML if you don’t have one already.
-
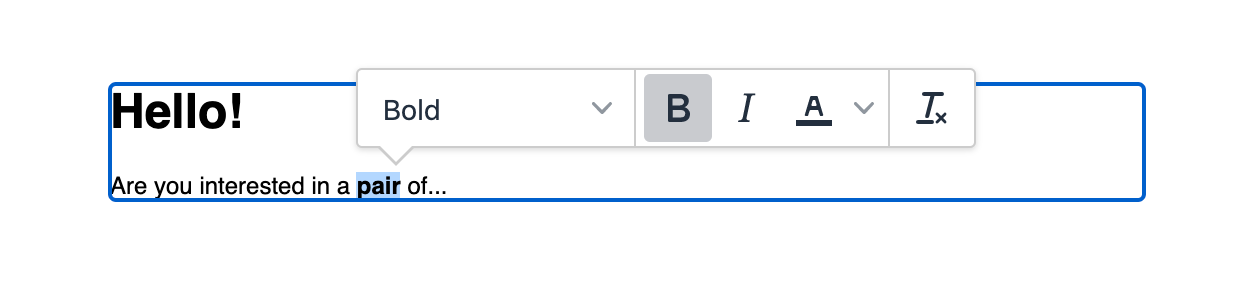
Save the changes, refresh your browser, and click on the text. You’ll be able to edit the text, and the toolbar will appear, providing more formatting options too.
If you run into the following error “This domain is not registered with Tiny Cloud” then this means you are running TinyMCE outside of a web server, or if the domain on which you’re running TinyMCE is not registered against your account.
To remove the notification, open it on localhost (which is already an approved domain by default), or register your app domain as an approved domain in your account.
Customizing the toolbar
TinyMCE comes with options you can customize, whichcan include different functionalities and features. Or, you may only want the options available to select style, bold, italics, color, and remove the formatting option.
Here’s how to make this toolbar configuration:
-
Add a toolbar with the following plugins:
tinymce.init({
 selector: "#mydiv",
 inline: true,
 menubar: false,
 toolbar: "styleselect | bold italic forecolor | removeformat"
});-
Save the changes, and reload the editor:

Alternatively, you might like to configure it with a lot more options. Check out the article on how to customize the TinyMCE toolbar for more information on configuring it for your application.
How to configure a Quickbar experience
In some cases, you might want to emulate the Medium experience, where the toolbar shows up only once you’ve highlighted some text.
The quickbars feature can be added by configuring the quickbars plugin and its associated toolbar options.
-
Re-configure the TinyMCE init script with the following:
tinymce.init({
  selector: "#mydiv",
  inline: true,
  plugins: ["quickbars"],
  quickbars_selection_toolbar:
    "styleselect | bold italic forecolor | removeformat",
  quickbars_insert_toolbar: false,
  menubar: false,
  toolbar: false,
});
Enhance your email marketing software
Looking to build or upgrade your email marketing products to stay competitive?
TinyMCE offers you exactly the solution you need so your own product offers your users the best content creation experience.
Where can you go next with inline editing?
From here, you have even more options for tweaking the UI/UX of your application:
- Customize the toolbar skin and icons to match your design system – choose from our premium package of skins and icons or design your own using our skin tool
- Add options for users to insert links, images, and other media
- Add premium features such as enterprise spell checking, link checking, and accessibility checking – available with our Cloud Professional plan – start with a free 14-day trial
- Or check out our comprehensive Tiny documentation for more configuration information.
Another major next step you can take – integrate an inline editor into one of the popular frameworks for building your website or app:
- Enhance Bootstrap forms with WYSIWYG editing
- How to emulate an online document editor with React
- Add a rich text editor to a simple Vue project
Contact TinyMCE if you need more information about inline editing!


