TinyMCE is used as the text entry component in over 100M+ products worldwide. It’s trusted by millions of developers who are creating the next generation of productivity and collaboration applications - check out examples of 9 products you can build with TinyMCE.
Among the many possibilities, TinyMCE can be used to build chat applications; previously, we wrote up how we used TinyMCE to enhance an open source chat app developed in Deno.
In this article, we’re going to take a step by step look at how to configure TinyMCE for chat applications.

Step 1: Start with the default config
If this is your first time using TinyMCE, let’s just take a moment to set up a simple project so you can follow along. If you’re already familiar with TinyMCE, you can jump ahead to the next section.
Create an HTML file using the following code from the TinyMCE quickstart guide, replacing no-api-key with your own Tiny API key. If you haven’t yet got an API key, you can get a free API key now.
<!DOCTYPE html>
<html lang="en">
 <head>
   <meta charset="utf-8">
   <meta name="viewport" content="width=device-width, initial-scale=1">
   <script src="https://cdn.tiny.cloud/1/no-api-key/tinymce/6/tinymce.min.js" referrerpolicy="origin"></script>
   <script>
     tinymce.init({
       selector: "#mytextarea"
     });
   </script>
 </head>
 <body>
 <h1>TinyMCE Example</h1>
   <form method="post">
     <textarea id="mytextarea"></textarea>
   </form>
 </body>
</html>Open the HTML file in a browser and the default TinyMCE editor will be displayed, initialized on the element with the same id as that specified by the selector option.
NOTE: You will be presented with a warning notification - This domain is not registered with Tiny Cloud - if you are running TinyMCE on your local machine outside of a web server, or if the domain on which you’re running TinyMCE is not registered against your account. To remove the notification, open it on localhost (which is already an approved domain by default), or register your domain as an approved domain in your account.

Step 2: Remove the menu bar
TinyMCE comes with a menu bar by default; however, you don’t typically provide a menu bar in a chat application - you want to keep the interface sleek and simple. To remove the TinyMCE menu bar, add menubar: false to the init script in your code:
tinymce.init({
  selector: "#mytextarea",
  menubar: false,
});
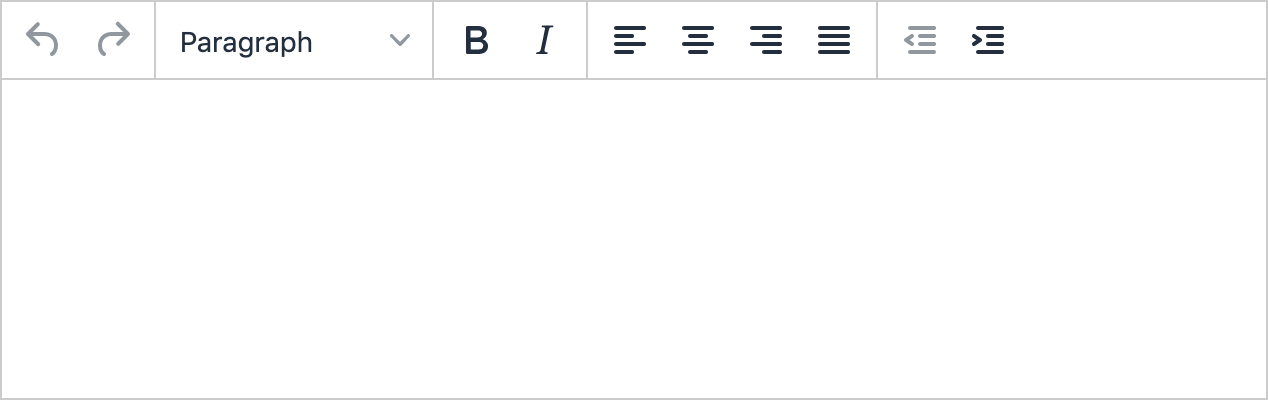
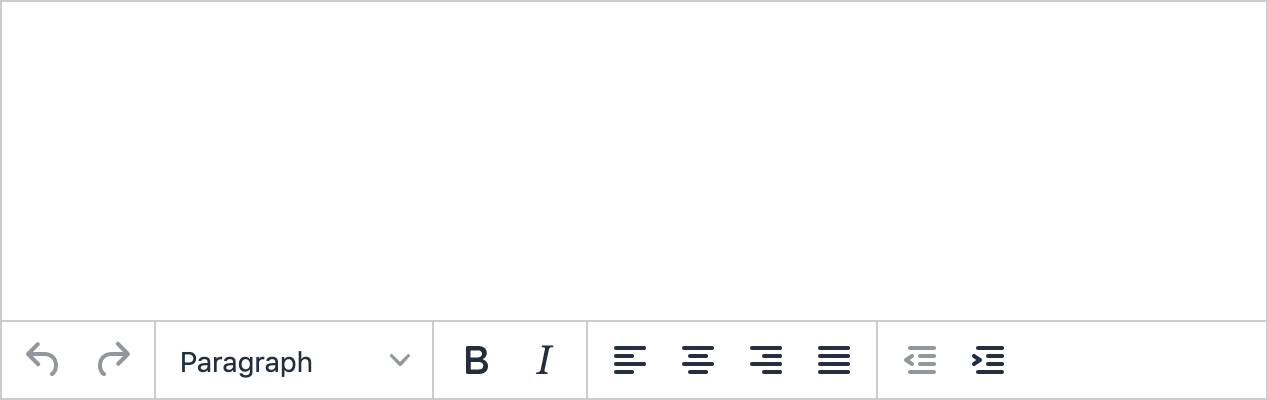
Step 3: Move the toolbar to the bottom
In most chat applications, the toolbar is positioned below the text box. You can move the toolbar to the bottom of the frame by adding toolbar_location: bottom.
tinymce.init({
  selector: "#mytextarea",
  menubar: false,
  toolbar_location: "bottom",
});
Step 4: Set up automatic resizing
You want to be able to control how the editor behaves when users enter more than one line of text. For example, you might like to initialize the editor for a single line of text, then have it resize automatically to fit more lines of text. You can do this using the autoresize plugin, which can be added to your TinyMCE config with the plugins option.
tinymce.init({
  selector: "#mytextarea",
  menubar: false,
  toolbar_location: "bottom",
  plugins: "autoresize",
  autoresize_bottom_margin: 0,
  max_height: 500,
});
Here we’ve also indicated that we want the initial size of the padding to be zero using the autoresize_bottom_margin option. Also, we’ve set a maximum height - once the editor reaches this height, a vertical scroll bar will be introduced.
For more information and configuration options, check out autoresize in our docs.
Step 5: Add placeholder text
In many modern content creation apps, placeholder text is used to prompt users. You can add placeholder text using the placeholder option.
tinymce.init({
  selector: "#mytextarea",
  menubar: false,
  toolbar_location: "bottom",
  plugins: "autoresize",
  autoresize_bottom_margin: 0,
  max_height: 500,
  placeholder: "Enter message . . .",
});

Step 6: Customize the toolbar options
TinyMCE is built to be flexible and to fit all kinds of use cases. We provide a default set of toolbar options to get you started, but you can configure it to suit just about any UX. For example, in your chat applications, you might want options like bold, italics, and strikethrough, plus options for inserting links, lists, quotes, emojis, and images. The default toolbar options can be overridden with the toolbar option.
tinymce.init({
  selector: "#mytextarea",
  menubar: false,
  toolbar_location: "bottom",
  plugins: "autoresize link lists emoticons image",
  autoresize_bottom_margin: 0,
  max_height: 500,
  placeholder: "Enter message . . .",
  toolbar:
    "bold italic strikethrough link numlist bullist blockquote emoticons image",
});
Some toolbar options depend on particular plugins, in which case, you’ll need to load the corresponding plugins too. For example, here we need to load the link, lists, emoticons and image plugins. See the full list of available toolbar buttons; “core” toolbar buttons are part of the core functionality, which means no additional plugin needs to be loaded for them to work.

Some of our premium plugins you might consider adding to enhance your product’s user experience are:
- Mention, allowing users to tag specific people in your community
- Spell Checker Pro, to highlight any spelling errors
- Enhanced Media Embed, to automatically convert links to the corresponding media
Further reading:
- Check out our article on customizing TinyMCE toolbar options.
- We’ve also put together a demo with some of the TinyMCE toolbar options aligned on the right.
- For more information and configuration options, check out the toolbar sections in the documentation under user interface options.
Step 7: Add a custom send button
There are many ways you could integrate a send button with TinyMCE. For example, you could use a button outside of TinyMCE that interacts with the editor as done in our Deno app. But there’s also a good opportunity here to demonstrate how to add custom buttons to TinyMCE. So let’s try it out!
Put simply, we need to register the button using addButton, and then add it to the toolbar config using the name we’ve given it. For example, here we’ve called it mySendButton.
When defining your button, there are options to provide a tooltip, button text (or, alternatively, an icon), and the onAction option is where you define the functionality your button will provide.
In this example, we’ve used a simple alert to demonstrate how to access and use the entered text, and then a call to reset the editor content. Of course, in your applications, you’ll want to pass the content through to where your messages appear in your chat window.
tinymce.init({
  /* ... */
  toolbar:
    "bold italic strikethrough code link numlist bullist blockquote emoticons image | mySendButton",
  setup: function (editor) {
    editor.ui.registry.addButton("mySendButton", {
      tooltip: "Send Message",
      text: "Send",
      onAction: function () {
        alert(editor.getContent());
        editor.resetContent();
      },
    });
  },
});
For more information and configuration options, check out how to create custom toolbar buttons in our docs. Again, you might like to look at how you can set it up to have TinyMCE toolbar options aligned on the right.

Step 8: Customize the skin and icons
At this point, you might be wondering if you can customize the look and feel of the editor to be more consistent with your UI and design styles.
Tiny’s Premium Skins and Icon Packs have been designed to give you loads of options when it comes to styling the editor to match your desired UI/UX. And they are now included with Tiny’s new Cloud Essential plan.
For instance, we could use the borderless skin with small icons:
tinymce.init({
  /* ... */ skin: "borderless",
  icons: "small",
});
Then wrap our own border, with rounded corners, around the editor:
<div style="border: 1px solid #ccc; border-radius: 5px; padding: 1px">
  <textarea id="mytextarea"></textarea>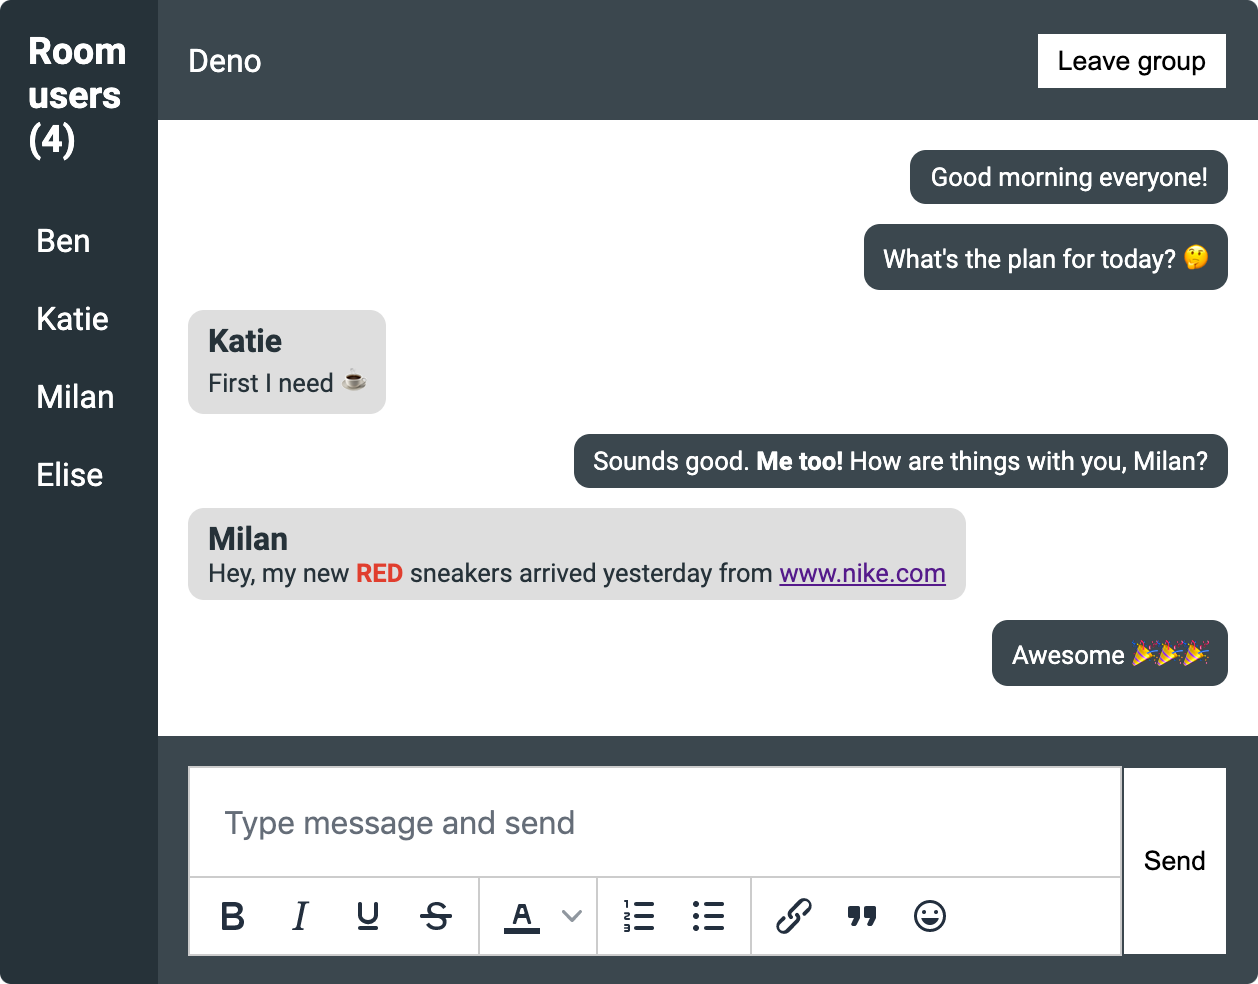
</div>Chat app example: what you get as a result
Check out the complete example on CodePen. Type a message and click Send.
What next?
This article demonstrates just some of the ways in which you can configure TinyMCE for a chat app; however, there really are so many possibilities to take it further from here. Why not tag us on Twitter @joinTiny with a screenshot of your TinyMCE configuration.
To see the TinyMCE editor working in a chat application, check out our article on how to build a simple chat app with a WYSIWYG editor.