


Having ‘Mentions’ functionality within your app, gives your customers a way to tag someone when they need their help or attention on something important. They can tag someone regarding a question, issue, suggestion or update.. It allows them to have direct conversations.
The accepted convention (when using Mentions functionality) is placing an @ symbol before a username: “@tagsomeone”.
Many types of web applications enable Mentions.
For example, a workflow application integrates mentions to help add speed and efficiency to get tasks done. While they can be added to a workflow or other app as a separate component, it’s helpful to find out if they’re included inside the text entry component. Some text entry components integrate the ability to tag some directly, and TinyMCE is one rich text editor that can give you fine-grained control over content creation and @mention functionality out-of-the-box.
It does this with the Mentions plugin.
Curious about Mentions? Wondering how to tag someone in TinyMCE? This tutorial shows you how to implement user tagging with the Mentions plugin in TinyMCE.
Who invented user tagging?
Joshua Schachter introduced the concept as “social bookmarking” or tagging for an application released in 2003. The ability to tag someone grew into prominence through Twitter, and the work of Chris Messina. The social media company implemented the specific user mentions syntax in 2009.
The concept of typing an “@” symbol to tag someone on a particular web application then proliferated across social media platforms.
How does the TinyMCE Mentions plugin work?
The Mentions plugin queries a data source (usually your database on a server) when an end user types the “@” symbol. That’s how you tag someone. The request to the server is a callback that has two parameters passed into it:
- The search query object
- A success callback to execute results
The search query object as a property - search term – that has the characters the user typed after the “@” symbol. The success call contains an array of user information in a specific pattern of keys and values.
The mentions_fetch option controls the callbacks. It’s not a Request construct, although the userRequests function works in a similar way. It does make use of a fetch method, and also the slice method, since the user only needs the part of the returned array that matches their query.
Why do you need user tagging and Mentions?
Before Mentions functionality existed, it was common to send messages directly (using other means) on anything that needed attention. That’s not a great use of time. The practice quickly got tedious,unwieldy and it didn't scale either – a customer trying to tell twenty people separately about a particular article, one at a time, is just not an option.
Including a Mentions feature within your applications, offers a few advantages. It provides:
- A better user experience (UX) in any application that requires communication between multiple users
- A way to include ‘tagging’, giving customers a fast means to connect over posts, questions, or other content
- A pathway to meet your customer’s expectations – Mentions have grown to become a widely accepted part of online interaction, and as a result it’s become a ‘table-stakes’ feature to offer in your app.
How to implement user tagging with Mentions in TinyMCE
Follow this procedure to create an example project, and add Mentions capability using the TinyMCE Mentions plugin.
Prerequisites
To follow along with this tutorial, you should have the following:
- JavaScript knowledge
- A TinyMCE API key
- A backend server to retrieve data from a database (you can use any of your choice)
You can get your FREE TinyMCE API key from your TinyMCE account. Doing so will remove the ‘Domain not Recognized’ warning features from your text area. The API key also grants you 14 days free access to TinyMCE premium plugins.
Initializing TinyMCE
-
To initialize TinyMCE: create a file called index.html, then copy and paste the following boilerplate HTML code snippet into the file:
<!DOCTYPE html>
<html lang="en">
  <head>
    <meta charset="UTF-8" />
    <title>TinyMCE</title>
  </head>
  <body>
  </body>
</html>-
Copy and paste the following code into the <head> element within your HTML file, replacing <api_key> with your TinyMCE API key:
<script
  src="https://cdn.tiny.cloud/1/<api_key>/tinymce/6/tinymce.min.js"
  referrerpolicy="origin"
></script>;
This uses a content delivery network (CDN) link to get TinyMCE up and running quickly; you cannot use TinyMCE without this script.
-
Add a <textarea> element within the HTML body:
<textarea>
    <p>Type "<kbd>@</kbd>" followed immediately by one or more characters.</p>
    <p></p>
</textarea>-
Create a file called tinymce-config.js file in your project directory and paste the following code snippet:
tinymce.init({
  selector: "textarea",
});
When initializing TinyMCE, you use the selector option to define the HTML element that you want TinyMCE to transform into a WYSIWYG editor. You can pass any valid CSS selector string within the selector option, for example #mytextarea and .textarea.
-
Import the script file within index.html. You can place it in your HTML body or head:
<script type="text/javascript" src="./tinymce-config.js"></script>;
Once TinyMCE has been initialized, it will create a WYSIWYG editor with default features like writing, editing, and formatting as well as access to a list of other features:
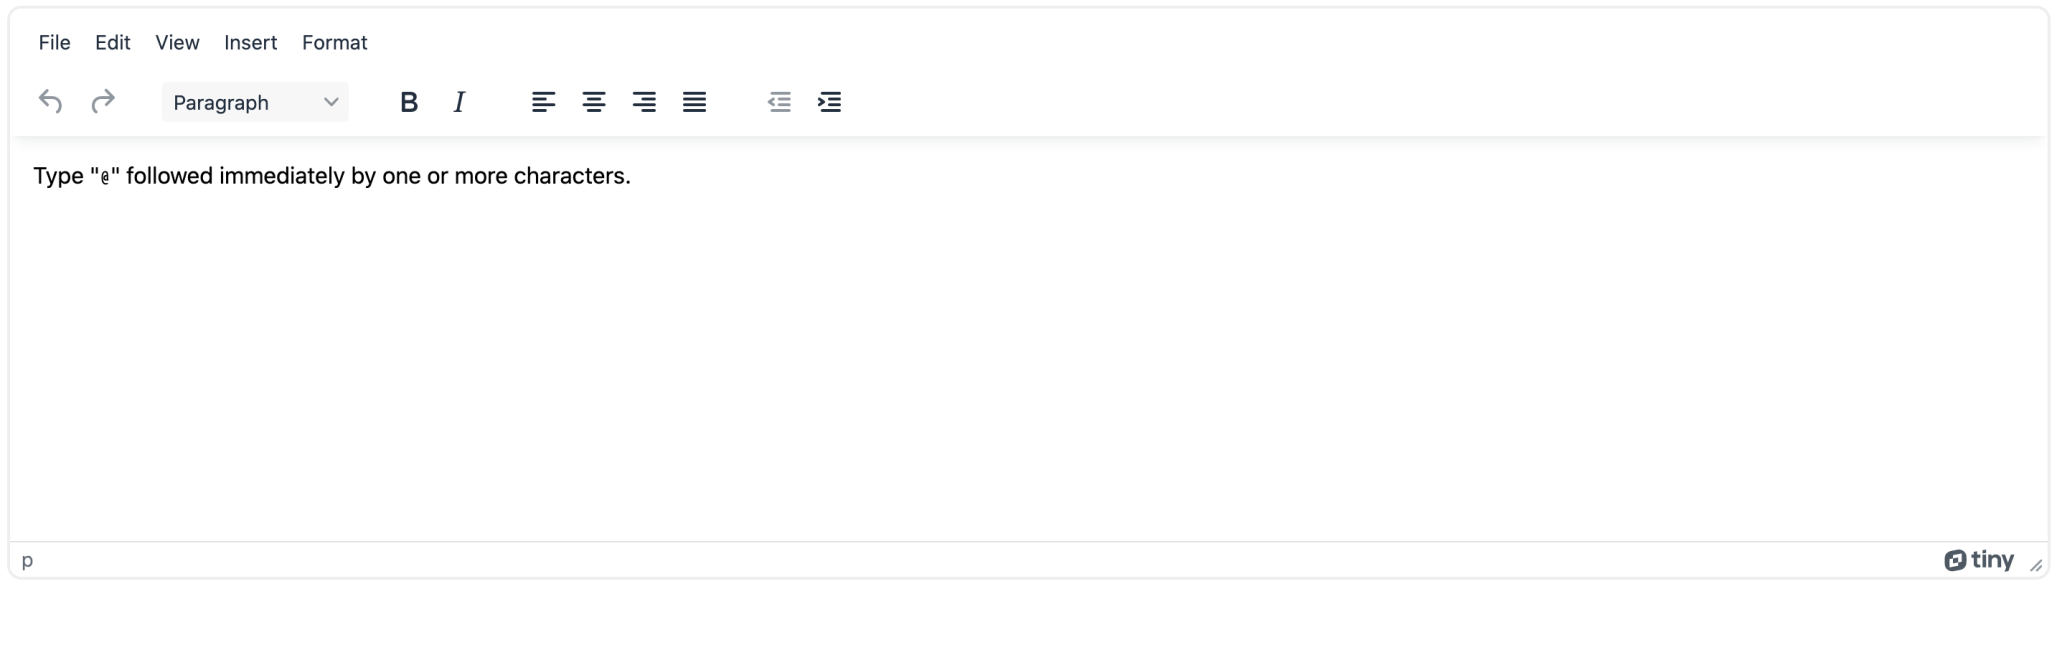
You can now set up the Mentions plugin to empower your customers with the ability to tag some directly in the text area.
Connecting to a database
Next up, you'll need a database from which the Mentions plugin will query your data. This tutorial mocks an API response to use as a demo database, which mimics what it would be like if you retrieved data from an actual database.
In your tinymce-config.js file, create a function called mockFetchUsers, which you will use to mock the API response:
const mockFetchUsers = () => {
  const names = [
    "Brynn Frey",
    "Keenan Callahan",
    "Kaitlynn Hamilton",
    "Teresa Pena",
    "Jazmin Benitez",
    "Alina Beard",
    "Johanna Golden",
    "Elena Logan",
    "Amiah Dickerson",
    "Anika Mcgrath",
    "Miriam Petty",
    "Eli Chapman",
    "Bobby Santos",
    "Sloane Glover",
    "Joel Johnson",
    "Jolie Wolf",
    "Arabella Cooke",
    "Rudy Walters",
    "Noah Weeks",
    "Marisol Chen",
    "Jefferson Holland",
    "Lorelei Mccarthy",
    "Jamal Norton",
    "Gavin Acosta",
  ];

  const bio = [
    "Singer/songwriter",
    "Musician",
    "Entrepreneur",
    "Artist",
    "Actor",
    "Writer",
    "Content creator",
    "Teacher",
    "Software Engineer",
    "Business Developer",
    "Business Owner",
    "Surgeon",
    "Doctor",
    "Nurse",
    "Physicist",
    "Astronaut",
    "Astronomer",
    "Astrophysicist",
    "Crypto Billionaire",
    "Blockchain Developer",
    "Data Scientist",
    "Data Engineer",
    "Data Analyst",
    "Optimist",
  ];

  const users = names.map((name, index) => {
    return {
      id: `${index}`,
      name,
      description: bio[index],
      image: `https://xsgames.co/randomusers/assets/avatars/${
        index < 17 ? "female" : "male"
      }/${index}.jpg`,
    };
  });

  return new Promise((resolve, reject) => {
    setTimeout(() => resolve(users), 300);
  });
};
This function returns a promise, which resolves with a list of users. This is the data you will pass in the Mentions plugin.
Using the Mentions plugin
To use Mentions in your editor, you need to pass these options into your TinyMCE initialization in tinymce-config.js:
tinymce.init({
  selector: "textarea",
  plugins: "mentions",
  mentions_fetch: mentions_fetch,
});
Setting mentions_fetch
This option takes in a callback that requests user data from your API. It then queries that data to match your search query. The callback gets passed two parameters:
- A query object
- A success callback
The query object contains the text you entered after the @ symbol, and the success callback is used to return your search results, which is an array of user data:
// tinymce-config.js

const mentions_fetch = async (query, success) => {
  let users = await mockFetchUsers();
  users = users.filter((user) =>
    user.name.toLowerCase().includes(query.term.toLowerCase())
  );

  success(users);
};
Note: The user data passed into the success callback must model a particular data structure; that is, it must contain a user object with the following properties. The image and description properties are optional:
id: string,
name: string,
image: string,
description: stringThe Mentions plugin also takes in other options like mentions_item_type, mentions_min_chars, mentions_menu_hover, mentions_selector, mentions_menu_complete, and mentions_select, explained below:
// tinymce-config.js

tinymce.init({
  selector: "textarea",
  plugins: "mentions",
  mentions_fetch: mentions_fetch,
  mentions_item_type: "profile",
  mentions_min_chars: 0,
  mentions_menu_hover: mentions_menu_hover,
  mentions_selector: "span.mention",
  mentions_menu_complete: mentions_menu_complete,
  mentions_select: mentions_select,
});
How do you tag someone in TinyMCE?
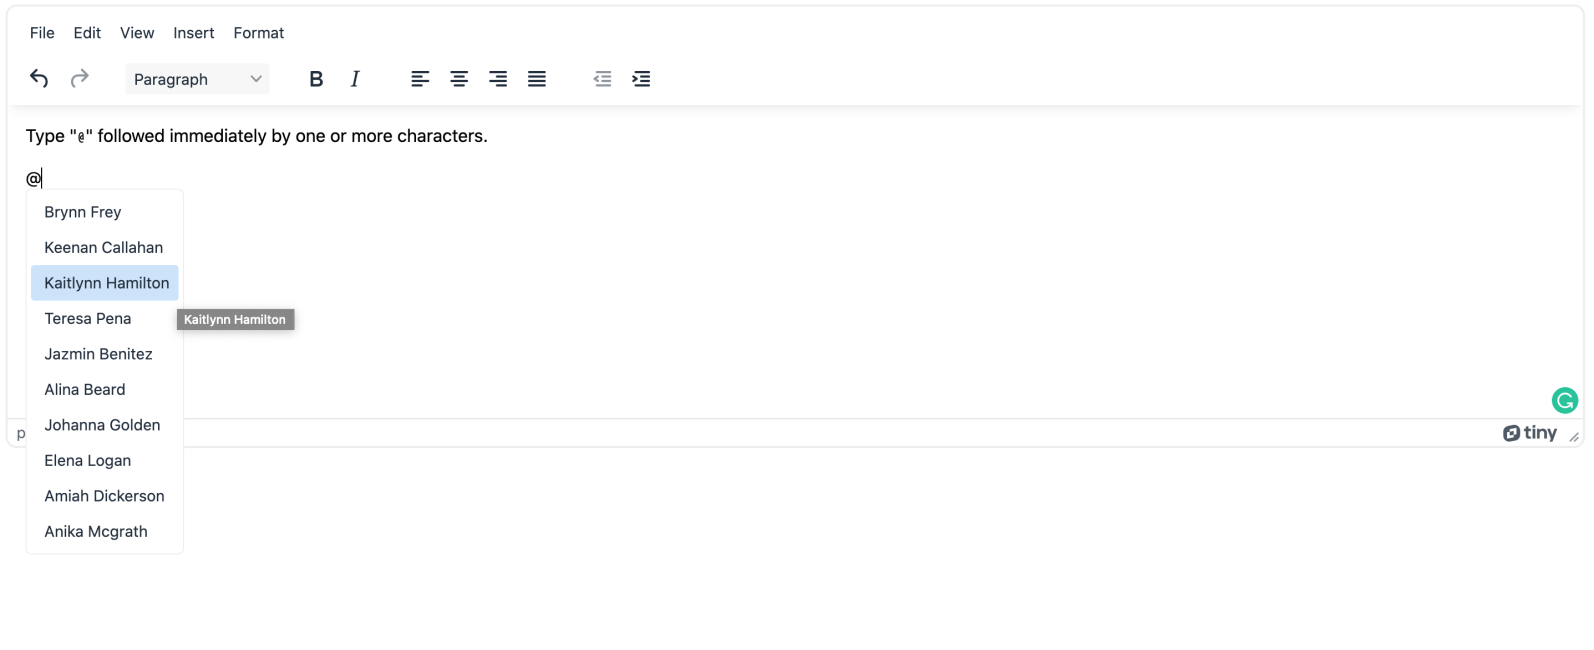
You can type the “@” symbol, and then start typing a name. A dialog opens showing the available people in the database. You can tag someone by selecting the specific person from the dialog window. This then tags someone in the TinyMCE text area.
There are several options you can configure to change how you can tag someone. The following sections explain the configuration involved.
Configuring mentions_item_type
This option chooses which user properties to display. You can pass in two types, name and profile. The name type displays only the ID and name of the users returned within the success callback:
[
  {
    id: "2",
    name: "Kaitlynn Hamilton",
  },
];
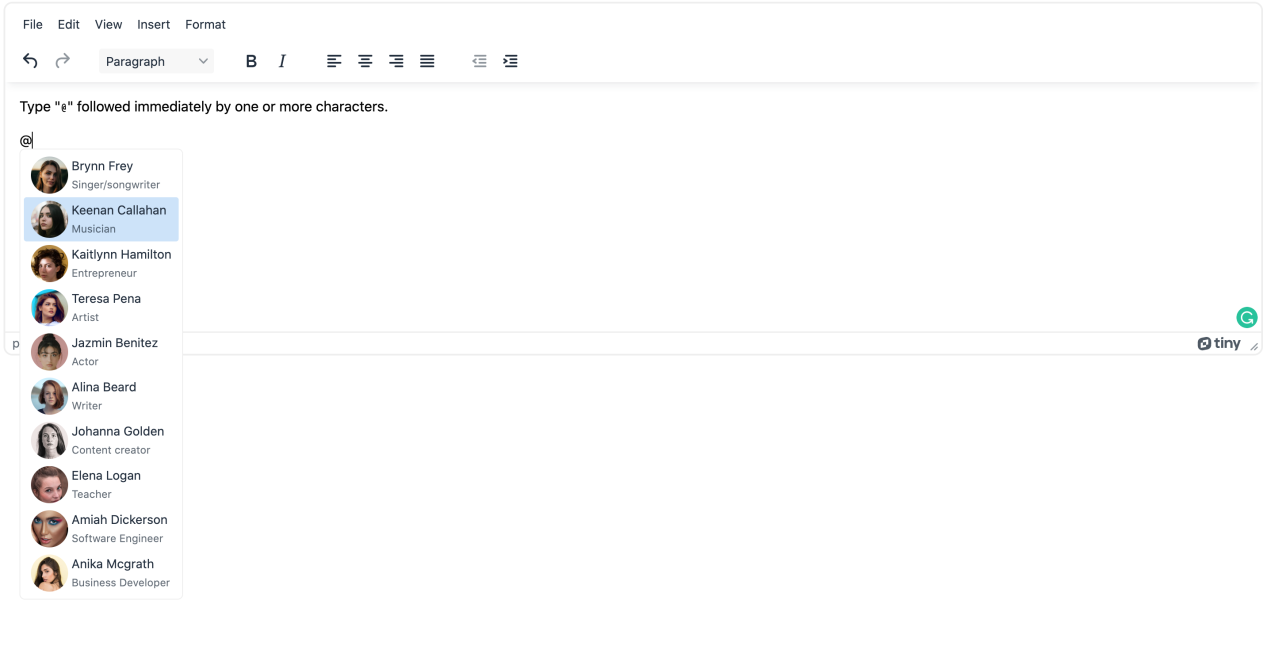
The profile type displays all the user properties returned within the success callback:
[
  {
    id: "1",
    name: "Keenan Callahan",
    image: "https://xsgames.co/randomusers/assets/avatars/female/1.jpg",
    description: "Musician",
  },
];
Setting mentions_min_chars
This option defines the number of characters it would take after the @ symbol to display the list of users.
Configuring mentions_menu_hover
This option sets what kind of user interface you would like to see when you hover over any mention, and it takes in a callback function with two parameters, a userInfo object and a success callback:
// tinymce-config.js

const mentions_menu_hover = async (userInfo, success) => {
  const users = await mockFetchUsers();
  const userDetail = users[userInfo.id];
  const div = document.createElement("div");

  div.innerHTML =
    '<div class="card">' +
    '<img class="avatar" src="' +
    userDetail.image +
    '"/>' +
    "<h1>" +
    userDetail.name +
    "</h1>" +
    "<p>" +
    userDetail.description +
    "</p>" +
    "</div>";

  success(div);
};

Adding the mentions_selector
This option enables the plugin to find existing Mentions that match the same CSS selector and must match the element returned from mentions_menu_complete.
Configuring mentions_menu_complete
This option takes in a callback function that must return an element that would override the default logic for inserting a mention. It takes in two parameters, an editor object and a userInfo object:
// tinymce-config.js

const mentions_menu_complete = (editor, userInfo) => {
  const span = editor.getDoc().createElement("span");
  span.className = "mention";
  span.setAttribute("data-mention-id", userInfo.id);
  span.appendChild(editor.getDoc().createTextNode("~" + userInfo.name));
  return span;
};
Setting the mentions_menu_select
This option takes in a callback function that returns an element that would be displayed when a user hovers over a selected @mention. This function takes in two parameters, the mention and a success callback:
// tinymce-config.js

const mentions_select = async (mention, success) => {
  const id = mention.getAttribute("data-mention-id");
  const users = await mockFetchUsers();
  const userDetail = users[id];

  const div = document.createElement("div");
  div.innerHTML =
    '<div class="card">' +
    '<img class="avatar" src="' +
    userDetail.image +
    '"/>' +
    "<h1>" +
    userDetail.name +
    "</h1>" +
    "<p>" +
    userDetail.description +
    "</p>" +
    "</div>";
  success(div);
};
Retrieving Mentions
How do you retrieve the list of Mentions from your editor? TinyMCE has you covered there – you can retrieve your list of Mentions by calling the getUsers function on the plugin instance of the editor:
// tinymce-config.js

const mentions = tinymce.activeEditor.plugins.mentions.getUsers();
console.log(mentions);
Where to next for user tagging and Mentions?
As a developer, it helps to provide a component that can be integrated easily, and is an important content creation tool. Mentions is an important function to give to customers the ability to tag someone, which helps satisfy the expected level of features for your customers to use.
These days, @mentions is an expected feature, especially if you’re in the process of building an application where collaborative communication tools are needed and attention needs to be called to a task – such as a workflow and automation application.
The TinyMCE Mentions plugin can add value to your projects, and implementing the plugin is straightforward, and it includes multiple features to play with.
To check your work, you can get the source code in this repository and view the demo to see it in action.


