


Enabling code snippets for anyone writing content in your app, shouldn’t take hours of time to complete. There are some libraries available that make the process of creating proper code snippets much easier. For instance, you can work with Prism JS, and manually build a solution.
Or, if you’re adding a reliable WYSIWYG into your CMS or DMS, why not explore your WYSIWYG’s ability to handle the syntax highlighting and design elements that make up a credible code snippet? For example, explore its ability to create proper HTML code snippets and JavaScript code snippets with highlighting.
TinyMCE, the world’s leading WYSIWYG, is compatible with Prism JS and with some small configuration, you can set up your app’s users to write credible and clear code snippets.
That’s the purpose of this article – to demonstrate the steps for configuring your app to provide reliable code snippet functionality.
What is a code snippet?
A code snippet is a specific region of the content placed within other text – and it’s meant to be both reusable, and shareable. In software development, a snippet is a part of a program that can be repeated and reused. For content and documentation, being able to copy and share the code snippet is the priority.
HTML code snippets and JavaScript code snippets are visually distinct code examples. They show the reader exactly how the HTML or JavaScript would look if it was written within a code editor or Integrated Development Environment.
This adds a degree of credibility to the content.
It also adds to the shareability of the HTML or JavaScript as the reader can see how the code would fit into their project right away.
How to configure HTML Code Snippets and JavaScript Code Snippets
Setting up credible and shareable code snippets with TinyMCE, involves configuring the Code Snippets plugin, and then making some additional adjustments as needed. The following demo shows how the plugin works.
Start with a TinyMCE basic demo
When you get your TinyMCE API key, you gain access to TinyMCE premium plugins for 14 days. Navigate to the Get-tiny sign up page to get your FREE API key.
-
Within your workstation environment, create an index.html file.
-
With your file open, in the head section, add script tags, and reference TinyMCE Cloud through a CDN link within the script tags. This is what the link looks like:
<script
  src="https://cdn.tiny.cloud/1/your-api-key/tinymce/6/tinymce.min.js"
  referrerpolicy="origin"
></script>;
Note: Creating an account with TinyMCE gets you a FREE API key. You can use your Google or GitHub account details to login. When you use this key, you get access to Premium TinyMCE plugins for 14 days, as well as no warning messages concerning API keys or domains in the text area.
-
Add another pair of script tags
-
Copy and paste the following JavaScript code snippet into the script tags. This tinymce.init method is how you control TinyMCE:
<script>
   tinymce.init({
   selector: '#editor',
   plugins: 'powerpaste casechange searchreplace autolink directionality advcode visualblocks visualchars image link media mediaembed codesample table charmap pagebreak nonbreaking anchor tableofcontents insertdatetime advlist lists checklist wordcount tinymcespellchecker editimage help formatpainter permanentpen charmap linkchecker emoticons advtable export autosave',
   toolbar: 'undo redo print spellcheckdialog formatpainter | blocks fontfamily fontsize | bold italic underline forecolor backcolor | link image | alignleft aligncenter alignright alignjustify lineheight | checklist bullist numlist indent outdent | removeformat',
   height: '700px'
       });
</script>-
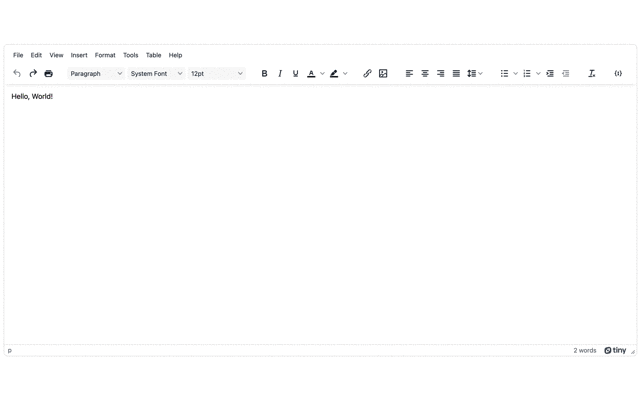
Add initial HTML content, and the CSS selector class to some textarea tags. The selector is set as an id with the value “editor” in the TinyMCE init script:
<body>
    <h1>TinyMCE Quick Start Guide</h1>

  <form id="post">
        <textarea id="editor">Hello, World!</textarea>

  </form>
</body>;
-
Test run the index.html file by opening it in your browser, or use a local server command with Python or with the PHP command:
How to set up Code Snippets plugin
With TinyMCE ready, you can now set up the Code Snippets plugin:
-
Open your index.html file, and navigate to the TinyMCE.init method
-
In the plugins list, add the Code Snippets plugin:
plugins: 'powerpaste casechange searchreplace autolink directionality advcode visualblocks visualchars image link media mediaembed codesample table charmap pagebreak nonbreaking anchor tableofcontents insertdatetime advlist lists checklist wordcount tinymcespellchecker editimage help formatpainter permanentpen charmap linkchecker emoticons advtable export autosave codesample',-
Add the plugin to the toolbar:
toolbar: 'undo redo print spellcheckdialog formatpainter | blocks fontfamily fontsize | bold italic underline forecolor backcolor | link image | alignleft aligncenter alignright alignjustify lineheight | checklist bullist numlist indent outdent | removeformat | codesample',-
For the Code Snippets plugin to work correctly, you’ll need to add a link to the Prism JS and the Prism CSS rules. Add the following CDN links to the top of the index.html page:
<script src="https://cdnjs.cloudflare.com/ajax/libs/prism/9000.0.1/prism.min.js" integrity="sha512-UOoJElONeUNzQbbKQbjldDf9MwOHqxNz49NNJJ1d90yp+X9edsHyJoAs6O4K19CZGaIdjI5ohK+O2y5lBTW6uQ==" crossorigin="anonymous" referrerpolicy="no-referrer"></script>
<script src="https://cdnjs.cloudflare.com/ajax/libs/prism/9000.0.1/components/prism-css.min.js" integrity="sha512-mHqYW9rlMztkE8WFB6wIPNWOVtQO50GYBsBRMyA1CMk34zLJ6BrvVy3RVHoIIofugmnoNLGxkuePQ9VT2a3u8w==" crossorigin="anonymous" referrerpolicy="no-referrer"></script>-
Save the changes
-
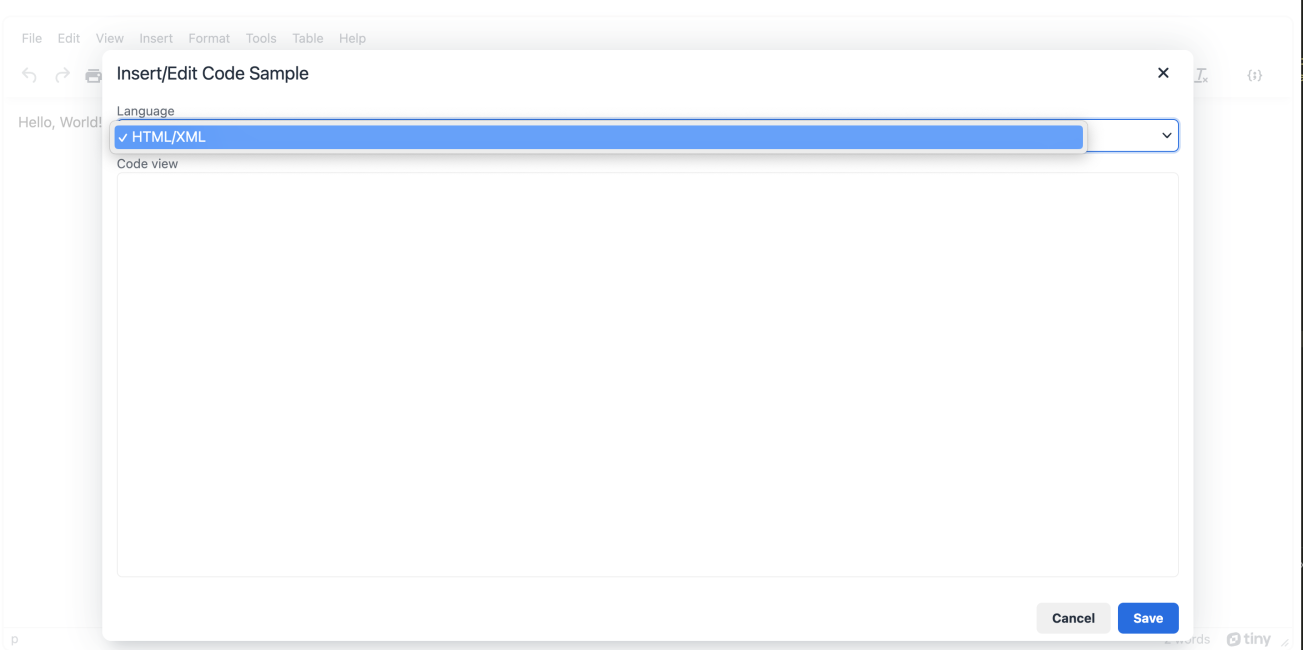
Open the demo index.html page in your browser, and set up a Code Snippet by clicking on the Code Snippet button in the toolbar
-
Add the following code to the Code Snippet dialog window that opens:
<!DOCTYPE html>
<html lang="en">
    <head>
      <script>
// Just a lil’ script to show off that inline JS gets highlighted - copied from prismjs.com
window.console && console.log('foo');
      </script>
<meta charset="utf-8" />
      <link rel="icon" href="assets/favicon.png" />
      <title>Prism JS for Code Snippet Highlighting</title>
</head>
  <body>
  </body>
</html>-
Click on the save button to view the new code snippet.
Code snippet example
How to configure Prism JS
By default, the Prism JS version TinyMCE relies on is the library provided with the plugin. You can change this default behavior by setting up a global Prism JS version. This is helpful if you need a specific syntax highlighting color, or other customization.
-
Navigate to your demo’s TinyMCE init script.
-
Add the following option to configure Global Prism JS:
            tinymce.init({
                …
                height: '700px',
                codesample_global_prismjs:
});-
Set the option to “true”
            tinymce.init({
                …
                height: '700px',
                codesample_global_prismjs: true,
});-
Save the changes
Configure only HTML Code Snippets
If you want to prevent your app’s writers from choosing languages, or limit the list of languages to prevent an overwhelming level of choice, you can control exactly what languages appear in the Code Snippet plugin dialog window. Here’s how it’s done:
-
Access your TinyMCE init script, and add the codesample languages option, along with an empty array:
            tinymce.init({
                …
                height: '700px',
                codesample_global_prismjs: true,
                codesample_languages: [ ]
});-
The language names need a text key, and a value key. Add the following to the empty array:
                codesample_languages: [ {
                text: , value: }
]-
Include the ‘HTML/XML’ text option and the ‘markup’ values:
codesample_languages: [
  {
    text: "HTML/XML",
    value: "markup",
  },
];
-
Save the changes
-
When adding content with the Code Snippets plugin, the only option available is HTML:
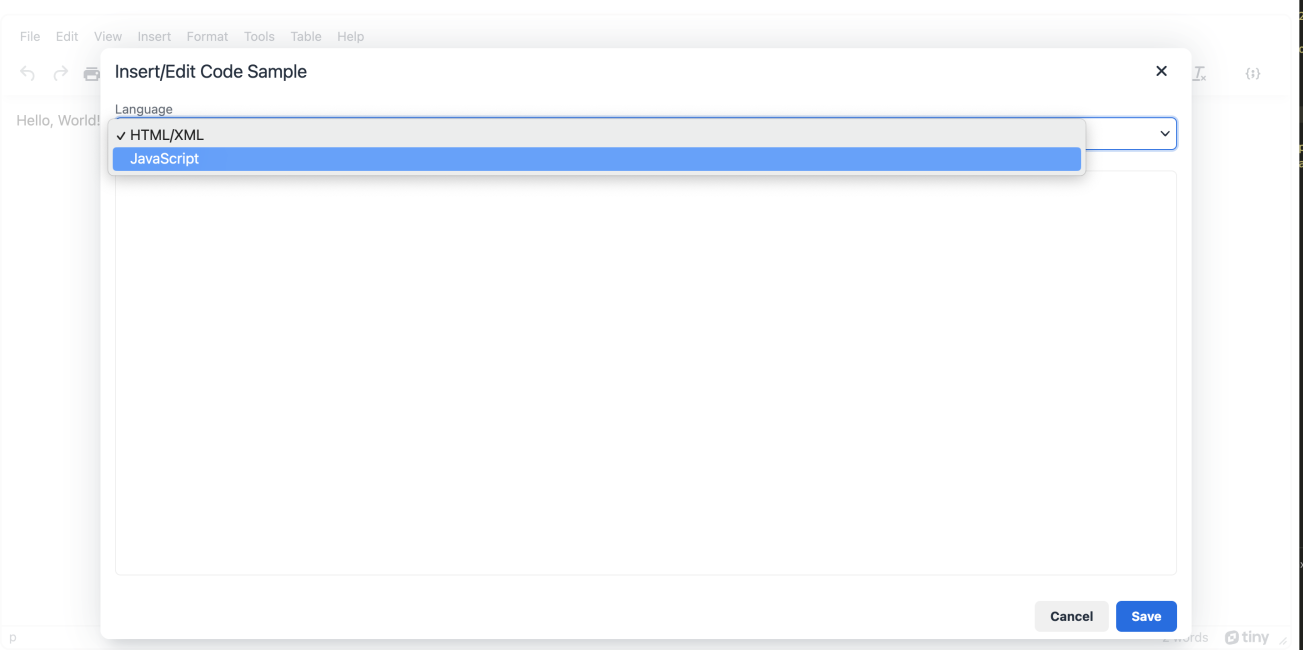
Include JavaScript Code Snippets
If you’d like to add JavaScript Code Snippets to the list, you can expand on the codesample languages list:
-
Add a new text and accompanying value option to the list:
                codesample_languages: [
                { text: 'HTML/XML', value: 'markup' },
{ text: ' ', value: ' ' },-
Include the JavaScript values to the list:
                codesample_languages: [
                { text: 'HTML/XML', value: 'markup' },
{ text: 'JavaScript', value: 'javascript' },-
Save the changes
-
When testing the Code Snippets plugin, JavaScript Code Snippets will now appear alongside HTML Code Snippets:
What’s next for your app’s content?
There are other plugins you can include in your application to help add to your end user’s credibility, and the readability of content:
- PowerPaste – the plugin automatically cleans content pasted into the text area.
- Advanced Code – an essential plugin for power users who want more control over the content or documentation they write into the text area.
- Advanced Typography – for automatically identifying and converting typographical symbols and other content in the text area for a more professional appearance.
Contact us if you have questions about the Code Snippet plugin, or other methods to help add methods of establishing credibility through strong content design.


