


Some apps struggle under the weight of managing excess text entry. What’s worse is that without integrity checking, the more text entry that’s saved to the database, the greater the risk of corrupt data damaging the back end.
One solution is to keep the character limit in a textarea set to a specific length with warnings about size. Another is to enforce a strict maxlength to keep the text entry under control.
Setting up a character limit stops excess typing, which then means less chances of database damage, and fewer diagnosis and fix tasks for your devops team. Controlling typing (through character limits) represents a key design element of both online forms, and micro-blogging platforms like Twitter.
This article explains how to limit characters in the TinyMCE text area. It covers how to set a maxlength, and how to add logic to check if the characters entered into the TinyMCE text area exceed the character limit.
Contents
How to set a character limit with TinyMCE
What you need to get started
Setting the TinyMCE max length for character limits
Character limits with tinymce.init
How to show character count
How to show word count instead of character count
How to set character limits with React
What to check after character limits
How to set a character limit with TinyMCE
What you need to get started
You don’t need to spend a large amount of time and attention configuring a character limit with TinyMCE. All you need is additional JavaScript to the tinymce.init content, and to make use of the Wordcount Plugin API.
Setting the TinyMCE max length for character limits
To complete the process, if you haven’t already done so, sign up for a FREE TinyMCE API key. This gives you access to Premium plugins for 14 days and also prevents any warning messages appearing in your TinyMCE text area.
Character limits start with tinymce.init
- Open an index.html file, and include boilerplate html, and the tiny.init script
<!DOCTYPE html>
<html lang="en">
    <head>
        <meta charset="UTF-8">
        <meta http-equiv="X-UA-Compatible" content="IE=edge">
        <meta name="viewport" content="width=device-width, initial-scale=1.0">
        <title>Character Count
        </title>
        <script src="https://cdn.tiny.cloud/1/your-api-key/tinymce/6/tinymce.min.js" referrerpolicy="origin"></script>
        <script>
            tinymce.init({
selector: "#editor",- Add the Wordcount plugin to your list of plugins:
plugins: 'advlist autolink lists link image charmap preview anchor pagebreak code visualchars wordcount',
- To limit the number of characters in the text area, add a setup option with a function called “editor” to the init script:
setup: function (editor) { }- Set up a variable called max , and set it as a number with the value of 20
setup: function(editor) {
	  	var max = 20;
}); - Include the editor.on option, and configure it to activate when there is a ‘submit’ event.
setup: function(editor) {
	  	var max = 20;
	      editor.on('submit')
- Set up a function called “event” inside the editor.on option, and inside that function, add a variable called “numChars”.
setup: function(editor) {
	  	var max = 20;
	    editor.on('submit', function(event) {
		  var numChars =
);- Add the tinymce.activeEditor API to select the TinyMCE editor, with the WordCount Plugin getCharacterCount() API method:
setup: function(editor) {
	      var max = 20;
	      editor.on('submit', function(event) {
		  var numChars = tinymce.activeEditor.plugins.wordcount.body.getCharacterCount();}
);
- Add an if statement to evaluate the number of characters typed, and send an alert if the characters exceed the specified max variable:
setup: function(editor) {
	  	var max = 20;
	    editor.on('submit', function(event) {
		  var numChars = tinymce.activeEditor.plugins.wordcount.body.getCharacterCount();
		  if (numChars > max) {
			alert("Maximum " + max + " characters allowed.");
			event.preventDefault();
			return false;
		  }
});- Create the textarea tags for TinyMCE along with form and button tags:
<form method="post" action="dump.php">
  <textarea id="mytextarea"></textarea>
  <button>Save</button>
</form>;
- Save the changes, and test out the plugin in your browser.
When typing into the textarea editor, click the button to check on the text character limit. The alert signals when the max character limit is exceeded:
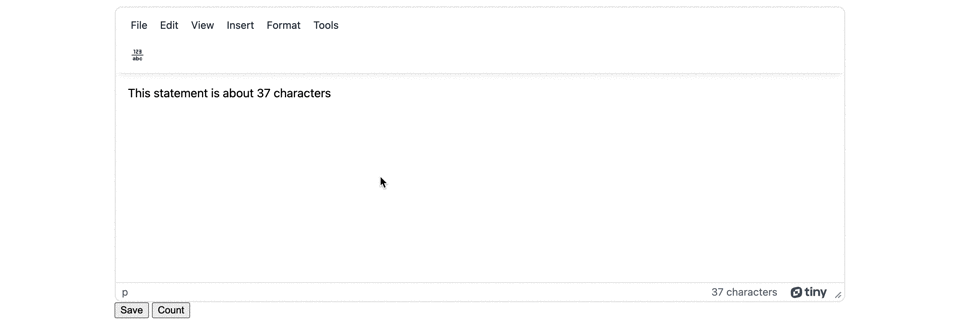
The following is the complete character limit demo.
How to show character count
Making use of the Wordcount Plugin, you can display the number of characters in the TinyMCE status bar. Alternatively, use the Wordcount Plugin API command to count the number of characters with or without whitespace, and send the product to the console, an alert, or another location.
-
Add a new script tag set to the end of the index.html file, and create a function inside it called “characterCount”:
<script> function characterCount() {}</script>;
-
Create a constant called “wordCount”, and add the TinyMCE activeEditor and wordcount API command to it:
<script>
       function characterCount() {
         const wordCount = tinymce.activeEditor.plugins.wordcount;
}-
Add an alert command to the function:
<script>
       function characterCount() {
         const wordCount = tinymce.activeEditor.plugins.wordcount;
         alert(wordcount.body.getCharacterCountWithoutSpaces());
}-
Create a button event listener to activate the Wordcount API:
<script>
       function characterCount() {
         const wordCount = tinymce.activeEditor.plugins.wordcount;
         alert(wordcount.body.getCharacterCountWithoutSpaces());
        }
        var buttonCount = document.getElementById('CharButton');
        buttonCount.addEventListener('click', characterCount, false);
</script>-
Create a button with the id specified in the event listener:
<body>

  <form method="post" action="dump.php">
                <textarea id="mytextarea"></textarea>
                <button>Save</button>
                <button id="CharButton">Count</button>

  </form>

</body>;
-
Save the changes, and test out the character count alert

Note: You can also click on the word count number in the status bar to switch to the character count, and see the character count change as you type. If you’re seeing character count rather than word count, you can switch the number by clicking on it in the status bar.
How to show word count instead of character count
Using the Wordcount plugin option on the status bar, you can switch between word count and character count. To change the alerts to show word count instead of character count:
-
Adjust the Wordcount Plugin API to check for word count instead of character count:
<script>
       tinymce.init({
           selector: "#editor",
           plugins: 'advlist autolink lists link image charmap preview anchor pagebreak code visualchars wordcount',
           toolbar: 'wordcount',
           setup: function (editor) {
               var max = 20;
               editor.on('submit', function (event) {
var numChars = tinymce.activeEditor.plugins.wordcount.body.getWordCount();-
Update the characterCount function to check for words rather than characters:
<script>
        function characterCount() {
            const wordcount = tinymce.activeEditor.plugins.wordcount;
            alert(wordcount.body.getWordCount());
}-
Save the changes, and use the buttons to retrieve a word count instead of character count.
How to set character limits with React
If you’re using the React framework with TinyMCE, you can limit the number of characters that can appear in the textarea. The React integration with TinyMCE uses the (editor.getContent({ format: 'text' }).length); API to check the content length. The documentation contains an example of the configuration with React:
function MyComponent({ initialValue, limit }) {
  const sizeLimit = limit ?? 50;
  const [value, setValue] = React.useState(initialValue ?? "");
  const [length, setLength] = React.useState(0);

  const handleInit = (evt, editor) => {
    setLength(editor.getContent({ format: "text" }).length); //A method for retrieving the character count in the textarea
  };

  const handleUpdate = (value, editor) => {
    const length = editor.getContent({ format: "text" }).length;
    if (length <= sizeLimit) {
      setValue(value);
      setLength(length);
    }
  };

  const handleBeforeAddUndo = (evt, editor) => {
    const length = editor.getContent({ format: "text" }).length;
    // note that this is the opposite test as in handleUpdate
    // because we are determining when to deny adding an undo level
    if (length > sizeLimit) {
      evt.preventDefault();
    }
  };

  return (
    <>
      <Editor
        initialValue={initialValue}
        value={value}
        onInit={handleInit}
        onEditorChange={handleUpdate}
        onBeforeAddUndo={handleBeforeAddUndo}
      />
      <p>Remaining: {sizeLimit - length}</p>
    </>
  );
}
Check on the TinyMCE integration with React documentation for more information. You can also try out the controlled component capabilities with the TinyMCE React demo .
Note: Some quirks exist within the integration. Sometimes, when the character limit is reached:
- TinyMCE calls the
setContentAPI method - The API adds one additional whitespace (a newline character), which counts as a character.
- The extra character is trimmed away as a result.
- The result is some small typographical issues.
For instance, if typing the phrase “the quick brown fox jumps over the lazy dog”, if the character limit is reached on the word “fox” at the “o” character, the following occurs:
- “the quick brown fo” changes to “the quick brown f” with the “o” character deleted as the person typing into the text area reaches the character limit.
- The setContent API method adds one additional whitespace (newline character), and then whitespace is trimmed. The editor state is “the quick brown f ” at this moment, rapidly becoming “the quick brown f” after the whitespace is trimmed.
- As the viewer keeps typing, adding the “x” in “fox”, the result is “the quick brown fx” as TinyMCE appends the “x” character in place of the trimmed whitespace following the “x” character keypress.
Other quirks to look out for include:
- Multiple spaces are replaced with
- These appear because HTML collapses multiple spaces into a single space by default. If you intend to store content as HTML in your app or project design, you may need to store content that is larger than how it appears in the editor because of the formatting effects.
- Emoji can use up more character spaces.
- Emoji cannot fit into a single 16-but code unit. Each character that represents the Emoji is counted by the character limit check.
What to check after character limits
When you’ve completed the additions to your index.html file, you can adjust the max character variable based on your project requirements.
Remember that you can find additional support for TinyMCE when signing up for a FREE API key , and information on the TinyMCE GitHub page .


