


From January 2023, TinyMCE no longer offers Real-Time Collaboration (RTC) for new customers. For Existing customers, we'll be in contact to discuss options. Please reach out to your Account Manager if you are a customer using RTC, and you have any questions about the plugin.
With the recent TinyMCE 5.9 release, we’re also delighted to bring you Real-time Collaboration for TinyMCE – it’s the new plugin that was just made publicly available.
Real-time collaboration (RTC) is the ability for two or more people to work together on some online text simultaneously. TinyMCE 5.9 now has this capability, and the RTC plugin provides secure, end-to-end encryption for all your collaborative sessions.
Whether your use case is a learning system, content management system, or another custom application, this post explains how to set up RTC using TinyMCE Cloud.
Installing Real-time Collaboration prerequisites
For the purpose of testing, and to fulfill your curiosity, you can find a demo application available in a teaching repository on GitHub. This demo uses a React app with TinyMCE as a front end, the client, and a server running Axios and SQLite to establish a database and route data.
To try out the demo you need to:
- Make sure you have access to git, yarn, and ssh-keygen on the command line.
- Open the command line, and clone the repository:
git clone git@github.com:tinymce/teach-rtc.git - Set up a TinyMCE account, and get your rich text editor API key.
- Open two terminals; one for the client side files and another for the server side files. This can be done within visual studio code using terminal view and split terminal, or with a pair of terminal prompts open if you don’t mind switching windows.
- Run
yarn installon the client and server folders to set up the needed packages. - Make a new file in the client folder called
.env.localand type inREACT_APP_TINYMCE_API_KEY=
Place the API key copied from your account dashboard directly after the “=” with no space
- In the terminal window, or in the command prompt, generate an SSH key in PEM format in the server directory using
ssh-keygen -m PEM -t rsa -b 2048 -f rsa-key. Leave the passphrase empty. - Move the key into a new
.pemfile withmv rsa-key rsa-key.private.pem - Generate a public SSH key in PEM format using
ssh-keygen -f rsa-key.pub -e -m PEM > rsa-key.public.pemand import the public key into your Tiny account in the JWT Keys tab, under the Import Public Key heading. Copy all the content in the.public.pemfile, including the BEGIN and END notes. - Run
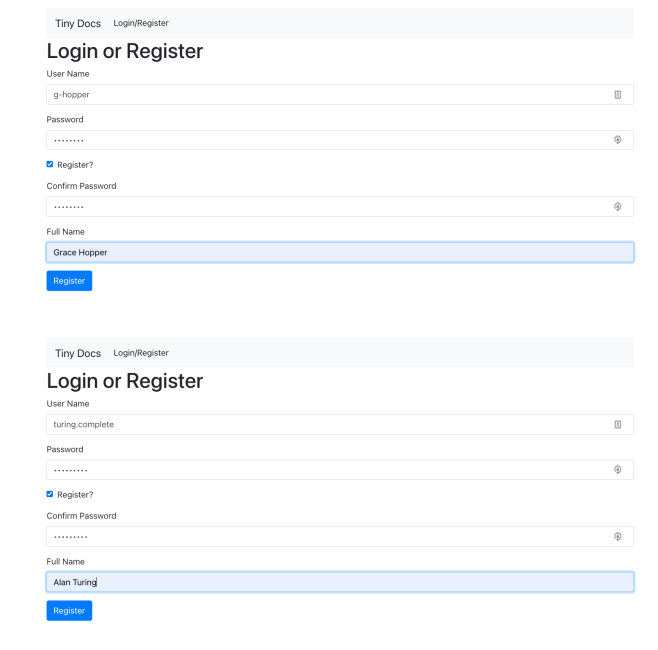
yarn startin the server directory to start the server. Repeat theyarn startin the client directory, and open the local address in your browser. This will start the app, and you can create some demo users. - Log in as one of your users, and create a new document in the demo app. Then in another browser or private window, create another user:
-
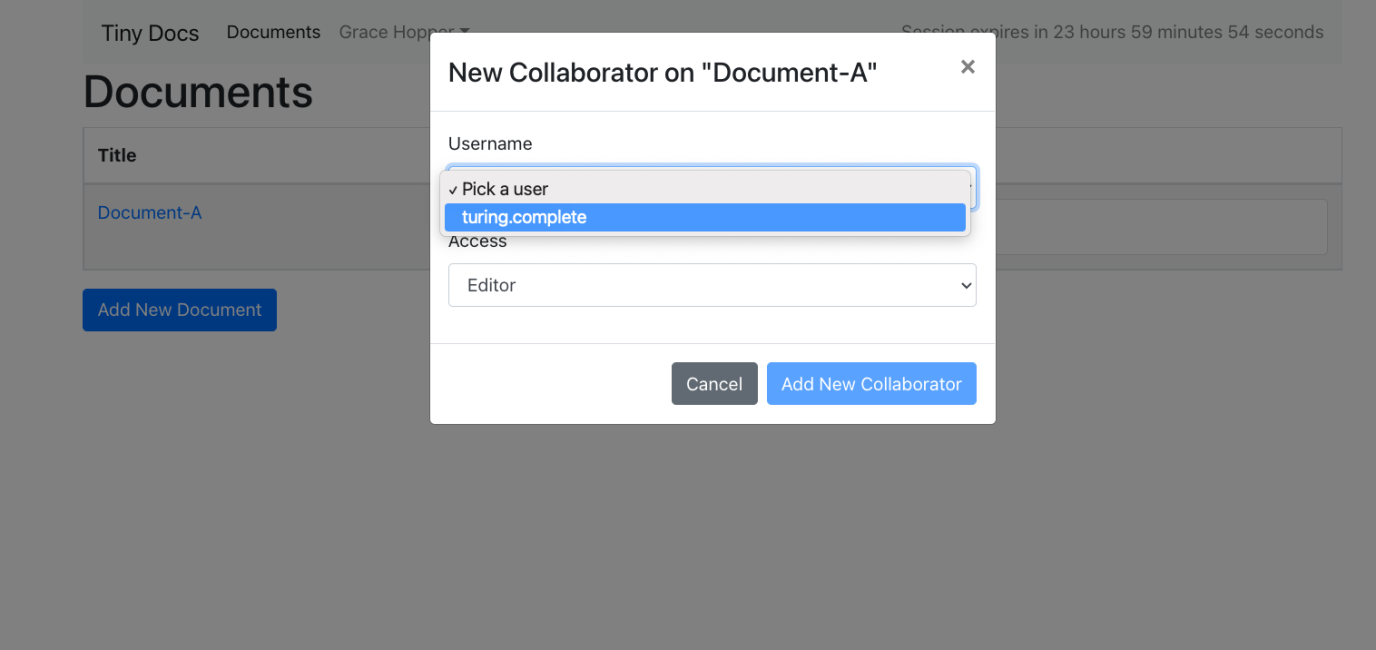
Add the new user as a collaborator on the document.
In its first form, the demo does not have Real-time Collaboration features available. If you log with your user accounts, you won’t be able to make changes to the document at the same time.
Setting up TinyMCE with RTC, including the cloud channel
Using the TinyMCE React integration, you can load the Real-time Collaboration plugin into TinyMCE using the init object.
Before doing anything else, stop the server with the cmd+c key combination. Then start making changes to the files.
Modify client/src/pages/DocumentEdit.js
- Remove line 31, which references OwnsLock. Take away references to OwnsLock, and then remove the 'use document lock' import.
- Remove line 32, which contains useDocumentAutosave, and the associated import on line 4.
- Remove lines 42 and 43 with the inInit and onRemove objects. Here is an example of the modified JavaScript:
export default function DocumentEdit({ token }) {
  const { documentId } = useParams();
  const { sub: username } = token ? decode(token) : {};
  const title = useDocumentTitle({ documentId });
  const { access } = useCollaborators({ documentId, username });
  const accessCanEdit = access === 'manage' || access === 'edit';
  const canEdit = accessCanEdit;
  const initialValue = useDocumentInitialValue({ documentId, canEdit });
const editorRef = useDocumentAutosave({ documentId, canSave: canEdit, initialValue}-
Configure the Real-time Collaboration plugin and its options. Note the cloud channel option, and that the properties of the encryption option are not secure, and should not be used in an actual application:
<Editor
  key={documentId}
  apiKey={process.env.REACT_APP_TINYMCE_API_KEY}
  cloudChannel="5-dev" //don’t forget to add the cloud channel to avoid any version errors
  disabled={!canEdit}
  initialValue={initialValue}
  onInit={(_evt, editor) => {
    editorRef.current = editor;
  }}
  onRemove={() => {
    editorRef.current = undefined;
  }}
  init={{
    ...config,
    plugins: "rtc " + config.plugins.join(" "),
    rtc_document_id: documentId,
    rtc_token_provider: ({ documentId }) => Promise.resolve({ token }),
    rtc_encryption_provider: ({ documentId, keyHint }) =>
      Promise.resolve({
        key: "This is not secure, Fix me!",
        keyhint: "1970-01-01T00:00:00.000Z",
      }),
  }}
/>;
Modify client/src/api/api.js
- Navigate to line 163 of the file, and include the 'version' function in the SaveContent information, and in the axios put call.
export const saveContent = async ({ documentId, version, content }) => {
const { data } = await axios.put(`/documents/${documentId}/content`, { content, version });Modify server/routes/api.js
- Navigate to line 341, and remove the ‘haslock’ middleware from the route.put statement.
Displaying more user information in a Real-time Collaboration session
For users within a collaboration session, there are three further configuration options recommended to provide the best possible experience. These are:
- rtc_user_details_provider - displays more information to users within the collaborative session such as full name and contact information.
- rtc_client_connected - tells the users if another client connects
- rtc_client_disconnected - tells the users if another client disconnects from the session.
Inside the DocumentEdit.js file, include the following:
-
Set a rtc_user_details_provider option directly after the rtc_encryption_provider option, and set the value as ‘getUserDetails’. When you hover your mouse over the other user’s cursor, you will see their full name.
-
Set up a console.log call for the rtc_client_connect and rtc_client connected properties:
rtc_user_details_provider: getUserDetails,
rtc_client_connected: (data) => console.log('connected:', data),
rtc_client_disconnected: (data) => console.log('disconnected:', data),Configuring RTC snapshots for the server component
Configuring rtc_snapshot will ensure that a user's work won’t be overwritten by a time-based autosave feature.
- Switch back to the DocumentEdit.js, and specify the
rtc_snapshotproperty after the encryption provider option. - Set the following to configure snapshots:
- documentId
- version
- getContent
rtc_snapshot: ({ documentId, version, getContent }) =>
  saveContent({ documentId, content: getContent() });
- Remove the
UseDocumentAutosavefunction, and well as the oninit and onRemove handlers. - Add saveContent to the imports:
Import { [...] saveContent} from '../api/api';Modify the app.js file found in the client/src/api folder.
- Locate the
SaveContentfunction on line 163, and add “version” between the documentId and content parameters. - Within the list of
@paramAxios put calls, add a new @param that specifies the version:
@param {string} inputs.version the version.- Change to the api.js file in the server/routes folder.
- Locate the
const contentobject under therouter.putrequest. This can be found on line 343 of the api.js file. - Add another const
const version = req.body.version;
- Add another if statement on line 350 to check that the version value is an integer:
if (typeof version !== ‘number’ || !/^\d+$/.test(version)) {
    return res.status(400).json({ success: falsem message: ‘The version must be an integrer.’});
}- Adjust the database to only store new content by locating the where call on line 354.
- Append a
.andWherecall afterwards, and set the inputs to be the following values:
await req
  .db("documents")
  .where("uuid", req.params.documentUuid)
  .andWhere("version", "<", version)
  .update({ content, version });
- Save the file, and then update the database using knex to create a new file named “add_version” with a timestamp:
$ yarn knex migrate:make add_version- In the new timestamp file, which can be found in the server/migrations folder, modify the exports up and export down properties:
exports.up = function (knex) {
  return knex.schema.alterTable("documents", (table) => {
    table.integer("version").notNullable().defaultTo(0);
  });
};

exports.down = function (knex) {
  return knex.schema.alterTable("documents", (table) => {
    table.dropColumn("version");
  });
};
-
Run the
yarn knex migrate:upcommand to add the changes to your database.
Now when you make changes as one of the users in the application, you can be certain that only the latest version of the document is saved.
Testing out RTC with TinyMCE
Now that you have set up RTC and its options, you can restart the server with the yarn start command. Log in to your demo application in two browser windows, one private browsing, and one regular browsing, and experiment with entering text:
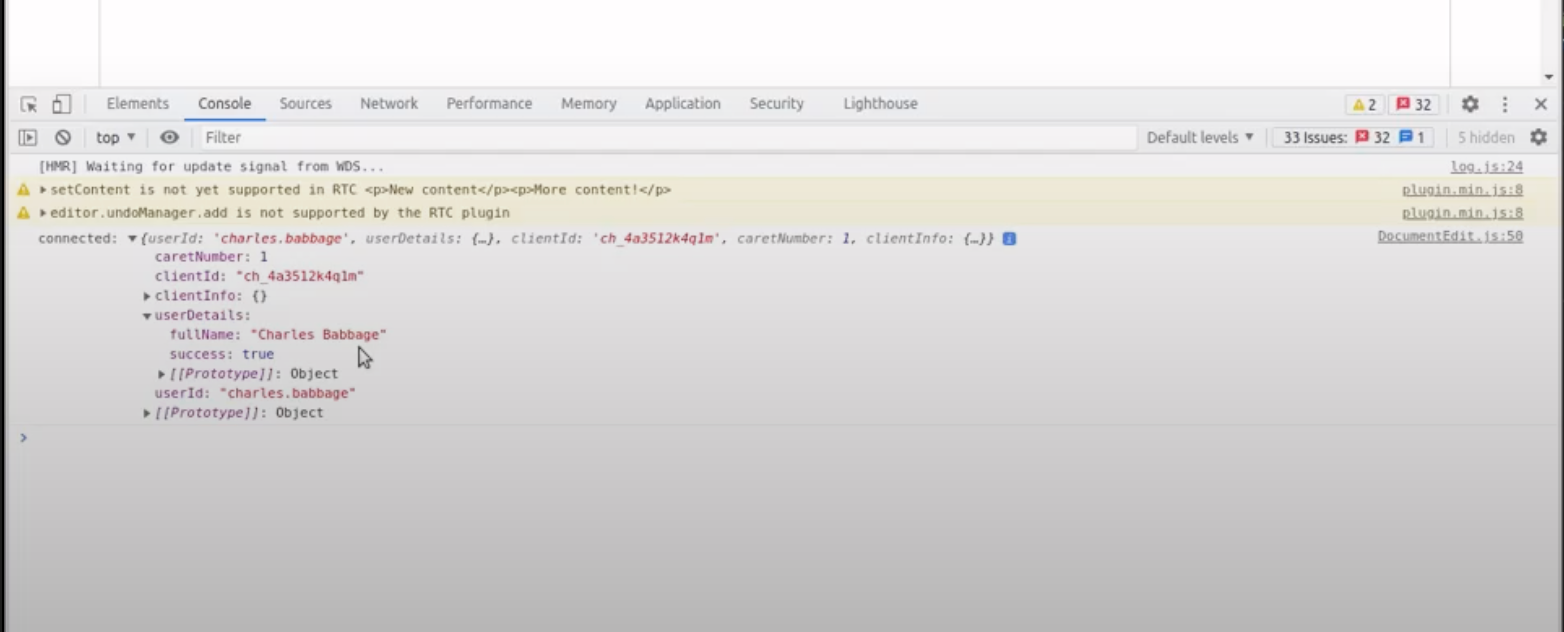
Open up the console by accessing developer tools in your browser. You will then be able to see information on the other client when they connect.
You can also check on user information by hovering over the cursor, and checking the console: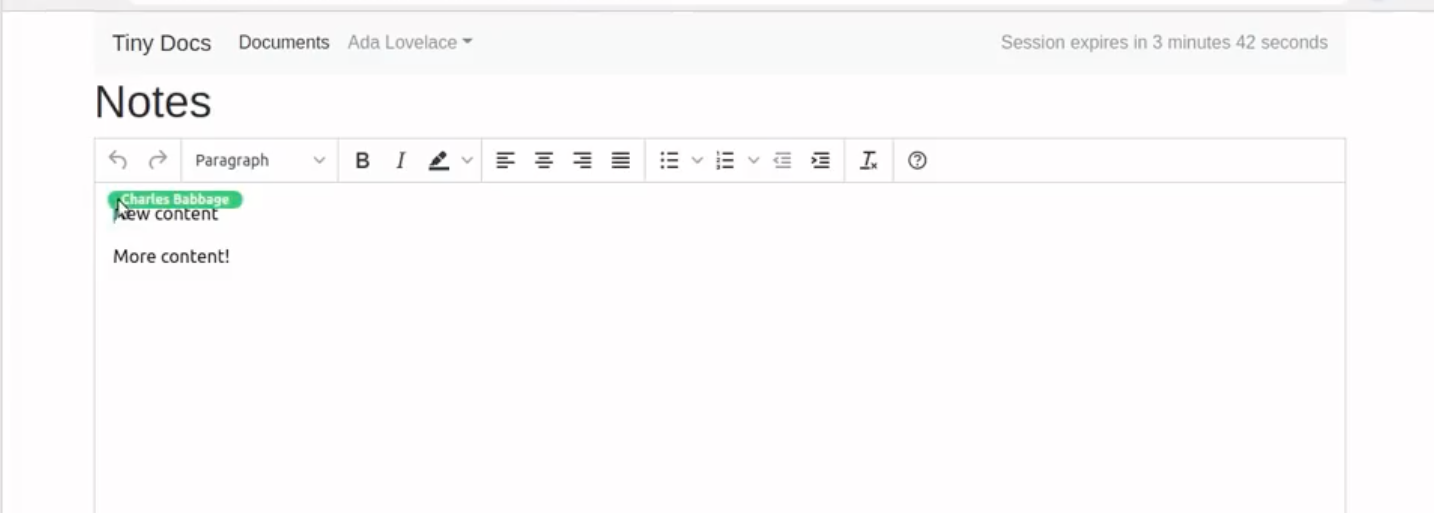
What to try next?
If you’ve signed up with TinyMCE to test out Real-time Collaboration, let us know what you think – contact us directly at tiny.contact@tiny.cloud, or get involved in our new GitHub discussion space!
Your feedback helps us to continue building and developing the Real-time Collaboration plugin, and evolve it from version 1.0, to version 2.0.


