


Giving your customers all the tools they need to finish creating their content is just the beginning. Content often changes hands, and different people use different software to interact with documents. It's frustrating, but the next step after integrating essential functionality into your application is to make sure your customers have a document export option.
Document export to PDF or to MSWord doesn't need to be arduous. There are out-of-the-box options available as reliable components that can add speed and save time and energy managing the PDF and MSWord export options.
TinyMCE provides document export capability, and when you add TinyMCE into your platform as the essential component for your content building application, you're giving your customer base document export, alongside a range of other content creation options.
In this guide, you'll find the steps needed to unlock document export capability in TinyMCE.
Let's begin...
How to export a Word document with TinyMCE
TinyMCE provides the capability to export Word documents and PDF content through two specific plugins, which you can configure separately or together depending on your document export requirements:
- Export to Word: An Advanced feature that converts the TinyMCE editor contents into an MSWord document (in .docx format)
- Export to PDF: Another Advanced feature that converts the editor contents into a PDF file
These two plugins work when TinyMCE is self-hosted (at the time of writing), with a plan to expand the document export capabilities through to Tiny Cloud. Check on the documentation for the Export to PDF and Export to Word plugins for the most up-to-date information on the plugin's availability.
✏️NOTE: These two plugins are Advanced TinyMCE features, which means you can access it alongside other Advanced features through a TinyMCE paid plan.
Document export in production
As an add-on, document export capability is available with a paid TinyMCE plan, and when you start your subscription, these are the next steps to get document export running:
- After signing up, you receive a license key, and the document export service URL.
- Configure the license key into your application within your TinyMCE init script
- Add the document export options that need the service URL set as a value (this step is shown in the procedure section below)
If you have any questions on this process, contact us, and we'll be able to walk through how TinyMCE's document export features can work for your project.
✏️NOTE: You can also try out a demo for PDF and MSWord export now with the demo on the TinyMCE website: The MSWord Export demo, and the PDF export demo.
How to configure document export capability in TinyMCE
The following steps show how the document export capabilities plugin works using a Content Management System (CMS) example based on the TinyMCE CMS solution. These are the prerequisites to know to test out the configuration:
- JavaScript and HTML experience
- The ability to set up TinyMCE self-hosted
- A TinyMCE API key
About your API key: When you sign up for your TinyMCE API key, available through the free Core plan, or the Essential, Professional, and Enterprise plans, your API key comes with a 14-day free trial of TinyMCE Advanced features, like document export.
1. Self hosting set up with TinyMCE
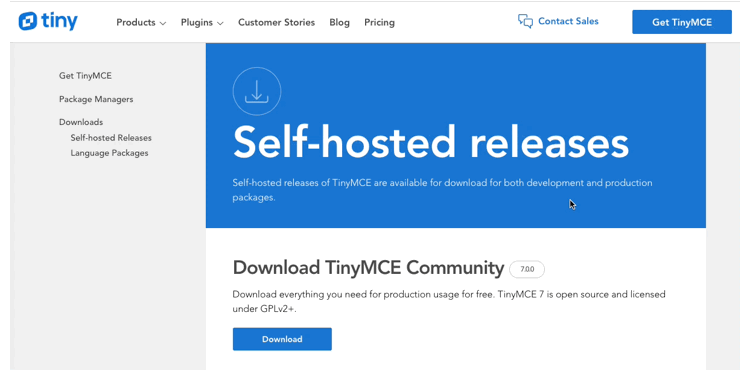
Navigate to the TinyMCE self-hosted download page, and click on the Download button.
Create a new demo folder in your development environment. Unzip the downloaded TinyMCE .zip file, and then move the TinyMCE self-hosted folder into the demo folder:
mkdir cms-builder/
cp -r /path/Downloads/tinymce/ /path/cms-builder/2. Including Advanced Features
Change into the cms-builder/ demo folder, and create a new index.html file, then paste the following TinyMCE configuration into the new index.html file:
<!doctype html>
<html lang="en">
<head>
<meta charset="utf-8">
<title>TinyMCE Landing Page Example</title>
<meta name="viewport" content="width=device-width, initial-scale=1">
<link rel="preconnect" href="https://fonts.googleapis.com">
<link rel="preconnect" href="https://fonts.gstatic.com" crossorigin>
<script src="tinymce/js/tinymce/tinymce.min.js" referrerpolicy="origin"></script>
<script>
tinymce.init({
selector: '#editor',
plugins: 'a11ychecker advcode advtemplate advlist advtable anchor autocorrect autosave editimage image link linkchecker lists markdown media mediaembed pageembed powerpaste searchreplace table template tinymcespellchecker typography visualblocks wordcount',
toolbar: 'undo redo | styles fontsizeinput | bold italic | align bullist numlist | table link image media pageembed | spellcheckdialog a11ycheck code | inserttemplate',
toolbar_sticky: true,
toolbar_mode: 'wrap',
height: 620,
editable_root: false,
editable_class: 'tiny-editable',
elementpath: false,
object_resizing: false,
resize: false,
image_caption: true,
images_file_types: "jpeg,jpg,png,gif",
style_formats: [
{title: 'Heading 1', block: 'h1'},
{title: 'Heading 2', block: 'h2'},
{title: 'Heading 3', block: 'h3'},
{title: 'Paragraph', block: 'p'},
{title: 'Blockquote', block: 'blockquote'},
{title: 'Fancy list', selector: 'ul', classes: 'fancy'},
],
advcode_inline: true,
spellchecker_ignore_list: [ 'CMS', 'devs' ],
a11ychecker_level: 'aaa',
advtemplate_templates: [
{
title: "About us",
content:
'<h2>About our company</h2>\n<p><a href="<a href="https://tiny.cloud">https://tiny.cloud</a>">XYZ Inc.</a> is a global leader in providing innovative solutions to businesses. We provide our clients with the latest technology, state-of-the-art equipment, and experienced professionals to help them stay ahead of their competition. Our comprehensive suite of services, from cloud computing and big data analytics to mobile and e-commerce solutions, ensures that all of our clients have the resources they need to stay competitive in an ever-changing business landscape. Our commitment to customer service and satisfaction is second to none, and we strive to be a reliable and trusted partner for our clients.</p>',
},
],
});
</script>
<style>
body {
margin: 2rem;
}
main {
max-width: 1100px;
margin: auto;
}
</style>
</head>
<body>
<main>
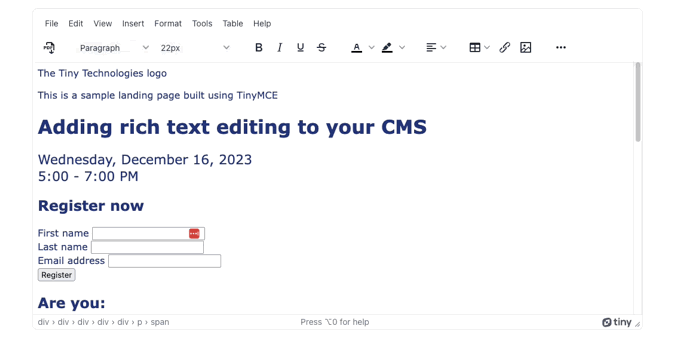
<textarea id="editor">
<div class="container-fluid text-bg-dark pt-5 tiny-hero">
<img src="images/sbc-cms-template-logo.png" alt="The Tiny Technologies logo" class="tiny-logo" width="120">
<div class="container-lg">
<div class="row gx-5 py-5">
<div class="offset-xl-1 col-xl-6 col-lg-7 col-md-7 col-sm-12 pt-5">
<div class="tiny-editable">
<p>This is a sample landing page built using TinyMCE</p>
<h1>Adding rich text editing to your CMS</h1>
<p><span style="font-size: 22px;">Wednesday, December 16, 2023</span><br><span style="font-size: 22px;">5:00 - 7:00 PM</span></p>
</div>
</div>
<div class="col-xl-4 col-lg-5 col-md-5 col-sm-12 register-form">
<div class="bg-primary p-3">
<h2 class="text-center my-3">Register now</h2>
<form>
<div class="mb-2">
<label for="first-name" class="form-label">First name</label>
<input type="text" class="form-control" id="first-name">
</div>
<div class="mb-2">
<label for="last-name" class="form-label">Last name</label>
<input type="text" class="form-control" id="last-name">
</div>
<div class="mb-2">
<label for="email" class="form-label">Email address</label>
<input type="email" class="form-control" id="email">
</div>
<div class="text-center my-3">
<button type="submit" class="btn btn-info btn-lg text-white px-5 py-2">Register</button>
</div>
</form>
</div>
</div>
</div>
</div>
</div>
<div class="container-fluid">
<div class="container-lg">
<div class="row gx-5 py-5">
<div class="offset-xl-1 col-xl-6 col-lg-7 col-md-7 col-sm-12">
<div class="tiny-editable">
<h2>Are you:</h2>
<ul class="fancy">
<li style="font-size: 20px;"><span style="font-size: 20px;">Building a new CMS and need rich text editor functionality?</span></li>
<li style="font-size: 20px;"><span style="font-size: 20px;">Extending an existing CMS and need to add more rich text editor functionality, or enhance the default editor?</span></li>
</ul>
<p><span style="font-size: 20px;">Then use the only WYSIWYG editor that’s trusted by 1.5M devs.</span></p>
</div>
</div>
</div>
</div>
</div>
<div class="container-fluid bg-primary text-white">
<div class="container-lg">
<div class="row gx-5 py-5 justify-content-center">
<div class="col-md-10 col-lg-8 col-xl-6 text-center">
<div class="tiny-editable">
<h2>How it works</h2>
<p>This landing page was built using TinyMCE.</p>
<p>All you have to do is define your page structure, which regions are editable, and then which TinyMCE features you want enabled.</p>
<p>Play around with this demo to see how TinyMCE works as a CMS WYSIWYG editor!</p>
</div>
</div>
</div>
</div>
<div class="container-lg">
<div class="row gx-5 pb-5">
<div class="col text-center">
<div class="tiny-editable"><img src="images/sbc-cms-template-face-1.png" alt="Portrait of Andrew Mitchell" width="200px">
<h3><span style="font-size: 20px;">Andrew Mitchell</span></h3>
<p>Chief Technology Officer (CTO)<br>Syntech Solutions</p>
</div>
</div>
<div class="col text-center">
<div class="tiny-editable"><img src="images/sbc-cms-template-face-2.png" alt="Portrait of Jennifer Lee" width="200"
height="200">
<h3><span style="font-size: 20px;">Jennifer Lee</span></h3>
<p>Director of Product Development<br>Stellar Innovations</p>
</div>
</div>
<div class="col text-center">
<div class="tiny-editable"><img src="images/sbc-cms-template-face-3.png" alt="Portrait of David Faraguay" width="200"
height="200">
<h3><span style="font-size: 20px;">David Faraguay</span></h3>
<p>Senior Data Scientist<br>QuantumTech Labs</p>
</div>
</div>
</div>
</div>
</div>
<div class="container-fluid">
<div class="container-lg">
<div class="row gx-5 py-4">
<div class="col offset-xl-1">
<p>Tiny Technologies, Inc. 2023</p>
</div>
</div>
</div>
</div>
</textarea>
</main>
</body>
</html>Save the change
3. Document export configuration
Include the Export to Word and Export to PDF plugin in the TinyMCE init script alongside the plugins and toolbar options:
tinymce.init({
    selector: '#editor',
    plugins: 'a11ychecker advcode advtemplate advlist advtable anchor autocorrect autosave editimage image link linkchecker lists markdown media mediaembed pageembed powerpaste searchreplace table template tinymcespellchecker typography visualblocks wordcount exportpdf exportword',
    toolbar: 'undo redo | exportpdf exportword | styles fontsizeinput | bold italic | align bullist numlist | table link image media pageembed | spellcheckdialog a11ycheck code | inserttemplate',
    toolbar_sticky: true,
    //Added between "undo redo" and "styles" toolbar buttons
Next, add the exportpdf and exportword option to the TinyMCE init script. In production, this URL is provided for you to configure, and the following URLs are only an example:
  tinymce.init({
    selector: '#editor',
    plugins: 'a11ychecker advcode advtemplate advlist advtable anchor autocorrect autosave editimage image link linkchecker lists markdown media mediaembed pageembed powerpaste searchreplace table template tinymcespellchecker typography visualblocks wordcount exportpdf exportword',
    toolbar: 'undo redo | exportpdf exportword | styles fontsizeinput | bold italic | align bullist numlist | table link image media pageembed | spellcheckdialog a11ycheck code | inserttemplate',
    toolbar_sticky: true,
    toolbar_mode: 'wrap',
    height: 620,
    editable_root: false,
    editable_class: 'tiny-editable',
    elementpath: false,
    object_resizing: false,
    resize: false,
    image_caption: true,
    images_file_types: "jpeg,jpg,png,gif",
    exportpdf_service_url: 'https://www.document-export.com/pdf/export/document',
exportword_service_url: 'https://www.document-export.com/word/export/document',Save the change.
You’ve now successfully set up document export capability with TinyMCE.
When you're making use of TinyMCE's document export capabilities in production, the export process resembles the following (using the Export to PDF plugin as an example):
Document export and more content building with TinyMCE
There are a range of other content management options and features available for you to provide for your customers when using TinyMCE. The editor integrates into many useful and established frameworks, and provides dedicated integrations, for example:
- Find out how to build a CMS with React and TinyMCE
- Create a CMS using the TinyMCE and Blazor integration
You can also check out our guide on choosing the best CMS for your project.
Contact us for more information on how TinyMCE can help shape your document export and management solutions.
Try TinyMCE 7 today as open source, or get our new Advanced plugins with a commercial licence


