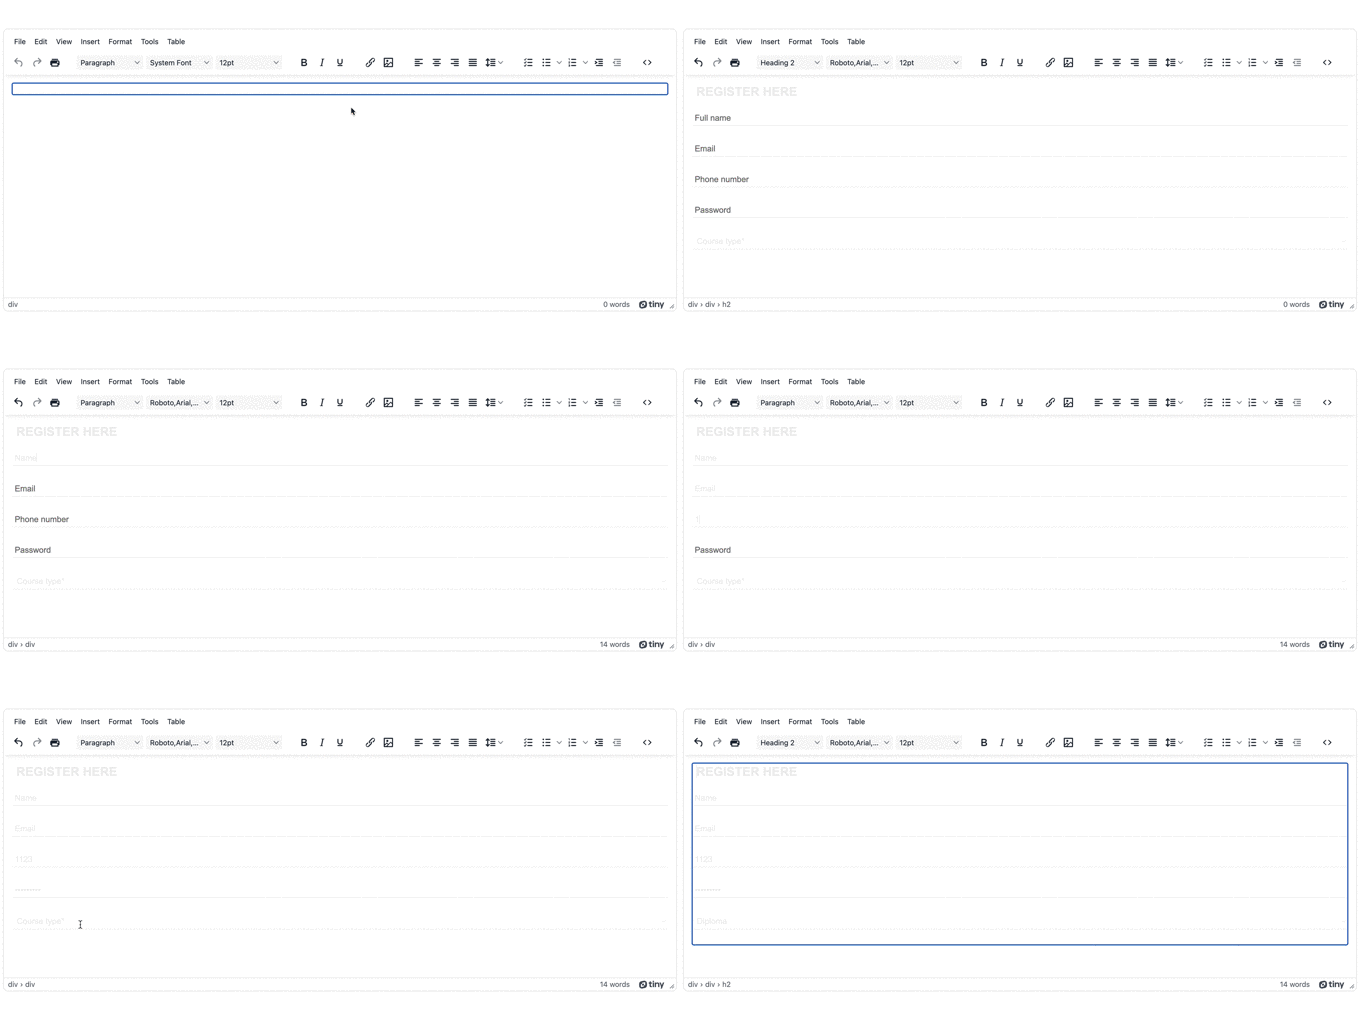
Paper forms have their uses, but it can be a struggle to update data collection to something that’s efficient and streamlined. Finding the time, and energy, to source a good builder, or component, to create updated fillable documents creates nothing but hassles when trying to select one which works for you.
A rich text editor can be the solution you need to make fillable forms and fillable documents. When working with fillable documents, an effective rich text editor can provide everything you need. For instance, TinyMCE is an easy-to-configure rich text editor which has the flexibility needed to make fillable forms, or become part of a fillable document in your app.
This article explores how TinyMCE works to make fillable forms, and demonstrates how to create a fillable document.
What is a fillable document
A fillable document is another term for a fillable form. A fillable form is a page (or a number of consecutive pages) where visitors or customers are asked to provide standard information. Usually this will have more than one input field, and the subsequent collected data is sent into a secure storage location such as a CRM or Database. The following are some examples of the different standards of fillable forms out there:
- applications
- e-signatures
- performance reviews
- surveys
How to turn a document into a fillable document?
There are few options available to turn an existing, static document into an interactive and fillable form:
- Rebuild the form in a new format with text input fields from scratch
- Have your static document converted into a fillable document with a conversion tool
- Make use of TinyMCE's available plugins for content control, such as PowerPaste.
Including TinyMCE in your content builder application unlocks the ability to quickly turn a document into a fillable document. Start by setting up TinyMCE’s PowerPaste Premium plugin, and then copy the form into the TinyMCE text area. The Power Paste plugin can handle both HTML content, and content from popular applications such as MS Word. It captures the static form, and allows you to keep the style, or clean it away and start fresh.
NOTE: For more on PowerPaste, check out guides on TinyMCE with PowerPaste: a copy and paste guide, and a guide on PowerPaste and HTML.
The following sections show TinyMCE’s flexibility by demonstrating you can go about adding existing content to TinyMCE, and build the form within the editor. And how you can use TinyMCE as the text editor sections of a form written in HTML.
How to enable fillable document creation with TinyMCE
If you're creating content within your application, you can incorporate TinyMCE into your app, and configure TinyMCE as the core for content building:
-
Create an index.html file, and add the following HTML to get started:
<!DOCTYPE html>
<html lang="en">
<head>
    <meta charset="UTF-8">
    <meta name="viewport" content="width=device-width, initial-scale=1.0">
    <title>Fillable Form with TinyMCE</title>
</head>
<body>

</body>
</html>-
Add the TinyMCE init script. This demo is optimized for content creation within the rich text editor:
<head>
    <meta charset="UTF-8">
    <meta name="viewport" content="width=device-width, initial-scale=1.0">
    <title>Fillable Form with TinyMCE</title>
    <script src="https://cdn.tiny.cloud/1/your-api-key/tinymce/6/tinymce.min.js" referrerpolicy="origin"></script>

    <script>
        tinymce.init({
          selector: '#editor',
          plugins: 'advcode, advlist, advtable, anchor, autosave, autolink, charmap, checklist, directionality, editimage, emoticons, export, formatpainter, image, insertdatetime, link, linkchecker, lists, media, mediaembed, nonbreaking, pagebreak, permanentpen, powerpaste, searchreplace, table, tableofcontents, tinymcespellchecker, visualblocks, visualchars, wordcount',
          toolbar: 'undo redo print | blocks fontfamily fontsize | bold italic underline | link image | alignleft aligncenter alignright alignjustify lineheight | checklist bullist numlist indent outdent | code',
          editable_root: false,
          editable_class: 'editable',
          powerpaste_word_import: 'prompt',
          powerpaste_html_import: 'prompt',
        });
</script>NOTE: Replace the “your-api-key” with your TinyMCE API key. You can sign up for a FREE API key when you register for a TinyMCE account (you can use Google or GitHub credentials to log in).
Your API key comes with a 14-day FREE trial of TinyMCE’s Premium plugins, such as PowerPaste, and adding your API key to the CDN script prevents domain name errors appearing in the text area.
-
Configure the editable class within the editor:
tinymce.init({
  selector: "#editor",
  plugins:
    "advcode, advlist, advtable, anchor, autosave, autolink, charmap, checklist, directionality, editimage, emoticons, export, formatpainter, image, insertdatetime, link, linkchecker, lists, media, mediaembed, nonbreaking, pagebreak, permanentpen, powerpaste, searchreplace, table, tableofcontents, tinymcespellchecker, visualblocks, visualchars, wordcount",
  toolbar:
    "undo redo print | blocks fontfamily fontsize | bold italic underline | link image | alignleft aligncenter alignright alignjustify lineheight | checklist bullist numlist indent outdent | code",
  editable_root: false,
  editable_class: "editable",
  powerpaste_word_import: "prompt",
  powerpaste_html_import: "prompt",
});
-
Add the following HTML to get the form started. The editable_root: false option means that the editor contents are not editable unless an HTML element contains the “editable” class:
<textarea id="editor">
  <div class="editable"></div>
</textarea>;
-
Save the changes, and then test out TinyMCE’s capability as a content builder for fillable forms:
- Open the source code view in the TinyMCE interface (the <> toolbar button)
- Copy and paste the following fillable document demo into the editor:
 <div class="editable" style="padding: 0px; margin: 0px 0px 20px; outline-style: none; font-family: Roboto, Arial, sans-serif; font-size: 16px; color: rgb(238, 238, 238); display: flex; align-items: center; white-space: normal;">
    <h2 class="code-line" style="text-transform: uppercase; margin: 0px 0px 0px 8px; position: relative;" data-line="129">REGISTER HERE</h2>
  </div>
  <div class="editable" style="padding: 0px; margin: 0px; outline-style: none; font-family: Roboto, Arial, sans-serif; font-size: 16px; color: rgb(238, 238, 238); display: flex; flex-direction: column; white-space: normal;">
  <input class="editable" style="padding: 5px; margin: 0px 0px 30px; outline-style: none; font-family: Roboto, Arial, sans-serif; font-size: 16px; color: rgb(238, 238, 238); border-style: none none solid; border-bottom-width: 1px; border-bottom-color: rgb(238, 238, 238);" type="text" placeholder="Full name">
  <input class="editable" style="padding: 5px; margin: 0px 0px 30px; outline-style: none; font-family: Roboto, Arial, sans-serif; font-size: 16px; color: rgb(238, 238, 238); border-style: none none solid; border-bottom-width: 1px; border-bottom-color: rgb(238, 238, 238);" type="text" placeholder="Email">
  <input class="editable" style="padding: 5px; margin: 0px 0px 30px; outline-style: none; font-family: Roboto, Arial, sans-serif; font-size: 16px; color: rgb(238, 238, 238); border-style: none none solid; border-bottom-width: 1px; border-bottom-color: rgb(238, 238, 238);" type="text" placeholder="Phone number">
  <input class="editable" style="padding: 5px; margin: 0px 0px 30px; outline-style: none; font-family: Roboto, Arial, sans-serif; font-size: 16px; color: rgb(238, 238, 238); border-style: none none solid; border-bottom-width: 1px; border-bottom-color: rgb(238, 238, 238);" type="password" placeholder="Password">
    <select class="editable" style="padding: 5px; margin: 0px 0px 30px; outline-style: none; font-family: Roboto, Arial, sans-serif; font-size: 16px; color: rgb(238, 238, 238); border-style: none none solid; border-bottom-width: 1px; border-bottom-color: rgb(238, 238, 238);">      <option style="background-color: black; border-style: none;" selected="selected" value="course-type">Course type*</option>
      <option style="background-color: black; border-style: none;" value="short-courses">Short courses</option>
      <option style="background-color: black; border-style: none;" value="featured-courses">Featured courses</option>
      <option style="background-color: black; border-style: none;" value="undergraduate">Undergraduate</option>
      <option style="background-color: black; border-style: none;" value="diploma">Diploma</option>
      <option style="background-color: black; border-style: none;" value="certificate">Certificate</option>
      <option style="background-color: black; border-style: none;" value="masters-degree">Masters degree</option>
      <option style="background-color: black; border-style: none;" value="postgraduate">Postgraduate</option>
    </select>
</div>- Save the change
You’ve now successfully built a fillable form in TinyMCE. This demonstrates how TinyMCE can work effectively as a content building component, unlocking the ability to create fillable documents within the editor.
How to create a fillable document in your app
If you're creating content within your application, you can use TinyMCE as the input element of your fillable form.
The following procedure is similar to the previous section, but incorporates TinyMCE into an HTML page:
-
Create a new index.html file
-
Add the following starter HTML:
<!DOCTYPE html>
<html lang="en">
<head>
    <meta charset="UTF-8">
    <meta name="viewport" content="width=device-width, initial-scale=1.0">
    <title>Fillable Form with TinyMCE</title>
 </head>
<body>
    <form action="/">
        <div class="title">
          <i class="fas fa-pencil-alt"></i>
          <h2>Register here</h2>
        </div>
        <div class="info">
          <div id="editor" type="text" class="fname" placeholder="Full name"></div>
          <div id="editor" type="text" name="name" placeholder="Email"></div>
          <div id="editor" type="text" name="name" placeholder="Phone number"></div>
          <div id="editor" type="password" name="name" placeholder="Password"></div>
          <select>
            <option value="course-type" selected>Course type*</option>
            <option value="short-courses">Short courses</option>
            <option value="featured-courses">Featured courses</option>
            <option value="undergraduate">Undergraduate</option>
            <option value="diploma">Diploma</option>
            <option value="certificate">Certificate</option>
            <option value="masters-degree">Masters degree</option>
            <option value="postgraduate">Postgraduate</option>
          </select>
        </div>
      </form>
</body>
</html>
-
Add the TinyMCE init script, which is optimized for inline editing:
    <script>
        tinymce.init({
          selector: '#editor',
          plugins: 'autosave, autolink, charmap, directionality, editimage, emoticons, export, formatpainter, image, insertdatetime, link, linkchecker, media, mediaembed, nonbreaking, pagebreak, powerpaste, searchreplace, tinymcespellchecker, visualblocks, visualchars',
          toolbar: 'undo redo print | blocks fontfamily fontsize | bold italic underline | link image',
          menubar: false,
          inline: true,
          powerpaste_word_import: 'clean',
          powerpaste_html_import: 'clean',
        });
</script>-
Add the following HTML form, where the div elements within the form are instance of TinyMCE:
    <form action="/">
        <div class="title">
          <i class="fas fa-pencil-alt"></i>
          <h2>Register here</h2>
        </div>
        <div class="info">
          <div id="editor" type="text" class="fname" placeholder="Full name"></div>
          <div id="editor" type="text" name="name" placeholder="Email"></div>
          <div id="editor" type="text" name="name" placeholder="Phone number"></div>
          <div id="editor" type="password" name="name" placeholder="Password"></div>
          <select>
            <option value="course-type" selected>Course type*</option>
            <option value="short-courses">Short courses</option>
            <option value="featured-courses">Featured courses</option>
            <option value="undergraduate">Undergraduate</option>
            <option value="diploma">Diploma</option>
            <option value="certificate">Certificate</option>
            <option value="masters-degree">Masters degree</option>
            <option value="postgraduate">Postgraduate</option>
          </select>
        </div>
</form>-
Test out the demo in your browser:

A variety of forms and fillable documents with TinyMCE
Fillable documents with TinyMCE are also possible with a variety of different frameworks and libraries thanks to TinyMCE’s dedicated integrations. TinyMCE can integrate quickly into your existing infrastructure to create fillable forms in:
If you'd like to speak to one of the Sales to find out more about how TinyMCE can best support your fillable forms, contact us to find out more about TinyMCE's flexibility.

