Building collaboration into a rich text editor is challenging no matter what app you're coding. Whether it's a document management system (DMS), content management system (CMS), learning management system (LMS), SaaS app, or something unique, requirements are massive: multiple users in the same document, content versioning, comment thread management, user mentions, and dynamic suggestions from large language models (LLMs). Users expect the app to just work, with no idea about the hours of coding and architecture behind something as simple as a mention inside a comment inside a shared document.
What does the timeline really look like for adding collaboration features to an RTE? It depends on your application's scale and sophistication, but you can calculate installation complexity and programming requirements. At a minimum, you can create a to-do list of necessary steps.
This guide examines all advanced collaboration features in Tiptap and TinyMCE to determine what the integration process looks like. Each rich text editor has merits for collaborative features. We'll use t-shirt sizes instead of time estimates to gauge implementation effort: Small, Medium, Large, and Extra Large.
Comparison table for collaboration features in TinyMCE and Tiptap
Here's what's available in TinyMCE and Tiptap for Advanced collaboration features:
|
TinyMCE collaboration feature |
Comparable Tiptap extension(s) |
|
AI Agent, AI Changes, AI Generation, AI Suggestions |
|
|
Version History, Snapshot Compare |
|
|
Mention |
|
|
Comments |
|
|
N/A |
Collaboration |
Suggested edits

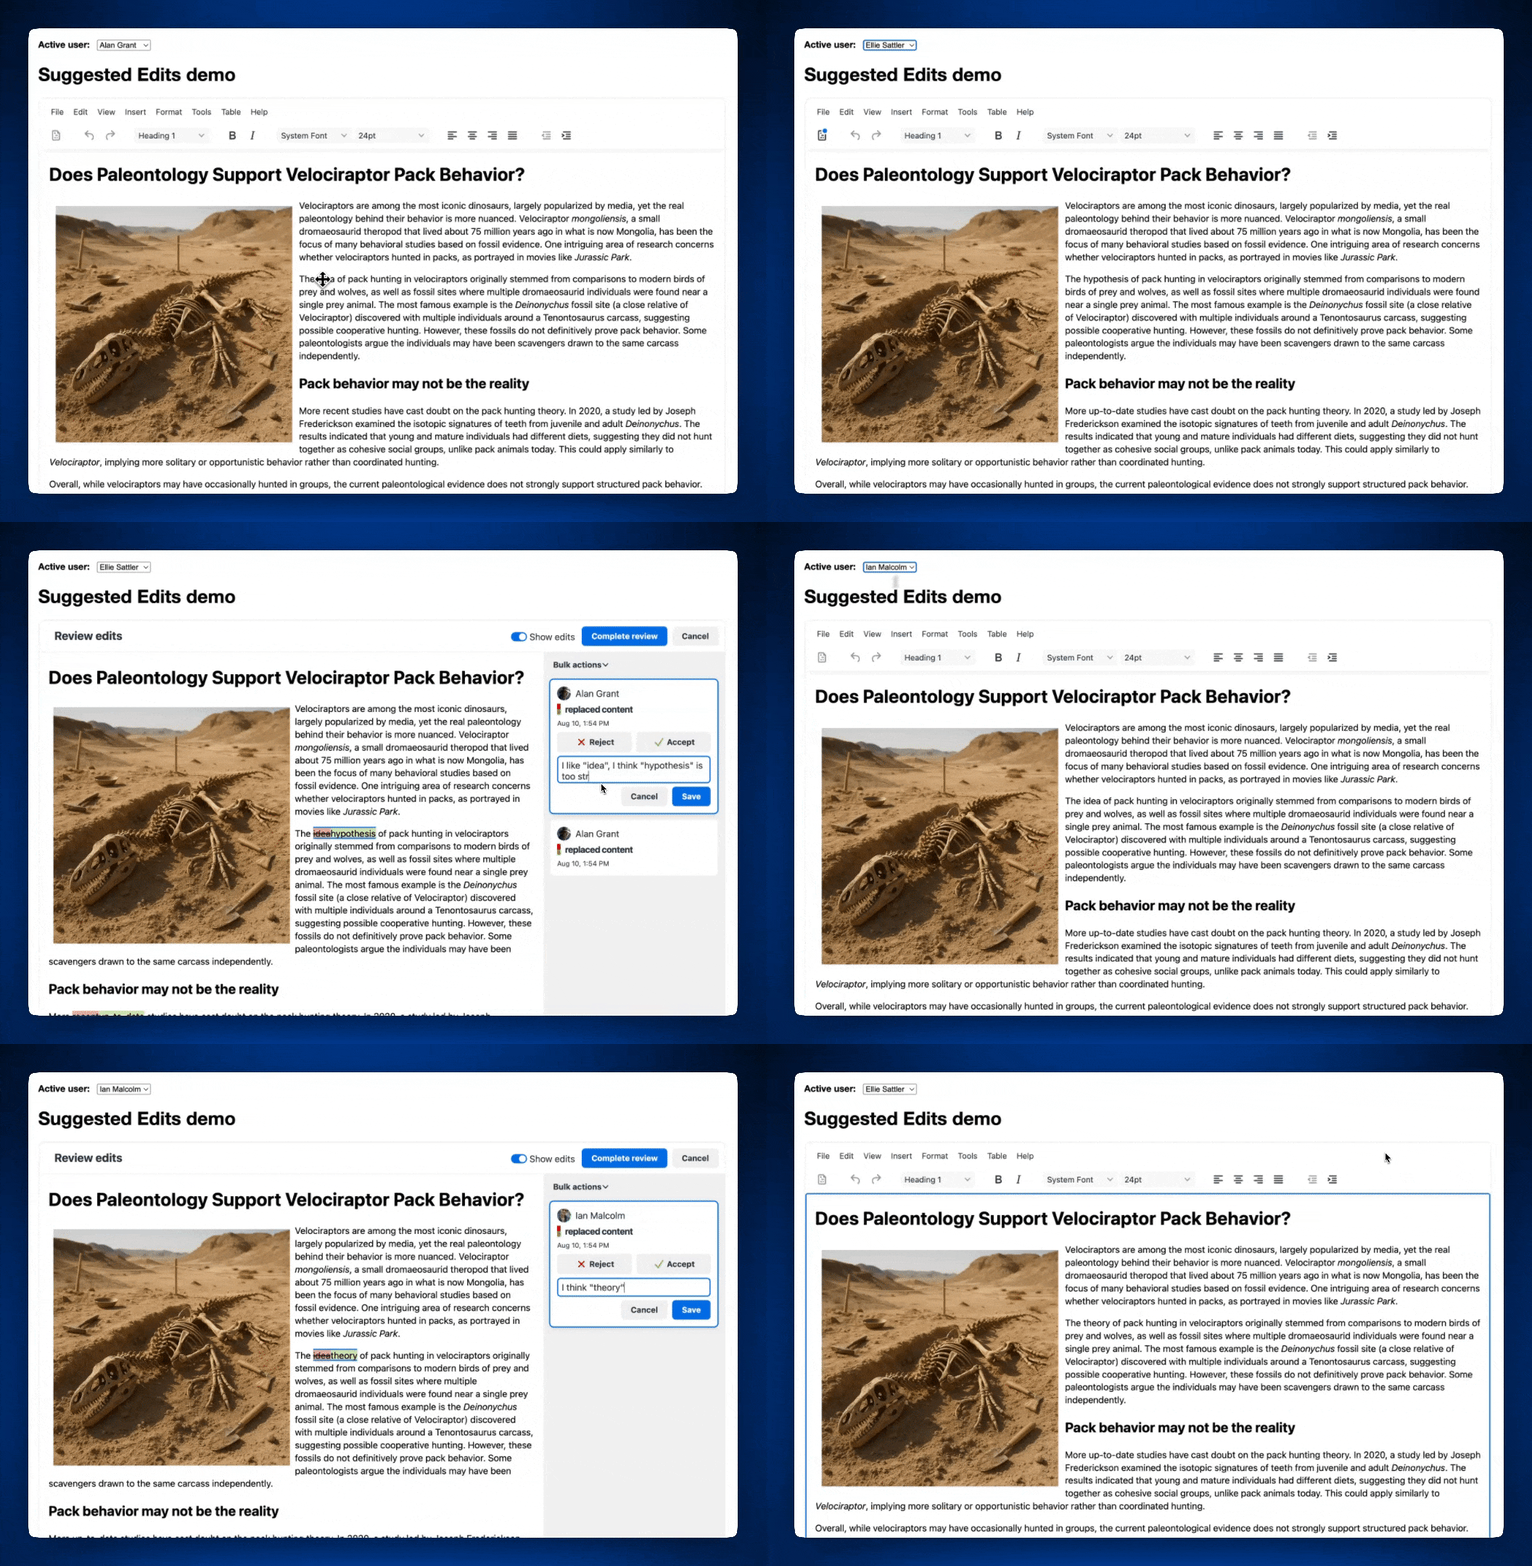
Suggested Edits launched with TinyMCE 8.0 in August 2025. This long-awaited feature lets users give inline feedback on suggested content changes and mark content for change without altering the original document–essential for solid collaboration apps.
Setting up Suggested Edits in TinyMCE requires several configuration steps. You'll need to connect to a user database, and model how to keep content with unreviewed edits ready in the editor.
Implementation requires:
- Installing Suggested Edits in the
pluginsandtoolbarlists. - Configuring the
suggestededits_modeloption, the JSON object holding different content states (must sync with editor content). - Configuring
fetch_users, which requires a callback function with user ID array that returns a Promise with user objects. - Configuring
user_id, which determines which unique user loads with the editor.
You can further customize permissions, access, and content loading via suggestededits_content and suggestededits_access, plus CSS styling. See our How to Add Suggested Edits to TinyMCE guide for a vanilla JavaScript example.
Level of effort: Large.
Real-time collaboration
Tiptap offers real-time collaboration through their foundational Collaboration extension. This extension is required for all other multi-user features and Tiptap extensions in this guide.
Installing Collaboration requires several dependencies, including Yjs and Hocuspocus (both by Tiptap). Collaboration uses Hocuspocus for backend operations, recording every change as Yjs updates rather than JSON or text. This means Collaboration and related extensions (Comments, Version History, Snapshot Compare) require a Tiptap-hosted Document server.
Installation requires:
- Installing Yjs via NPM.
- Installing Document, Paragraph, and Text extensions via private NPM, then adding them to the Extensions array.
- Connecting Yjs to
TiptapCollabProviderfor user synchronization and JWT authentication. - Connecting to the Document server with the Hocuspocus
providercode in index.jsx. - Configuring secure user authentication for JWT validation.
- Adding menu buttons for user access.
This covers real-time collaboration installation and the base Collaboration extension needed for other Tiptap features.
Level of effort for implementation: Extra Large.
Document history
Document history appears in content, document, and learning management systems. Users need to retrieve former drafts, lesson plans, or documents within the rich text editor.
Integration isn't as intuitive as the UI we build for storing and maintaining document versions, managing user authentication, and handling roles. Even with ready-made extensions and plugins, both Tiptap and TinyMCE require complex document history setups.
Time to implement Tiptap’s Version History and Snapshot Compare
Tiptap needs two extensions for comprehensive document history. Version History creates different document versions. Snapshot Compare shows changes between versions.
Version History installation
Tiptap's Version History follows typical extension installation with extra steps.
Note: Version History lets users create versions but doesn't include version previews. Per Tiptap's docs: "The examples […] directly modify the document and don't provide local-only previews of the version."
Installation requires:
- Installing Yjs, @hocuspocus/transformer libraries, and Version History extension via private NPM, then adding to Extensions array.
- Converting Hocuspocus transformer payload to JSON for API communication.
- Configuring version storage, data location, and retrieval methods.
- Implementing UI previews for front-end UX.
- Adding menu buttons for user access.
Version History needs Collaboration extensions and requires custom programming for storage, UI previews, and payload conversion.
Level of effort: Large to Extra Large with heavy customization.
Snapshot Compare installation
Snapshot Compare installs quickly since it relies on Collaboration and Version History extensions plus TiptapCollabProvider.
Install via private NPM, add to Extensions array, and add menu buttons. Snapshot Compare has two settings: provider and mapDiffToDecorations for UI customization. You can configure metadata, color-code user differences, and control display formatting.
Level of effort: Small to Medium with customization.
Time to implement TinyMCE’s Revision History

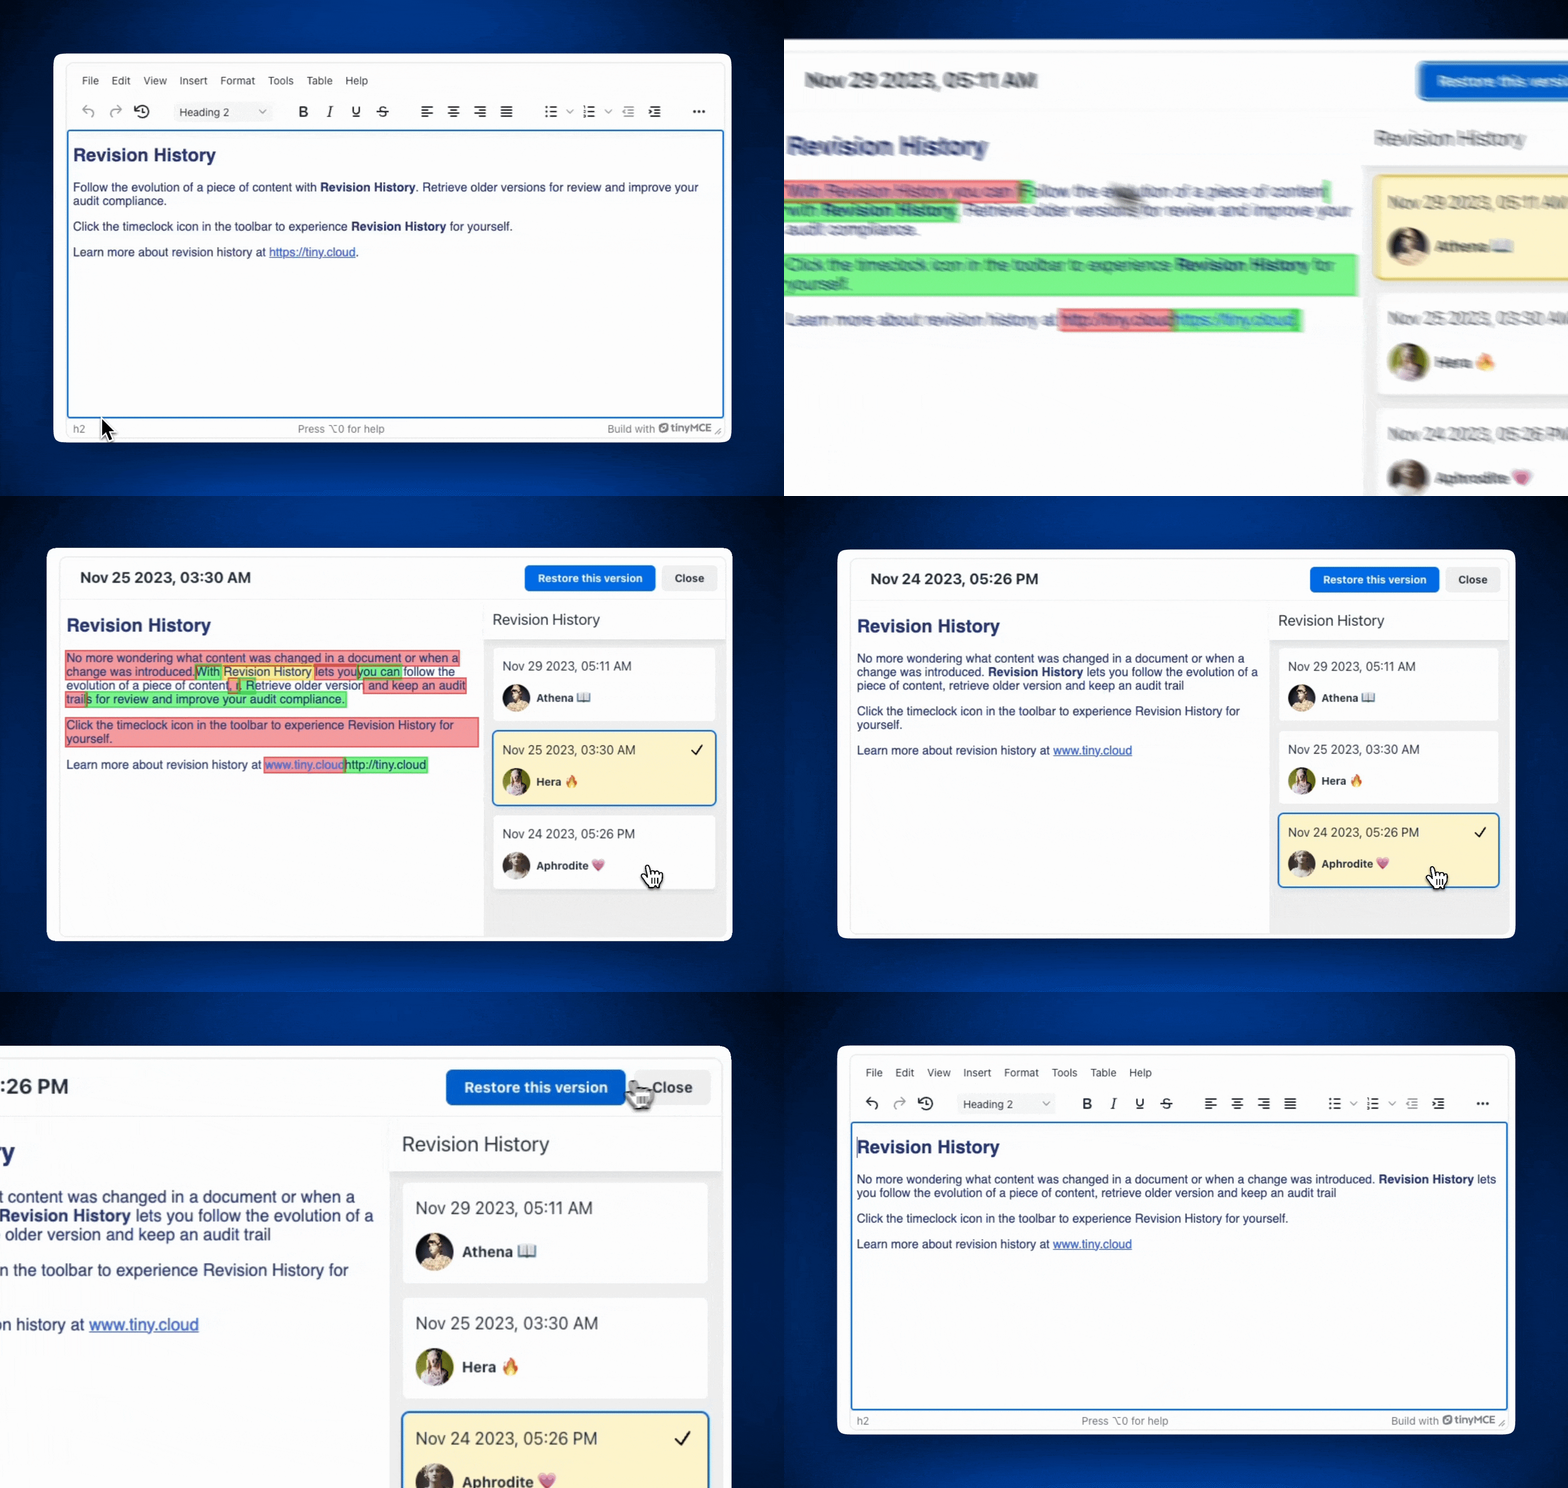
Revision History is TinyMCE's document versioning feature, letting users load previous versions and compare them side by side.
Unlike simple TinyMCE plugins, Revision History requires version storage, side-by-side display, and user change tracking between save points. The comprehensive features (authors, comparison, history) justify the integration effort.
Note: Revision History works only in classic mode, not inline mode. See TinyMCE Classic editing mode documentation.
Revision History installation
Three major installation parts: initial setup, lazy loading, and author implementation.
Initial installation:
- Adding the plugin to
pluginsandtoolbar. - Adding
revisionhistory_fetchreference to TinyMCE config. - Writing
revisionhistory_fetchrequest connecting to your backend.
See our Revision History installation guide for code samples.
Lazy loading implementation: Keeps your app lightweight by loading a version list upfront, then fetching full content on request.
- Creating a lightweight revision list for TinyMCE.
- Writing
revisionhistory_fetch_revisionfor specific revision requests. - Adding
revisionhistory_fetch_revisionto config. - Updating
revisionhistory_fetchfor lightweight initial loading.
See our lazy loading tutorial for code samples.
Author implementation: Shows who edited which version. Most setups continue using existing fetch functions.
- Adding
revisionhistory_authorandrevisionhistory_display_authorto config. - Adding
authorobject torevisionsandlightRevisionsJSON. - Configuring display options.
Read our author information guide or check the TinyMCE documentation.
You can customize CSS for brand consistency and add custom styles to the plugin.
Level of effort: Large to Extra Large based on app size.
User comments and mentions
Comments launch collaboration in RTEs. Discussion drives editing, drafting, and group creation. Both Tiptap and TinyMCE offer conversation features that function similarly—both have REST APIs and need extensive configuration. Both TinyMCE and Tiptap have user mentions, also.
Time to implement TinyMCE’s Comments and Mentions
Comments and Mentions work perfectly together. While you can install Mentions alone, it’s best to install both since they complement each other.
Comments installation process
TinyMCE Comments offers Embedded Mode and Callback Mode. Most apps need Callback Mode, which connects to your backend via the TinyMCE Comments API. Embedded Mode takes ~10 minutes using our Comments Plugin setup guide.
Callback Mode setup requires:
- Adding the feature to
pluginsandtoolbarlists. - Configuring required Callback Mode options with their functions (each accepts done/fail callbacks). TinyMCE provides copy/paste code snippets. Just customize for your API endpoints and authentication:
- Implementing
sidebar_show optionfor comment sidebar display.
That’s the general process required to configure TinyMCE Comments in Callback Mode.
Level of effort: Extra Large.
Mentions installation process
TinyMCE Mentions let users mention each other Google Docs-style within the content editor. Note: only the first ten users in the array display in the UI.
Installation requires:
- Adding the feature to the
toolbarandpluginslists. - Creating a single callback function called
mentions_fetchto request users from your API.
It’s a simple process compared to other plugins, and there are seven customization options for Mentions for more control.
Level of effort for implementation: Small.
Time to implement Tiptap’s Comments and Mention
Tiptap’s Comments extension is robust, and so has a robust implementation process. The comments are managed in Threads, which are the parent container for conversations in Tiptap. Threads are complex chains of comments that allow you to control how conversations happen in the RTE.
Comments installation process overview
Tiptap's Comments extension is robust with a correspondingly complex implementation. Comments use Threads, which are parent containers for conversations that create complex comment chains.
Installation overview
Two main steps: install the extension and connect to the Tiptap-hosted Document Server.
Extension installation:
- Installing Comments extensions via private NPM and adding to Extensions array.
- Adding comment buttons to the menu.
Backend connection:
- Connecting Threads to existing
TiptapCollabProvider(Threads pass through the provider). - Connecting Document server to Tiptap Comments REST API.
Comments is complicated to install, and to customize. Thread management alone requires extensive configuration for:
- Creating new threads.
- Receiving and watching threads/comments.
- Manual thread receiving and rendering.
- Updating threads.
- Deleting threads.
- Creating, updating, deleting comments.
- Resolving/unresolving threads.
- Selecting threads.
Optional webhooks enable external notifications and replies (like JIRA email notifications), requiring additional work.
Level of effort: Extra Large
Mention installation process overview
Tiptap's Mention extension adds @mention support with customizable rendering. Like TinyMCE, Mentions functions as a standalone extension.
Installation requires:
- Installing @tiptap/extension-mention, tippy.js, and @tiptap/suggestion via NPM.
- Adding Mention to the Extensions array in your Tiptap editor instance.
- Configuring suggestion options to define trigger characters.
Optionally, you can configure Tiptap’s Mention extension with another half dozen available settings like a suggestions configuration. The suggestions configuration supports multiple mention types within one editor using different trigger characters (other than @). Examples use .filter() for searching, but you can implement async API queries or integrate search libraries like fuse.js.
Level of effort: Medium
What’s next?
If you've made it this far, you're serious about delivering top-notch collaborative editing. Why not try TinyMCE? Our free 14-day trial includes advanced collaboration features like Comments, Mentions, Revision History, AI Assistant, and Suggested Edits. See how much faster your team can move, and if you need help, TinyMCE is just a message away. Let's build something great together!
