


Sometimes your User Interface (UI) is pushed to accommodate far too much text. Other times, content gets cut down. What’s needed is a component in the UI that can conceal and reveal content – one that gives the reader control over what they want to read. An accordion component with an easy to implement accordion UI, can help here.
A rich text editor is also an essential part of content production, and has a significant impact on the UI. If you need to unite an accordion component with a rich text editor, TinyMCE provides this capability with the Accordions plugin. This post shows how to integrate and set up the plugin in TinyMCE.
What is an accordion component
In basic terms, the accordion component allows information to be concealed, and then on a click, revealed. And unsurprisingly, the accordion UI process gets its name from the musical instrument that expands and contracts to make music.
An accordion UI component must be applied with care:
- Interrogate assumptions and decide what’s best for your production flow.
- Interrogate widely held assumptions about how much readers dislike scrolling, because research shows readers do scroll through content, and decide what’s best for your production flow.
- Consider the accessibility of content when it’s hidden vs. when it’s clearly displayed.
- Accordions are useful when there are a few, important pieces of information on the page, and readers don’t need to see it all – not everything is essential reading for everyone.
How to add an accordion component to TinyMCE
The Accordion plugin uses the <details> and <summary> elements in the TinyMCE text editor along with some options in the TinyMCE init script to construct accordion UI components. The following demo shows how to get started with the Accordion plugin
-
Add the following HTML to the index.html file:
<!DOCTYPE html>
<html lang="en">
<head>
    <meta charset="UTF-8">
    <meta name="viewport" content="width=device-width, initial-scale=1.0">
    <title>Accordions TinyMCE Demo</title>
</head>
<body>
    <textarea>
    <h1>Frequently Asked Questions</h1>
   <div>Q: What is the purpose of this demo?</div>
    <details>
        <summary>Demo purpose question summary</summary>
        <p>A: The purpose of this demo is to showcase how to create an FAQ section using HTML and provide answers to common questions.</p>
    </details>
    <div>Q: Can I customize the appearance of the FAQ section?</div>
    <details>
        <summary>Customization question summary</summary>
        <p>A: Yes, you can customize the appearance of the FAQ section by modifying the CSS styles in the "style" section of the HTML code.</p>
    </details>
    <div>Q: How can I add more questions and answers?</div>
    <details>
        <summary>Add more questions summary</summary>
        <p>A: To add more questions and answers, duplicate the HTML code for a question and answer pair, and update the content accordingly.</p>
    </details>
  </textarea>
</body>
</html>-
Copy the following script tag, and replace the “your-api-key” string with your TinyMCE API key. Adding your API key to the TinyMCE init script prevents any errors about domain names appearing in the TinyMCE text area:
<script
  src="https://cdn.tiny.cloud/1/your-api-key/tinymce/6-dev/tinymce.min.js"
  referrerpolicy="origin"
></script>;
-
Create a second pair of script tags in the HTML head section, and copy the following JavaScript into the tags. This is the TinyMCE init script:
    <script>
    tinymce.init({
        selector: 'textarea#accordion',
        plugins: [
          "advlist", "anchor", "autolink", "charmap", "code", "fullscreen",
          "help", "image", "insertdatetime", "link", "lists", "media",
          "preview", "searchreplace", "table", "visualblocks"
          ],
        height: 1200,
        toolbar: "undo redo |link image | styles | bold italic underline strikethrough | align | bullist numlist",
      });
</script>-
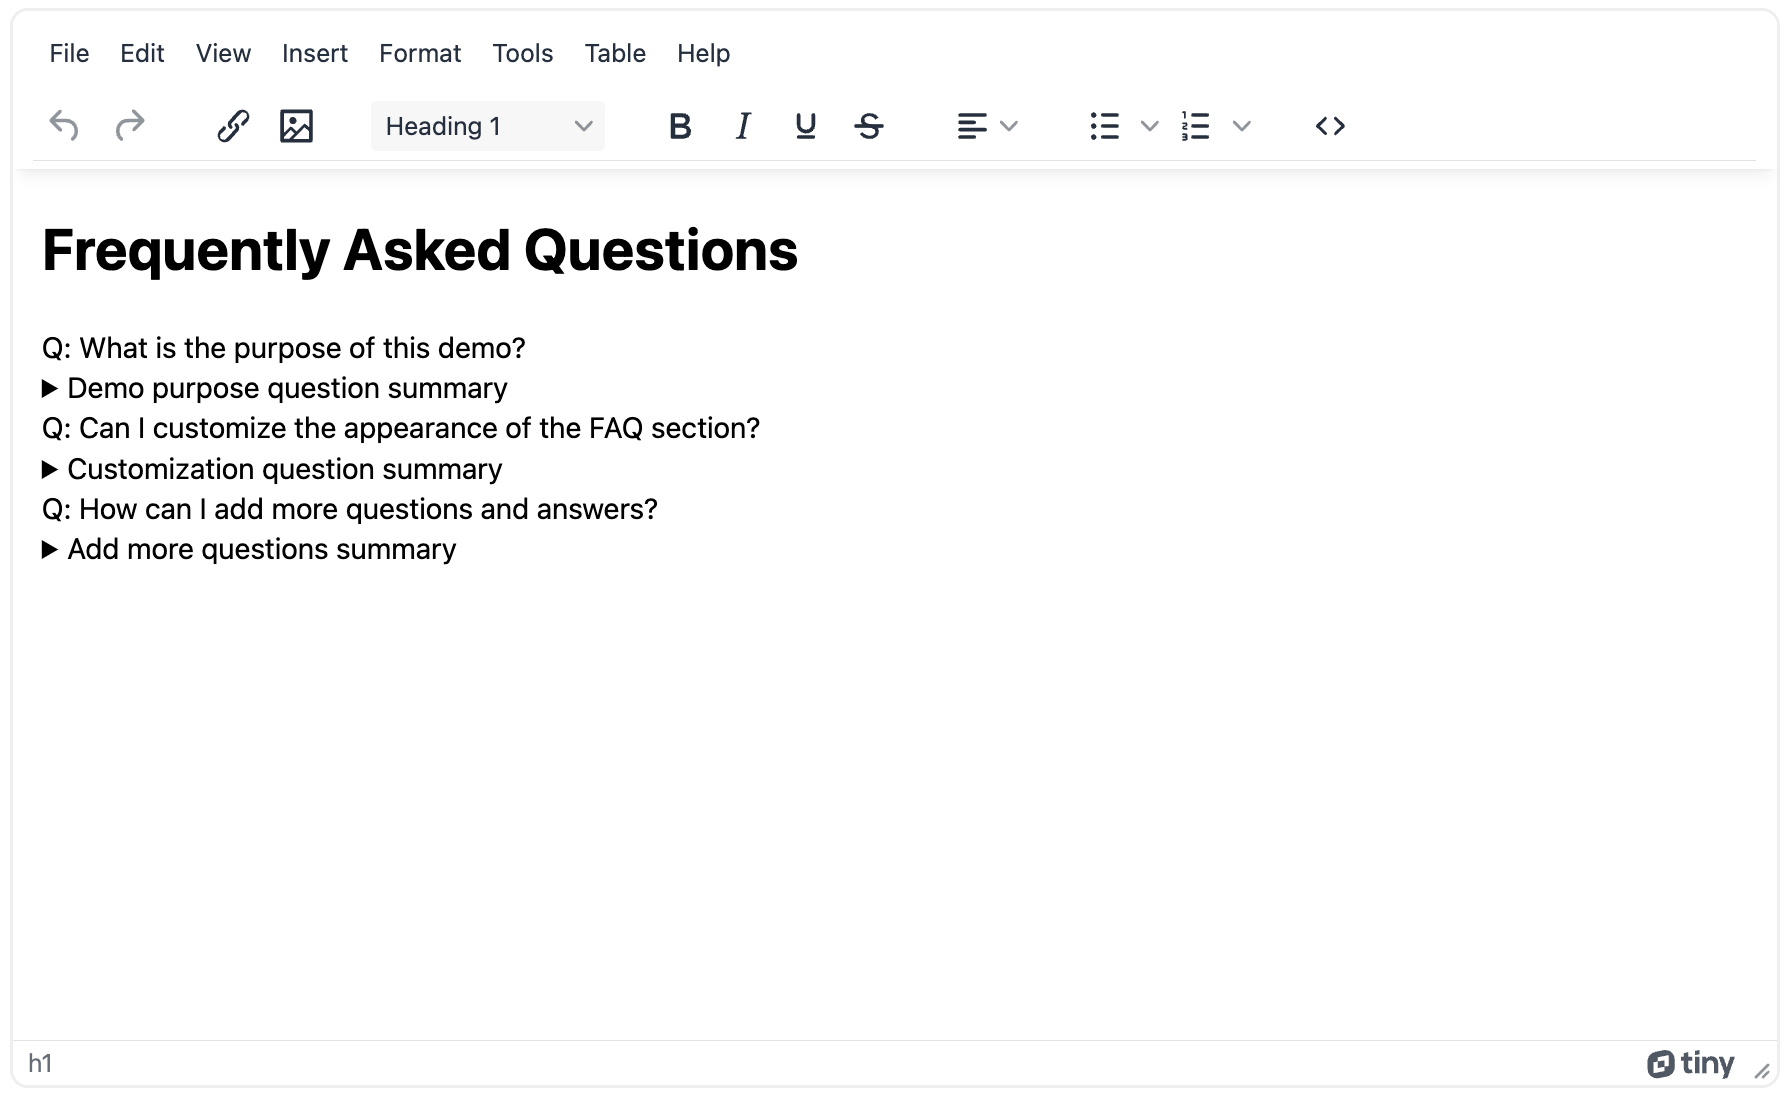
At this stage, you can test out the HTML in the browser. You can open the index.html file directly in your browser, or make use of the Python command, or the PHP command to start a testing server on the local host address.
The demo FAQ section has content, but it’s not currently working. The accordion UI change when the accordion component is added in the following steps changes this clutter into something easier to read:
-
Configure the Accordion plugin in the TinyMCE init script by adding the plugin to the plugin list, and the toolbar list:
plugins: [
          "advlist", "advcode", "anchor", "autolink", "charmap", "code", "fullscreen",
          "help", "image", "insertdatetime", "link", "lists", "media",
          "preview", "searchreplace", "table", "visualblocks", "accordion"
          ],
        height: 600,
toolbar: "undo redo |link image | styles | bold italic underline strikethrough | align | bullist numlist | code | accordion",-
Add the TinyMCE content_style option, and include the following CSS to style the accordion component:
       plugins: [
          "advlist", "advcode", "anchor", "autolink", "charmap", "code", "fullscreen",
          "help", "image", "insertdatetime", "link", "lists", "media",
          "preview", "searchreplace", "table", "visualblocks", "accordion"
          ],
        height: 600,
        toolbar: "undo redo |link image | styles | bold italic underline strikethrough | align | bullist numlist | code | accordion",
        content_style: `
         details {
             padding: 1rem;
             margin: 0.5rem;
             background-color: #F0F2F5;
         }
        `,
-
Save the changes, and then refresh the demo to test out the Accordion plugin:
Creating a new accordion UI item
You can rely on the Accordion plugin button in the TinyMCE toolbar to transform content into an accordion component:
- Select the contents to become an accordion component.
- Click on the accordion toolbar button to transform it.
- You can check on the result in the source code to see the HTML tags that make up the accordion UI:
Accordion component accessibility
Accessible accordion components, at their most basic level, show a directional arrow indicating when the concealed content is hidden and when it’s displayed. The TinyMCE Accordion plugin accounts for this essential accessibility requirement, but what makes the component even more accessible are accordion commands that can expand or collapse the accordion UI component automatically in response to events.
For example, the hover event with the mouse or eye tracking software can connect with the following execCommand to change the accordion:
tinymce.activeEditor.execCommand("ToggleAccordion", false, true);
Accordion UI parity
Make sure that when using an accordion that the accessibility experience for the accordion UI has parity with all other experiences. Guides on UI parity explain that if an accordion component is collapsed, then screen readers should not be able to parse the hidden content. In essence, make sure that hidden content is hidden for everyone, and screen readers do not start parsing all the content within the accordion component. The TinyMCE DomUtils API methods can help here to adjust the attributes of the details tags.
What to try after setting the accordion component
Try some of the other components to adjust your user interface and change content and UI appearance, as well as check on content accessibility:
- Content accessibility: what it is, and how to implement it
- How to create document templates for different UI experiences
- How to create dynamic CSS content in the editor UI
Have any questions? Reach out and contact us to find out more about TinyMCE and Accordion UI components.


