


Rich text editors are now part of almost every website. When you see a big text field with options that allow you to (at the very least) add formatting – like making your text bold, change text direction, or add emojis – then you've seen and used a rich text editor.
There are several different methods to build rich text editors – one of them is using the contenteditable attribute, which allows you to make any HTML element editable.
Not only does it allow the user to change or add text – it also allows formatting to be added, including making text bold or italic. However, the contenteditable attribute doesn’t provide visible options that the user can use to format text, and it has limitations that make it hard to use it to build a rich text editor.
In this article, you'll learn more about what contenteditable does, its limits, and some alternatives. Editors like TinyMCE overcome the limitations of contenteditable, but here we’re going to explore how far you can go with only the contenteditable element.
What is contenteditable?
contenteditable is an HTML attribute that you can add to any HTML element. If its value is true or an empty string, that means that the user can edit it by clicking the element. For example:
<div contenteditable="true">
	Change me!
</div>When the user clicks the words Change me!, they'll be able to type and add their own words.
If the contenteditable attribute is not given to an element, or it has an invalid value, the element will inherit the "editable" state from its parents. For example, using the following code snippet:
<div contenteditable="true">
	Change me!
	<b>This is bold</b>
	<i>This is italic</i>
</div>When the user clicks This is bold and tries to make changes to it, the text they type will be bold. If they try to make changes to This is italic, the text will be italic. However any text that's not enclosed in a formatting tag, will be styled as the default text.
For better accessibility, you should also use the role attribute with the value textbox. This is used to identify which elements allow text input, especially when the element is not an input with type text or a textarea element.
When it comes to the user experience, though, the contenteditable tag on its own doesn't do much. It allows the user to edit, but the onus is on the user to know the markup needed, to give their text even the most basic formatting.
How to add simple formatting options
To add formatting options like making the text bold and italic, or even adding undo and redo options, you can use the JavaScript method execCommand.
When an HTML document has a form input or an element with the contenteditable attribute and the user is editing these editable elements, the document object exposes the execCommand method. This method allows you to manipulate the content entered in the editable elements.
It should be noted, though, that the execCommand is deprecated, and may not be supported by all browsers (more about this, including how to work around it, is discussed later).
execCommand takes 3 parameters.
- The name of the command to execute, which should be one of the commands listed.
- A boolean value for whether the UI should be shown, although this doesn't work as intended for all commands.
- An argument you can pass to some of the commands if necessary. But if no argument is necessary, it can be null.
If you want to add a button that the user can use to make the text bold, you can create one and add a click event handler that uses execCommand to make the editable text bold. This can also be used to apply other text formatting options on the editable text.
For example, here's a toolbar to be used on a contenteditable element. It allows the user to make the text bold, italic, or underlined:
<div class="toolbar">
  <button id="boldButton">Bold</button>
  <button id="italicButton">Italic</button>
  <button id="underlineButton">Underline</button>
</div>
<div id="editor" contenteditable="true" role="textbox" style="margin-top: 10px; border: 1px solid gray; padding: 10px; border-radius: 5px;">
	Start Editing...
</div>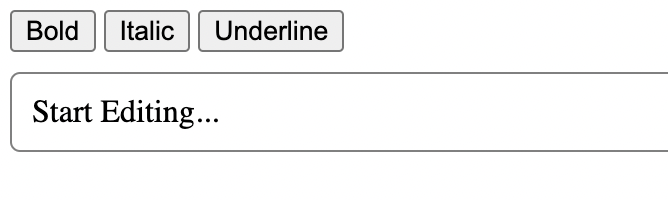
And here's the JavaScript to add the functionality:
const editor = document.getElementById("editor");
const boldButton = document.getElementById("boldButton");
const italicButton = document.getElementById("italicButton");
const underlineButton = document.getElementById("underlineButton");

function performAction(command) {
  document.execCommand(command, false, null);
  editor.focus();
}

boldButton.addEventListener("click", function () {
  performAction("bold");
});

italicButton.addEventListener("click", function () {
  performAction("italic");
});

underlineButton.addEventListener("click", function () {
  performAction("underline");
});
This will first declare variables for the editor and each of the three buttons. It also creates a function, performAction, which recieves the command name as a parameter. This function executes the command using execCommand, and uses editor.focus() to ensure that the editor remains focused, improving user experience. Then, for each button's click event handler, the performAction function is called, passing the name of the command based on the button clicked.
An alternative to this approach is to make use of a rich text editor for your text style. (TinyMCE offers the ability to style text by default.)
Undo and redo functionality
The execCommand method also allows for undo features. If the user selects a word and makes it bold, but then changes their mind, they can select the word and click the Bold button, reverting the word to standard text.
However, if you want to add undo and redo buttons that allow the user to undo and redo changes in general, it gets more complicated.
First, add new buttons for undo and redo next to the other buttons in the toolbar:
<button id="undoButton">Undo</button>
<button id="redoButton">Redo</button>Then, declare variables for these two elements in JavaScript:
const undoButton = document.getElementById('undoButton');
const redoButton = document.getElementById('redoButton');You also need a variable to hold the history of editing:
const history = {
  back: [],
  forward: []
};In this example, back is used to undo changes, whereas forward is used to redo changes.
Change the code of the performAction function to push the content to the back array before the changes are applied:
function performAction(command) {
  if (
    !history.back.length ||
    history.back[history.back.length - 1] != editor.innerHTML
  ) {
    history.back.push(editor.innerHTML);
  }
  document.execCommand(command, false, null);
  editor.focus();
}
Now add an event handler for the click event on the undo button:
undoButton.addEventListener("click", function () {
  if (!history.back.length) {
    return;
  }
  history.forward.push(editor.innerHTML);
  editor.innerHTML = history.back.pop();
  editor.focus();
});
This first checks if the back array in the history object is empty. If it's not empty, the current content of the editor is added to the forward array in the history object, which is helpful if the user wants to redo what they undid. Then the content of the editor is set to the last item in the back array, and the editor is focused again.
After that, add the event handler for the click event on the redo button:
redoButton.addEventListener("click", function () {
  if (!history.forward.length) {
    return;
  }

  history.back.push(editor.innerHTML);
  editor.innerHTML = history.forward.pop();
  editor.focus();
});
If the forward array is empty, this won’t do anything. Otherwise, it pushes the current content of the editor into the back array in case the user wants to undo what they redid, then sets the content of the editor to the last item in the forward array.
Finally, add an event handler to the keydown event on the editor:
editor.addEventListener("keydown", function () {
  history.forward.length = [];
  history.back.push(editor.innerHTML);
});
When the user makes changes to the content, this clears the forward array, since they can't redo old changes, and pushes the new changes to the back array.
You can test out this simple editor on CodePen.
Limitations of contenteditable
While it’s possible to build a rich text editor from scratch, there are some limitations that should be considered before you attempt this project.
Cross-browser behavior
If you were to create a rich text editor from scratch with contenteditable, there are some cross-browser limitations you need to be aware of.
Scribe's browser inconsistencies documentation for the execCommand method shows differences in how some commands are handled in different browsers. These differences can lead to a different HTML structure generated in the contenteditable element.
For example, when using the indent command, which adds space at the beginning of the text, Chrome converts <br> elements to <p> elements, but Firefox doesn't. Although this might not seem like a big change, the fact that different HTML structures can be generated for different browsers, it can often lead to inconsistencies in how elements are rendered.
Older browser support
Another thing you need to be careful of when you develop your rich text editor is supporting older browsers. If you aim to make content editable and easy to publish for all users (regardless of what version of the browser they might have), you need to be aware of what works and what doesn't on older browsers.
For example, according to Can I Use, which provides details on feature functionality by browser, there's a known limitation in Internet Explorer where contenteditable can't be added to elements like table or its nested child elements (td, tr, etc.). It can, however, be added to a div nested inside a table cell.
When developing your own rich text editor, you need to be aware of details like these so you can offer users a consistent experience, regardless of what browser or platform they’re using.
Deprecation
When working with contenteditable, you’ll need to use execCommand to add many of the text formatting functionalities. However, as mentioned earlier, this command is deprecated, and may not be supported by all browsers, especially more recent versions.
If you depend on execCommand and it’s no longer supported by browsers, the functionalities in your contenteditable editor that rely on it will stop working, leaving your editor semi-functional at best.
Because of that, if you want to ensure your editor has a long lifespan, you need to consider adding these functionalities without the execCommand function, which adds another layer of difficulty.
Overcoming the limitations
If you want to build your own rich text editor using contenteditable, the best approach is building a consistent layer on top of contenteditable that can handle limitations and issues related to cross-browser behavior and older browser support.
However, overcoming these limitations is difficult, especially seeing new devices and versions of browsers are constantly launching.. Therefore, it must be noted that building and maintaining a rich text editor requires a lot of resources.
Alternatively, you can use a quality reliable editor, and have a dedicated team constantly working to add new features and find solutions to known limitations. TinyMCE offers support for your project, and provides a broad array of useful features that you therefore don’t need to spend time and energy configuring yourself.
Building a rich text editor is hard
The contenteditable attribute can be very helpful if you're looking to create a simple editor with basic functionality. You can easily add text formatting functionalities, such as making the text bold or italic.
However, if you want more than basic functionality, you’ll quickly discover that building a full-featured rich text editor by yourself is harder than it sounds.
TinyMCE, is a rich text editor packed with features, including localization and emoji as well as being optimized for mobile. Editors like TinyMCE navigate the limitations of contenteditable so you don’t have to, and also offer additional functionality, like compliance, focus, and collaboration solutions. It just takes six lines of code to get started using TinyMCE, allowing you to create web-ready content, and then customize and expand your editor interface beyond any single element.


