If you’ve ever written a blog or worked with a Content Management System (CMS), there’s a good chance you’ve heard about rich text editors – popularly known as WYSIWYG (What You See Is What You Get) editors.
A rich text editor allows users to enter text and formatting via a GUI. It converts input into HTML behind the scenes. Why is this important? It enables non-technical users to create web-ready code.
Having been on the market since the late 1990s, rich text editors have progressively evolved to support complex features like undo/redo.
Undo and redo are essential
Undo and redo operations are a must-have feature in any rich text editor – they’re a user's safety net. For a great user experience (UX), users need to solve their editing problems in a rich text editor.
An undo/redo button makes your users more confident, because it’s a clear signal that if they make a mistake, they can easily undo and restore changes. For example, if a user accidentally deletes a paragraph, the undo function can restore their work – and spare them a lot of frustration.
However, implementing the undo/redo functionality is complicated. It requires an understanding of data structures like Stack.
You need to know which actions need to be pushed onto the stack, as well as when to push them, and the same goes for the pop operation.
In this article, you'll find out about the complexity of creating and maintaining the undo/redo functionality, and see how the TinyMCE rich text editor makes it easy.
Why you need undo function, and why it's complicated
Undo function is essential because…
Undo and redo operations are the most basic implementation of the undo/redo algorithm. It uses a single stack and an index variable, which preserves the action history. It involves the following steps:
- Initialize two variables,
levels(array) andindex(integer). - Perform the following operations:
- On a
WRITEoperation, push the character to thelevelsstack. - On the
UNDOoperation, set the current index tocurrent index - 1. - On the
REDOoperation, set the current index tocurrent index + 1.
You also need to consider the points when the undo/redo kicks in. For example, what’s the increment of an undo? Some options could be:
- On each character
- On each word,
- On the space key
- When the user stops typing
- Or every several seconds.
There’s no objectively correct answer, and the reality is that an undo/redo algorithm needs to be smart enough to use all of these options to enhance the user experience.
Apart from the UX side of the undo/redo behavior, you also need to consider the technical aspects like:
- Data storage format
- Memory footprint
- Cursor position
- Performance in large documents
Other complications can include things like handling emojis, links with previews, tables, and many other features customers want.
These details are important to consider because each time a new feature is introduced to the editor, it needs to be integrated as part of the undo/redo operations.
All of these UX and technical issues make undo/redo functionality a hard problem to solve.
| When you’re building an application, you need a robust tool that’s actively maintained and has a great backing behind it. One such tool is TinyMCE. |
Implementing undos in TinyMCE
In this section, you'll learn about how to implement the TinyMCE editor and make use of the UndoManager API provided by the TinyMCE Javascript library.
- Open up the terminal, navigate to a path of your choice and run the following commands to create a project directory (
tiny-mce-undo-redo).mkdir tiny-mce-undo-redo cd tiny-mce-undo-redo - Install the TinyMCE NPM package by running the following commands in the terminal:
npm init npm install tinymce --save - Create an
index.htmlfile by running the following commands, in which you'll be implementing the TinyMCE editor:touch index.html - Open the
index.htmlfile and add the following code to it:<!DOCTYPE html> <html lang="en"> <head> <meta charset="UTF-8"> <meta http-equiv="X-UA-Compatible" content="IE=edge"> <meta name="viewport" content="width=device-width, initial-scale=1.0"> <title>TinyMCE</title> <!-- 1 --> <script src="/node_modules/tinymce/tinymce.min.js"></script> <style> body { margin: 4rem auto; max-width: 760px; font-family: 'Inter'; } </style> </head> <body> <h1>TinyMCE Editor</h1> <!-- 2 --> <textarea id="my-textarea"></textarea> </body> <script> // 3 tinymce.init({ selector: 'textarea#my-textarea', }); </script> </html>
In the above code:
- You include the
tinymce.min.jsfile from thenode_modulesdirectory using thescripttag. You can also include TinyMCE directly from the CDN. - You add a
textareaelement and give it an ID (my-textarea), which will be used by the TinyMCE instance. - You initialize the TinyMCE (
init) instance by providing it with theselectorattribute (textarea#my-textarea), which is used to select thetextareawith IDmy-textarea.
Start a live server in VS Code or by using the serve command from the terminal, then visit the associated localhost URL.
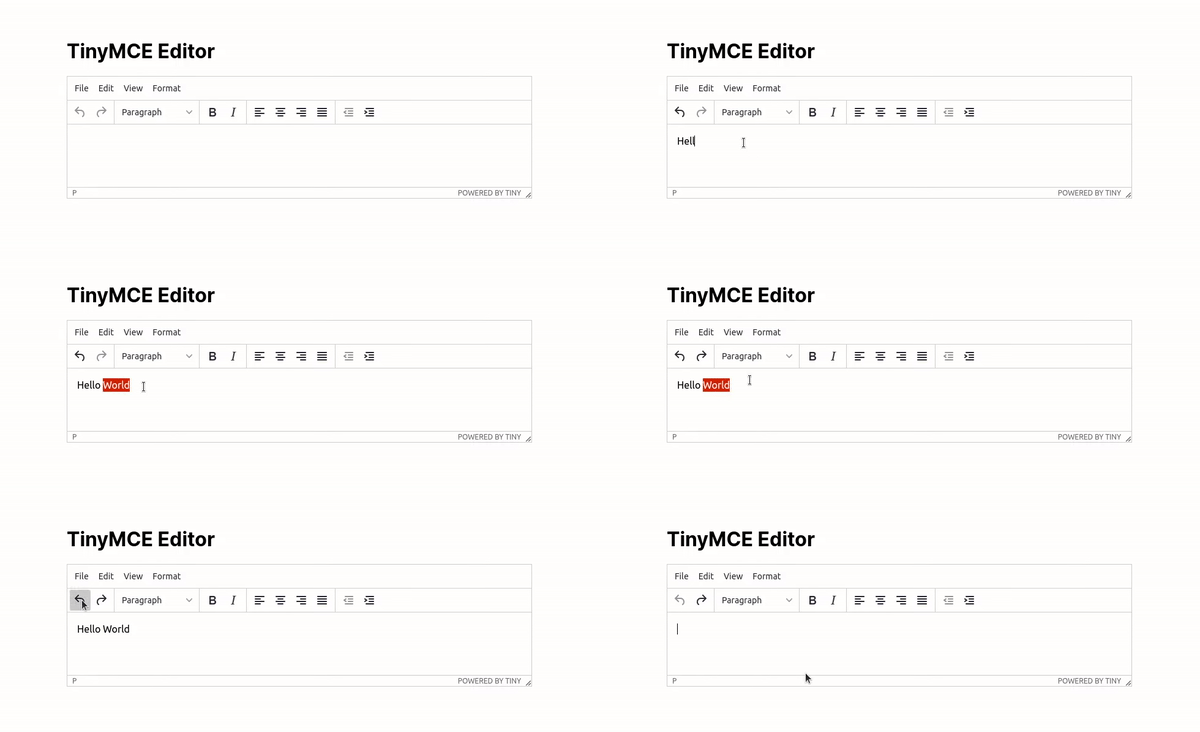
To test the undo functionality, add some content in the editor, do some formatting actions, and then click the Undo button.

But what if you want to customize the behavior of the editor? To allow this, TinyMCE provides an API that you can use to programmatically control the editor.
Using the Undo Manager API
TinyMCE provides an UndoManager API that allows you to manage the undo/redo history levels for the editor. Using this API, you can code your own undo/redo functionality so it aligns perfectly with your application’s use cases.
The UndoManager API comes with different methods that allow you to build custom behavior. In this tutorial, you'll see how to make use of the UndoManager API.
UndoManager API – HasUndo / HasRedo
UndoManager API provides two methods for detecting undo levels, hasUndo, and hasRedo, which return true/false if the undo manager has any undo/redo levels, respectively.
To see this in action:
- Update the
index.htmlfile by adding the following code:<body> ... <br /> <p>Status</p> <p>Has Undo: <span id="undo-message-box"></span></p> <p>Has Redo: <span id="redo-message-box"></span></p> <br /><br /> <p>Custom Actions</p> <button onclick="hasUndo()">Has Undo</button> <button onclick="hasRedo()">Has Redo</button> </body> - Next, add the
hasUndoandhasRedofunctions under thescripttag in theindex.htmlfile, as shown in the following code:<script> ... function hasUndo() { const hasUndoMessageBox = document.getElementById('undo-message-box') // 1 const hasUndo = tinymce.activeEditor.undoManager.hasUndo() hasUndoMessageBox.innerText = hasUndo } function hasRedo() { const hasRedoMessageBox = document.getElementById('redo-message-box') // 2 const hasRedo = tinymce.activeEditor.undoManager.hasRedo() hasRedoMessageBox.innerText = hasRedo } </script>
In the above code:
- In the
hasUndofunction, you refer to the TinyMCE editor (tinymce.activeEditor), then call the UndoManager (undoManager) API'shasUndomethod, which returns a boolean value. - The hasRedo function works the same way: you refer to the TinyMCE editor (tinymce.activeEditor), then call the UndoManager (undoManager) API's hasUndo method, which returns a boolean value.
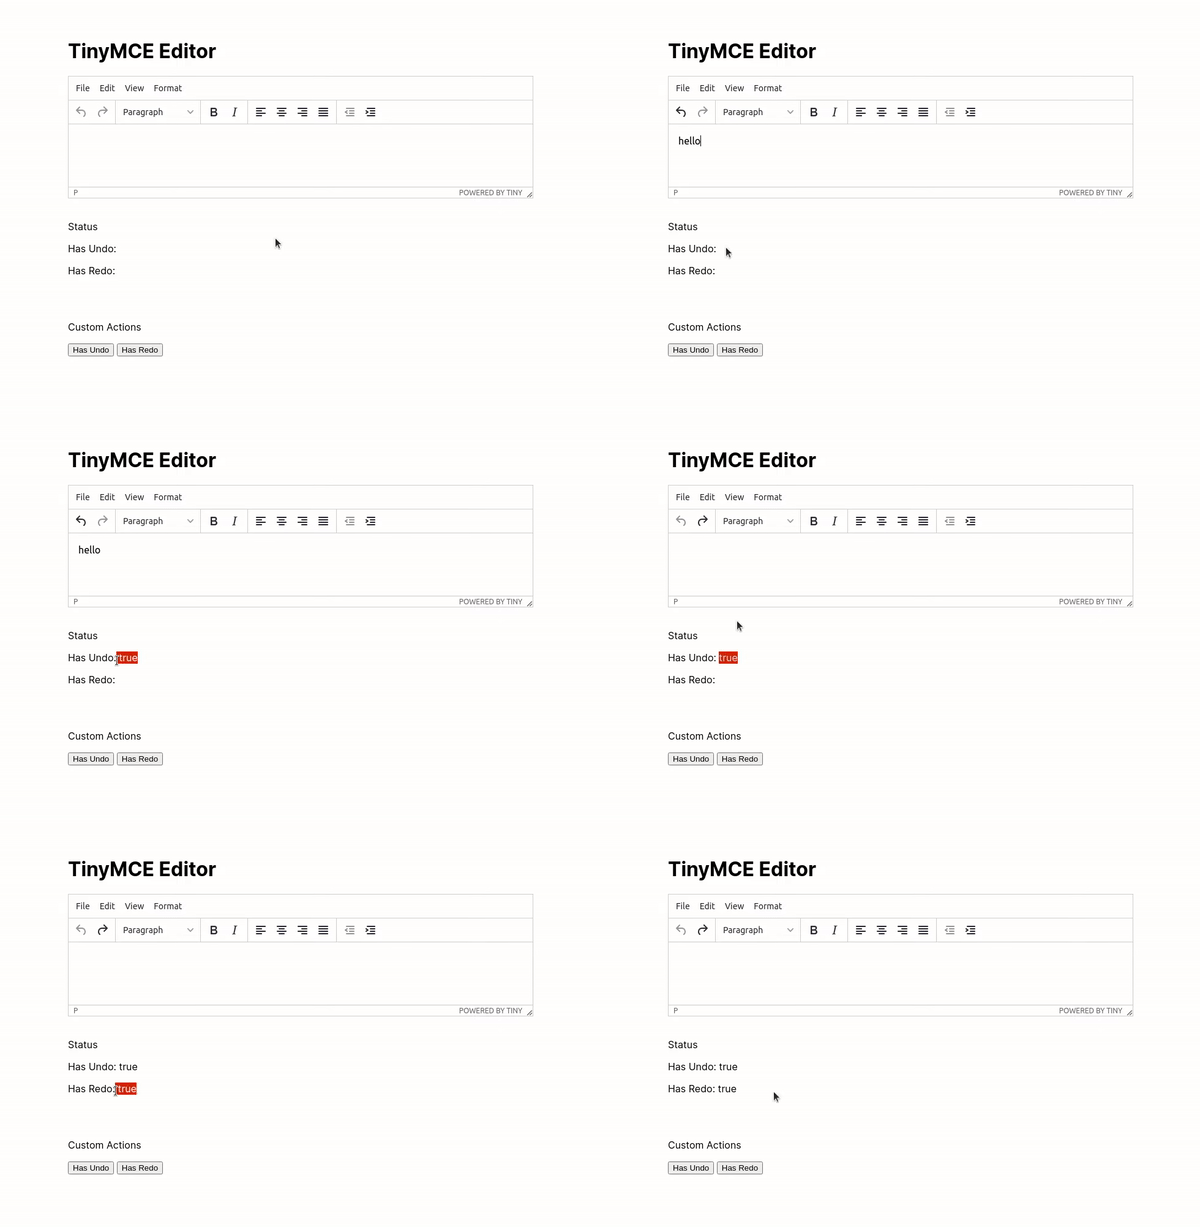
Save your progress and visit the localhost URL to test the hasUndo and hasRedo functions.
UndoManager API – Custom Undo and Redo
The UndoManager API provides two methods for customization, undo, and redo, which undo or redo the last action in the editor.
To implement a custom undo/redo feature:
- Update the
index.htmlfile by adding the following code:<body> ... <p>Custom Actions</p> <button onclick="hasUndo()">Has Undo</button> <button onclick="hasRedo()">Has Redo</button> <button onclick="customUndo()">Custom Undo</button> <button onclick="customRedo()">Custom Redo</button> </body> - Add the
customUndoandcustomRedofunctions under the script tag in the index.html file, as in the following code:<script> ... function customUndo(){" "} { // 1 tinymce.activeEditor.undoManager.undo() } function customRedo(){" "} { // 2 tinymce.activeEditor.undoManager.redo() } </script>;
In the above code:
-
In the
customUndofunction, you refer to the TinyMCE editor (tinymce.activeEditor), then call the UndoManager (undoManager) API'sundomethod, which undoes the last action in the editor. -
In the
customRedofunction, you refer to the TinyMCE editor (tinymce.activeEditor), then call the UndoManager (undoManager) API'sredomethod, which redoes the last action in the editor. -
Both of these functions return an object that contains the undo or redo level, or null if no action was performed.
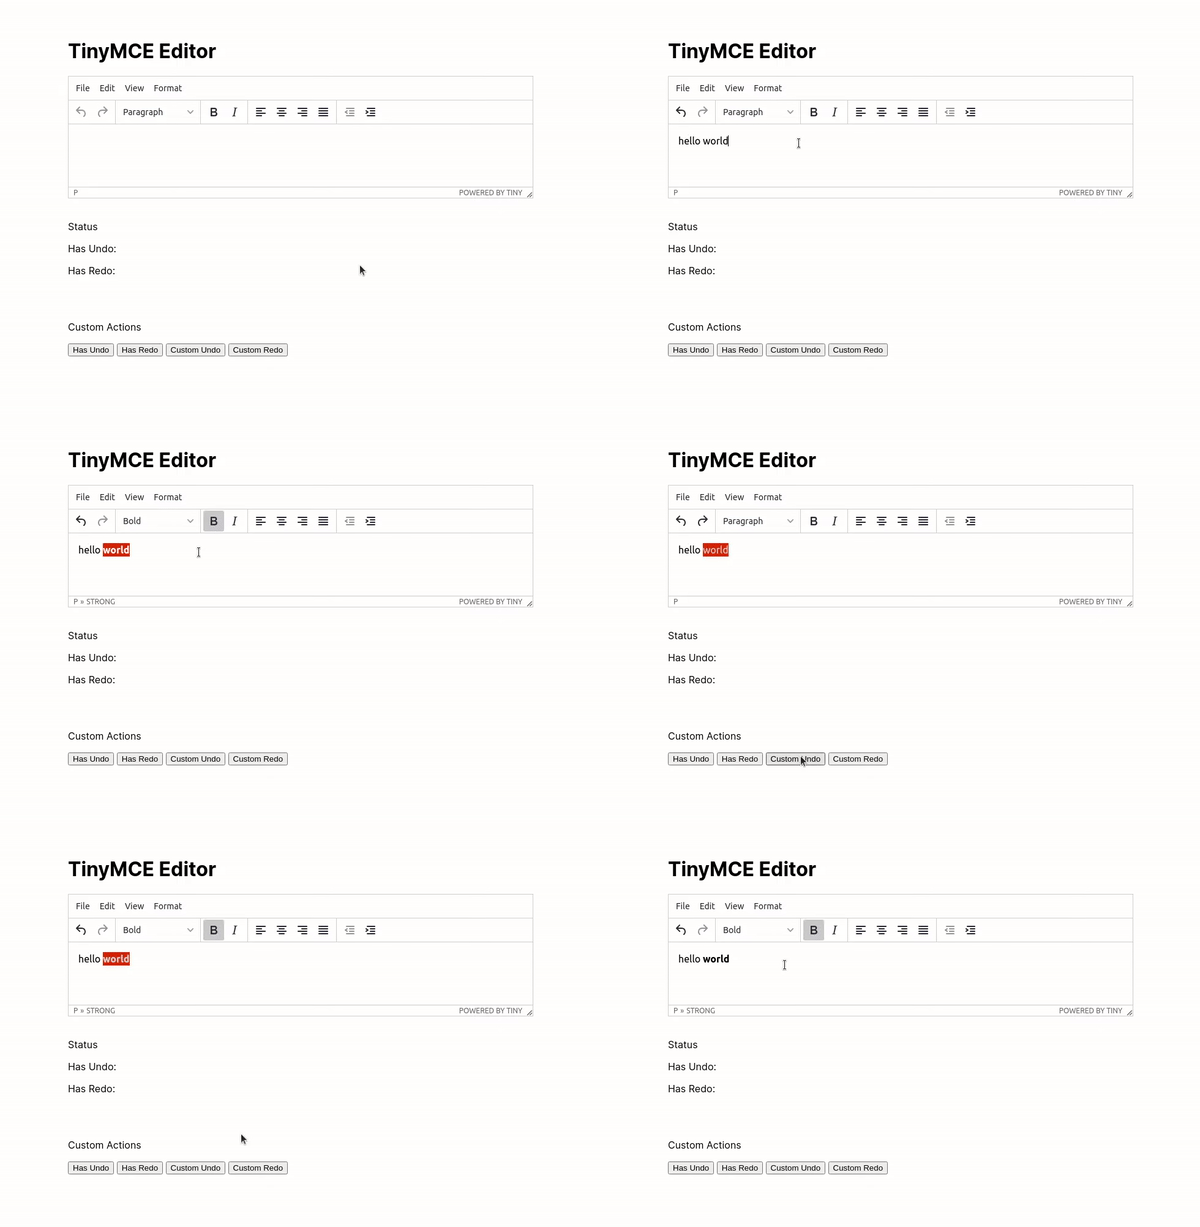
Save your progress and visit the localhost URL to test the customUndo and customRedo functions.

UndoManager API – Clear Undo history
The UndoManager API provides a clear method that allows you to remove all the undo levels from the editor.
To implement the clear feature:
- Update the
index.htmlfile by adding the following code:<body> ... <p>Custom Actions</p> <button onclick="hasUndo()">Has Undo</button> <button onclick="hasRedo()">Has Redo</button> <button onclick="customUndo()">Custom Undo</button> <button onclick="customRedo()">Custom Redo</button> <button onclick="clearUndoLevels()">Reset</button> </body> - Add the
clearUndoLevelsfunction under thescripttag in theindex.htmlfile as in the following code:<script> ... function clearUndoLevels(){" "} { // 1 tinymce.activeEditor.undoManager.clear() } </script>;
In the above code:
In the clearUndoLevels function, you refer to the TinyMCE editor (tinymce.activeEditor), then call the UndoManager (undoManager) API's clear method which removes all the undo levels from the editor.
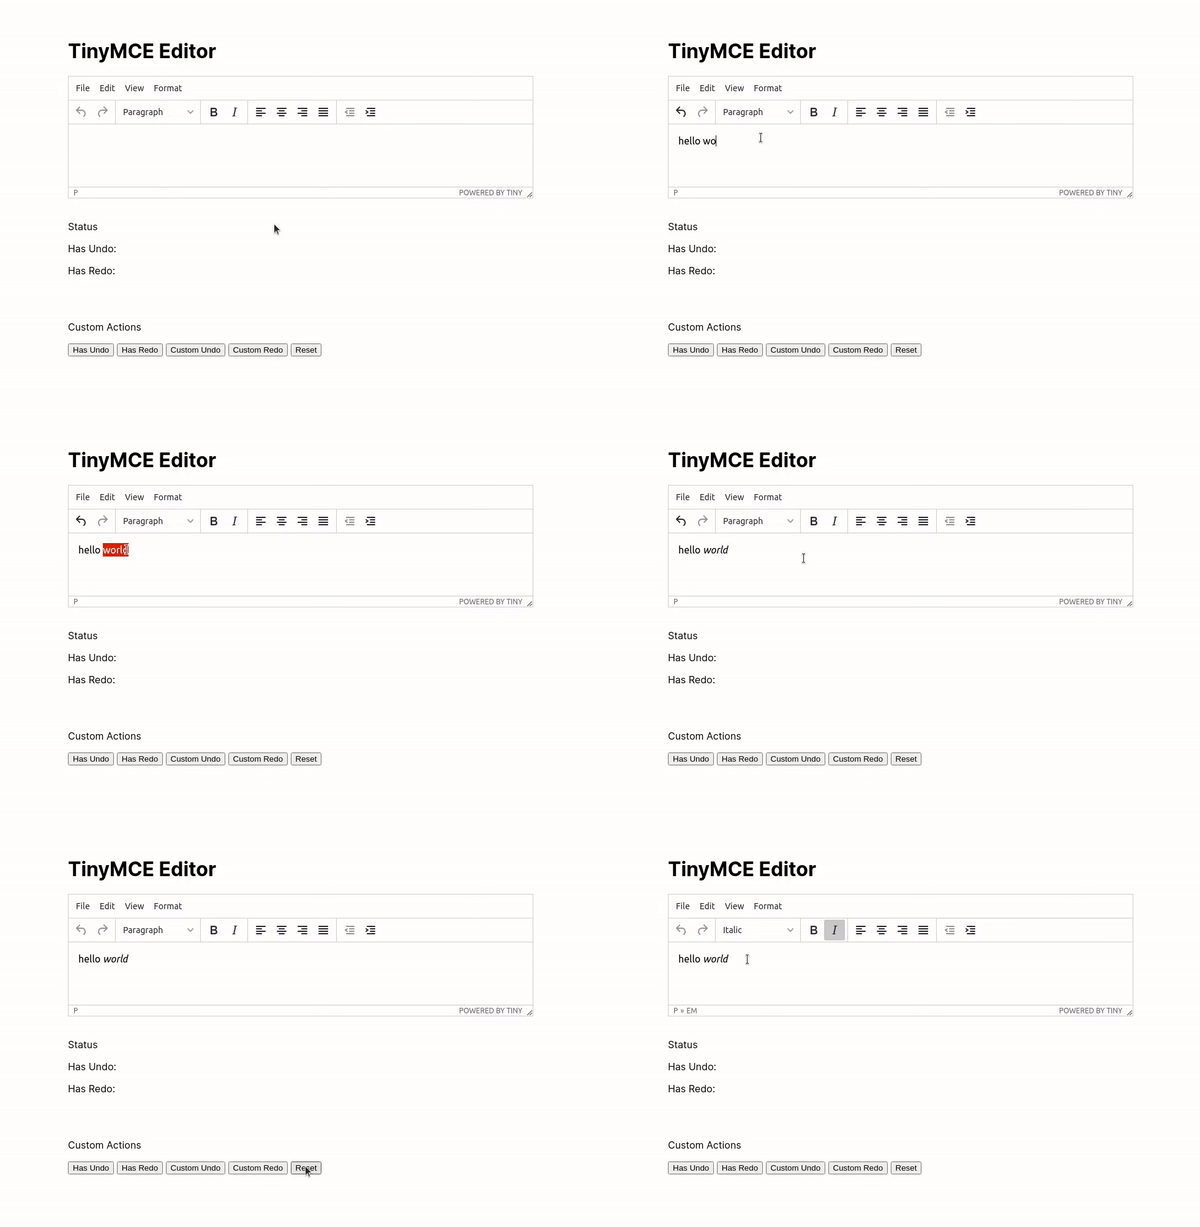
Finally, save your progress and visit the localhost URL to test the clearUndoLevels function.

Where to look for more on undo and redo
By using the TinyMCE UndoManager API, it’s possible to more easily implement undo functionality. You can use this API to customize the editor’s default behavior, and build your own functionality.
If you and your team are looking for a rich text editor that allows anyone, anywhere to create visually stunning, web-ready content with compliance, undo, and collaboration solutions, learn more with TinyMCE.

