


If you are using the TinyMCE editor (or a product built with TinyMCE) and it has not been configured correctly, you may be presented with the following warning:
This domain is not registered with Tiny Cloud.
To remove the warning, there are one or two things you’ll need to do, depending on the specific notification displayed:
- Check you are passing in the correct API key when loading the TinyMCE script file.
- Register the domain on which you’re running TinyMCE.
If you are an end user and you are not in a position to update the configuration of the TinyMCE editor within the product you’re using, contact your IT department or system administrator. They will be able to remove the warning, and can contact us for more assistance if required.
1. Check the API key
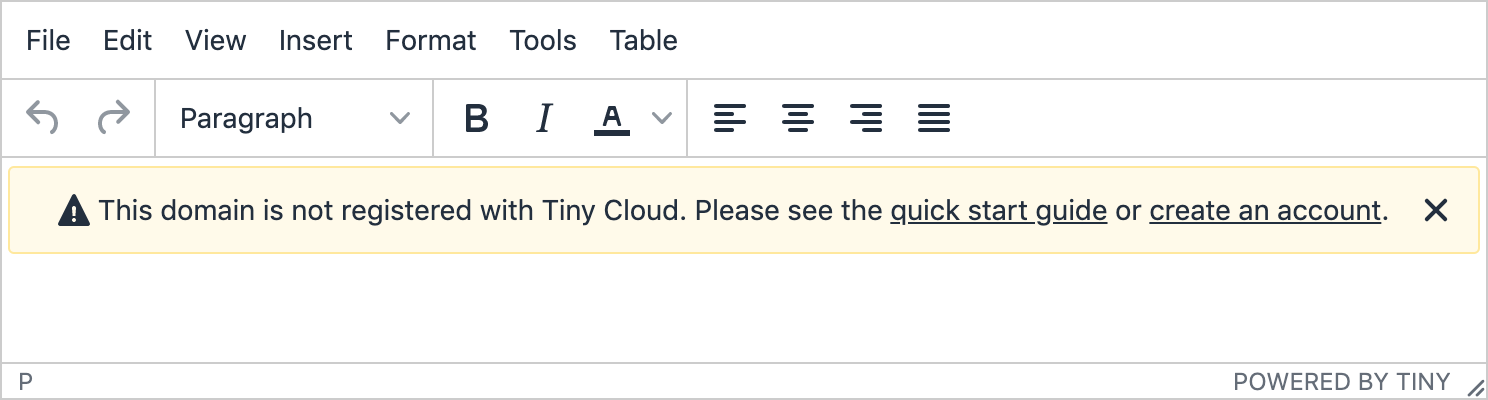
If your API key is not configured correctly, you’ll be presented with the following notification, that suggest you see the quickstart guide or create an account.
Ensure you are using the correct API key wherever you are loading TinyMCE within script tags. For example, in the following code, no-api-key needs to be replaced by the API key provided with your account:
<script src="https://cdn.tiny.cloud/1/no-api-key/tinymce/6/tinymce.min.js" referrerpolicy="origin"></script>- If you don’t yet have a Tiny Cloud API key, get a free API key now.
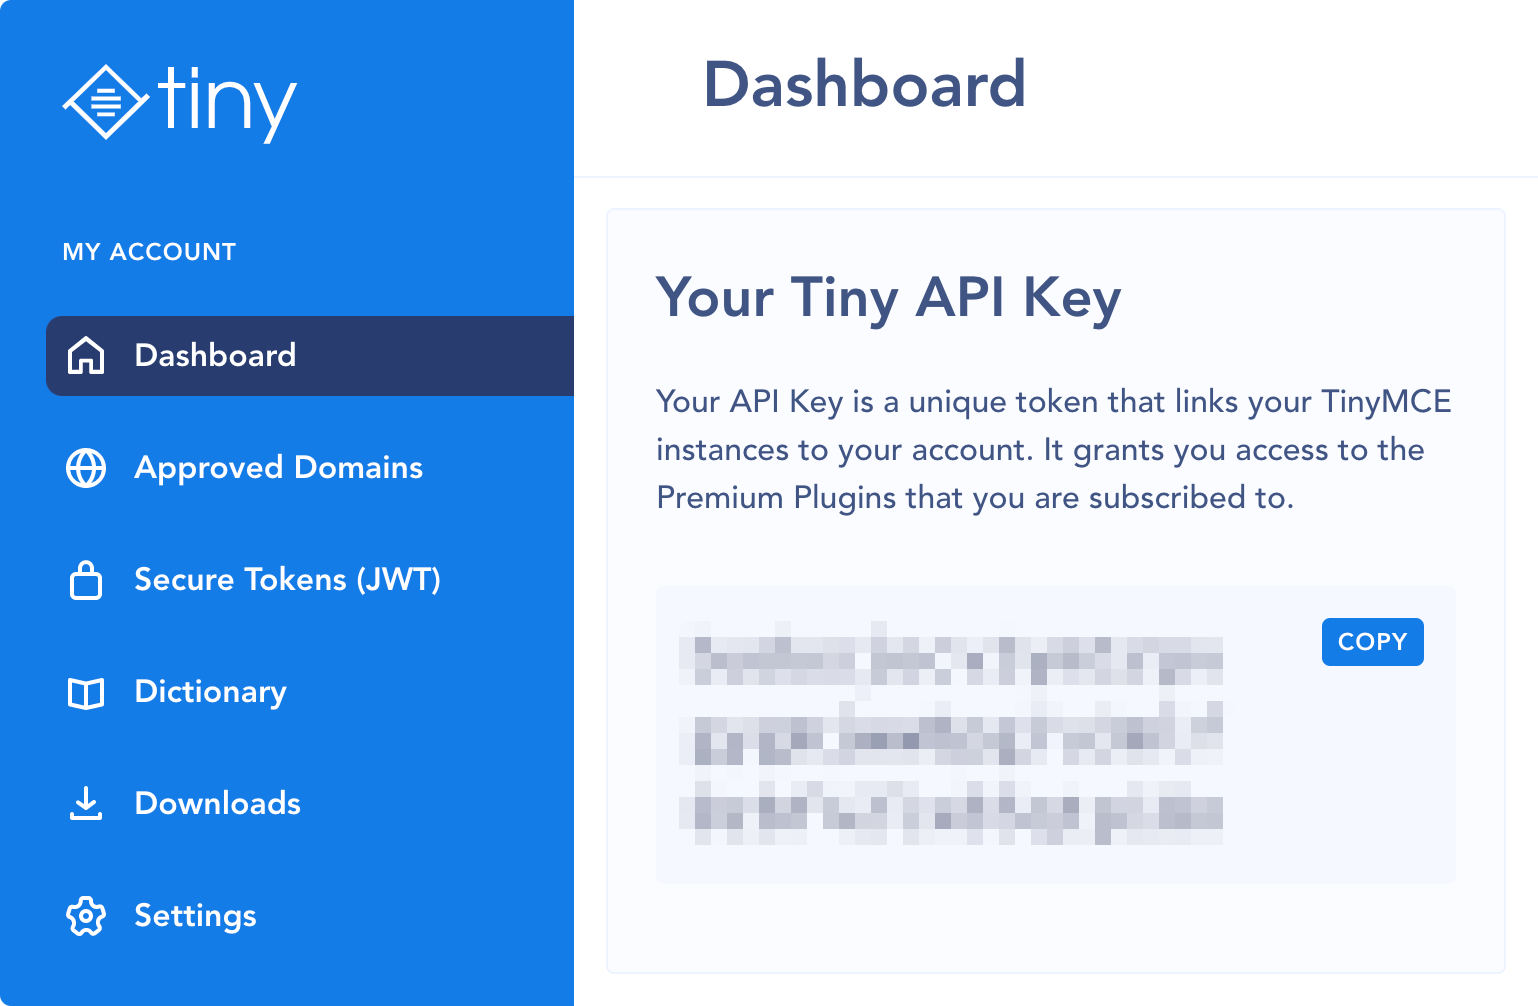
- View your API key on your account dashboard.
- Copy your API key directly from your dashboard and insert it into your code wherever TinyMCE is being loaded (for example, in place of
no-api-keyin the code snippet shown above).
When using Tiny Cloud, adding your API key prevents the editor changing into read-only mode. It's an important part of the Tiny Cloud configuration.
2. Register the domain
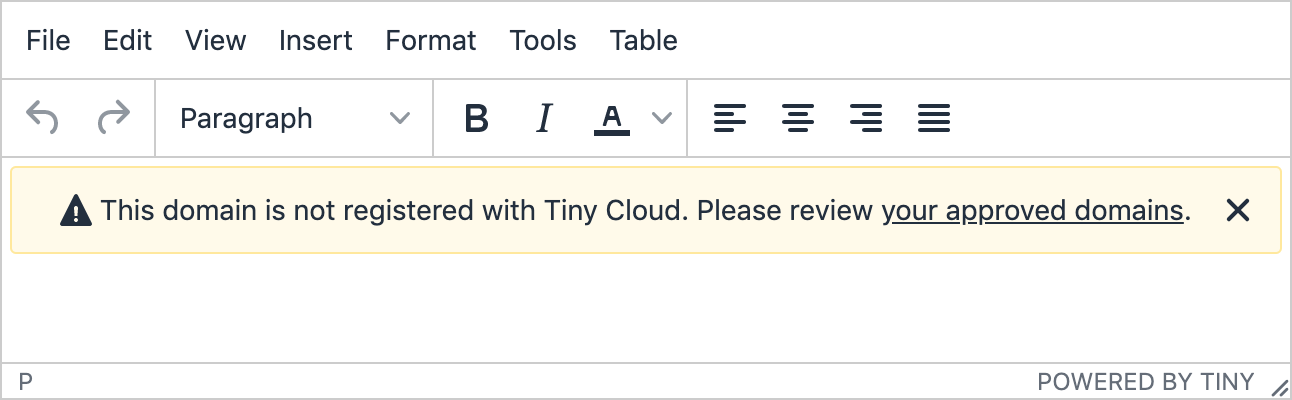
If the domain you’re running TinyMCE on is not registered on your account, you’ll be presented with the following notification, suggesting that you review your approved domains.
Firstly, it is important to note that you will continue to see this notification if you are running TinyMCE on your local machine outside of a web server, for example, from a location like file:///Users/Ben/index.html.
If you’re running it on your local machine, run it on localhost - it’s already registered as an approved domain on your account by default.
Otherwise, if you’re running TinyMCE on another server, you’ll need to register that domain on your account:
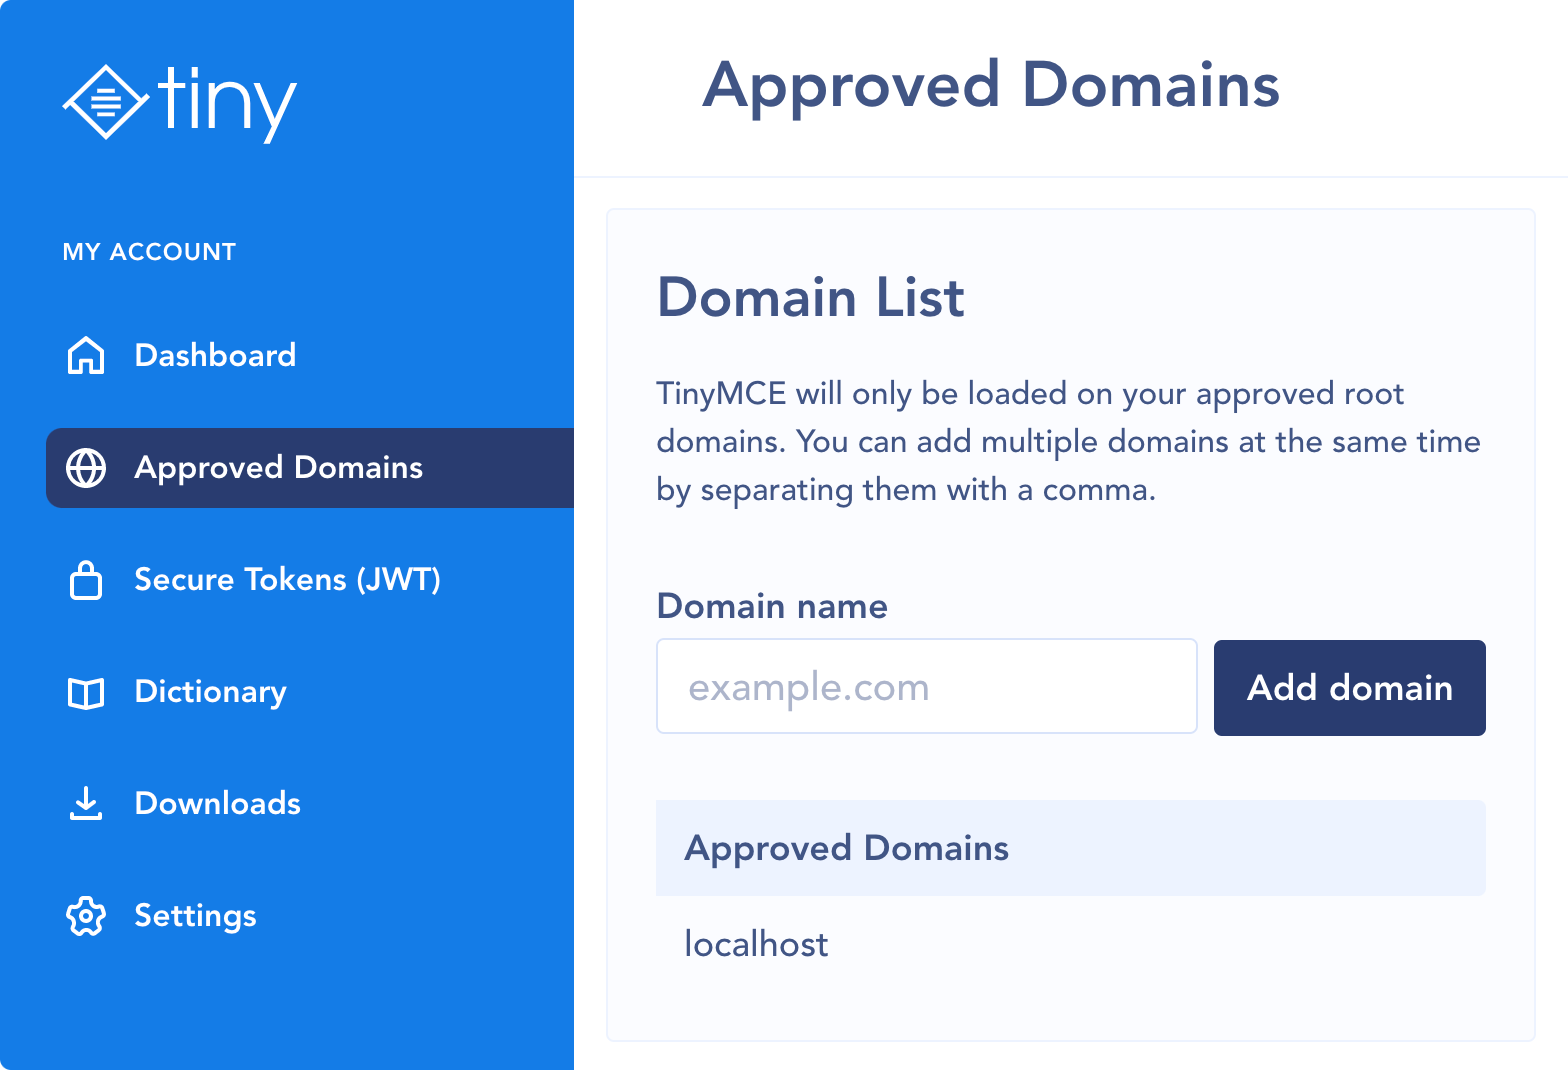
- View the approved domains in your Tiny account. If you haven’t already verified your email address, you’ll be prompted to do that first.
- Add the domains you wish to assign to your account. For example, if you want TinyMCE to load on
store.example.com, type that into the Domain name field and click Add domain.
Note that there may be a limit on the number of domains you can register depending on your plan; for instance, the Cloud Essential and Cloud Professional plans allow you to register one domain in addition to localhost. View all plans here.
After adding your domain, it may take some time for the changes to propagate through the system before taking effect.
What next?
Have you unlocked the full potential of TinyMCE?
Check out 9 products you can build with TinyMCE. But why stop at nine? The sky’s the limit when it comes to potential use cases - if it’s imaginable, then it’s possible with Tiny 🚀
Enhance your applications with our Skins and Icon Packs or premium plugins, including our most popular PowerPaste, Spell Checker Pro, Link Checker, and Accessibility Checker. Start with a free 14 day trial.


