


Forms are designed to change. They start off as blank input, select, and textarea elements and expand to capture important information. Sounds simple enough. What’s risky is handling that change from blank to complete. Particularly in a textarea where there’s more complex information involved in the change events. The HTML textarea onchange event is designed to listen for events and then respond to them, if that’s a form requirement.
But what if there’s more specific requirements, for more content? Like handling change and other functionality like uploading images, embedding content, and styling text? A standard textarea won’t cover these cases.
If you need a rich text editor that handles not just textarea onchange events, but a variety of other functionalities as well, then TinyMCE provides an easy-to-configure and effortlessly customizable solution, including textarea onchange event management. This post explains the configuration around the onchange event.
What is textarea onchange
Textarea onchange is an HTML attribute that fires when the element value changes. When the onchange attribute has a JavaScript value as an attribute, the script fires in response to the value change. For instance, an alert that fires when the change event is detected, and responds on the change (hence the name onchange):
<textarea onchange="alert('the textarea has change')"></textarea>It’s useful for adding the ability to detect if content is entered into a textarea, but in production, JavaScript can provide a more effective solution, particularly if there’s a form with multiple textareas.
JavaScript textarea onchange
For JavaScript textarea onchange, the syntax is not an attribute, but a line of JavaScript that has an event listener (as a minimum). The event listener activates a script when the change event happens on the target:
addEventListener("change", (event) => {
      alert(’the textarea has changed’)
});The change event listener triggers in response to a complete change event. The change event itself consists of the following steps:
- Content is added or deleted from the textarea
- The writer clicks away, removing focus from the textarea
This makes the change event distinct from events such as individual keystrokes.
Integration of TinyMCE and textarea onchange events
TinyMCE can be configured to respond to change events, and even has a set of other change-related events for more precise event management (NodeChange and SelectionChange for instance). The following demo explores just the change event.
NOTE: Before you dive into the test for textarea onChange events, sign up for a TinyMCE API key first. Using the key in the demo and in your form or page removes any warning errors related to domain names. You also gain free access to TinyMCE Premium plugins for 14 days. Navigate to the Get-tiny sign up page to get your FREE API key.
-
Create an index.html file in your development environment, and copy the following HTML into the file:
<!DOCTYPE html>
<html lang="en">
<head>
    <meta charset="UTF-8">
    <meta http-equiv="X-UA-Compatible" content="IE=edge">
    <meta name="viewport" content="width=device-width, initial-scale=1.0">
    <title>TinyMCE Demo</title>
</head>
    <body>
    </body>
</html>-
With your file open, in the head section, copy and paste the following script tag, which connects to TinyMCE through the cloud:
<script
  src="https://cdn.tiny.cloud/1/your-api-key/tinymce/6/tinymce.min.js"
  referrerpolicy="origin"
></script>;
-
Change the “your-api-key” string to your TinyMCE API key.
-
Copy and paste the following script tags directly after the script tag added in Step 2. It’s the tinymce.init method for controlling TinyMCE and events related to the rich text editor:
<script>
   tinymce.init({
   selector: '#editor',
   plugins: 'powerpaste casechange searchreplace autolink directionality advcode visualblocks visualchars image link media mediaembed codesample table charmap pagebreak nonbreaking anchor tableofcontents insertdatetime advlist lists checklist wordcount tinymcespellchecker editimage help formatpainter permanentpen charmap linkchecker emoticons advtable export autosave',
   toolbar: 'undo redo print spellcheckdialog formatpainter | blocks fontfamily fontsize | bold italic underline forecolor backcolor | link image | alignleft aligncenter alignright alignjustify lineheight | checklist bullist numlist indent outdent | removeformat',
   height: '700px'
       });
</script>-
Copy and paste the following HTML content into the demo body content:
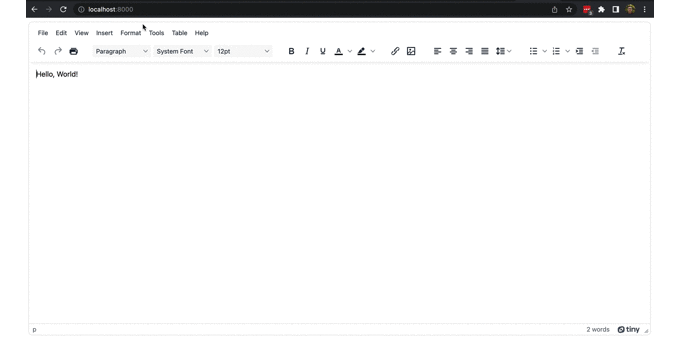
  <form id="post">
    <textarea id="editor">Hello, World!</textarea>
</form>-
Add the setup option to the TinyMCE init script:
tinymce.init({
  selector: "#editor",
  plugins:
    "powerpaste casechange searchreplace autolink directionality advcode visualblocks visualchars image link media mediaembed codesample table charmap pagebreak nonbreaking anchor tableofcontents insertdatetime advlist lists checklist wordcount tinymcespellchecker editimage help formatpainter permanentpen charmap linkchecker emoticons advtable export autosave",
  toolbar:
    "undo redo print spellcheckdialog formatpainter | blocks fontfamily fontsize | bold italic underline forecolor backcolor | link image | alignleft aligncenter alignright alignjustify lineheight | checklist bullist numlist indent outdent | removeformat",
  height: "700px",
  setup: (editor) => {},
});
-
Include the following JavaScript function to configure the onChange event. This creates an alert when the event fires:
setup: (editor) => {
  editor.on("change", (e) => {
    alert("The TinyMCE rich text editor content has changed.");
  });
};
-
Save the changes, and then test run the index.html file by opening it in your browser, or use a local server command with Python or with the PHP command:
You can configure the setup option for your specific form or page requirements, and add a variety of other features to better support your forms design, such as compliance features, to keep the form content precise and clear of errors.
Textarea onchange events, TinyMCE, and beyond
There are a variety of other events you can configure with TinyMCE. A variety of API methods are also available. As an example, the guide on the DOM.Utils API method demonstrates how TinyMCE API methods allow for effortless customization to set up useful responses to events.
For support in your forms or applications, you can contact the TinyMCE sales team for more information on how the TinyMCE rich text editor can help you meet your requirements.


