


While React, Vue, and Angular are widely known frameworks, there’s another framework that also builds web applications quickly. It’s called Svelte.
Svelte is renowned as a fast, nimble framework for building web based applications. How? It increases its speed (compared to other frameworks) by building your application into JavaScript at build time, not run time.
With Svelte, your web app is assembled when the human-readable JavaScript, HTML, and CSS is converted into code a browser can understand (compile time). By contrast, other frameworks assemble the app at run time, which is when the browser loads and shows the app on screen.
It also boasts some other advantages. Svelte features can be added incrementally to your current web application, and it updates your changes while it’s running.
Getting started with Svelte
There are three parts to configuring Svelte applications. The Script tags, HTML tags, and the CSS style. The specific syntax of the Svelte application calls for the Script tags to appear first, with the HTML tags in the middle, and the CSS style tags last.
It’s easy to try out a demo in your browser using Svelte’s REPL. With a locally built demo, however, you can build a Svelte application with more features, and without third-party scripts being blocked by the browser.
To build a local demo, start by installing Svelte on your local machine. To do this, you’ll need the following:
- Node Package Manager (npm) installed
- Command-line access
1. Install Svelte
Open your command line terminal, and run the npx and degit command. The npx command draws content from a local, or a remote repository – in this case, the Sveltejs repository. After you type in the sveltejs/template part of the command, name your test project. In the following example, the test project is named “svelte-rich-text-editor”:
<span data-preserver-spaces="true">npx degit sveltejs/template svelte-rich-text-editor</span>The terminal will return a message to let you know the copy of Svelte has worked: cloned sveletejs/template#HEAD
cd svelte-rich-tet-editorRun the npm install command to update the node packages on your system.
npm installWith the updates finished, you can then build your Svelte demo app:
npm run dev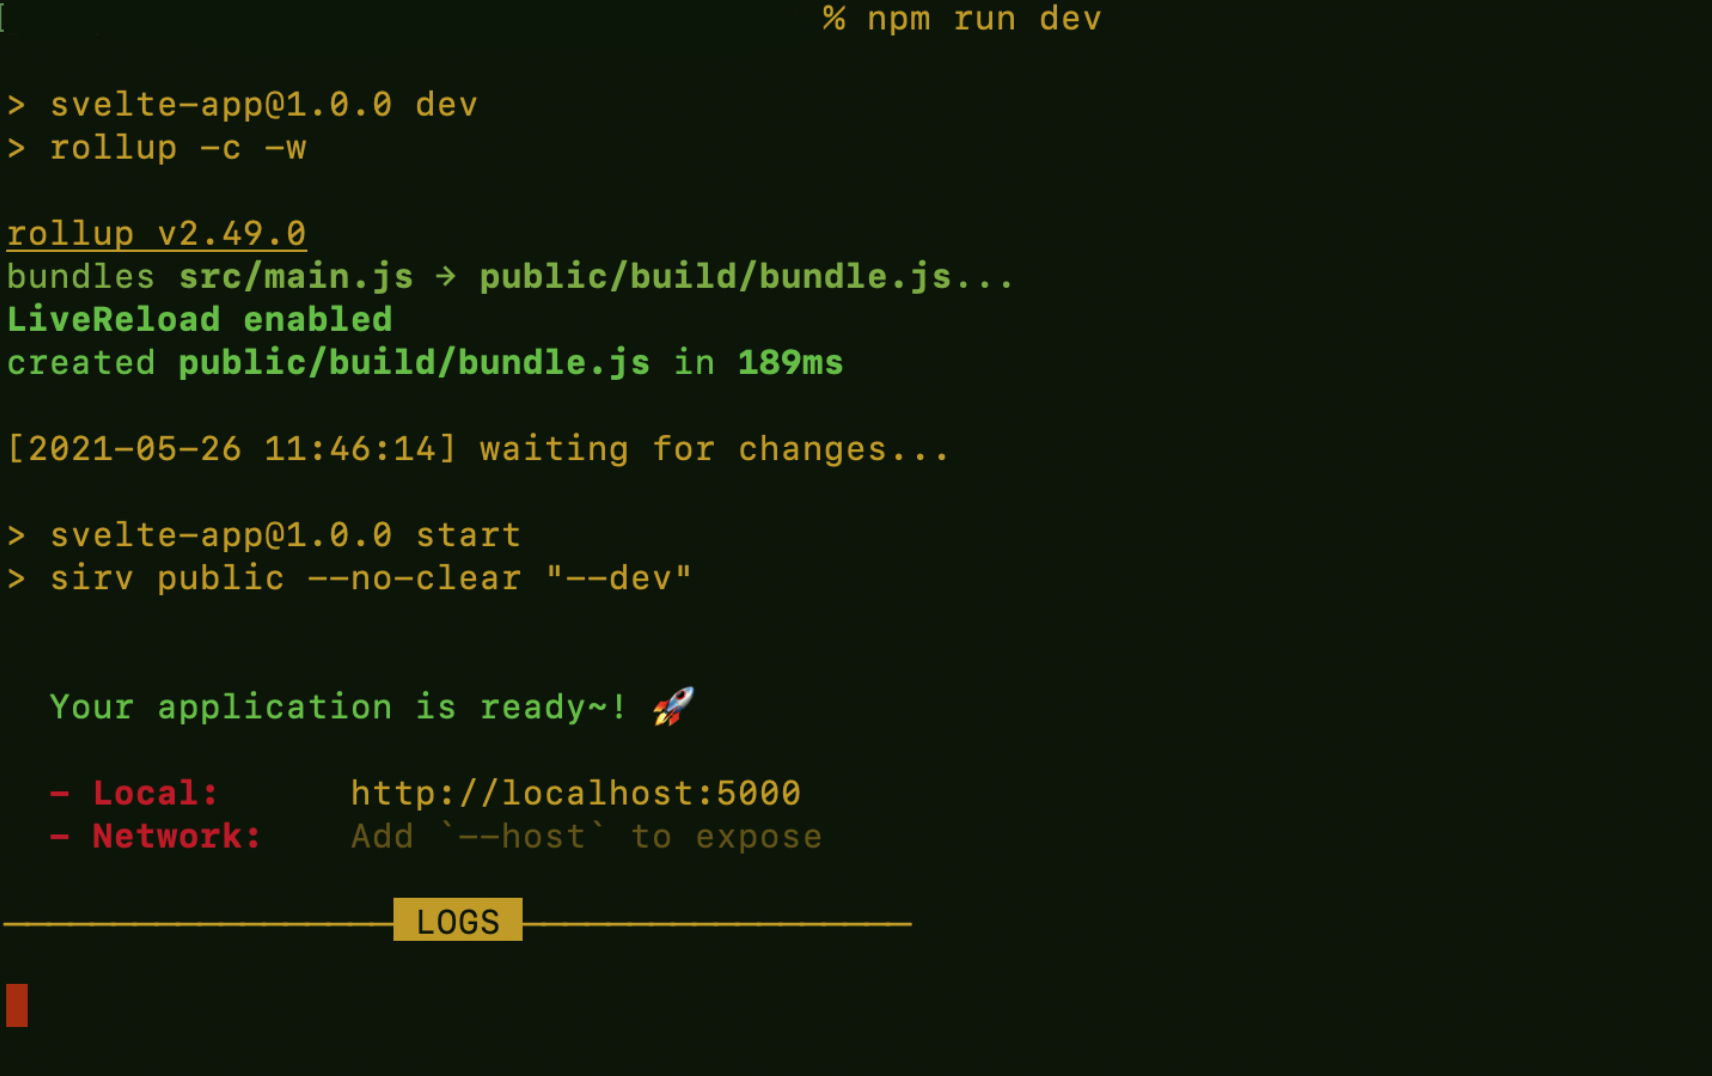
You can then open your demo web app. Svelte runs your app on localhost:5000. Open the localhost link that Svelte prints on the command line in your web browser. The Svelte ‘Hello World’ screen shows the speed of setting up and running a web application on Svelte:

The web application will automatically update when you make changes to the demo app source files. You can switch off the web app by pressing CTRL + C on the command line terminal.
3. Configure the demo with TinyMCE rich text editor
Change into the src/ directory of your demo application:
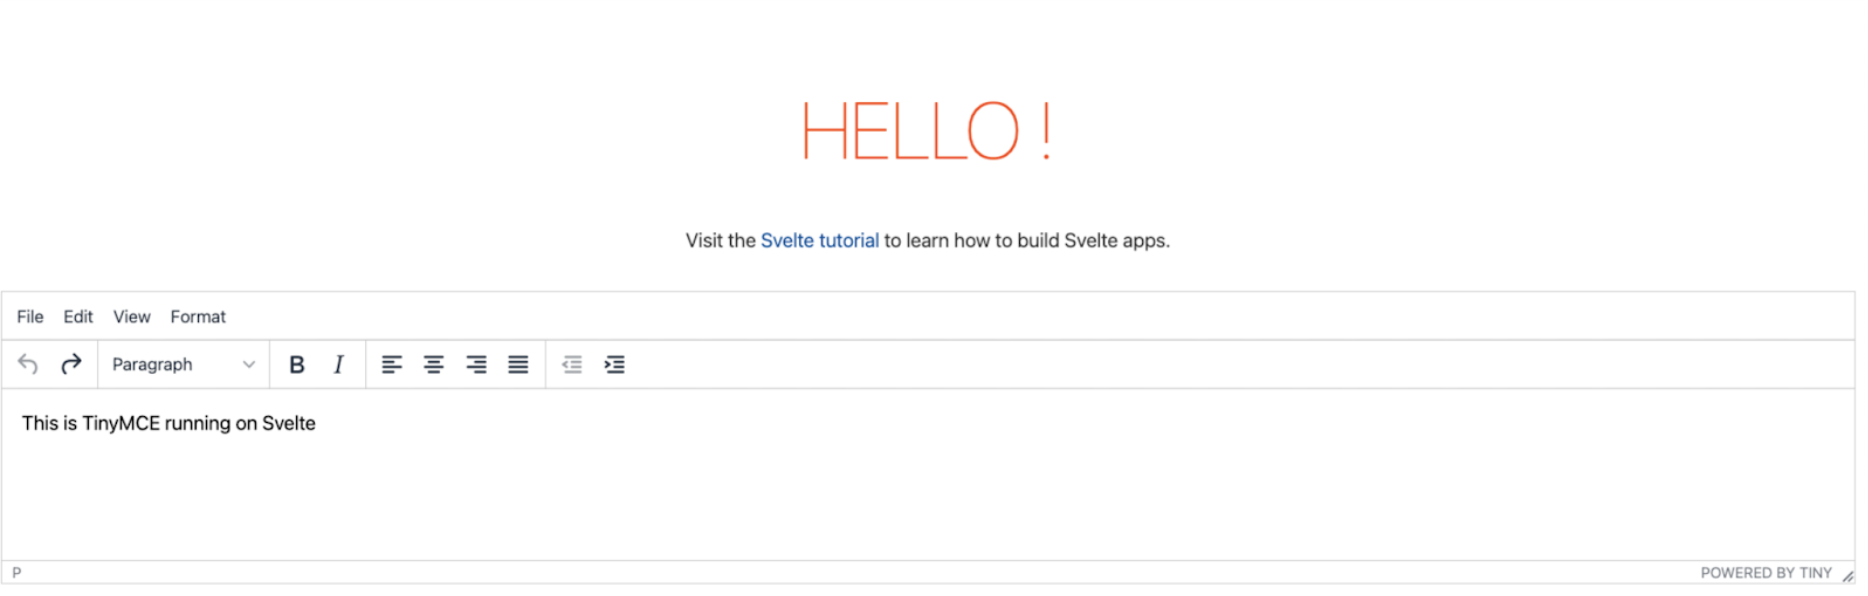
cd src/Open the App.svelte file inside the src directory. This is the file where you can make changes, to place the TinyMCE rich text editor inside a Svelte application.
You can open the App.svelte with your preferred text editor.
When you have the file open, you will need to make the following adjustments to integrate TinyMCE:
- A script area that includes a variable for the application and some default text
- A constant inside the script that loads the third party application with the window function.
- The
<svelte:head>tags that calls out to the cdn of the variable, and uses the on:load function. - Add a textarea tag to the main text section.
Start with the script area tags:
<script>
  let tiny; //set up a tiny variable
  let value = 'This is TinyMCE running on Svelte'; //set up a value for Svelte to add to the HTML

  const tinymceloaded = () => {
    tiny = window.tinymce.init({ //include the tinymce.init statement with the window function
    selector: 'textarea',
  });
}
</script>Set up the the <svelte:head> tags:
<textarea bind:value={value}/>The update application then appears in your browser:
4. An alternative syntax for your rich text editor
You can also load the <svelte.head> content before the script tags, and adjust the script tags. In this example, we included the premium emoticon plugin, and the emoticon icon on the TinyMCE toolbar:
<svelte:head>
<script src="https://cdn.tiny.cloud/1/tiny-api-key-here/tinymce/5/tinymce.min.js" referrerpolicy="origin" on:load={tinymceloaded}></script>
</svelte:head> //Use the onload function with the tinymceloaded variable
<script>
function tinymceloaded() { //set up the tinymceloaded variable as a function here
    window.tinymce.init({
    selector: 'textarea',
    plugins: 'emoticons',
    toolbar: 'emoticons’
  })
}
</script>

<textarea></textarea> //Svelte also works with traditional <textarea> syntaxWhat’s next?
You can find out more about running TinyMCE rich text editor on different frameworks, such as Angular and React. To find out more about our premium plugins like the emoticons, see the premium plugins documentation, or talk to our sales team for more information.
You can sign up for an API key to try out the different premium plugins, and see which ones work for you and for your project.


