


A great writing experience needs to be almost anonymous. That is, where the interface is so easy to use, the boundaries around the editor seem to fade away and the writer enters a ‘flow’ state. For any applications that aim to give their writers an easy-to-use experience, achieving that flow state is an important part of delivering that experience.
To get there, consider the small parts that make up the rich text editor. Is the functionality right for your writers? Do the small parts contribute to the flow of the whole, or do they cause friction, and make for a dreary experience?
If you’re in need of reliability, and the flexibility to combine features until you get a winning combination, consider adding the TinyMCE rich text editor to your application. Its features make for an easy-to-use experience, as many business owners have reported.
But there is a hiccough – what if you already have a rich text editor running in your application, and it’s causing problems (to say the least). If that editor is the Quill editor, you can easily migrate away from Quill, and change to TinyMCE. That’s what’s explored in this article – migrating from the Quill rich text editor to TinyMCE – to make your application’s writing experience flow.
Contents
Which is better, Quill or TinyMCE?
Quill cons: why you may want to migrate
Quill not working with Angular
Quill-image-resize not working
Migrate from Quill text editorto TinyMCE step-by-step
Which is better, Quill or TinyMCE?
Every editor has its own highlights and ongoing bugs. But in this case, currency matters (not currency in terms of money, but in terms of general acceptance). If you compare the two editors, the Quill editor’s last update was 2019, so it’s been without an update for several years. In comparison, TinyMCE has released frequent updates since 2019.
Acting in their role as important components within large projects, rich text editors need to have regular software releases matter for security. There’s also the question – can software with limited updates, adapt fast enough to customers needs? Let’s find out.
Quill cons: why you may want to migrate
There are some known issues that you may be experiencing:
Quill CSS not working
To introduce any kind of style into the Quill editor, you must access a specific CSS file, and reference it within HTML link tags. You may find that if you try and target any Quill classes directly with CSS, the editor style won’t change. This is a common cause of CSS not working in the Quill editor. To get CSS working, you need to set up the style you want in a CSS file, and reference it. This is a necessary encapsulation process to style the Quill editor.
Quill not working with Angular
Connecting Quill to projects running Angular can become complicated. The integration can stop working if the CSS files are not imported into the Angular project module css file. Then, reference the styles file in the project index file.
Quill-image-resize not working
If setting up the Quill Image Resize module with Angular, you’ll need to check what version of Angular you’re planning to use. Versions 6 and onwards do not work with the Quill Image resize module. Instead, you’ll need to investigate the Quill Blot Formatter project, a third party project, for establishing a reliable resize method.
Databases content and Quill
What is the Delta format? It’s a subset of JavaScript Object Notation (JSON) format. One of the ways web applications can process and display information is in JSON format. Contrasting JSON with HTML, JSON describes content in a format that a browser and humans can read by listing a set of keys and values that describe those keys. By contrast, HTML format wraps content in tags that describe to the browser the shape of the content, and so that the content is human readable.
When you save any content written in the Quill editor, it’s converted into Delta format and saved. Here’s an example:
{
  ops: [
    { insert: 'This', attributes: { bold: true } },
    { insert: ' is ' },
    { insert: 'grey', attributes: { color: '#cccccc' }},
    {insert: ‘ text.’ }
    ]
}Quill interprets this as: This is grey text.
What’s happening here is that the ops object contains a set of instructions telling the Quill editor to insert the text into the editor, and style it with the value listed by the attribute key.
The purpose of the Delta format is understanding: Quill is a rich text editor that interprets the information stored inside its editor area. This can be useful for applications that export and broadcast the information in the editor, and need to be able to parse and understand the information.
You can convert your saved content out of the Delta format when you set out to migrate (make sure you include time for conversion in your checklist of migration tasks!)There are a number of community-based tools built for conversion. A Node Package Manager (npm) tool can be configured to convert Quill content from Delta to HTML format as you type.
For configuring a conversion tool, the element to use when converting the Quill Delta’s to HTML is the quill.root.innerHTML. You could set up your application to include some kind of logic for converting and storing converted Deltas:
<!DOCTYPE html>
<html lang="en">
<head>
    <meta charset="UTF-8">
    <meta http-equiv="X-UA-Compatible" content="IE=edge">
    <meta name="viewport" content="width=device-width, initial-scale=1.0">
    <title>Document</title>
    <script referrerpolicy="origin" type="text/html" src=""></script>
    <link href="https://cdn.quilljs.com/1.3.6/quill.snow.css" rel="stylesheet">
</head>
<body>
<h2>Quill Delta to HTML test</h2>
<div id="editor">
    <p>Hello World!</p>
    <p>Some initial <strong>bold</strong>text</p>
    <p><br></p>
</div>

<!-- use the 'quill.root.innerHTML function and a POST request to output Delta content in HTML format' -->
<form id="quill-form"
      method="POST"
      onsubmit="this['contents'].value = quill.root.innerHTML;"
      name="QuillcontentForm">
    <input type="hidden" name="id" value="239" />
    <input type="hidden" name="contents" value="" />
</form>
<button form="quill-form">Convert Quill Editor Content</button>

<script src="https://cdn.quilljs.com/1.3.6/quill.js"></script>

<script>
  var quill = new Quill('#editor', {
    theme: 'snow'
  });
</script>

</body>
</html>Migrate from Quill text editor to TinyMCE step-by-step
How to disable Quill editor?
To remove Quill right away, in most cases, the editor integration fits into your applications with the snippets of code in your HTML including:
- An element on which to instantiate the editor
- A reference to the editor code
- And the Javascript code that instantiates the editor on the element
<div id="editor">
  <p>Hello World!</p>
  <p>Some initial <strong>bold</strong> text</p>
  <p><br></p>
</div><script src="https://cdn.quilljs.com/1.3.6/quill.js"></script><script>
var quill = new Quill('#editor', {
theme: 'snow'
});
</script>If you want to disable Quill, remove the JavaScript content.
Step 1. Integration
To reintegrate TinyMCE in place of Quill in your app, replace the JavaScript that references the Quill editor and the JavaScript that sets the editor design.
-
Change your HTML code so that it references the TinyMCE package and initializes the TinyMCE editor instead of Quill:
<div id="editor"></div>

<script src="https://cdn.tiny.cloud/1/no-api-key/tinymce/6/tinymce.min.js" referrerpolicy="origin"></script>

<script>
  tinymce.init({
    selector: '#editor'
  });
</script>-
You’ll need to replace no-api-key with your own Tiny API key. If you don’t already have one, you can get a free API key now which will provide you with access to all the standard text formatting options plus 49 core plugins that you can add or remove as needed to further enhance the user experience.
Here’s an example of the transition from Quill to TinyMCE:
Step 2. Plugins and toolbar options
Once you have the default editor up and running, one big thing stands out: the two editors differ in the default plugins and toolbar configuration, but both can be customized to suit your needs.
When using Quill, you may have customized the toolbar options with the toolbar module. For example, a simplified user experience might provide only bold, italic, underline, and strike options, as follows.
<script>
var toolbarOptions = ['bold', 'italic', 'underline', 'strike'];
var quill = new Quill('#editor', {
  modules: {
    toolbar: toolbarOptions
  },
  theme: 'snow'
});
</script>TinyMCE toolbar options (and plugins) call for a similar setup. For example, you’re migrating from Quill and you want your TinyMCE editor to have the same user options as the default Quill editor.
-
Adjust the TinyMCE initialization script and use the toolbar to customize the options provided to users.
-
Then, add any plugins not included with the core editor:
<script>
tinymce.init({
  selector: "#editor",
  plugins: "lists link",
  toolbar: "styleselect bold italic underline link numlist bullist removeformat",
  menubar: false
});
</script>Step 3. Formats
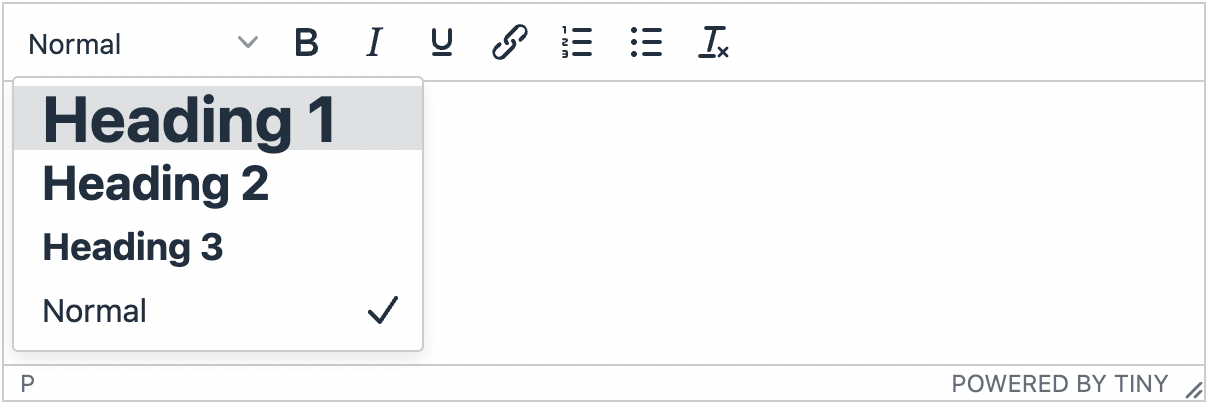
At this point the editor appears to provide the same functionality as the Quill editor; however, the formatting drop down provides many more options than those provided in the default Quill editor.
Bonus! To avoid confusion, especially when your customers have grown accustomed to a particular user experience, you may prefer to stick to the styles previously around. You can configure these using the style_formats option.
1. Set up the editor to maintain the styles in the dropdown to those provided in the default Quill editor:
- Heading 1,
- Heading 2,
- Heading 3,
- Normal
For example:
<script>
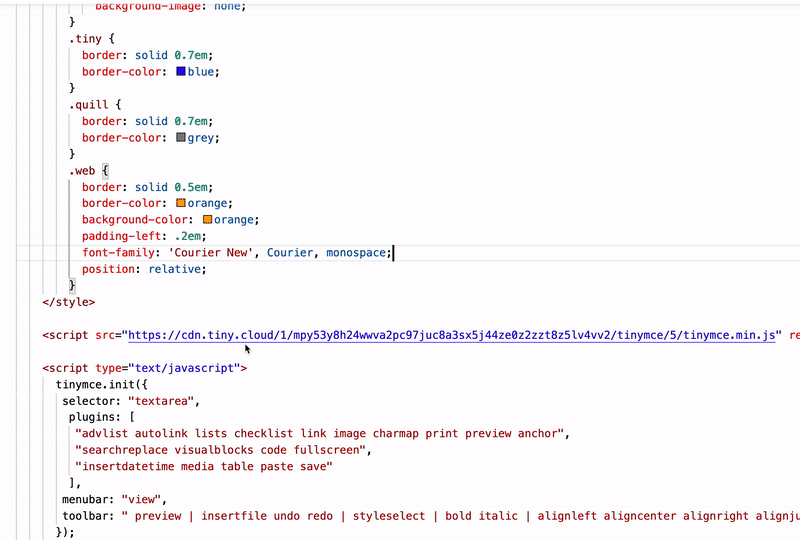
tinymce.init({
selector: "textarea",
plugins: "lists link fullscreen",
toolbar: "styleselect bold italic underline link numlist bullist removeformat",
style_formats: [
{title: 'Heading 1', block: 'h1'},
{title: 'Heading 2', block: 'h2'},
{title: 'Heading 3', block: 'h3'},
{title: 'Normal', block: 'p'}
],
menubar: false
});
</script>2. Save the changes, and confirm that the output looks correct:
Complete WYSIWYG migration example
Here is a complete HTML example with the TinyMCE configuration that you can use as a starting point for your migration from Quill. Simply copy and paste the following code into an HTML file and open it in a browser.
<!DOCTYPE html>
<html lang="en">
  <head>
    <meta charset="utf-8">
    <meta name="viewport" content="width=device-width, initial-scale=1">
    <script src="https://cdn.tiny.cloud/1/no-api-key/tinymce/6/tinymce.min.js" referrerpolicy="origin"></script>
    <script>
      tinymce.init({
        selector: "#editor",
        plugins: "lists link fullscreen",
        toolbar: "styleselect bold italic underline link numlist bullist removeformat",
        style_formats: [
          {title: 'Heading 1', block: 'h1'},
          {title: 'Heading 2', block: 'h2'},
          {title: 'Heading 3', block: 'h3'},
          {title: 'Normal', block: 'p'}
        ],
        menubar: false
      });
    </script>
  </head>
  <body>
  <h1>TinyMCE Example</h1>
      <div id="editor">Hello, World!</div>
  </body>
</html>What’s next for WYSIWYG migration?
- Customization – Once you have migrated to TinyMCE, you have loads of new configuration options and UI customizations available to enhance your application’s user experience. Check out our article about how to customize toolbar options as well as skins and icons.
- Additional help and support – For more complex migrations, you can contact our support team at any time for assistance. We’re ready to help you take your applications to the next level.
If you run into any issues, support is also available as a part of TinyMCE’s Enterprise and Tiny Cloud Subscriptions to help facilitate and finish any large scale migration. You can also reach out to StackOverflow with the TinyMCE tag. The tag puts you in touch with Tiny's online community.
To try out TinyMCE, you can sign up for a free API key, and see how our range of plugins can help support your use cases and needs.


