


In learning, academic integrity flows across every role – teachers, students, heads of department, administrators… It affects everyone and every aspect of learning management. But what does it take to fit integrity into the systems and tools used in learning management?
Perhaps a better question is: Can you program integrity into a Learning Management System (LMS)?
It depends on the LMS and the editor component in question. TinyMCE represents an editor component that supports the needs of an LMS. It includes:
- Non-editable PDF Export
- Enhanced Media Embedding and Footnotes for references
- Link checking with Autolink (no pretend links)
TinyMCE gives you these features, and more.
And, when you configure TinyMCE as your rich text editor with TinyMCE Cloud, the configuration setup process quickly gives you a fully featured LMS text editor.
Setting up the rich text editor in a LMS takes a few steps, but it’s worth spending a little trying out to see the features in action. Follow the steps in this article to set up TinyMCE Cloud in a LMS configuration.
What you need to get started
To get TinyMCE, register for an API key. The API key gives you free access to TinyMCE premium plugins for 14 days. Support is included within these 14 days, and using your API key stops warning messages in the text editor.
How to get a key:
- Navigate to the pricing plans for TinyMCE. Choose the plan that fits your app.
- Go directly to the Get-tiny sign up page to get your FREE API key
Type in your account information. Select Sign up. When you arrive at the dashboard screen, you can see your API key on the page.
TinyMCE requires an API key when accessed through the CDN, as Tiny Cloud. Adding your API key prevents the editor changing into read-only mode when using Tiny Cloud. In addition, using your API key also prevents other warning messages in the text editor area such as:
This domain is not registered with Tiny Cloud. Please see the quick start guide or create an account
Remove these warning messages by adding your API key as a reference within an app. The following demo shows how these steps are done.
It draws example content from the TinyMCE LMS demo config, which you can find collected within the TinyMCE solution pages.
Set up TinyMCE Cloud with a LMS
You can check on the video summary for a guide on how to get set up:
And here's the transcript:
-
In a new directory, create an index.html file
- Create HTML boilerplate for the file, including a head and body section
-
With your file open, in the head section, add script tags, and reference TinyMCE Cloud through a CDN link within the script tags. Copy and paste this content into your HTML file:
<script
  src="https://cdn.tiny.cloud/1/your-api-key/tinymce/6/tinymce.min.js"
  referrerpolicy="origin"
></script>;
Replace the “your-api-key” with your API key from your TinyMCE account.
-
Add the tinymce.init script to your index.html demo. Here’s the complete HTML and JavaScript content:
<!DOCTYPE html>
<html>
<head>
  <meta charset="utf-8">
  <title>LMS use-case demo</title>
  <meta name="viewport" content="width=device-width, initial-scale=1">
  <script src="https://cdn.tiny.cloud/1/add-your-api-key/tinymce/6/tinymce.min.js" referrerpolicy="origin"></script>
  <script>
    tinymce.init({
      selector: "#editor",
    });
  </script>
  </head>
  <body>
      <div class="editor-wrap">
        <textarea id="editor"></textarea>
      </div>
  </body>
</html>-
Test run the index.html file by opening it in your browser, or use a local server command with Python or PHP.
When you see the text editor load, your Tiny test is a success (good work!). Up next, how to configure the academic integrity and other features with TinyMCE in LMS:
Configure TinyMCE for LMS text editing
The first change to make is some additional configuration added to the tinymce.init script.
-
Adjust the tinymce.init script, drawing content from the demo LMS config, to shape an LMS rich text editor, including some CSS to change the editor appearance:
<script>
    tinymce.init({
      selector: "#editor",
      plugins: "a11ychecker advcode autocorrect autoresize autosave charmap charmap checklist code emoticons footnotes fullscreen image link linkchecker lists media mediaembed mergetags powerpaste preview table tinycomments tinymcespellchecker",

      toolbar: "undo redo | blocks | bold italic underline strikethrough forecolor backcolor | align checklist bullist numlist | link image media footnotes mergetags table | subscript superscript charmap blockquote | tokens | spellchecker a11ycheck  |  addcomment showcomments | fullscreen preview",

      statusbar: false,

      toolbar_sticky: true,

      mediaembed_max_width: 800,

      block_formats: 'Title=h1; Heading=h2; Sub heading=h3; Blockquote=blockquote; Paragraph=p',

      font_css: ['https://fonts.googleapis.com/css2?family=Asap:ital,wght@0,400;0,550;1,400&display=swap'],

      a11y_advanced_options: true,
      a11ychecker_html_version: 'html5',
      a11ychecker_level: 'aa',

      mergetags_list: [
      {
        title: "Course",
        menu: [{
          value: 'Course.Name',
          title: 'Course Name'
        },
        {
          value: 'Course.Teacher.Name',
          title: 'Teacher Name'
        },
        {
          value: 'Course.Department.Head',
          title: 'Department Head'
        }
        ]
      },
      {
        title: "Assignment",
        menu: [{
          value: 'Assignment.Name',
          title: 'Assignment Name'
        },
        {
          value: 'Assignment.DueDate',
          title: 'Assignment Due Date'
        }
        ]
      },
      {
        title: "Student",
        menu: [{
          value: 'Student.Name',
          title: 'Student Name'
        },
        {
          value: 'Student.ID',
          title: 'Student ID'
        },
        {
          value: 'Student.Email',
          title: 'Student Email'
        }
        ]
      }
      ],

      text_patterns: [
        { start: 'darnit', replacement: '????' },
        { start: '????', replacement: '????' },
        { start: '1/2', replacement: '1/2' },
        { start: '--', replacement: '--' },
        { start: '(c)', replacement: '(c)' },
        { start: '->', replacement: '?' },
        { start: '* ', cmd: 'InsertUnorderedList' },
        { start: '1. ', cmd: 'InsertOrderedList', value: { 'list-style-type': 'decimal' } },
        { start: '#', format: 'h1' },
        { start: '##', format: 'h2' },
        { start: '###', format: 'h3' },
      ],

      tinycomments_mode: 'embedded',
      tinycomments_author: 'rmartel',
      tinycomments_author_name: 'Rosalina Martel (Instructor)',
      tinycomments_author_avatar: 'https://www.tiny.cloud/images/avatars/avatar-RosalinaMartel.jpg',

      sidebar_show: 'showcomments',

      content_style: `
      body {
        max-width: 800px;
        margin: auto;
        font-family: 'Asap', serif;
        font-size: 17px;
        color: #222f3e;
      }
      h1, h2, h3, strong {
        font-weight: 550;
      }
      table th,
      table thead td {
        background-color: #ecf0f1;
        font-weight: 550;
        text-align: left;
      }
      table caption {
        display: none;
      }
      table[] caption {
        display: table-caption;
      }
      .mce-footnotes {
        font-size:12px;
      }
      `
    });
</script>-
Add some style content to adjust the overall appearance of the demo around the LMS rich text editor:
<style>
    body {
      margin: 60px 16px;
      font-family: -apple-system, BlinkMacSystemFont, "Segoe UI", Roboto, Oxygen-Sans, Ubuntu, Cantarell, "Helvetica Neue", Helvetica, Arial, sans-serif;
      background-color: #fafafc;
      font-family: 'Asap', serif;
      color: #222f3e;
    }
    .editor-wrap {
      max-width: 1200px;
      margin: auto;
    }
</style>-
Save the style changes, and reload the LMS in your browser:
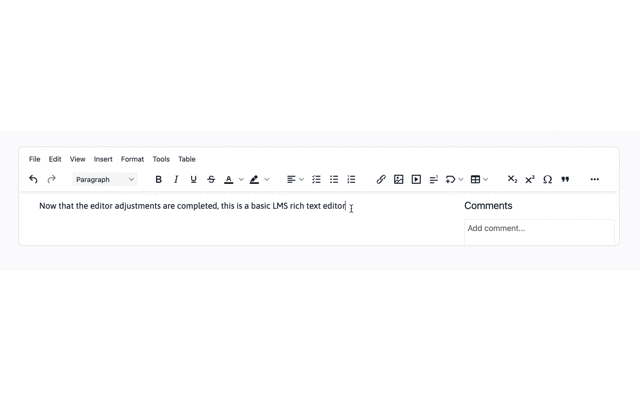
With the style complete, the text editor changes from an example into something resembling a LMS. Next is to introduce content intended to support teachers using the LMS
LMS content control and integrity with TinyMCE Cloud
This LMS config draws some sample content from the TinyMCE LMS config.
Adding sample assignment design content
-
Adjust the HTML content within the text area to include the following HTML drawn from the LMS demo config:
<h1>Assignment: {{ assignment.name }}</h1>
  <p>Enter a short introduction to the assignment. Export this document as a PDF and save in local workstation and shared drive when complete.</p>

  <h2>Learning Outcomes</h2>
    <p>Describe learning outcomes for the assignment in relation to curriculum, budgets, and risk assessment</p>

  <h2>Initial Feedback</h2>
    <p>Place any feedback gathered from panel here:</p>

  <h2>Content Exemplars and Sources</h2>
    <p>Include links to exemplar or source material for the assignment</p>

  <table style="border-collapse: collapse; width: 99.8698%; height: 157px;" border="1">
    <thead>
      <tr>
        <td style="width: 18.2224%;" scope="col">Source Title</td>
        <td style="width: 28.2224%;" scope="col">Embed Source</td>
        <td style="width: 5.2224%;" scope="col">Checked?</td>
      </tr>
    </thead>
  <tbody>
      <tr>
        <td scope="col"></td>
        <td scope="col"></td>
        <td scope="col"></td>
      </tr>
  </tbody>
  </table>

  <h2>Grading Criteria</h2>
    <table style="border-collapse: collapse; width: 99.8698%; height: 157px;" border="1">
      <thead>
        <tr>
          <th style="width: 18.0915%;" scope="col"> </th>
            <td style="width: 18.0915%;" scope="col">High Achievement</td>
            <td style="width: 18.2224%;" scope="col">Good Achievement</td>
            <td style="width: 18.2224%;" scope="col">Pass</td>
            <td style="width: 18.2224%;" scope="col">Fail</td>
        </tr>
      </thead>
    <tbody>
        <tr>
          <th style="width: 18.0915%;" scope="col">Demonstrated knowledge of color theory</th>
            <td style="width: 18.0915%;">The student shows an outstanding knowledge and command of color theory concepts</td>
            <td style="width: 18.2224%;">The student shows good knowledge and understanding of color theory concepts</td>
            <td style="width: 18.2224%;">The student shows some knowledge of color theory and a basic understanding of color theory concepts</td>
            <td style="width: 18.2224%;">The student has not demonstrated knowledge of color theory, or the concepts of color theory.</td>
        </tr>
        <tr>
          <th style="width: 18.0915%;" scope="col">Argument composition skills</th>
            <td style="width: 18.0915%;">The student shows an outstanding argument composition skills</td>
            <td style="width: 18.2224%;">The student shows good argument composition skills</td>
            <td style="width: 18.2224%;">The student shows some argument composition skills.</td>
            <td style="width: 18.2224%;">The student does not show clear argument composition skills</td>
        </tr>
        <tr>
          <th style="width: 18.0915%;" scope="col">Consulted resources</th>
            <td style="width: 18.0915%;">The student shows they have consulted excellent resources</td>
            <td style="width: 18.2224%;">The student has consulted good resources</td>
            <td style="width: 18.2224%;">The student has consulted some resources required for the assignment</td>
            <td style="width: 18.2224%;">The student has not consulted adequate resources</td>
        </tr>
        <tr>
          <th style="width: 18.0915%;" scope="col">Writing, Grammar, and Clarity</th>
            <td style="width: 18.0915%;">The student shows a command of the language in their work</td>
            <td style="width: 18.2224%;">The student shows effective writing skills</td>
            <td style="width: 18.2224%;">The student shows clear writing skills</td>
            <td style="width: 18.2224%;">The student shows unclear writing skills</td>
        </tr>
      </tbody>
    </table>
</textarea> -
Save the changes, and reload the demo:

|
A note on non-editable content |
|
Any content wrapped in the “{{ }}” curly bracers appears non-editable. This prevents change to the due dates assigned to students, student names, and assignment names. The style of the non-editable areas were also associated with a class. Because of this, a CSS style applied to the class in the tinymce.init script controls and changes their appearance. |
TinyMCE Cloud LMS content in action
The LMS config here shows an assignment criteria sheet builder, with a rubric, and space for capturing and checking potential sources. Academic integrity affects all roles. And this config supports a teacher’s work.
Check on the TinyMCE LMS solutions page for a different config.
For this config, there are several useful functions working. Next up is a detailed look at what they can do.
Since this config has some longer blocks of JavaScript and HTML, you can test out the features in this code pen:
The next steps for your LMS editor
Check out our LMS editor page for further information, and remember that your FREE API key grants free access to Premium Plugin functionality for 14 days, after which you need to either choose a Premium plan or remove the TinyMCE premium features.
|
What you get from TinyMCE’s Premium Plugins: |
|
Contact us for more information if you have any questions on adding TinyMCE to your LMS app. Premium customers and anyone on a 14-day free trial has access to our enterprise-grade professional support team.


