


Keeping information organized is one of the biggest challenges in content authoring. Things get out of hand when documents grow in size, and navigation becomes difficult. Management of information can be made easier with a guide – a map to navigate through documents. But the process of making this navigation element for your content creation experience can be difficult. There are many landmarks in documents to take into account.
The process doesn't have to be arduous with the right tools to support your content creation experience. Give your customers the essentials to manage their documents with control of HTML, and easy-to-make tables of contents.
With TinyMCE at the core of your content creator experience, whether it's an app or web page, you can easily gain the ability to control HTML, create tables, and even set up a table of contents in HTML and update it with the press of one button if needed.
This article explains all the ins-and-outs of what to do: getting TinyMCE set up, and using TinyMCE's powerful plugins to best support your customers and their content creation work.
What is a table of contents
A table of contents is essentially a list of headings the author writes to make reading large documents easier. They are a navigation support feature, like a map, to navigate large documents. They help the reader scan what's in a document quickly, getting the "lay of the land" at a glance. In an information-heavy world, the ability to rapidly scan a document's contents is valuable. That's why tables of contents are important for content creation.
Table of contents examples
As an example, in a written document, a table of contents shows the names or headings of each chapter in the document, as well as the corresponding page number that the chapter can be found on.
Digital documents usually contain hyperlinks, which connect the table of contents to the headings of each chapter. In an ideal content creator, the table of contents automatically creates a link to the heading, and maintains the links if the digital document's headings change.
In regards to formatting, subheadings can appear in a table of contents, and these are often indented, and are nested under their parent heading.
How to create an HTML table of contents
To create an HTML table of contents manually, you can make use of the HTML list elements, for example:
- Setting up the table element, creating a column for the chapter title and a second column for page numbers or location
- Using the definition list (<dl>) element
- Selecting the ordered list (<ol>) element
The following is an example HTML table of contents:
-
In your development environment, create a new index.html file
-
Copy the following initial HTML to get started:
<!DOCTYPE html>
<html lang="en">
<head>
<meta charset="UTF-8">
<meta name="viewport" content="width=device-width, initial-scale=1.0">
<title>HTML table of contents and TinyMCE</title>
</head>
<body>
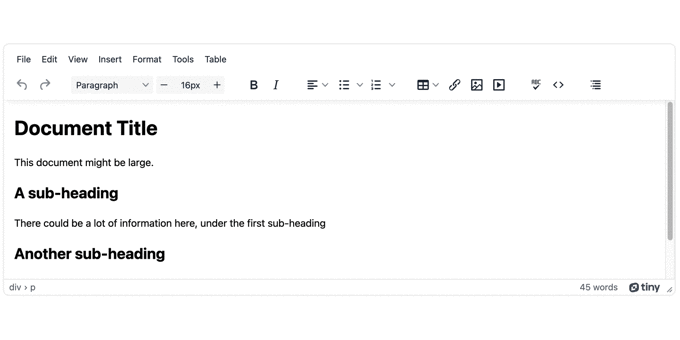
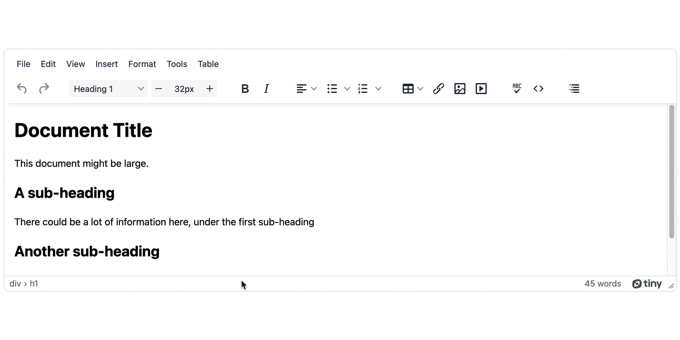
<h1>Document Title</h1>
<p>This document might be large.</p>
<h2 id="chapter1">A sub-heading</h2>
<p>There could be a lot of information here, under the first sub-heading</p>
<h2 id="chapter2">Another sub-heading</h2>
<p>There could be a lot of information here as well, under the second sub-heading</p>
<footer>This is the last section of the document</footer>
</body>
</html>-
Add the following HTML table of contents, which is made with the ordered list element:
<!DOCTYPE html>
<html lang="en">
<head>
    <meta charset="UTF-8">
    <meta name="viewport" content="width=device-width, initial-scale=1.0">
    <title>HTML table of contents and TinyMCE</title>
</head>
<body>
    <ol class="toc" role="list">
        <li>
          <a href="#chapter1">
            <span class="title">A sub-heading</span>
          </a>
        </li>
        <li>
          <a href="#chapter2">
            <span class="title">Another sub-heading</span>
          </a>
        </li>
    </ol>
    <h1>Document Title</h1>
      <p>This document might be large.</p>
    <h2 id="chapter1">A sub-heading</h2>
      <p>There could be a lot of information here, under the first sub-heading</p>

    <h2 id="chapter2">Another sub-heading</h2>
      <p>There could be a lot of information here as well, under the second sub-heading</p>
    <footer>This is the last section of the document</footer>
</body>
</html>-
Save the changes, and then open the HTML file in your browser to see the HTML table of contents.
How to insert automatic table of content with TinyMCE
Looking closely at the above example, a few things are clear:
- The HTML table of contents won't automatically update as new chapters are added or edited
- There's a overhead involved in checking the HTML, and customizing it
It's more efficient, and easier on your customers, to include an automatic, HTML table of contents option for content creation. Using TinyMCE, you can make use of the Table of Contents Premium plugin to provide a better content creation experience. The user experience provided by the Table of Contents plugin is familiar for any customers who've created documents in Microsoft Office products, where updating the table of contents when the headings change is made easier with a refresh button.
-
In the index.html file from the previous example, include TinyMCE in the head section of the document through the CDN link (TinyMCE cloud):
<script
  src="https://cdn.tiny.cloud/1/your-api-key/tinymce/6/tinymce.min.js"
  referrerpolicy="origin"
></script>;
-
Replace the "your-api-key" string with your TinyMCE API key.
You can sign up for a FREE API key (you can use Google or GitHub credentials), and your API key comes with a 14 day free trial of TinyMCE's Premium plugins, like the Table of Contents plugin.
-
Include the following script tag to configure TinyMCE (the TinyMCE init script):
   <script>
        tinymce.init({
          selector: '#editor',
          plugins: 'advcode, advlist, advtable, anchor, autosave, autolink, charmap, checklist, directionality, editimage, emoticons, export, formatpainter, image, insertdatetime, link, linkchecker, lists, media, mediaembed, nonbreaking, pagebreak, permanentpen, powerpaste, searchreplace, table, tinymcespellchecker, visualblocks, visualchars, wordcount',
          toolbar: 'undo redo print spellcheckdialog formatpainter | blocks fontfamily fontsize | bold italic underline forecolor backcolor | link image | alignleft aligncenter alignright alignjustify lineheight | checklist bullist numlist indent outdent | removeformat | tableofcontents',
          editable_root: false,
          editable_class: 'editable'
        });
</script> -
Add the Table of Contents plugin to the list of plugins and the toolbar:
plugins: 'advcode, advlist, advtable, anchor, autosave, autolink, charmap, checklist, directionality, editimage, emoticons, export, formatpainter, image, insertdatetime, link, linkchecker, lists, media, mediaembed, nonbreaking, pagebreak, permanentpen, powerpaste, searchreplace, table, tinymcespellchecker, visualblocks, visualchars, wordcount, tableofcontents',
toolbar: 'undo redo | styles fontsizeinput | bold italic | align bullist numlist | table link image media pageembed | spellcheckdialog a11ycheck code | inserttemplate | tableofcontents',-
Remove the HTML table of contents from the previous section
-
Wrap the HTML content from the demo in the previous section with textarea elements, and add the "editor" id to the opening tag:
</head>
  <body>
   <textarea id="editor">
    <h1>Document Title</h1>
      <p>This document might be large.</p>
    <h2 id="chapter1">A sub-heading</h2>
      <p>There could be a lot of information here, under the first sub-heading</p>
    <h2 id="chapter2">Another sub-heading</h2>
      <p>There could be a lot of information here as well, under the second sub-heading</p>
    <footer>This is the last section of the document</footer>
   </textarea>
  </body>
</html>-
Include a div element directly after the textarea, and give it the "editable" class. TinyMCE has the editable_root: false option, which is designed for content building. The editable class ensures content can be edited:
<textarea id="editor">
    <div class="editable">
      <h1>Document Title</h1>
        <p>This document might be large.</p>
      <h2 id="chapter1">A sub-heading</h2>
        <p>There could be a lot of information here, under the first sub-heading</p>
      <h2 id="chapter2">Another sub-heading</h2>
        <p>There could be a lot of information here as well, under the second sub-heading</p>
      <footer>This is the last section of the document</footer>
    </div>
</textarea>-
Save the changes, and then test out the TinyMCE Table of Contents plugin by using a local host testing tool such as the Python or PHP command line tool:
NOTE: The Table of Contents plugin uses any existing CSS id selectors included for the heading elements. If there are none, then the plugin automatically generates an id, and uses it to link the heading in the HTML table of contents to corresponding document heading.
Customizing your HTML table of contents in TinyMCE
There are different customization options available for configuring your HTML table of contents with TinyMCE:
- Use the ordered list element
- Specify the type of list numbers used
- Activate or deactivate the Table of Contents header
The following steps explain how to customize the HTML table of contents in TinyMCE using these methods:
-
Modify the TinyMCE init script with the tableofcontents_orderedlist option:
       tinymce.init({
          selector: '#editor',
          plugins: 'advcode, advlist, advtable, anchor, autosave, autolink, charmap, checklist, directionality, editimage, emoticons, export, formatpainter, image, insertdatetime, link, linkchecker, lists, media, mediaembed, nonbreaking, pagebreak, permanentpen, powerpaste, searchreplace, table, tableofcontents, tinymcespellchecker, visualblocks, visualchars, wordcount',
          toolbar: 'undo redo | styles fontsizeinput | bold italic | align bullist numlist | table link image media pageembed | spellcheckdialog a11ycheck code | inserttemplate | tableofcontents',
          editable_root: false,
          editable_class: 'editable',
tableofcontents_orderedlist: true,-
Add the tableofcontents_orderedlist_type option, and set it to use upper case roman numerals:
         tableofcontents_orderedlist: true,
tableofcontents_orderedlist_type: 'I', //Valid options for the configuration: "1" for numbers, "A" for upper case letters, "a" for lower case letters, "I" roman numerals, "i" lower case roman numerals.-
Add the tableofcontents_includeheader option, and set it to 'false' to prevent the header from appearing:
         tableofcontents_orderedlist: true,
         tableofcontents_orderedlist_type: 'I', //Valid options for the configuration: "1" for numbers, "A" for upper case letters, "a" for lower case letters, "I" roman numerals, "i" lower case roman numerals.
         tableofcontents_includeheader: false

});-
Save the changes, and then test out the new Table of Contents configuration:
Beyond an HTML table of contents with TinyMCE
You can customize other functions within TinyMCE to keep content organized, or help your customers create incredible content:
- Create document templates using TinyMCE's Advanced Template plugin
- Make HTML tables, and adjust the table background
- Use 3D text effects for innovated designs
Contact the TinyMCE Sales team if you need to directly add TinyMCE to your project, and start using Table of Contents, and other Premium plugins.


