TinyMCE is the chosen authoring tool used within millions of applications worldwide.
In order to stay up to date with the latest trends and innovations, we are ending support for TinyMCE 4.x. This will enable us to focus more of our efforts on the roadmap for TinyMCE 5 and beyond.
If you haven’t yet migrated from TinyMCE 4 to TinyMCE 5, now is the time to do it!
What we are doing and when
We previously announced the end of support for TinyMCE 4.x - officially supported through to December 31, 2020. Further to this, access to online services for TinyMCE 4 will be switched off on the following dates:
- CacheFly CDN (
http://tinymce.cachefly.net/) - November 30 2020 - TinyMCE CDN (
https://cdn.tinymce.com/) - February 25th 2021 - Tiny Cloud
stable(https://cloud.tinymce.cloud/&https://cdn.tiny.cloud/) - February 25th 2021
Notification messages will be displayed in the console for developers ahead of time, and we will email all developers who have provided us with their contact details.
If you are using either our CacheFly or TinyMCE CDN, the chances are we do not have your contact details. As we approach these shut-off dates, we will display notification messages within the editor itself stating - “Your access to TinyMCE will expire...either contact your administrator or upgrade your account…”. This is to ensure you can update the editor and not risk a critical error come the migration dates.
What you need to do
If you are using an application in which the above notification message is displayed, contact your IT department or administrator - they will be able to resolve the issue. You can keep using the application in the meantime by closing the notification message.
If you are an administrator or developer of a product using the TinyMCE editor, read on. This article will help you migrate your instance of TinyMCE to the latest version.
TinyMCE 5
TinyMCE 5 is the next generation WYSIWYG editor bridging the gap between a great UX, developer-friendly features, and cutting edge functionality. TinyMCE has always been the staple in bringing the best content creation experience to a wide range of established and emerging enabling technologies - see 9 products you can build with TinyMCE.
TinyMCE 5 brings significant improvements to the editor, including:
- The most advanced, intuitive, mobile rich text editing experience on the market - read more about Tiny mobile
- A modern and more flexible UI, enabling you to create the best possible UX for the products you’re building
- The ability to configure skins to match the design system used in your product, app or website, plus a skinning tool to assist with skin creation
- 6 new premium plugins, including Advanced Tables, Case Change, Checklist, Page Embed, Permanent Pen, plus Skins and Icon Packs
- Next level support for creating and editing tables, so users can present data in the most efficient and effective way
Check out a demo for yourself on our home page.
Get Your Free TinyMCE API Key →
Migrate from TinyMCE 4 to TinyMCE 5
To assist you with migrating from TinyMCE 4 to TinyMCE 5, we’ve put together a simple 4-stage, step-by-step process that will help with most migrations:
- Update the core editor
- Review themes and editing modes
- Consider core plugin changes
- Review any advanced configurations
For more information, refer to the migration guide in the Tiny docs.
1. Update the core editor
In many cases, migrating from TinyMCE 4 to TinyMCE 5 is as simple as updating the source of the TinyMCE script file in your HTML pages (replacing no-api-key with your own API key from your Tiny account dashboard):
<script src="https://cdn.tiny.cloud/1/no-api-key/tinymce/5/tinymce.min.js" referrerpolicy="origin"></script>For example, see the following HTML files and the resulting editor instance for each, with the only difference being the source of the TinyMCE script file.
TinyMCE 4
<!DOCTYPE html>
<html lang="en">
  <head>
    <meta charset="utf-8">
    <meta name="viewport" content="width=device-width, initial-scale=1">
    <strong><script src="https://cloud.tinymce.com/stable/tinymce.min.js"></script></strong>
    <script>
      tinymce.init({
        selector: "#mytextarea"
      });
    </script>
  </head>
  <body>
    <h1>TinyMCE Quick Start</h1>
    <form method="post">
      <div id="mytextarea">Hello, World!</div>
    </form>
  </body>
</html>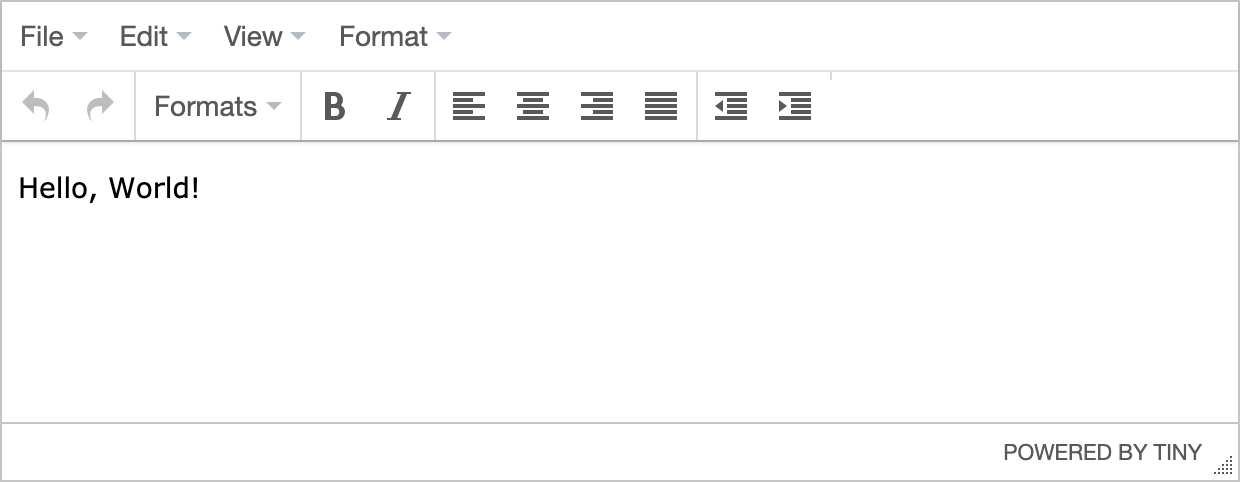
TinyMCE 5
<!DOCTYPE html>
<html lang="en">
  <head>
    <meta charset="utf-8">
    <meta name="viewport" content="width=device-width, initial-scale=1">
    <strong><script src="https://cdn.tiny.cloud/1/no-api-key/tinymce/5/tinymce.min.js" referrerpolicy="origin"></script></strong>
    <script>
      tinymce.init({
        selector: "#mytextarea"
      });
    </script>
  </head>
  <body>
  <h1>TinyMCE Quick Start</h1>
    <form method="post">
      <div id="mytextarea">Hello, World!</div>
    </form>
  </body>
</html>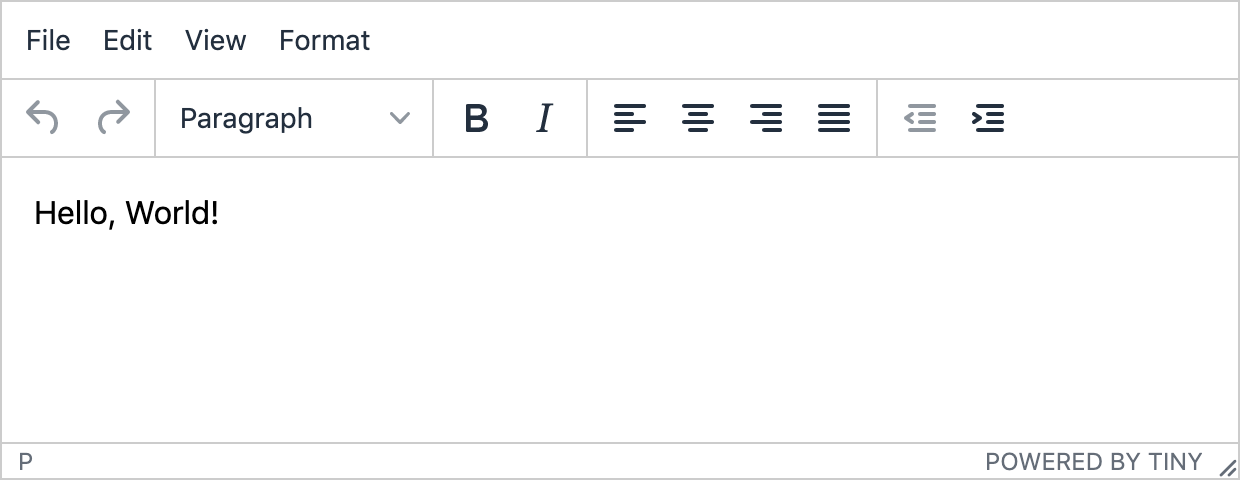
2. Review themes and editing modes
All themes provided with TinyMCE 4 have been removed. In TinyMCE 5, there is a single, modern, and responsive theme called Silver that is enabled by default.
Previously, themes were also used as a way of configuring different modes of the editing experience, like inlite and mobile; however, these are now separate configuration options of their own.
TinyMCE 4
In TinyMCE 4, you may have had a theme specified in your configuration:
tinymce.init({
  selector: "#mytextarea",
  theme: "modern",
});
TinyMCE 5
In TinyMCE 5, you can either provide the silver theme, or simply remove the theme option from the config altogether; for example:
tinymce.init({
  selector: "#mytextarea",
  theme: "silver",
});
Inline mode
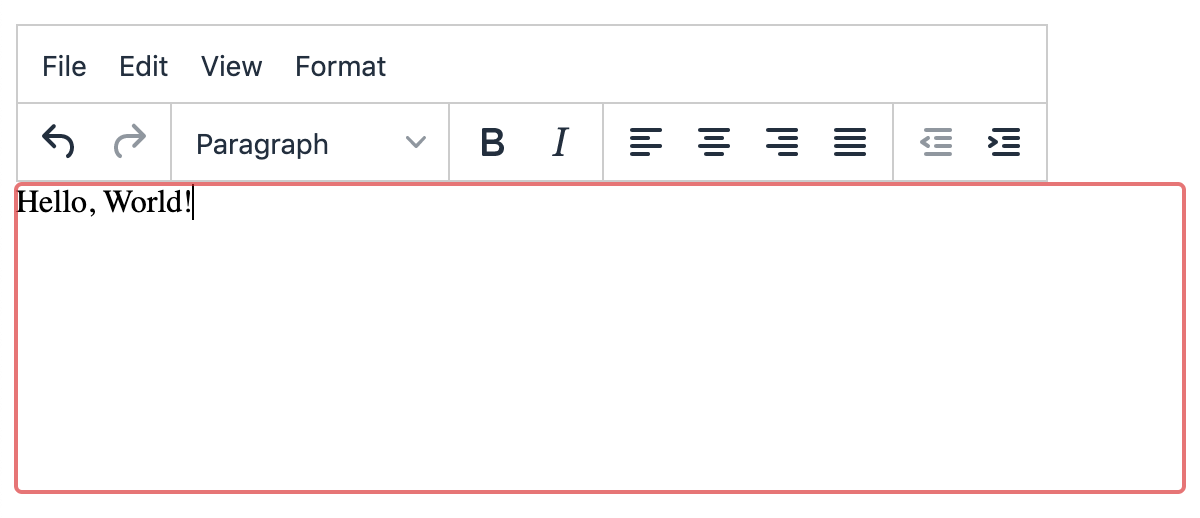
In both TinyMCE 4 & TinyMCE 5, inline mode is configured by setting the inline option to true:
tinymce.init({
  selector: "#mytextarea",
  inline: true,
});
Read more information about inline mode.
Inlite/distraction-free mode
TinyMCE 4
In TinyMCE 4, the distraction-free inlite mode was configured with the following settings:
tinymce.init({
  selector: "#mytextarea",
  inline: true,
  theme: "inlite",
});
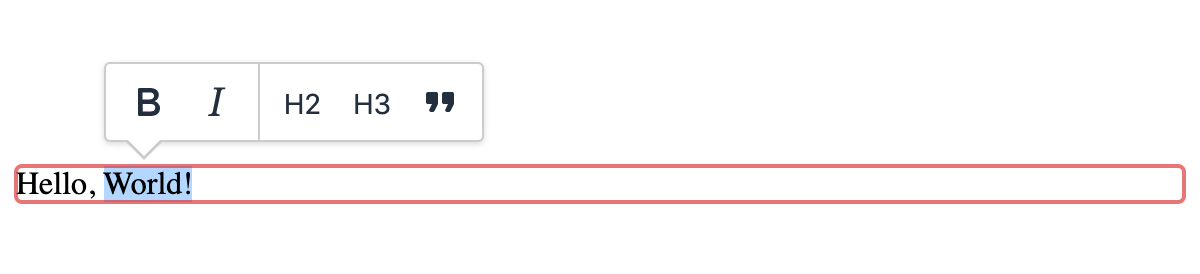
TinyMCE 5
In TinyMCE 5, the same distraction-free mode is configured with the new quickbars plugin. The following TinyMCE 5 configuration will replicate the same behavior as the default inlite configuration above:
tinymce.init({
  selector: "#mytextarea",
  inline: true,
  plugins: "quickbars",
  toolbar: false,
  menubar: false,
});
Note that the quickbars plugin allows for more flexibility - it can be used in the regular or inline modes, with or without the menu bar or toolbar.
It’s also important to note that if you have customized the inlite menu options using selection_toolbar or insert_toolbar, you’ll also need to change these to quickbars_selection_toolbar and quickbars_insert_toolbar, respectively.
Read more information about distraction-free mode.
Mobile mode
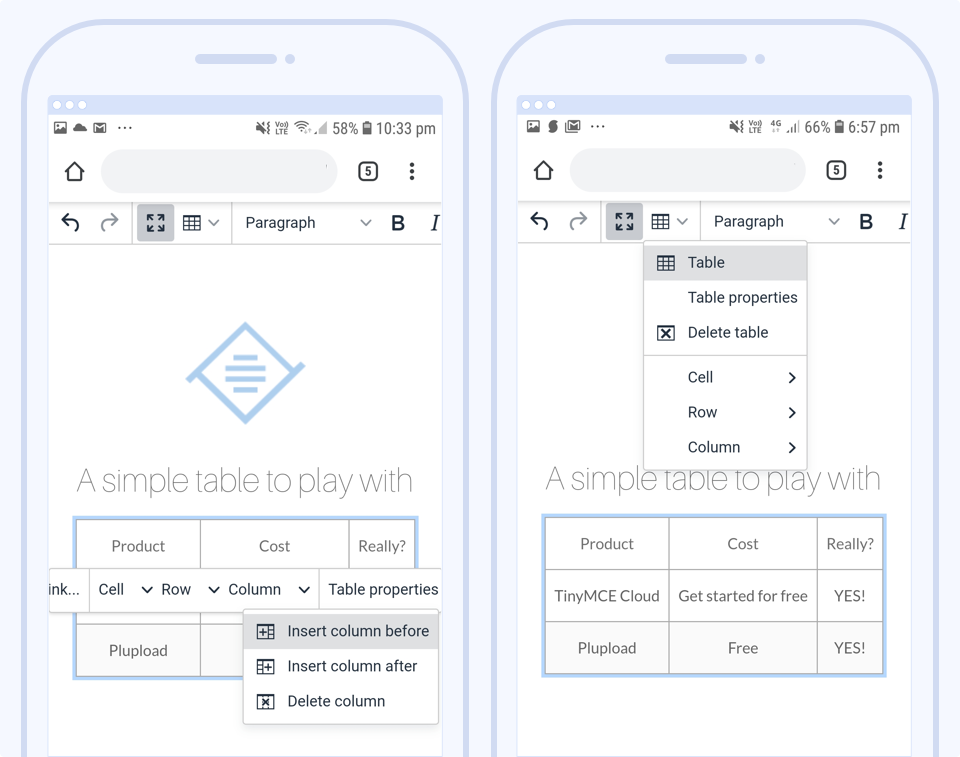
With the release of TinyMCE 5.1, came a complete mobile-first redesign of TinyMCE, significantly better than the previous mobile experience. With the responsive design, there is typically no need for a separate mobile option - the mobile UX is applied automatically to suit the device used - and almost all 50+ plugins are supported, compared to only three plugins previously. Read more about the features and benefits of TinyMCE mobile.
TinyMCE 4
In TinyMCE 4, the mobile experience was configured with a specific mobile option:
tinymce.init({
  selector: "#mytextarea",
  mobile: {
    theme: "mobile",
  },
});
TinyMCE 5
If you were previously using the mobile theme, we strongly recommend removing the mobile option from your configuration and trying the new, mobile-first design.
You can still use the mobile option to override the default mobile experience with your own specific settings if required (including reverting back to the legacy mobile theme - but with support for only the three plugins as before).
Read more about configuring TinyMCE mobile.
3. Consider core plugin changes
In TinyMCE 5, the contextmenu, textcolor, and colorpicker plugins are included in the core editor and do not need to be loaded explicitly using the plugins option.
If they remain in your list of loaded plugins, TinyMCE will only raise a warning. However, take note of the changes to their corresponding config options, shown below.
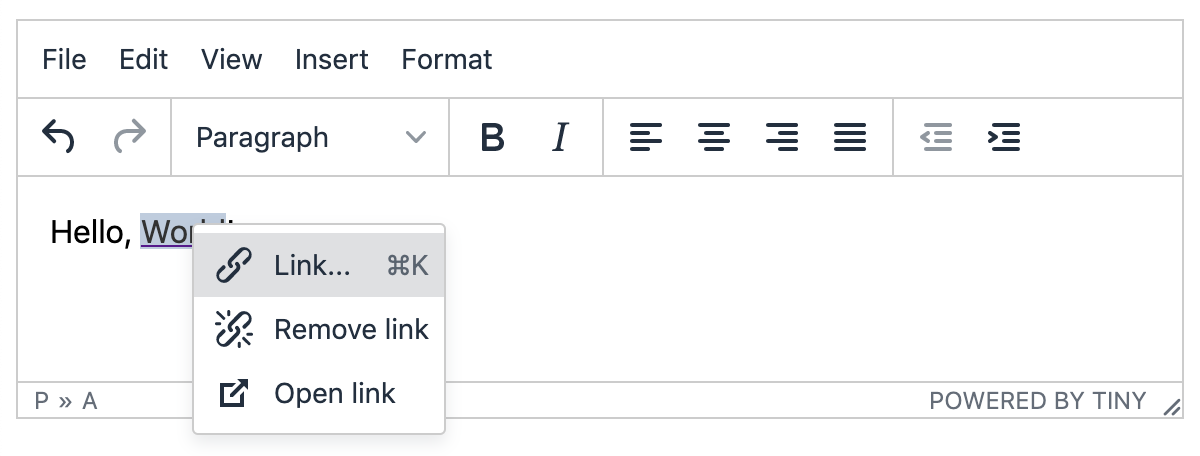
contextmenu
TinyMCE 4
In TinyMCE 4, the context menu was enabled by loading it as a plugin to support any plugins that made use of it, for example, the link plugin:
tinymce.init({
  selector: "#mytextarea",
  plugins: "link contextmenu",
});
TinyMCE 5
In TinyMCE 5, the context menu is included with the core editor and enabled by default when relevant plugins are loaded. To remove it, set it to false:
tinymce.init({
  selector: "#mytextarea",
  plugins: "link",
  contextmenu: false,
});
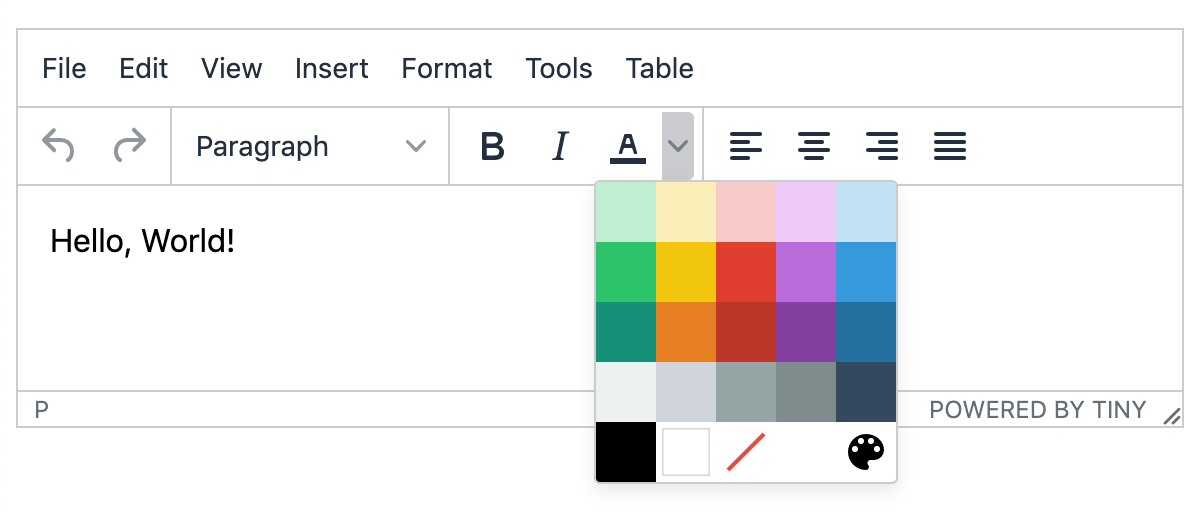
textcolor
TinyMCE 4
In TinyMCE 4, there were three options used to configure the color pallette - textcolor_cols, textcolor_rows, textcolor_map - for example:
tinymce.init({
  selector: "#mytextarea",
  plugins: "textcolor",
  toolbar: "forecolor",
  textcolor_cols: "3",
  textcolor_rows: "3",
  textcolor_map: [
    "993366",
    "Red violet",
    "FFFFFF",
    "White",
    "FF99CC",
    "Pink",
    "FFCC99",
    "Peach",
    "FFFF99",
    "Light yellow",
    "CCFFCC",
    "Pale green",
    "CCFFFF",
    "Pale cyan",
    "99CCFF",
    "Light sky blue",
    "CC99FF",
    "Plum",
  ],
});
TinyMCE 5
In TinyMCE 5, there are only two (renamed) options - color_cols and color_map - with the number of rows calculated automatically. For example, the following config is the version 5 equivalent:
tinymce.init({
  selector: "#mytextarea",
  toolbar: "forecolor",
  color_cols: "3",
  color_map: [
    "993366",
    "Red violet",
    "FFFFFF",
    "White",
    "FF99CC",
    "Pink",
    "FFCC99",
    "Peach",
    "FFFF99",
    "Light yellow",
    "CCFFCC",
    "Pale green",
    "CCFFFF",
    "Pale cyan",
    "99CCFF",
    "Light sky blue",
    "CC99FF",
    "Plum",
  ],
});
colorpicker
TinyMCE 4
In TinyMCE 4, the option to select a custom color from a color picker, when using the textcolor plugin, was configured by adding the colorpicker plugin:
tinymce.init({
  selector: "#mytextarea",
  plugins: "textcolor colorpicker",
  toolbar: "forecolor backcolor",
});
TinyMCE 5
In TinyMCE 5, the color picker is included with the core editor and enabled by default. It can be disabled using the new custom_colors option:
tinymce.init({
  selector: "#mytextarea",
  toolbar: "forecolor backcolor",
  custom_colors: false,
});
Other name changes
If you’re using the autoresize plugin:
autoresize_min_heightis nowmin_heightautoresize_max_heightis nowmax_height
Height and width settings have been removed from plugin dialogs, with the following options removed from these plugins:
codeplugin -code_dialog_heightandcode_dialog_widthcodesampleplugin -codesample_dialog_heightandcodesample_dialog_widthpreviewplugin -plugin_preview_heightandplugin_preview_widthtemplateplugin -template_popup_heightandtemplate_popup_width
4. Review any advanced configurations
If you are making use of advanced UI configuration methods and configuration settings, including custom UI components such as toolbar buttons, context toolbars, menu items, or dialogs, read more about the changes to UI components and configuration settings.
The API methods for registering UI components have moved. They are now part of tinymce.editor.ui.registry.
All inline style configurations have been removed in TinyMCE 5 in favor of modern CSS. This affects all TinyMCE 4 UI component configurations. Skins should be used for custom styling in TinyMCE 5.
What next?
For more information about migrating to TinyMCE, refer to the migration guide. If you’re migrating to the cloud from a self-hosted configuration, also refer to our cloud deployment guide.
Apply skins and icons from the most popular design systems, available with our skins and icon packs. Or design your own using our TinyMCE skin tool. More information about creating your own skin is available in our Tiny docs.
TinyMCE 5 comes with a simplified pricing option for our premium features (such as our most popular PowerPaste plugin) and access to support which may be helpful as you migrate. Start with a free 14-day trial.
Contact us for more assistance migrating to TinyMCE 5 or for more information about any of our premium plugins.