


While document storage and retrieval are essential, you also need to be careful you’re not missing important, some would say small, details. When planning how your Document Management System (DMS) works (and this is true whether you’re building an internal DMS or you have a DMS app in the planning phase) there’s one component that can let everyone down.
Unless you have a great writing experience, no one is happy.
It lies at the very heart of document management – a rich text editor – and thankfully it’s a component that’s easy to upgrade and integrate. By improving the usability of your system and giving writers a clean, familiar interface (just like MS Word and GDocs) it’s a support element your DMS can’t be without.
Here’s why and how it can be incorporated:
- Rapid customization: TinyMCE’s code is customizable, so it doesn’t require a huge investment of time = save developer effort and hours.
- Diverse features: With plugins like PowerPaste, Exports, Advanced Media Embed, Print, AutoSave, and Word Count, your writers can draft, modify, and publish every type of document they need (even with emoji if you need).
- Fast integration: Using Tiny Cloud, you can activate TinyMCE in your project within minutes.
This article explains how to quickly get started using TinyMCE in a DMS.
What you need to get started
First, you need an API key. This key gives you free access to TinyMCE premium plugins for 14 days. There are two links to follow.
- Navigate to the pricing plans for TinyMCE. Choose the plan that fits your app.
- Go directly to the Get-tiny sign up page to get your FREE API key
Enter the information you would like for your account, and select Sign up. When you arrive at the dashboard screen, your API key is at the top center of the page.
TinyMCE Cloud requires an API key to work. Otherwise, the editor changes into read-only mode. Adding your API key also prevents other warning messages, such as the following:
This domain is not registered with Tiny Cloud. Please see the quick start guide or create an accountAdding your API key to your app or project removes those warning messages. Here’s how to do that.
Set up TinyMCE Cloud
This video outlines the process:
The following configuration is a demo you can follow, to try out TinyMCE in a DMS.
-
Create an index.html file
- Add the HTML boilerplate content including the head and body tags
-
With your file open, in the head section, add script tags, and reference TinyMCE Cloud through a CDN link within the script tags. This is what the link looks like:
https://cdn.tiny.cloud/1/your-api-key/tinymce/6/tinymce.min.jsAnd this is where it goes in the index.html file:
<script
  src="https://cdn.tiny.cloud/1/your-api-key/tinymce/6/tinymce.min.js"
  referrerpolicy="origin"
></script>;
-
Add another pair of script tags, add the following JavaScript. It’s the tinymce.init method for controlling TinyMCE.
  <script>
    tinymce.init({
      selector: "#editor",
    });
</script>-
In the body of your index.html file, add textarea tags, and then save the document. These textarea tags give TinyMCE something to act on.
-
Test run the index.html file by opening it in your browser, or use a local server command with Python or PHP:
This means you’ve successfully tested TinyMCE (Nice work!). It’s time, now, to show you how TinyMCE works within your DMS.
Configure TinyMCE for a versatile DMS
The first change to make is some additional configuration added to the tinymce.init script.
-
Include lines to change the icon and toolbar appearance. Also include the following CSS style content for TinyMCE to create a DMS editor:
<script>
    tinymce.init({
      selector: "#editor",
      plugins: "advcode advlist advtable anchor autocorrect autolink autosave casechange charmap checklist codesample directionality editimage emoticons export footnotes formatpainter help image insertdatetime link linkchecker lists media mediaembed mergetags nonbreaking pagebreak permanentpen powerpaste searchreplace table tableofcontents tinycomments tinymcespellchecker visualblocks visualchars wordcount",

      toolbar: "undo redo spellcheckdialog | blocks fontfamily fontsize | bold italic underline forecolor backcolor | link image addcomment showcomments  | align lineheight checklist bullist numlist | indent outdent | removeformat",

      spellchecker_active: true,
      spellchecker_language: 'en_US',
      spellchecker_languages: 'English (United States)=en_US,English (United Kingdom)=en_GB,Danish=da,French=fr,German=de,Italian=it,Polish=pl,Spanish=es,Swedish=sv',

      tinycomments_mode: 'embedded',
      tinycomments_author: 'rmartel',
      tinycomments_author_name: 'Rosalina Martel',
      tinycomments_author_avatar: 'https://www.tiny.cloud/images/avatars/avatar-RosalinaMartel.jpg',

      sidebar_show: 'showcomments',

      mergetags_list: [
        {
          value: 'Document.Title',
          title: 'Document Title'
        },
        {
          value: 'Publish.Date',
          title: 'Publish Date'
        },
        {
          value: 'Author.Name',
          title: 'Author Name'
        }
      ],

      content_style: `
        body {
          background: #fff;
        }
        @media (min-width: 840px) {
          html {
            background: #eceef4;
            min-height: 100%;
            padding: 0 .5rem;
          }
          body {
            background-color: #fff;
            box-shadow: 0 0 4px rgba(0, 0, 0, .15);
            box-sizing: border-box;
            margin: 1rem auto 0;
            max-width: 820px;
            min-height: calc(100vh - 1rem);
            padding:4rem 6rem 6rem 6rem;
          }
        }
      `,
    });
</script>-
Next, for the DMS framework around the rich text editor on the page, include style tags in your index.html head content:
  <style>
    body {
      margin: 4rem auto;
      padding: 0 2rem;
      background-color: #f9f9fb;
    }

    main {
      width: 100%;
    }
</style>-
Save and reload the demo. You should see the beginnings of TinyMCE’s DMS abilities in your browser:
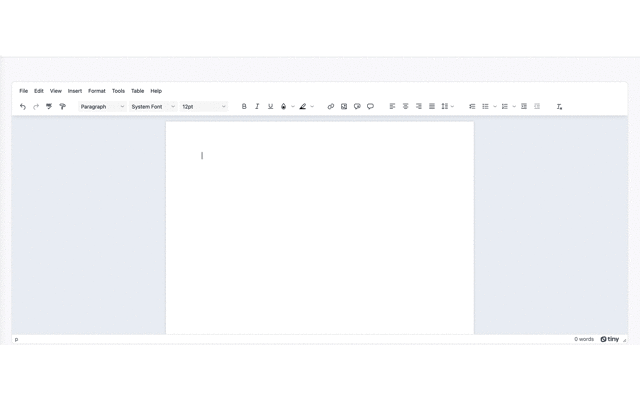
TinyMCE with DMS content in action
With TinyMCE configured, add some example documentation to see the DMS configuration in action.
This content appears on the TinyMCE DMS Editor page.
-
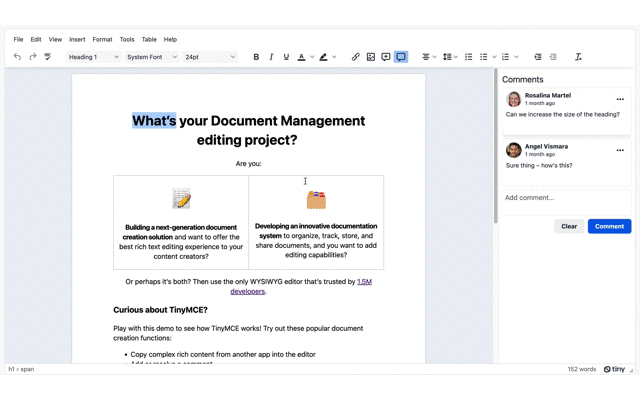
In the body content of your index.html file there should be textarea tags from the previous steps. Add a heading and paragraph inside the textarea tags:
<h1 style="text-align: center;"><span class="mce-annotation tox-comment" data-mce-annotation-uid="mce-conversation_95621585221662750341026" data-mce-annotation="tinycomments">What’s</span> your Document Management editing project? </h1>
<p style="text-align: center;">Are you:</p>-
Include an HTML table in the demo:
<table style="border-collapse: collapse; width: 100%;" border="1"><colgroup> <col style="width: 50%;"> <col style="width: 50%;"> </colgroup>
        <tbody>
          <tr>
            <td style="text-align: center;"><strong><span style="font-size: 36pt;">📝</span><br><br>Building a next-generation document creation solution</strong> and want to offer the best rich text editing experience to your content creators?</td>
            <td>
              <p style="text-align: center;"><span style="font-size: 36pt;"><strong>🗂️</strong></span></p>
              <p style="text-align: center;"><strong>Developing an innovative documentation system</strong> to organize, track, store, and share documents, and you want to add editing capabilities?</p>
            </td>
          </tr>
        </tbody>
</table>-
Add the additional paragraphs, and an unordered list:
<p style="text-align: center;">Or perhaps it’s both? Then use the only WYSIWYG editor that’s trusted by <a href="<a href="https://tiny.cloud/">https://tiny.cloud</a>" target="_blank" rel="noopener">1.5M developers</a>.</p>
<h3>Curious about TinyMCE?</h3>
<p>Play with this demo to see how TinyMCE works! Try out these popular document creation functions:</p>
<ul>
<li>Copy complex rich content from another app into the editor</li>
<li>Add or resolve a comment</li>
<li>Drag-and-drop an image from your computer, then edit it within TinyMCE</li>
<li>Insert {{dynamic.content}} into the document using Merge Tags (start typing "{{")</li>
<li>Any other functionality that you would expect in a document editor!</li>
</ul>
<p>Watch the video below to see how easy it is to get started (embedded in one click using <em>Enhanced Media Embed</em>):</p>
<div style="left: 0px; width: 100%; height: 0px; position: relative; padding-bottom: 56.25%; max-width: 650px;" data-ephox-embed-iri="<a href="https://www.youtube.com/watch?v=_Pp1xnhQqec">https://www.youtube.com/watch?v=_Pp1xnhQqec</a>"><iframe style="top: 0px; left: 0px; width: 100%; height: 100%; position: absolute; border: 0px;" src="<a href="https://www.youtube.com/embed/_Pp1xnhQqec?rel=0&controls=0">https://www.youtube.com/embed/_Pp1xnhQqec?rel=0&controls=0</a>" scrolling="no" allowfullscreen="allowfullscreen"></iframe></div><!--tinycomments|2.1|data:application/json;base64,eyJtY2UtY29udmVyc2F0aW9uXzk1NjIxNTg1MjIxNjYyNzUwMzQxMDI2Ijp7InVpZCI6Im1jZS1jb252ZXJzYXRpb25fOTU2MjE1ODUyMjE2NjI3NTAzNDEwMjYiLCJjb21tZW50cyI6W3sidWlkIjoibWNlLWNvbnZlcnNhdGlvbl85NTYyMTU4NTIyMTY2Mjc1MDM0MTAyNiIsImF1dGhvciI6InJtYXJ0ZWwiLCJhdXRob3JOYW1lIjoiUm9zYWxpbmEgTWFydGVsIiwiYXV0aG9yQXZhdGFyIjoiaHR0cHM6Ly93d3cudGlueS5jbG91ZC9pbWFnZXMvYXZhdGFycy9hdmF0YXItUm9zYWxpbmFNYXJ0ZWwuanBnIiwiY29udGVudCI6IkNhbiB3ZSBpbmNyZWFzZSB0aGUgc2l6ZSBvZiB0aGUgaGVhZGluZz8iLCJjcmVhdGVkQXQiOiIyMDIyLTA5LTA5VDE5OjA1OjQxLjAyNVoiLCJtb2RpZmllZEF0IjoiMjAyMi0wOS0wOVQxOTowNTo0MS4wMjVaIn0seyJ1aWQiOiJtY2UtcmVwbHlfNzk5MTUxODA5MjE2NjI3NTA1NTM5MjYiLCJhdXRob3IiOiJhdmlzbWFyYSIsImF1dGhvck5hbWUiOiJBbmdlbCBWaXNtYXJhIiwiYXV0aG9yQXZhdGFyIjoiaHR0cHM6Ly93d3cudGlueS5jbG91ZC9pbWFnZXMvYXZhdGFycy9hdmF0YXItQW5nZWxWaXNtYXJhLmpwZyIsImNvbnRlbnQiOiJTdXJlIHRoaW5nIOKAkyBob3cncyB0aGlzPyIsImNyZWF0ZWRBdCI6IjIwMjItMDktMDlUMTk6MDk6MTMuOTI2WiIsIm1vZGlmaWVkQXQiOiIyMDIyLTA5LTA5VDE5OjA5OjEzLjkyNloifV19fQ==-->
</textarea>-
Save and reload the DMS config. With the example contents added inside the textarea, the ability of TinyMCE to organize and format your DMS content becomes much clearer:
The next steps for your DMS editor
Check out our DMS editor page for further information, and remember that your FREE API key grants free access to Premium Plugin functionality for 14 days, after which you need to either choose a Premium plan or remove the TinyMCE premium features.
Contact us for more information if you have any questions on adding TinyMCE to your DMS app. Premium customers and anyone on a 14-day free trial has access to our enterprise-grade professional support team.


