


To many, Artificial Intelligence (AI) seems to be a new technology. But it’s been quietly working in the background for years – in the form of spam filters for email, automatic email categorization, and smart personal assistants such as Cortana, Siri, and Autocompletion in content writing. Recently though, ChatGPT has had the most attention. If you’re aiming to add an AI assistant to your application, it shouldn’t take a lot of time, energy, or a spike in your current sprint to sort out a ChatGPT integration at some point in your application. Here’s the answer...
So you’ve decided to add AI to make your job easier (or satisfy your customer’s demands), but there’s the small annoyance of switching tabs or windows to access it. That’s not helpful, nor useful. The answer is to add the AI into the center of content creation – the WYSIWYG – with a new interface overlay built directly into the editor. Brilliant!
That’s the true power of the new TinyMCE AI Assistant (Premium) plugin. It does more than just add ChatGPT to the editor, it makes the AI assistant useful to content creators.
Read on to find out how to:
- Set up the TinyMCE AI Assistant (Premium) plugin
- Test out the plugin in development
- Configure a demo implementation that provides security following OpenAI best practices
Table of contents
What is an artificial general intelligence system?
How to integrate ChatGPT with TinyMCE
Understanding ChatGPT parameters
Why use TinyMCE's AI Assistant?
Configure the OpenAI API key securely
A basic setup in a development environment
Understanding the AI Assistant toolbar buttons
Server-side environments for the endpoint
The server-side endpoint setup
Flows of information between the app and endpoints
A server-side setup for the TinyMCE AI Assistant
Creating pre-written prompts with the ai_shortcuts option
What to try next with the AI Assistant plugin
What is Open AI?
They’re a research and development organization founded on December 11th, 2015, that works on creating artificial general intelligence systems. Their charter explains more about their leadership and long-term safety plans.
What is an artificial general intelligence system?
Open AI defines artificial general intelligence as an autonomous system that processes language. The language processing systems can generate text, classify it, and summarize text accurately. These systems are useful for performing tasks, and following the Open AI primary mission, the intent is to support people in their work. Their AI systems are built to be safe, and to be helpful.
What is ChatGPT?
ChatGPT – where GPT stands for “generative pre-trained transformer” – is a type of artificial general intelligence system called a transformer model. ChatGPT can interpret language, and respond with useful information.
As a Large Language Model (LLM) ChatGPT can understand natural language. While a complete explanation of what a transformer model is lies beyond the scope of this tutorial, the idea behind this form of Natural Language Processing (NLP) is a concept called “self-attention”. The NLP looks for similarities between words in sentences of fixed length. It then writes its own sentences by putting words that are more likely to be connected, into a sequence.
You can read more about the research that OpenAI is working on in their index of articles.
How does ChatGPT work?
ChatGPT works by interpreting natural language given to it in the form of a text prompt, and then returning useful information.
OpenAI trained ChatGPT to understand natural language by making use of “tokens” (words that have specific weight and meaning when grouped with other words). It then searches through different knowledge domains for matching answers. That knowledge comes from combing through all the available information online (whether it is verified, and fact-checked, or not).
However, that ‘training content’ only includes information published online up to 2021 (brought up in the OpenAI help documents) and is by no means a comprehensive search of the internet. Because of this, there’s no guarantee that ChatGPT is:
- Delivering accurate information, or
- Interpreting the language “tokens” correctly.
Fact checking and interpretation are still vital to a ChatGPT integration. This falls under a larger ethical discussion that’s beyond this tutorial’s scope, but it’s an important one to have – especially in light of security, brand reputation, and the trustworthiness of AI-generated content.
How to integrate ChatGPT with TinyMCE
Prerequisites
There are several must-haves – experience, keys, and tools to secure before getting started:
- An OpenAI API key
- A TinyMCE API key
- A text editor
- Command line access
- Experience with JavaScript and HTML for applications
Understanding ChatGPT parameters
It's important to understand how to configure the JavaScript that supports prompts sent to ChatGPT completion endpoints. The request parameters need to follow a specific configuration format. Here's the specific parameter pattern:
- Model – the specific AI model, (or algorithm) that’s trained to interpret the meaning of data and return a logical response when prompted.
- Prompt – the actual request to ChatGPT in a string format.
- Temperature – this integer indicates how high the random factor in the ChatGPT algorithm should be (a range of 0-2), with lower numbers in the range creating less random and more deterministic responses.
- Max Tokens – this limits the number of text tokens ChatGPT returns to the person asking the question. There are limits on tokens, so lower numbers can potentially support more questions.
And here is an example:
const ChatGPT = {
  model: "text-davinci-003",
  prompt: selection,
  temperature: 0,
  max_tokens: 70,
};
Why use TinyMCE's AI Assistant?
There’s two key reasons to enable the TinyMCE AI Assistant over another plugin:
- It creates a familiar UI for content creators who are working within your app.
- There's no tab or window switching whatsoever, it all happens in the editor UI.
Pre-written prompts also make the AI Assistant more useful. When configured with the ai_shortcuts option, you can quickly set up a set of prompts that are available for reuse, and can be applied to content in the TinyMCE text area.
NOTE: The TinyMCE AI Assistant plugin is available as an optional add-on to customers with a Premium or Custom pricing plan. You can also try the plugin when you sign up for a FREE TinyMCE API key with free trial. The API key comes with 14 days free trial access to all our Premium plugins, like the AI Assistant.
Using the AI Assistant plugin brings with it a number of other advantages compared to an AI integration built from scratch:
- Automatically interprets messages from OpenAI, which are sent in JSON format, saving the need to include JSON parsing content into the configuration
- The UI window holds prompt content even when customers switch tabs – another useful feature you don't need to configure yourself
- The plugin isn't limited to ChatGPT. It's designed to fit into and integrate with different AI backends to suit what you need
- Providing pre-written prompts helps non-AI or AI beginner users leverage what may otherwise be unusable technology to them
Then there's the important matter of security. Setting up a server-side proxy with the AI Assistant plugin creates a more secure connection. Find out more in the following sections on configuring a server-side environment. The following section demonstrates how to set up the AI Assistant plugin in a development environment for testing.
Configure the OpenAI API key securely
The first step when configuring the AI Assistant plugin, one that's important for security, is setting up your OpenAI API key as an environment variable. You can make use of open source frameworks such as "Oh my BASH" and "Oh my ZSH" to configure your bash_profile.
This is important to set early in development so that your AI Assistant implementation so you can access the API key later (when testing a server-side proxy for more security, for example). An example configuration:
export OPENAI_API_Key=<your-API-key>A basic setup in a development environment
It's not recommended to deploy the AI Assistant plugin without a server-side proxy in place to protect your API key, but the following steps introduces the plugin to a development environment for testing and experimentation:
-
Start with a TinyMCE configuration. Add the following to an index.html file in your development environment:
<!DOCTYPE html>
<html lang="en">
<head>
<meta charset="UTF-8">
<meta name="viewport" content="width=device-width, initial-scale=1.0">
<title>TinyMCE AI Assistant</title>
<script src="https://cdn.tiny.cloud/1/no-api-key/tinymce/6/tinymce.min.js" referrerpolicy="origin"></script>
<script>
tinymce.init({
selector: 'textarea',
plugins: 'advtable powerpaste casechange searchreplace autolink advcode image link codesample table tableofcontents insertdatetime advlist lists checklist wordcount tinymcespellchecker',
toolbar: 'undo redo print spellcheckdialog formatpainter | bold italic underline forecolor backcolor | link | alignleft aligncenter alignright alignjustify lineheight | checklist bullist numlist | removeformat',
height: '700px'
});
</script>
</head>
<body>
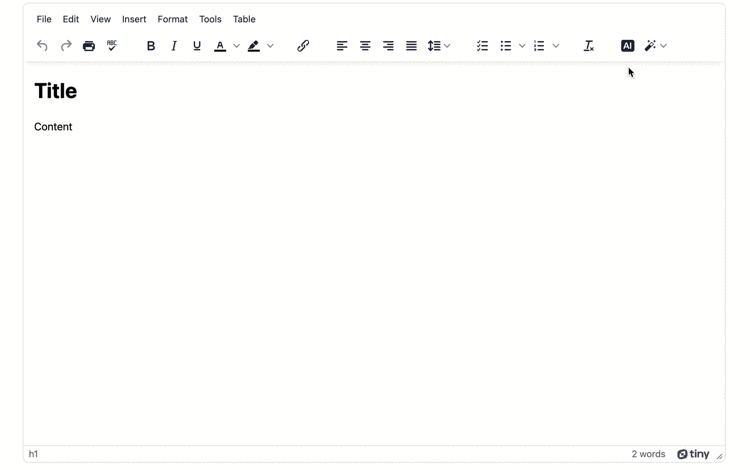
<textarea id="editor">
<h1>Title</h1>
<p>Content</p>
</textarea>
</body>
</html>-
Change the "no-api-key" string with your API key, and add the AI Assistant plugin to the TinyMCE plugins list, and the two toolbar options to the toolbar list, which are aidialog and aishortcuts:
tinymce.init({
        selector: 'textarea',
        plugins: 'ai advtable powerpaste casechange searchreplace autolink advcode image link codesample table  tableofcontents insertdatetime advlist lists checklist wordcount tinymcespellchecker',
toolbar: 'undo redo print spellcheckdialog formatpainter | bold italic underline forecolor backcolor | link | alignleft aligncenter alignright alignjustify lineheight | checklist bullist numlist | removeformat | aidialog aishortcuts',NOTE: Since the AI Assistant plugin was built with flexibility in mind, it's possible to use the ai_shortcuts option to configure pre-written prompts. Instructions on this customization are detailed in the upcoming section.
-
Create a constant to configure the API key, referencing the OpenAI key, and place it above the TinyMCE init script:
WARNING: The basic configuration contains the OpenAI API key coded into the same files that make up the front end of the demo app. This is not best practice for API key security. This demo is not suitable for production for this reason.
const api_key = <OPENAI_API_KEY>

tinymce.init({-
Add the ai_request promise to the TinyMCE init script, which includes the OpenAI parameters:
   tinymce.init({
        selector: 'textarea',
        ...//content omitted for brevity
        height: '700px',
                ai_request: (request, respondWith) => {
                    const openAiOptions = {
                        method: 'POST',
                        headers: {
                            'Content-Type': 'application/json',
                            'Authorization': `Bearer ${api_key}`
                        },
                        body: JSON.stringify(
                            {
                                model: 'gpt-3.5-turbo',
                                temperature: 0.7,
                                max_tokens: 800,
                                messages: [
                                    {
                                        role: 'user',
                                        content: request.prompt
                                    }
                                ]
                            }
                        )
};-
Include the following JavaScript to handle the responses from the OpenAI completions endpoint:
           };
            respondWith.string((signal) => window.fetch('https://api.openai.com/v1/chat/completions', {
                        signal,
                        ... openAiOptions
                    }).then(async (response) => {
                        if (response.ok) {
                            return response.json();
                        } else {
                            return Promise.reject(`Failed to communicate with the OpenAI API. ${
                                await response.text()
                            }`);
                        }
                    }).then((data) => data.error ? Promise.reject(`Failed to communicate with the ChatGPT API because of ${
                        data.error.type
                    } error: ${
                        data.error.message
                    }`) : data).then((data) =>
                        data ?. choices[0] ?. message ?. content ?. trim()));
}-
Save the changes, and then test out the AI Assistant plugin by opening the index.html file in the browser, or using a php localhost or a python localhost, to test the AI Assistant plugin:
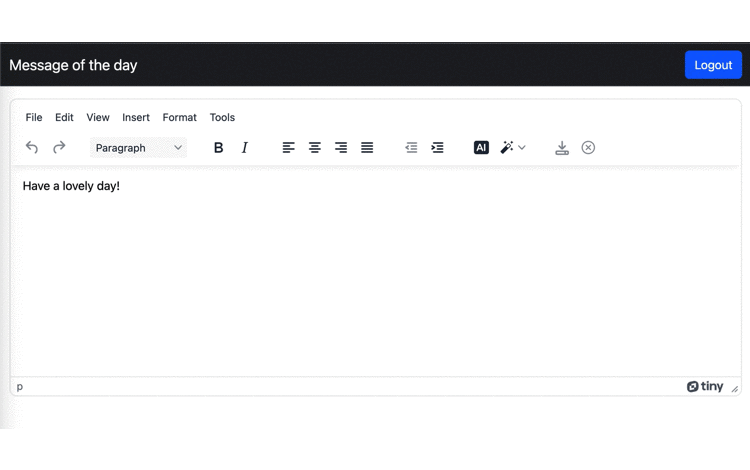
You can see in this development demo that the familiar UI provides makes interacting with the AI Assistant easier. There are no tab or window changes away from the rich text editor. But while the UI is familiar, there are security concerns to answer.
Understanding the AI Assistant toolbar buttons
There are two main toolbar buttons, one for AI queries for writing new content, and a second for the analysis of existing content in the text area. These are configured by adding the ai_request and ai_shortcuts options to the TinyMCE init script (as demonstrated in the preceding demo).
The ai_shortcuts option comes with several pre-written prompts installed and ready for content creators. These default prompts can be switched off by setting the ai_shortcuts option to false or as an empty array with []. You can also configure your own pre-written prompts, which is demonstrated in the following sections.
Security considerations
The major security concern is the Open AI API key. In the basic configuration, it's hard coded into the application. There is a second security concern: any customer logged into the app can send requests. Without a log-in barrier with credentials, there is no control mechanism for user-level authorization.
Taking a close look at a reference implementation of the AI Assistant server-side proxy, provides solutions for security. That's what's explained in the next section.
Server-side environments for the endpoint
There are a number of different options available for the server-side proxy in your app. For instance, there are different options:
The server-side proxy in the following section makes use of Envoy combined with Open Policy Agent (OPA). The OPA filters requests that flow from the AI Assistant app to server-side proxy and back.
The server-side endpoint setup
The example implementation for a server-side proxy makes use of Docker and Docker Compose for some container images, and to bundle all the files for the server-side proxy together. To install Docker, the documentation identified the different methods based on your operating system:
- MacOS - a native application with sandbox security
- Windows - provides all needed Docker tools
- Linux - runs a virtual machine and creates a custom docker context on startup
Docker compose comes included with Docker when it's installed. Note that there are two versions available: version 1 of Docker Compose is not integrated into Docker, but version 2 is available, and has a command syntax without any dashes between the Docker commands (e.g. docker compose). You may need to migrate to version 2.
Flows of information between the app and endpoints
To understand the security advantages of the server-side configuration, it's important to look closely at the flows of requests and responses:
- Your app connects to the proxy, which then connects to the Authorization endpoint, sending the AI prompt through – the endpoint responds with either one of two codes: 200 OK if the Chat request is authorized, or 403 to deny the request.
- If the Authorization endpoint is satisfied, the proxy then connects to the OpenAI Moderation endpoint, which responds to the prompt with one of two codes: 200 if the prompt passes moderation, or 400 if it fails.
- If Moderation passes, the proxy then sends the prompt on to the OpenAI Chat Completions endpoint – the completion is handled by the proxy, and then sends it back to the App, where it is streamed to the TinyMCE AI Assistant interface.
You can see a diagram of the flows involved in the documentation written for the server-side proxy reference repository.
This structure meets the recommended best practices promoted by OpenAI – it keeps the API key out of the app source code, and out of client side interactions. It accounts for authorization, where content creators without an account cannot send a prompt through.
Looking more closely at the reference implementation shows further security refinements, and a complete deep dive is beyond the scope of this article, but a key point is the logging. The log.rego file ensures that any sensitive information isn't logged. It's another example of how the TinyMCE AI Assistant plugin provides best practice security.
A server-side setup for the TinyMCE AI Assistant
Setting up the reference implementation is straightforward:
-
Navigate to the implementation repository, and clone or save the files to your environment in a .zip format.
-
Unzip the collected files if accessed in .zip format, and using the command line interface of your choice, change into the implementation directory.
cd openai-proxy-reference-implementation/-
Check on the directory structure by listing the contents. A standard Docker app makes use of a src directory for presenting the application (usually including a Dockerfile) and a spc folder where configurations that control the project. The reference implementation makes use of an example-app folder for the application presentation, and a config folder that controls the reference-implementation:
ls - la;
.
..
.DS_Store
.gitignore
LICENSE.TXT
README.md
config
docker-compose.yaml
docs
example-appAt this point you can use the Docker command to start the service-side proxy and explore it:
docker compose upwhich returns the following to indicated that the endpoints are active:
✔ Network openai-proxy-reference-implementation_default          Created                                                                                                           0.1s
✔ Container openai-proxy-reference-implementation-example-app-1  Created                                                                                                           0.1s
✔ Container openai-proxy-reference-implementation-opa-1          Created                                                                                                           0.1s
✔ Container openai-proxy-reference-implementation-envoy-1        Created                                                                                                           0.1s

Attaching to openai-proxy-reference-implementation-envoy-1, openai-proxy-reference-implementation-example-app-1, openai-proxy-reference-implementation-opa-1-
Open the http://localhost:3000/ address in the browser, and log in to the reference implementation demo app using "admin" as the credentials:
You can open the developer console in your browser of choice, and check on the Network tab to see the flows between the server-side proxy and the OpenAI endpoints in action. The previous steps show how to get started with the AI Assistant plugin, and the next steps explain how to make adjustments to the AI Assistant plugin to configure more specific pre-written prompts.
Creating pre-written prompts with the ai_shortcuts option
Pre-written prompts are a valuable part of the TinyMCE AI Assistant plugin. There are several prompts available in the ai_shortcuts option, or you can configure more pre-written prompts that fit your specific needs. Here's how it's done, using the development environment demo from the previous steps as an example:
-
Open the index.html file in your text editor.
-
Adjust the TinyMCE init script to include the following AI dialog prompt and shortcut:
           tinymce.init({
                selector: '#editor',
                plugins: 'ai advtable powerpaste casechange searchreplace autolink advcode image link codesample table  tableofcontents insertdatetime advlist lists checklist wordcount tinymcespellchecker',
                toolbar: 'undo redo print spellcheckdialog formatpainter | bold italic underline forecolor backcolor | link | alignleft aligncenter alignright alignjustify lineheight | checklist bullist numlist | removeformat | aidialog aishortcuts',
                height: '700px',
                ai_shortcuts: [
                     { title: 'Screenplay', prompt: 'Convert this to screenplay format.' },
                     { title: 'Stage play', prompt: 'Convert this to stage play format.' },
                     { title: 'Radio play', prompt: 'Convert this to radio play format.' },
                     { title: 'Classical', subprompts:
                        [
                          { title: 'Dialogue', prompt: 'Convert this to a Socratic dialogue.' },
                          { title: 'Homeric', prompt: 'Convert this to a Classical Epic.' },
                        ]
                      }
],-
Save the changes
-
Open the demo index.html again in the browser, using the localhost services such as PHP or Python if you need, and check on the newly created pre-written prompts:
What to try next with the AI Assistant plugin
While this tutorial has explained the basic setup, and demonstrated how to get started testing a more secure installation with the reference implementation of a server-side proxy, this is only the start of what you can start building with an AI Assistant plugin configured directly into the WYSIWYG. TinyMCE provides a wealth of useful plugins that you can also incorporate into your app's rich text editor for a more useful experience:
- The Advanced Templates plugin for efficient document building
- Automated checks for accessible content with the Accessibility Checker plugin
- Spell Checker Pro for comprehensive spell checking across different languages
You can even explore and experiment with the API methods available to activate TinyMCE editor options in response to events as needed. If you're interested in exploring more with the TinyMCE AI Assistant (Premium) plugin, get in touch with our team today.


