


When you're building with Bootstrap, image uploads aren't an extra perk. They’re a critical part of the content experience for many different types of web applications. For a publication that needs images in every post, a property management company receiving images from tenants who put in a maintenance request, an ecommerce marketplace where users sell their items, or countless other applications, image uploads must be quick and easy.
If you’re building a publishing platform, property management CRM, or something else with Bootstrap, you’ll need to make images easy and fast for users to upload. You don’t have time to spend developing a system to handle all of this. Instead you can use a robust rich text editor that is combined with a high-quality image optimization solution: TinyMCE.
What is Bootstrap and why should you use it?
Bootstrap is a popular front-end framework that’s been around for nearly 15 years and is used by 15.8% of websites. Bootstrap stands out because of its mobile-first approach, and a library of CSS components ready to go. It’s powered by JavaScript, and made for building large applications quickly. Bootstrap also supports all major browsers and performs CSS normalization to avoid issues related to browser settings. It’s a great framework for creating a consistent experience when you’re building a web app.
What’s Image Optimizer and why should you use it?
TinyMCE’s Image Optimizer, powered by Uploadcare, is a feature that automates responsive image handling and performance optimization securely, right inside the editor. It compresses and reformats images on upload, generates srcset attributes for device-specific delivery, and serves assets through Uploadcare’s secure CDN.
When it comes to image uploads, Image Optimizer streamlines the process for users of your application. Using APIs or user-friendly file uploaders, the platform lets you accept files like user-generated images and other files safely, simplifying and accelerating uploads with a CDN and multipart uploading for large images.
You’ll also get additional functionality beyond fast and secure image uploads. Your application can offer built-in editing options like cropping, filters, and non-destructive adjustments that can be reverted at any time, without additional coding by you and your team. It’s designed to make media workflows much easier, reduce load times for application and website users, and keep images sharp on any device.
Build a Bootstrap blog submission page with Image Optimizer
If you’re using TinyMCE in your Bootstrap app already and want to try out Image Optimizer inside the RTE (Rich Text Editor), this guide is for you. Let’s take a look at the process for adding Image Optimizer to TinyMCE on a demo Bootstrap blog submission page.
Prerequisites
To walk through this guide, you’ll need a couple of things:
- A TinyMCE API key: You should already have an API key with your TinyMCE account, which you can find on the Integrate TinyMCE page under My Account.
- Uploadcare Account: If you don’t have an Uploadcare account yet, reach out to your TinyMCE Customer Success Manager, and they’ll help you get one.
Step one: Create an index.html file
To get started, you’ll create an index.html with a basic page setup that’s made for mobile responsiveness:
<!doctype html>
<html lang="en">
  <head>
    <meta charset="utf-8">
    <meta name="viewport" content="width=device-width, initial-scale=1">
    <title>Bootstrap + TinyMCE</title>
  </head>
  <body>
  </body>
</html>Step two: Adding Bootstrap to index.html
Now that you have an index.html file to work with, add Bootstrap’s CSS to the <head> and JavaScript for dropdowns, tooltips, and popovers before the closing </body> tag. Here’s what they look like on their own:
Bootstrap CSS
<link href="https://cdn.jsdelivr.net/npm/bootstrap@5.3.7/dist/css/bootstrap.min.css" rel="stylesheet" integrity="sha384-LN+7fdVzj6u52u30Kp6M/trliBMCMKTyK833zpbD+pXdCLuTusPj697FH4R/5mcr" crossorigin="anonymous">Bootstrap’s JavaScript bundle
<script src="https://cdn.jsdelivr.net/npm/bootstrap@5.3.7/dist/js/bootstrap.bundle.min.js" integrity="sha384-ndDqU0Gzau9qJ1lfW4pNLlhNTkCfHzAVBReH9diLvGRem5+R9g2FzA8ZGN954O5Q" crossorigin="anonymous"></script>And here’s how it looks all together in the index.html file:
<!doctype html>
<html lang="en">
  <head>
    <meta charset="utf-8">
    <meta name="viewport" content="width=device-width, initial-scale=1">
    <title>Bootstrap + TinyMCE</title>
    <link href="https://cdn.jsdelivr.net/npm/bootstrap@5.3.7/dist/css/bootstrap.min.css" rel="stylesheet" integrity="sha384-LN+7fdVzj6u52u30Kp6M/trliBMCMKTyK833zpbD+pXdCLuTusPj697FH4R/5mcr" crossorigin="anonymous">
  </head>
  <body>
    <script src="https://cdn.jsdelivr.net/npm/bootstrap@5.3.7/dist/js/bootstrap.bundle.min.js" integrity="sha384-ndDqU0Gzau9qJ1lfW4pNLlhNTkCfHzAVBReH9diLvGRem5+R9g2FzA8ZGN954O5Q" crossorigin="anonymous"></script>
  </body>
</html>Now you have an HTML page with Bootstrap to create a blog submission page.
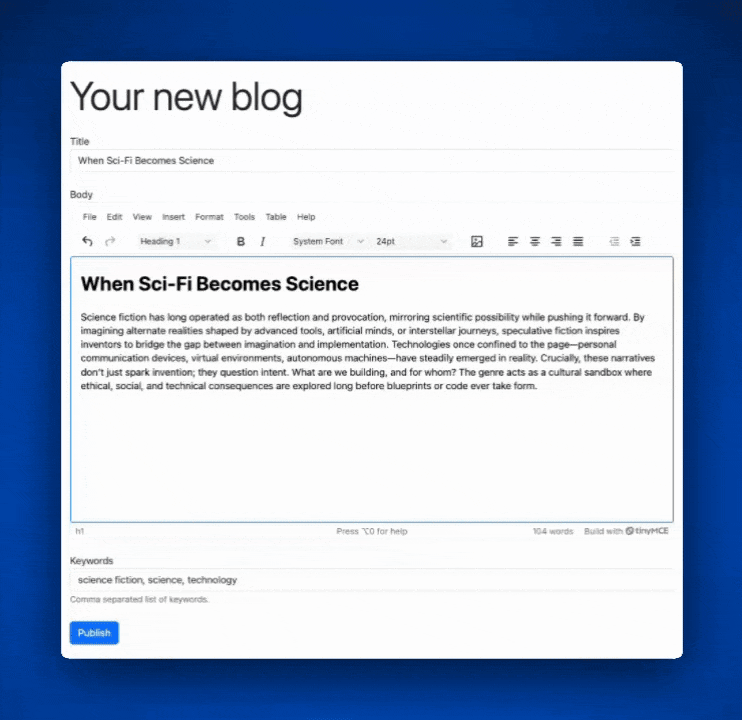
Step three: Add a Bootstrap layout for a blog submission page
Now it’s time to add a Bootstrap layout to the page. Copy and paste the following code into the <body> of the page:
...
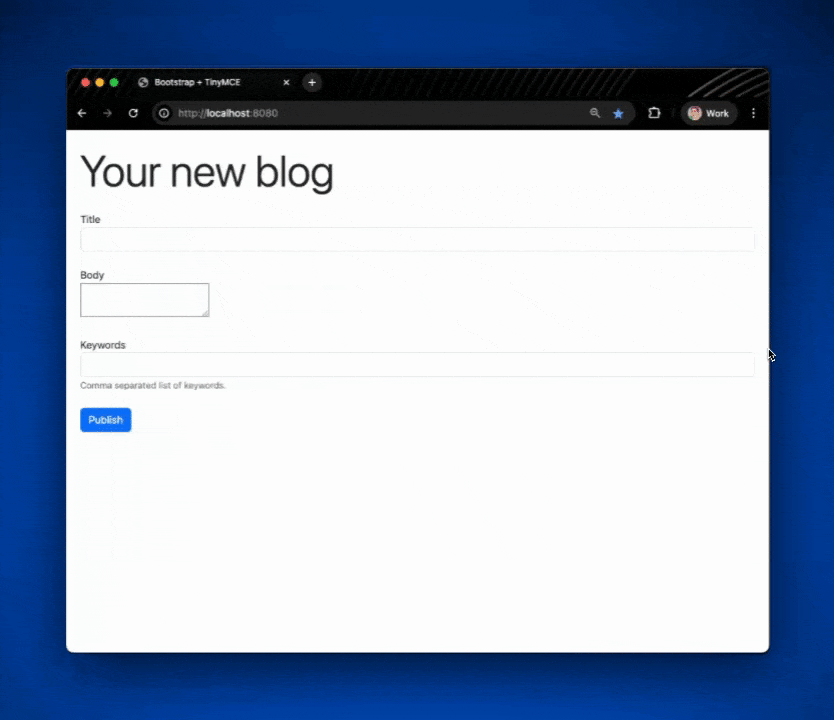
<h1 class="display-2">Your new blog</h1>
<div class="form row mt-4">
<div class="form-group col-sm">
<label for="title">Title</label><input type="text"
class="form-control" id="title"/>
</div>
</div>
<div class="form col mt-4">
<div class="form-group">
<label for="articleBody">Body</label>
<textarea id="articleBody" rows="20" cols="110"></textarea>
</div>
<div class="form-group mt-4">
<label for="keywords">Keywords</label><input type="text"
class="form-control" id="keywords"/><small id="keywordsHelp"
class="form-text text-muted" >Comma separated list of
keywords.</small>
</div>
</div>
<div class="form row mt-4">
<div class="form-group col-sm">
<button name="submitbtn" class="btn btn-primary">
Publish
</button>
</div>
</div>
</div>
...
</body>And then copy and paste this code into the <head> :
...
 <style>
    body {margin: 2%;}
  </style>
...Now let’s run it locally so you can see it in the browser!
Run your setup locally with http-server
It’s easy to see your application in your default browser with http-server, a simple command line server. If you don’t already have it, install http-server globally with this command:
npm install http-serverThat’s all it takes to install!
To serve your HTML page to your default browser, simply run http-server in the same directory as your index.html file. If you’re following this guide so far, you’ll see the app in your browser at http://localhost:8080/.
⚠️ Note: http-server will actually point you to http://127.0.0.1:8080, but this won’t work by default for TinyMCE because 127.0.0.1 is not an approved domain on the TinyMCE dashboard by default, but localhost is. You can always add it to the approved domain but for the sake of this tutorial, just use localhost instead.
It will be a flexible app, so you can resize the browser window to see your responsive page.
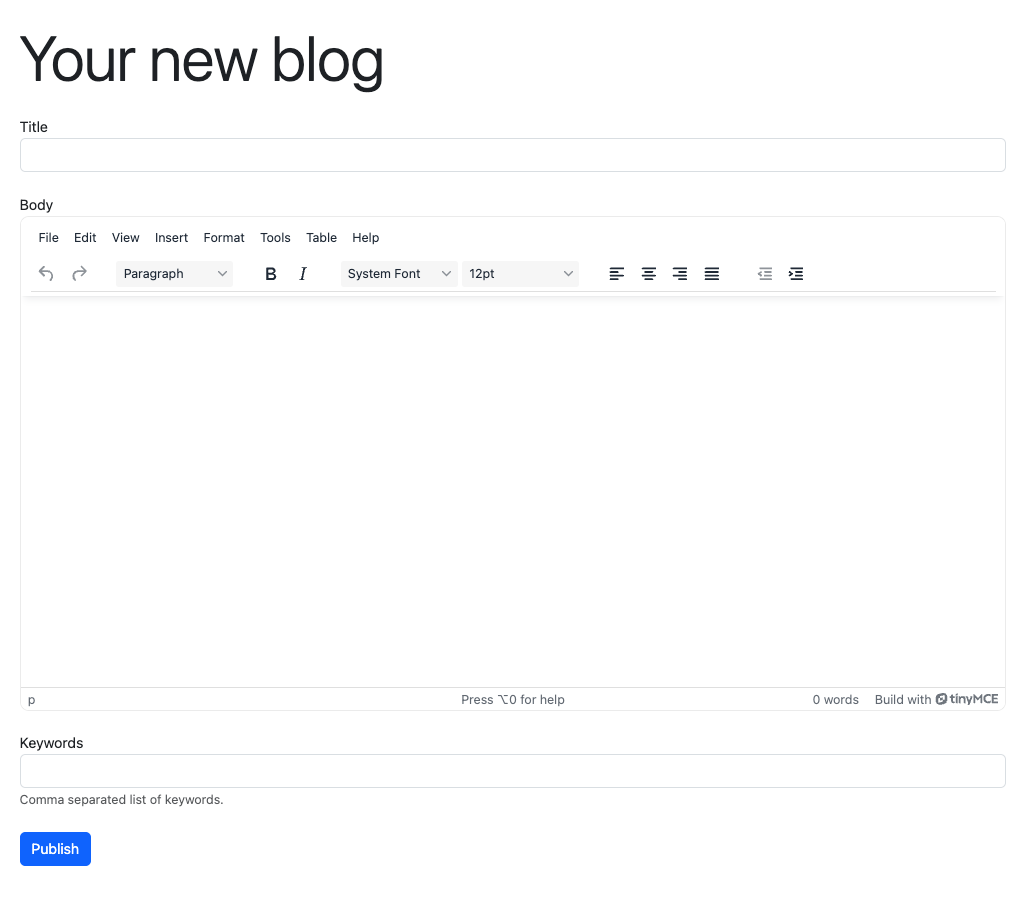
Step four: Add and configure a rich text editor in Bootstrap
The next step for this Bootstrap blog app is to add a rich text editor for content creation and image uploading.
Configure TinyMCE in Bootstrap
To configure TinyMCE in index.html:
- Import TinyMCE via a
<script>to the<head>tag.
<!-- Replace no-api-key below with a real TinyMCE API key --> <script src="https://cdn.tiny.cloud/1/no-api-key/tinymce/8/tinymce.min.js" referrerpolicy="origin"></script> - Add the TinyMCE initialization
<script>to the<div>holding thearticleBody.
<div class="form-group">
      <label for="articleBody">Body</label>
    </div>
    <div class="form-group">
    <script>
      tinymce.init({
        selector: '#articleBody',
        min_height: 550,
        plugins: 'lists link table code help wordcount autoresize',
        toolbar: 'undo redo | blocks | bold italic | fontfamily fontsize | alignleft aligncenter alignright alignjustify | outdent indent'
      })
    </script>
      <textarea id="articleBody"></textarea>
    </div>
Once TinyMCE is added to the Bootstrap form, index.html should look like this:
<!doctype html>
<html lang="en">
<head>
  <meta charset="utf-8">
  <meta name="viewport" content="width=device-width, initial-scale=1">
  <title>Bootstrap + TinyMCE</title>
  <link href="https://cdn.jsdelivr.net/npm/bootstrap@5.3.7/dist/css/bootstrap.min.css" rel="stylesheet" integrity="sha384-LN+7fdVzj6u52u30Kp6M/trliBMCMKTyK833zpbD+pXdCLuTusPj697FH4R/5mcr" crossorigin="anonymous">
  <!-- Replace no-api-key below with a real TinyMCE API key  -->
  <script src="https://cdn.tiny.cloud/1/no-api-key/tinymce/8/tinymce.min.js"
  referrerpolicy="origin"></script>
<style>
  body {margin: 2%;}
</style>
</head>
<body>
  <h1 class="display-2">Your new blog</h1>
  <div class="form row mt-4">
    <div class="form-group col-sm">
      <label for="title">Title</label><input type="text"
      class="form-control" id="title"/>
    </div>
 </div>
  <div class="form col mt-4">
<div class="form-group">
      <label for="articleBody">Body</label>
    </div>
    <div class="form-group">
    <script>
      tinymce.init({
        selector: '#articleBody',
        min_height: 550,
        plugins: 'lists link table code help wordcount autoresize',
        toolbar: 'undo redo | blocks | bold italic | fontfamily fontsize | alignleft aligncenter alignright alignjustify | outdent indent'
      })
    </script>
      <textarea id="articleBody"></textarea>
    </div>
    <div class="form-group mt-4">
      <label for="keywords">Keywords</label><input type="text"
      class="form-control" id="keywords"/><small id="keywordsHelp"
      class="form-text text-muted" >Comma separated list of
      keywords.</small>
    </div>
  </div>
  <div class="form row mt-4">
    <div class="form-group col-sm">
      <button name="submitbtn" class="btn btn-primary">
  Publish
      </button>
    </div>
  </div>
  </div>
  <script src="https://cdn.jsdelivr.net/npm/bootstrap@5.3.7/dist/js/bootstrap.bundle.min.js" integrity="sha384-ndDqU0Gzau9qJ1lfW4pNLlhNTkCfHzAVBReH9diLvGRem5+R9g2FzA8ZGN954O5Q" crossorigin="anonymous"></script>
</body>
</html>⚠️ Note: Don’t forget to replace no-api-key with your real TinyMCE API key.
If you’re regularly saving your index.html file, you can refresh localhost:8080 and see the changes.
Configure TinyMCE’s Image Optimizer
Now that you have a demo Bootstrap blog app in an index.html file with rich text editing built in, it’s time to add Image Optimizer’s capabilities to the app.
Integrating Image Optimizer into TinyMCE with Uploadcare’s default CDN and storage settings is a three-step process that requires:
- Adding Image Optimizer to
toolbarandpluginsintinymce.init, anduploadcare_public_key. - Adding Uploadcare signed uploads with
uploadcare_signed_upload_auth_provider. - Contacting your TinyMCE Customer Success Manager to connect your Uploadcare and TinyMCE accounts together.
To make things easy for this guide, here is a tinymce.init script with both of the necessary Image Optimizer configurations added.
You will need to replace <your-public-key> with a valid Uploadcare public key. If you don't already have an Uploadcare account, contact your TinyMCE Customer Success Manager to get one set up.
⚠️ Note: Even if you do have an Uploadcare account, you will still need the TinyMCE and Uploadcare accounts to be connected for Image Optimizer to work properly.
tinymce.init({
  selector: "#articleBody",
  min_height: 550,
  plugins: "lists link table code help wordcount autoresize uploadcare",
  toolbar:
    "undo redo | blocks | bold italic | fontfamily fontsize | uploadcare | alignleft aligncenter alignright alignjustify | outdent indent",
  uploadcare_public_key: "<your-public-key>",
  uploadcare_signed_upload_auth_provider: (publicKey) =>
    Promise.resolve({
      signature: "sig",
      expire: 123,
    }),
});
And that’s all it takes to add Image Optimizer to TinyMCE. 🎉
If you’ve implemented this code and don’t have an Uploadcare account or you haven’t contacted your Customer Success Manager yet, the app will still appear just fine but Image Optimizer won’t work. Instead, an error will appear in the RTE.
🔥 Hot Tip: We recommend heading to our tutorial How to Optimize Images in TinyMCE with Uploadcare and completing it in order to integrate Image Optimizer and explore all of the configuration options available for your users, like storage and responsiveness settings.
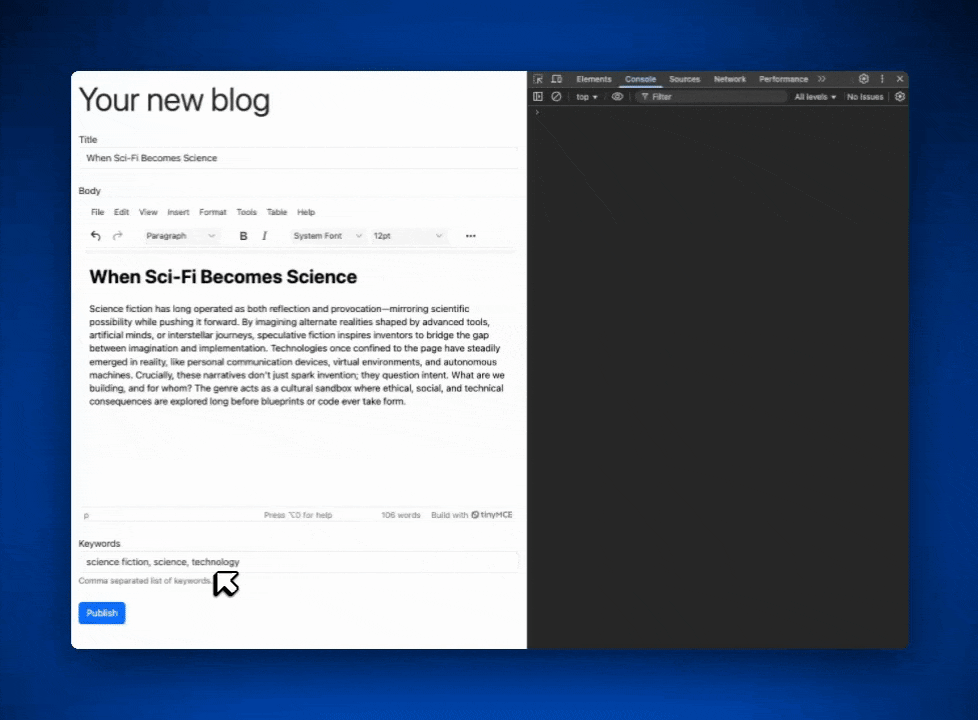
Step five: Extract HTML content from the editor
Now that you have a Bootstrap blog app with a robust RTE built into it, let’s take this to the next level. For any blog or content management system (CMS) app, it’s important to be able to extract the HTML content from the <textarea>.
For the purposes of this guide, the HTML data will just be sent to the browser console. You can create your own JavaScript functions and add them to the Bootstrap app if you want to send the HTML data elsewhere as a JSON object.
To extract HTML data from the rich text editor, you will:
- Add an asynchronous function to the TinyMCE
<script>to handle getting HTML content.
window.handleForm = async function() { const editor = tinymce.activeEditor; const data = editor.getContent({ format: "html" }); console.log({ data }); - Add an
onClickevent to the Publish button to send the HTML to the browser console and reference the function.
onclick = "handleForm()";
Once you’ve added the function and the event, your finished index.html should look like this:
<!doctype html>
<html lang="en">
<head>
  <meta charset="utf-8">
  <meta name="viewport" content="width=device-width, initial-scale=1">
  <title>Bootstrap + TinyMCE</title>
  <link href="https://cdn.jsdelivr.net/npm/bootstrap@5.3.7/dist/css/bootstrap.min.css" rel="stylesheet" integrity="sha384-LN+7fdVzj6u52u30Kp6M/trliBMCMKTyK833zpbD+pXdCLuTusPj697FH4R/5mcr" crossorigin="anonymous">
  <!-- Replace no-api-key below with a real TinyMCE API key  -->
  <script src="https://cdn.tiny.cloud/1/no-api-key/tinymce/8/tinymce.min.js"
  referrerpolicy="origin"></script>
  <style>
  body {margin: 2%;}
</style>
</head>
<body>
  <h1 class="display-2">Your new blog</h1>
  <div class="form row mt-4">
    <div class="form-group col-sm">
      <label for="title">Title</label><input type="text"
      class="form-control" id="title"/>
    </div>
  </div>
  <div class="form col mt-4">
    <div class="form-group">
      <label for="articleBody">Body</label>
    </div>
    <div class="form-group">
    <script>
      tinymce.init({
        selector: '#articleBody',
        min_height: 550,
        plugins: 'lists link table code help wordcount autoresize',
        toolbar: 'undo redo | blocks | bold italic | fontfamily fontsize | alignleft aligncenter alignright alignjustify | outdent indent',
        uploadcare_public_key: '',
        uploadcare_signed_upload_auth_provider: (publicKey) =>
          Promise.resolve({
            signature: "sig",
            expire: 123,
          }),
        uploadcare_store_type: 'temporary'
      })

        window.handleForm = async function() {
        const editor = tinymce.activeEditor;
        const data = editor.getContent({ format: "html" });
        console.log({ data });
      }
    </script>
      <textarea id="articleBody"></textarea>
    </div>
    <div class="form-group mt-4">
      <label for="keywords">Keywords</label><input type="text"
      class="form-control" id="keywords"/><small id="keywordsHelp"
      class="form-text text-muted" >Comma separated list of
      keywords.</small>
    </div>
  </div>
  <div class="form row mt-4">
    <div class="form-group col-sm">
      <button name="submitbtn"  onclick="handleForm()" class="btn btn-primary">
  Publish
      </button>
    </div>
  </div>
  </div>
  <script src="https://cdn.jsdelivr.net/npm/bootstrap@5.3.7/dist/js/bootstrap.bundle.min.js" integrity="sha384-ndDqU0Gzau9qJ1lfW4pNLlhNTkCfHzAVBReH9diLvGRem5+R9g2FzA8ZGN954O5Q" crossorigin="anonymous"></script>
</body>
</html>Now you have a Bootstrap application that sends the HTML content from the RTE to the browser’s console when you click the Publish button.
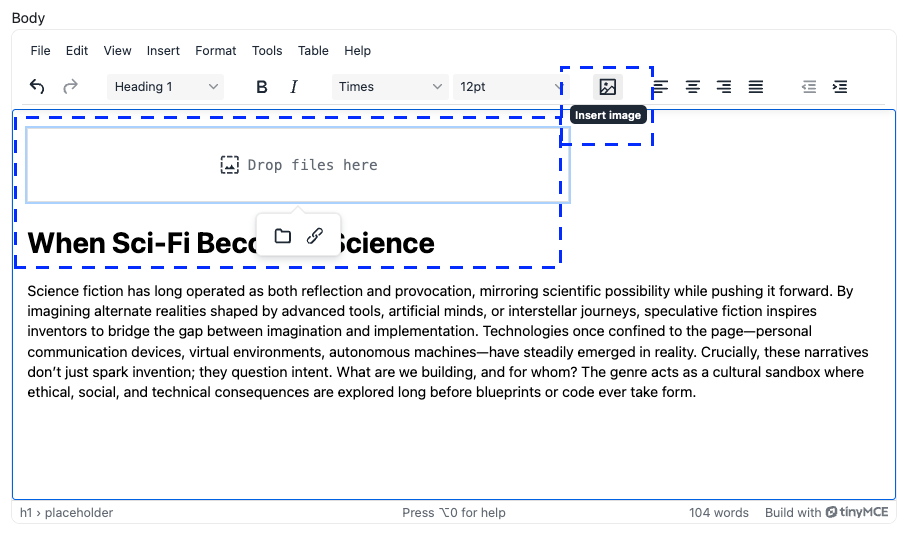
Step six: Upload images to be optimized and responsive
You’ve successfully built a whole Bootstrap blog submission page with secure image uploads and a rich text editor! 🎉 The next step is to test image uploads with Image Optimizer.
Uploading a new image is intuitive. You’ll just click the Image Optimizer icon in the toolbar, and a dialog will open. Upload any image to see how easy it is for users to add their content to your app. Then check out the different adjustments available for every uploaded image. You can take Image Optimizer even further with added filters for your users. It’s the next level of image uploads in Bootstrap apps.
What’s next? Add more to your Bootstrap blog app
Thanks for joining us for this guide! If you want to add more to your Bootstrap blog app, try some of our other tutorials, like how to change TinyMCE to Dark Mode, how to configure Google Fonts in TinyMCE, or how to alter margins and spacing inside the RTE.
Got questions for us after reading this guide? Send us a message today to talk to a human about Image Optimizer.


