Your WYSIWYG editor can do more to support your accessible documents plan – if it’s deliberately designed to be a supporting component. The best WYSIWYG editors can make coding accessible document options into your application much faster. Since accessibility options are often neglected until the end of development, any support to get your accessible documents plan established earlier can make a significant difference.
Thankfully, you speed up your accessibility plans with a rich text editor that provides an accessible interface, and accessible document capability for your customers. This guide explains the features available from the TinyMCE WYSIWYG that help set up accessible document capabilities.
Accessible documents and image management
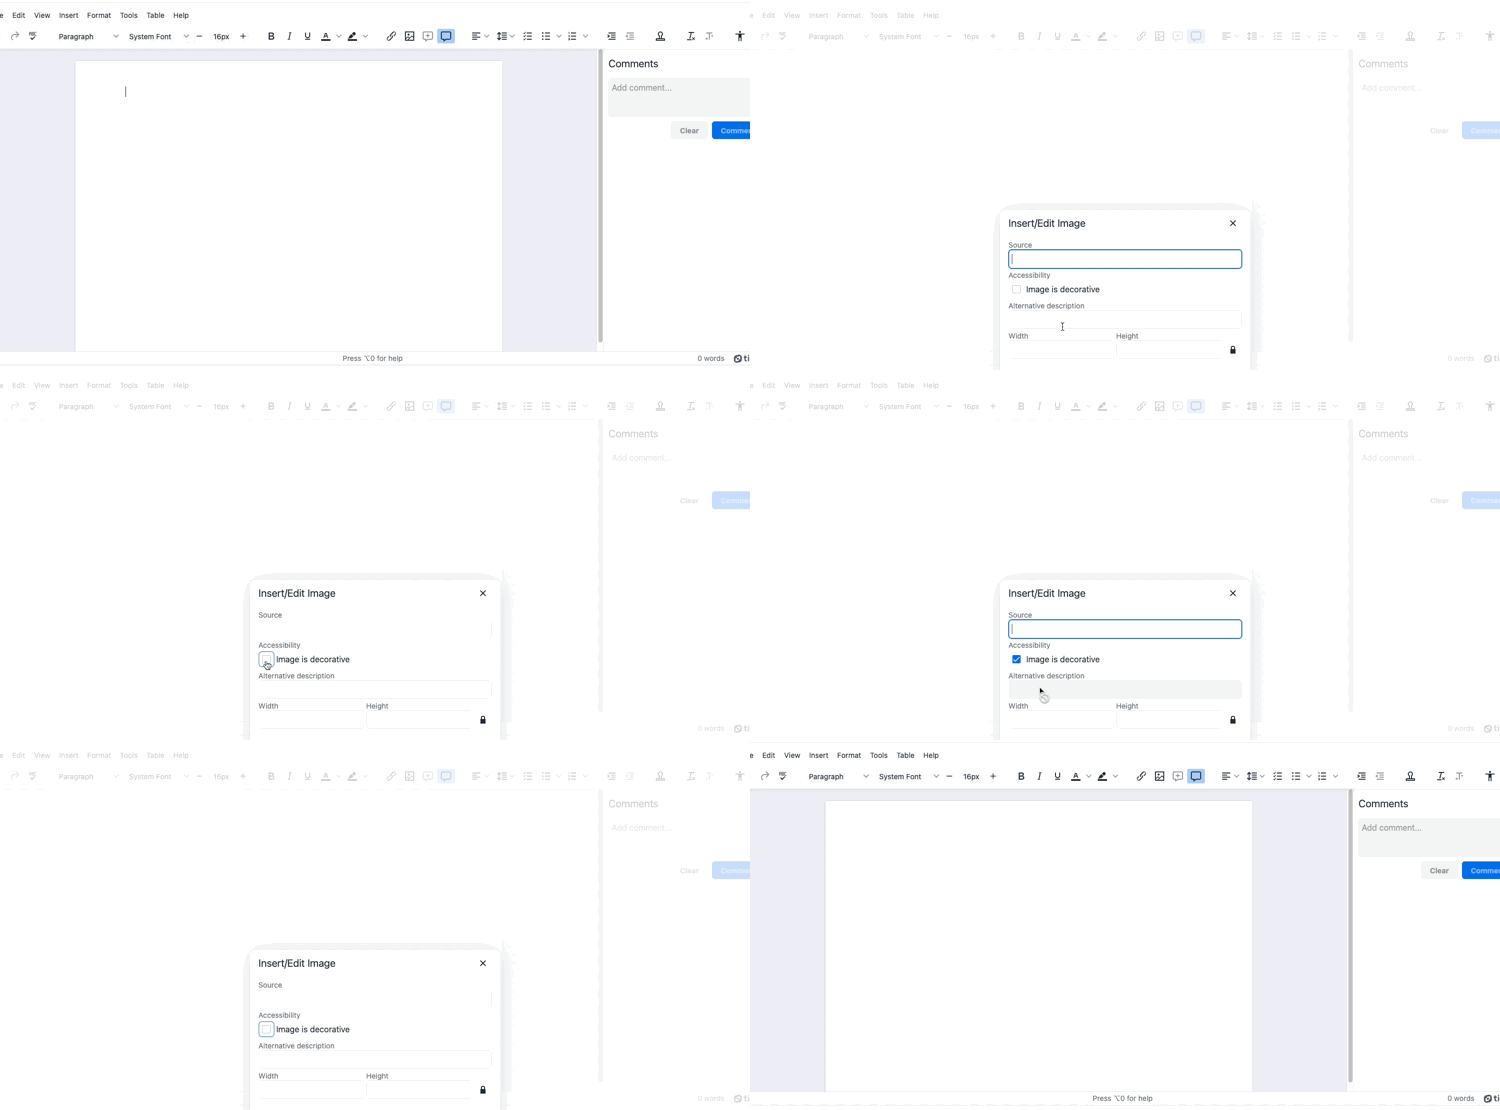
Adding accessible image descriptions, and specifying if an image is decorative or important information, contributes to creating accessible content. TinyMCE's advanced option for accessibility, specifically a11y_advanced_options, can activate accessible image options, helping to address an important accessibility need.
To explain how to use this option, the following demo is based on the TinyMCE Document Management System (DMS) solution, and provides a useful example for creating accessible documents in production.
Start by creating a new index.html file in your development environment, and paste the following HTML into it:
<!DOCTYPE html>
<html lang="en">

<head>
	<meta charset="UTF-8">
	<meta name="viewport" content="width=device-width, initial-scale=1.0">
	<title>Accessible Documents with TinyMCE</title>
	<script src="https://cdn.tiny.cloud/1/ADD-YOUR-API-KEY/tinymce/7/tinymce.min.js" referrerpolicy="origin"></script>
	<script type="text/javascript">
    	tinymce.init({
        	selector: "#editor",
        	plugins: "a11ychecker advcode advlist advtable advtemplate anchor autocorrect autolink autosave casechange charmap checklist codesample directionality editimage emoticons footnotes formatpainter help image insertdatetime link linkchecker lists markdown media mediaembed mergetags nonbreaking pagebreak permanentpen powerpaste searchreplace table tableofcontents tinycomments tinymcespellchecker typography visualblocks visualchars wordcount",
        	toolbar: "undo redo spellcheckdialog | aidialog aishortcuts | blocks fontfamily fontsizeinput | bold italic underline forecolor backcolor | link image addcomment showcomments  | align lineheight checklist bullist numlist | indent outdent | inserttemplate | removeformat typography | a11ycheck",
        	editable_root: true,
        	height: '700px',
        	toolbar_sticky: true,
        	autosave_restore_when_empty: true,
        	spellchecker_active: true,
        	spellchecker_language: 'en_US',
        	spellchecker_languages: 'English (United States)=en_US,English (United Kingdom)=en_GB,Danish=da,French=fr,German=de,Italian=it,Polish=pl,Spanish=es,Swedish=sv',
        	typography_langs: ['en-US'],
        	typography_default_lang: 'en-US',
        	tinycomments_mode: 'embedded',
        	tinycomments_author: 'rmartel',
        	tinycomments_author_name: 'Rosalina Martel',
        	tinycomments_author_avatar: 'https://www.tiny.cloud/images/avatars/avatar-RosalinaMartel.jpg',
        	sidebar_show: 'showcomments',
        	mergetags_list: [
            	{
                	value: 'Document.Title',
                	title: 'Document Title'
            	},
            	{
                	value: 'Publish.Date',
                	title: 'Publish Date'
            	},
            	{
                	value: 'Author.Name',
                	title: 'Author Name'
            	}
        	],
        	advtemplate_templates: [
            	{
                	title: 'Non-compete clause',
                	content: '<h3>NON-COMPETE</h3>\n<p>This agreement contains a non-compete clause, which prohibits the {{Employee.Name}} from directly or indirectly engaging in similar activities to those performed in their employment with the Company, within {{Distance.Miles}} miles of the Company’s business premises, for a period of {{Noncompete.Years}} years after the termination of their employment. This clause shall apply regardless of whether the Employee is employed by a competitor or any other third party.</p>'
            	},
            	{
                	title: 'Corporate hierarchy diagram',
                	content: '<p><img style="display: block; margin-left: auto; margin-right: auto;" src="<a href="https://i.postimg.cc/tJ82QN1H/corporate-hierarchy.png">https://i.postimg.cc/tJ82QN1H/corporate-hierarchy.png</a>" width="282" height="248"></p>'
            	},
            	{
                	title: 'More reusable document content',
                	content: '<p>Insert any HTML content as a template!</p>'
            	}
        	],
        	ai_shortcuts: [
            	{ title: 'Summarize content', prompt: 'Provide the key points and concepts in this content in a succinct summary.' },
            	{ title: 'Improve writing', prompt: 'Rewrite this content with no spelling mistakes, proper grammar, and with more descriptive language, using best writing practices without losing the original meaning.' }
        	],
        	content_style: `
            	body {
              	background: #fff;
            	}
            	/* Disable the blue "focus" border for the editable region */
            	.editable-section:focus-visible {
              	outline: none !important;
            	}
            	.header,
            	.footer {
              	font-size: 0.8rem;
              	color: #ddd;
            	}
            	.header {
              	display: flex;
              	justify-content: space-between;
              	padding: 0 0 1rem 0;
            	}
            	.header .right-text {
              	text-align: right;
            	}
            	.footer {
              	padding:2rem 0 0 0;
              	text-align: center;
            	}
            	/* Apply page-like styling */
            	@media (min-width: 840px) {
              	html {
                	background: #eceef4;
                	min-height: 100%;
                	padding: 0.5rem;
              	}

              	body {
                	background-color: #fff;
                	box-shadow: 0 0 4px rgba(0, 0, 0, .15);
                	box-sizing: border-box;
                	margin: 1rem auto 0;
                	max-width: 820px;
                	min-height: calc(100vh - 1rem);
                	padding: 2rem 6rem 2rem 6rem;
              	}
            	}
          	`,
    	});
	</script>

</head>

<body>
	<textarea name="content" id="editor"></textarea>
</body>Save the change.
If you open the demo file in your browser, and test out adding an image, the image options are lacking, from an accessibility perspective, with only an alt text input:

Add the a11y_advanced_options option to the TinyMCE init script, and set it to true.
    <script type="text/javascript">
        tinymce.init({
            selector: "#editor",
            plugins: "a11ychecker advcode advlist advtable advtemplate anchor autocorrect autolink autosave casechange charmap checklist codesample directionality editimage emoticons footnotes formatpainter help image insertdatetime link linkchecker lists markdown media mediaembed mergetags nonbreaking pagebreak permanentpen powerpaste searchreplace table tableofcontents tinycomments tinymcespellchecker typography visualblocks visualchars wordcount",
            toolbar: "undo redo spellcheckdialog | aidialog aishortcuts | blocks fontfamily fontsizeinput | bold italic underline forecolor backcolor | link image addcomment showcomments  | align lineheight checklist bullist numlist | indent outdent | inserttemplate | removeformat typography | a11ycheck",
            editable_root: true,
            height: '700px',
            toolbar_sticky: true,
            autosave_restore_when_empty: true,
a11y_advanced_options: true,Save the change, and now when adding another image to the contents, there’s now an option for specifying decorative images into your accessible documents.
Accessible documents and iframe Aria text
When TinyMCE initializes, it creates an iframe HTML element, and this element replaces the textarea set up on your web page. When using a framework like Angular or Vue, the element name is different (Usually <Editor /> ), but the process remains the same when the page HTML builds. Screen readers scan HTML elements, and can read aloud Aria text to assist readers living with different vision requirements. TinyMCE provides the ability to set up Aria text for the TinyMCE iframe element directly in the TinyMCE init script.
To set this up, add the following line to the DMS demo init script:
    <script type="text/javascript">
        tinymce.init({
            selector: "#editor",
            plugins: "a11ychecker advcode advlist advtable advtemplate anchor autocorrect autolink autosave casechange charmap checklist codesample directionality editimage emoticons footnotes formatpainter help image insertdatetime link linkchecker lists markdown media mediaembed mergetags nonbreaking pagebreak permanentpen powerpaste searchreplace table tableofcontents tinycomments tinymcespellchecker typography visualblocks visualchars wordcount",
            toolbar: "undo redo spellcheckdialog | aidialog aishortcuts | blocks fontfamily fontsizeinput | bold italic underline forecolor backcolor | link image addcomment showcomments  | align lineheight checklist bullist numlist | indent outdent | inserttemplate | removeformat typography | a11ycheck",
            editable_root: true,
            height: '700px',
            toolbar_sticky: true,
            autosave_restore_when_empty: true,
            a11y_advanced_options: true,
iframe_aria_text: 'The TinyMCE Text Editor, replacing the textarea element’Save the change, and then check the demo HTML using the developer console inspector tool. You can see that the Aria text is now available, and ready for screen readers to parse.
Accessible documents, highlight on focus, and custom skins
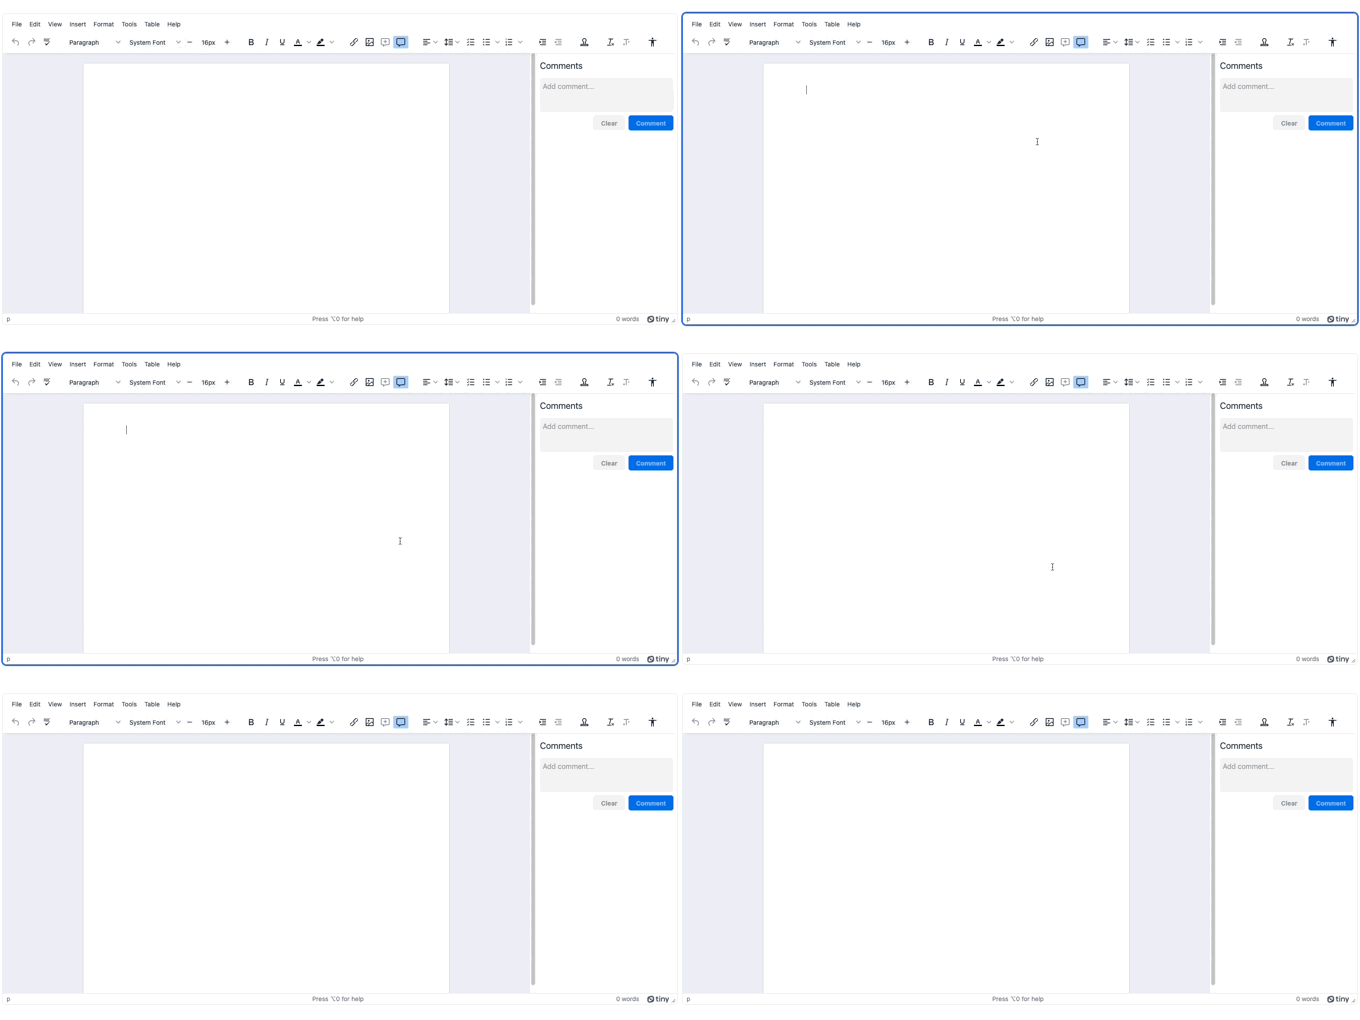
TinyMCE provides the option to highlight the text area when it has focus using the highlight_on_focus option. This provides an important visual cue that the editor is ready for document writing. As of the TinyMCE version 7 release, the highlight_on_focus option is set to true by default. You can adjust its behavior if needed by including the option in your TinyMCE init script, and setting it to false.
If you’re using a custom TinyMCE skin, however, this can affect the highlighting behavior. When designing the skin, use the following CSS to create the highlighting on focus effect:
@edit-area-border-color: #2D6ADF;

@edit-area-border-width: 2px;Alternatively, you can use the TinyMCE setup option with the TinyMCE getContainer() API method with blur and focus events to configure a dynamic highlight on focus configuration that works with custom skins. To show this effect in the demo, add the highlight_on_focus option, and set it to false:
    <script type="text/javascript">
        tinymce.init({
            selector: "#editor",
            plugins: "a11ychecker advcode advlist advtable advtemplate anchor autocorrect autolink autosave casechange charmap checklist codesample directionality editimage emoticons footnotes formatpainter help image insertdatetime link linkchecker lists markdown media mediaembed mergetags nonbreaking pagebreak permanentpen powerpaste searchreplace table tableofcontents tinycomments tinymcespellchecker typography visualblocks visualchars wordcount",
            toolbar: "undo redo spellcheckdialog | aidialog aishortcuts | blocks fontfamily fontsizeinput | bold italic underline forecolor backcolor | link image addcomment showcomments  | align lineheight checklist bullist numlist | indent outdent | inserttemplate | removeformat typography | a11ycheck",
            editable_root: true,
            height: '700px',
            toolbar_sticky: true,
            autosave_restore_when_empty: true,
            a11y_advanced_options: true,
            iframe_aria_text: 'The TinyMCE Text Editor, replacing the textarea element’
highlight_on_focus: false,Then paste the following setup option to the DMS demo init script.
setup: (editor) => {
      // Apply the focus effect
      editor.on("init", () => {
      editor.getContainer().style.transition = "border-color 0.15s ease-in-out, box-shadow 0.15s ease-in-out";
        });
      editor.on("focus", () => { (editor.getContainer().style.boxShadow = "0 0 0 2px rgba(45, 106, 223, 1)"),
      (editor.getContainer().style.borderColor = "#2D6ADF");
        });
      editor.on("blur", () => {
      (editor.getContainer().style.boxShadow = ""),
      (editor.getContainer().style.borderColor = "");
       });
},Save the changes, and then test out the custom highlight on focus:

Tool tips and shortcuts for accessible documents
The TinyMCE 7 release introduced tooltip and keyboard shortcut improvements. When using TinyMCE version 7, toolbar options now display a tooltip, and the keyboard shortcut to use for activating the toolbar button when only using a keyboard.
The TinyMCE Help feature also provides a visible keyboard shortcut. The shortcut appears on the lower edge of the editor, supporting keyboard-only navigation by clearly displaying how to reach the help menu. If you need to deactivate this feature, you can add the help_accessibility option to your TinyMCE init script, and set it to false.
💡NOTE: There’s even more accessibility features available when using the Advanced Accessibility Checker plugin in your TinyMCE configuration. When you sign up for a FREE TinyMCE API key, you get a 14-day free trial of Advanced features like accessibility checker.
More accessibility with TinyMCE
If you need a guide on accessible design, there are several TinyMCE resources available to help you get started:
- What is accessible content? A guide that explains the essentials on accessible content
- 6 specific web accessibility challenges for businesses and how to handle them
- What every product designer needs to know about visual accessibility
Contact us if you need more information on setting up accessible content building with TinyMCE.
Try TinyMCE 7 today as open source, or get our new Advanced plugins with a commercial licence
