


Back in 1997, in Japan, mobile devices featured a new way for people to express themselves with text. They were called emoji. Since then, emoji have proliferated, and now appear in devices worldwide. And because they’re now commonplace, if you’re building an app (maybe an Angular app) your customers likely expect emoji to be available to use… to express themselves.
To understand the ways you can include an emoji picker in your design, it can be helpful to first see a demonstration.. Angular represents a good place to start. It’s still a well-regarded framework, and setting up an Angular app shows you something close to a real-world, production app.
In this article, the demo integrates the TinyMCE rich text editor with Angular. Why use TinyMCE? It’s a reliable rich text editor that provides an effective emoticon plugin. Once you’ve configured the plugin with some JavaScript, you can easily and quickly then have a WYSIWYG editor with emoji running in your Angular app.
Unfortunately, Angular versions below 5 are not supported. This ‘How to’ guide works for Angular with a rich text editor released after version 5.
What’s the difference between emoticons and emoji?
A smiley face made out of keyboard keys, like this one : ), is an emoticon. If the smiley face is a graphic or looks like a cartoon, it’s an emoji, like this one 😀. While the TinyMCE plugin is named the Emoticon Plugin, it includes emoji in the library of symbols you can add to the text area. Just be aware that the plugin does not auto-convert text emoticons into a graphical emoji.
Installing Angular for setting up an app
If you haven’t already, install Node Package Manager (npm) and the Angular CLI. If you don’t have Angular installed, now’s your chance to test it out – you’ll have taken the first step on the path to becoming a full stack developer.
However, it’s also a good idea to update Node Package Manager. After you’ve finished installing npm, open up a Terminal or PowerShell window, and run:
$ npm install npm@latest -gWith that complete, install the Angular CLI:
$ npm install -g @angular/cliWith TinyMCE, as you’ll soon see in the following how-to sections, the process to add a rich text editor with an emoji picker requires importing TinyMCE, and configuring the plugin. It’s not an intensive process compared to the other solutions.
Set up Angular Emoji Picker with TinyMCE
To create a TinyMCE Angular project, change into the project directory, and then install the tinymce-angular package (the thin wrapper connecting TinyMCE to Angular):
$ ng new --defaults --skip-git tinymce-angular-demo
$ cd tinymce-angular-demo
$ npm install --save @tinymce/tinymce-angularRewriting the default Angular setup
Set up your app by changing the default app.module.ts and app.component.html files. The pathway to find these files:
/your/environment/pathway/tinymce-angular-demo/src/app/Now edit your app.module.ts file. It sounds drastic, but remove the demo contents of the typescript file, and then paste in the new content and save the changes:
import { BrowserModule } from '@angular/platform-browser';
import { NgModule } from '@angular/core';
import { EditorModule } from '@tinymce/tinymce-angular';
import { AppComponent } from './app.component';
@NgModule({
  declarations: [
     AppComponent
   ],
   imports: [
    BrowserModule,
    EditorModule
   ],
   providers: [],
   bootstrap: [AppComponent]
 })
export class AppModule { }Next edit your app.component.html file. Work in your API key at this stage. Again, remove the demo content and then paste in the following content and save the changes:
<h1>TinyMCE 5 Angular Demo</h1>
 <editor
   apiKey="your-api-key-lives-here"
   [init]="{
     height: 500,
     menubar: false,
     selector: '',
     plugins: [
       'advlist autolink lists link image charmap print preview anchor',
       'searchreplace visualblocks code fullscreen',
       'insertdatetime media table paste code help wordcount'
     ],
     toolbar:
       'undo redo | formatselect | bold italic backcolor | \
       alignleft aligncenter alignright alignjustify | \
       bullist numlist outdent indent | removeformat |help'
   }"
></editor>At this stage, you can test out the modified app to see if it works:
$ ng serve --openThe result:
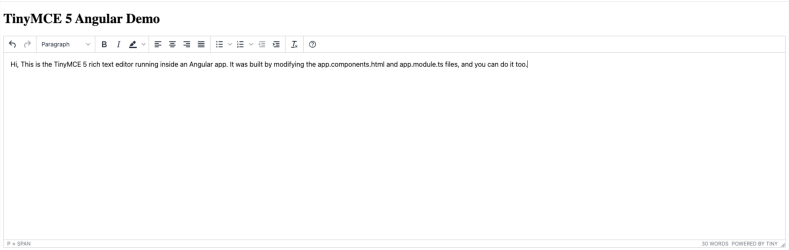
There is a solution if you get stuck with a This Domain is not Registered notice. Use the ctrl + c keys to stop the angular app running in your Terminal or PowerShell window.
Adding the Emoji Picker into the Angular app
Edit your app.component.html file to work in the TinyMCE emoticons plugin, and the emoticon option in the toolbar.
For this example, I placed the emoticon option at the end of the toolbar, offset by the pipe (|) character. Add in the emoticons_database object at the end of the editor content. Don’t forget to add a comma at the end of the toolbar options:
<h1>TinyMCE 5 Angular Demo</h1>
 <editor
   apiKey="your-api-key-lives-here"
   [init]="{
     height: 500,
     menubar: false,
     selector: '',
     plugins: [
       'emoticons advlist autolink lists link image charmap print preview anchor',
       'searchreplace visualblocks code fullscreen',
       'insertdatetime media table paste code help wordcount'
     ],
     toolbar:
       'undo redo | formatselect | bold italic backcolor | \
       alignleft aligncenter alignright alignjustify | \
       bullist numlist outdent indent | removeformat | emoticons  | help',
       emoticons_database: 'emojis'
   }"
></editor> With the plugin and toolbar modifications saved, restart the Angular app with the ng serve --open command in a Terminal or Powershell window.
Check on the Angular app with the TinyMCE editor. You can see the emoji ascii character on the toolbar, or type an emoji directly into the rich text editor by typing a ‘:’ followed by the emoji keyword.

Check on the Angular Emoji Picker demo:
What other ways are there for setting Angular Emoji pickers?
If you’re at the stage where you have Angular running, and you’re not sure that the TinyMCE rich text editor can provide what you need, there are some alternatives. The cautionary note is that these solutions require more adjustments to the different files that make up your Angular App. This could be easy or difficult to manage, based on the size of your app, and how many dependencies need attention.
1.Use the ng-emoji-picker directive
This requires several steps to implement. You need to configure it in your Angular app alongside moving image content from the GitHub repository manually, and adding it to an assets folder. It’s an extra step that could end up costing more time in the future.
2.Use the EmojioneArea jQuery plugin
While this option can be simple to set up, it still requires changing multiple fields. However it’s simplicity is an advantage for adding an emoji picker to your app. It is still a separate component, however, and that’s still an additional component to manage.
3.Use ngx-emoji-mart
This solution requires multiple files to manage. You can modify each component, module, and scss files in your app, but if you’re new to using frameworks or web design, or are looking for a solution with minimal built errors, the more files to modify, the greater the risk of build errors.
What’s next for your Angular app with TinyMCE?
It’s possible to change the type of emoji that appear in your app. You can manually add in a specific emoji, or link your Angular app to an emoji database.
Or, you can develop and engineer other features for your Angular app such as Creating a reactive form with Angular.
Contact us for more information about TinyMCE, or if you’re feeling adventurous and ready to try Tiny, sign up to get started.


