


The content_css option in TinyMCE is where you put all the css to style the contents in your TinyMCE rich text editor – paragraphs, headings, images, tables.
But there are also a couple of styles you can include in your content_css that will improve the editing experience. They aren’t included by default, because we like our styles to have un-opinionated content – we want to give you developers the most freedom possible.
We want you to be able to implement your WYSIWYG html styles, without our ideas standing in your way.
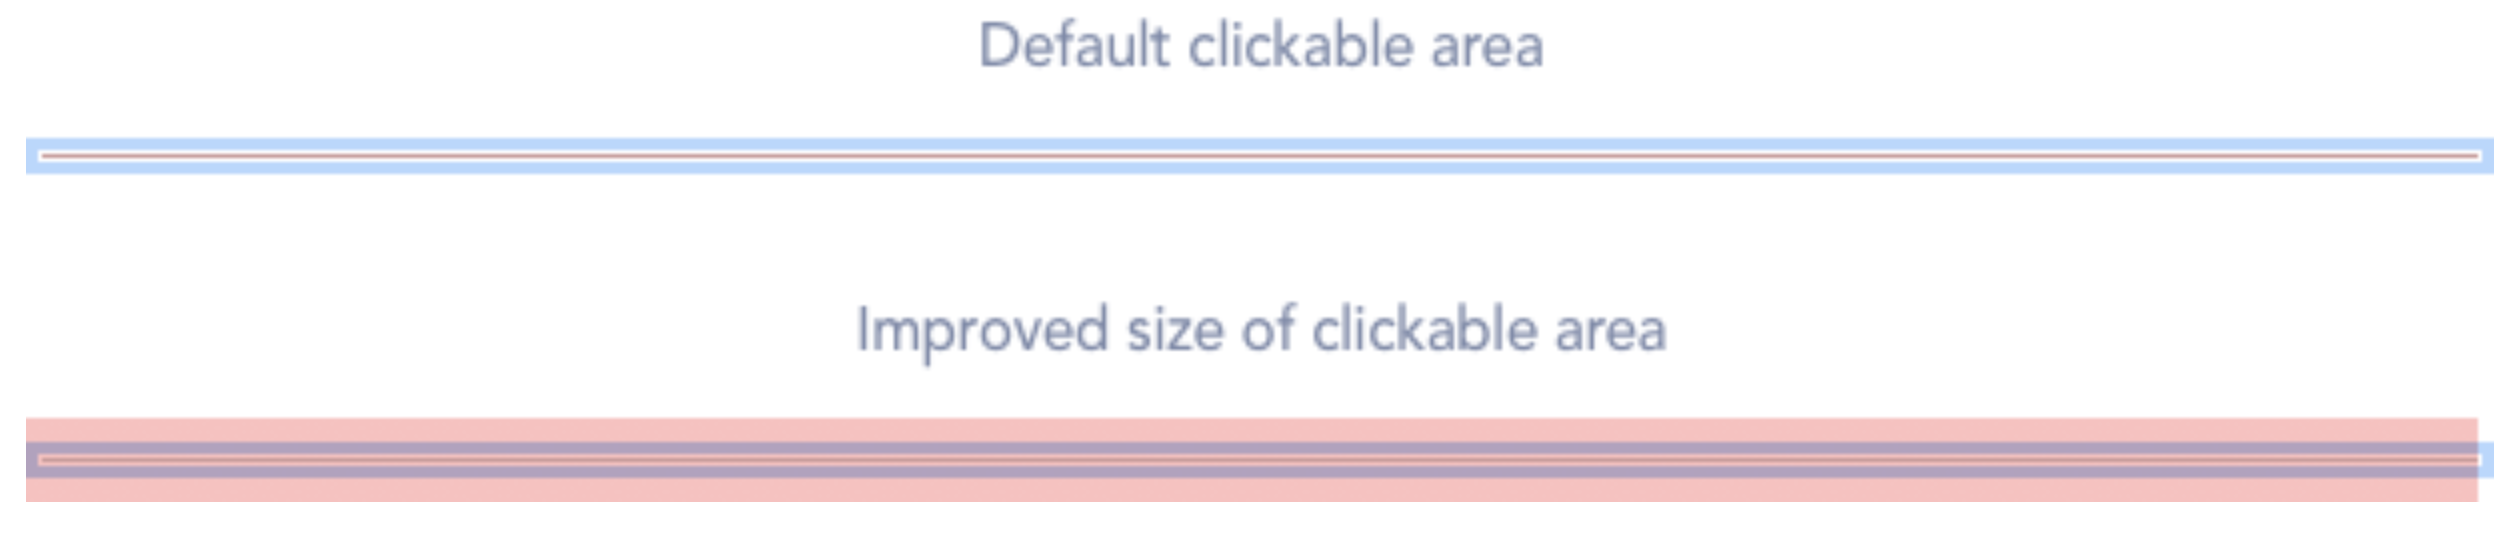
Improve WYSIWYG horizontal rules selection
The horizontal rule – the <hr> element – is often a single pixel gray hair line. That is pretty rough to select. By adding a pseudo element and positioning it on top of the horizontal rule we’ve created a much larger click area, making it way easier to select.
Use the following css in your content_css:
/* Make our invisible overlay be positioned relative to the hr */
hr {
   position: relative;
}

/* Create an invisible overlay that greatly increases the clickable area */
hr::after {
    content: '';
    display: block;
    height: 21px;
    left: 0;
    position: absolute;
    right: 0;
    top: -10px;
}Fix paragraph margins in table cells
Normally when you create a table cell in TinyMCE, text isn’t wrapped in any element – until you hit Enter. Then it wraps your text into paragraphs. By default, those paragraphs have a margin top and bottom, which makes the table cell appear to have way too much white space.

Fortunately this is easily fixed. Include the below css in your content_css to remove the top margin of the first element, and the bottom margin of the last element inside table cells.
/*
* Paragraphs in table cells
*/
/* Remove all margins from elements that are direct children
* of td and th. Here we are using the universal selector but
* to give more control you could narrow down to the specific
* selectors you support in your tables
*/
td > *,
th > * {
    margin: 0;
}

/* Use the famous lobotomized owl selector to reintroduce a margin
* in-between elements inside table cells.
*/
td > * + *,
th > * + * {
    margin-top: .75em;
}Tweaking selected object’s focus outline
Non-text elements like img, figure, media, and any non-editable object gets a blue focus outline when selected in TinyMCE. The default skin has these outlines defined using the outline property.
One drawback is that the outline doesn’t follow a border radius. So if an image or non-editable block has rounded corners, the outline will still display as a blue rectangle. That looks pretty bad. One solution I’ve used a lot, is to override the default styles and include box-shadow instead of outline because the former follows a border radius.
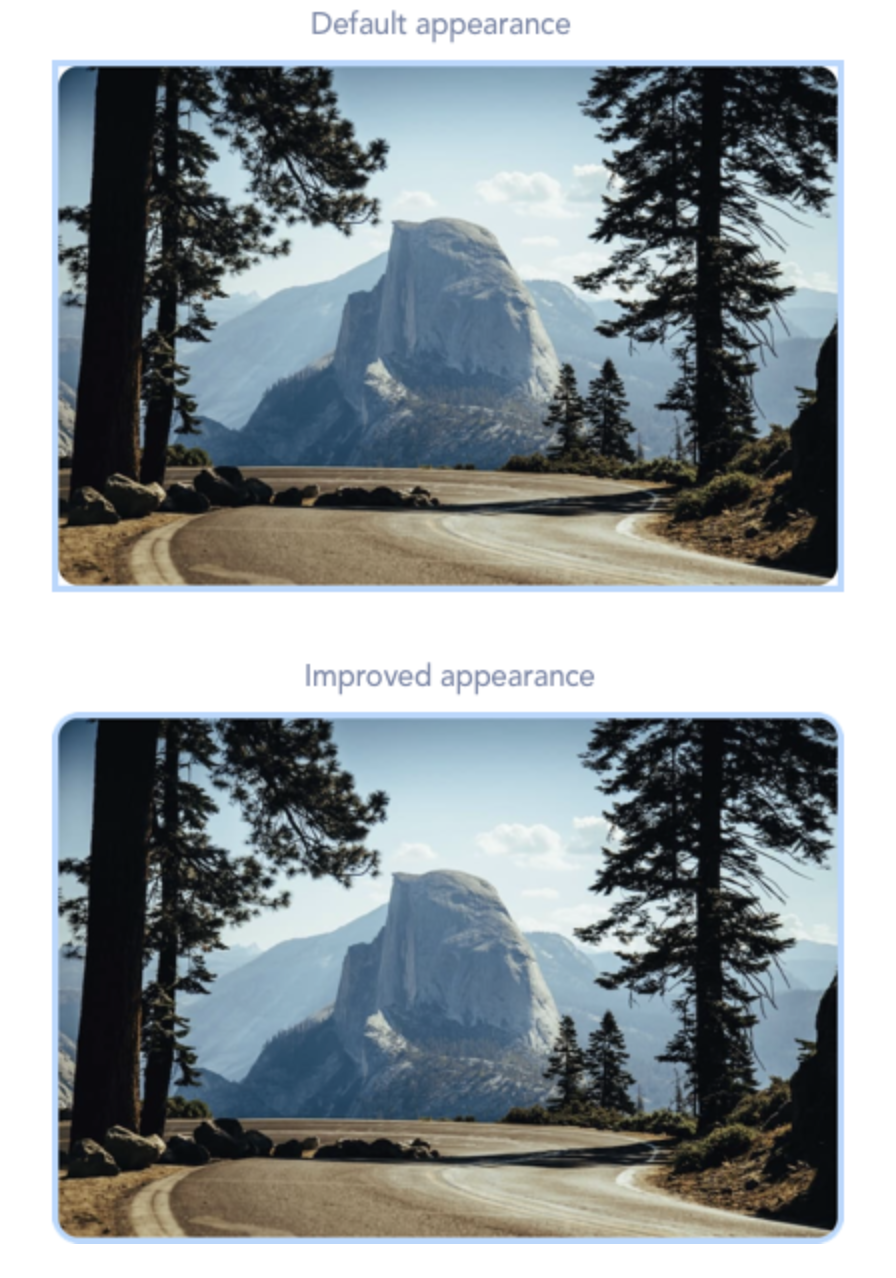
Here’s how to apply it to an image. The same technique applies to other elements as well, but you need to know how to use the browser inspector to hunt down the particular classes and attributes to override.
/*
* Use box shadow instead of outline for selectable elements
*/
img {
    border-radius: 10px;
}
/* Override the default content styles to remove the outline
* and reintroduce it as a box-shadow
*/
.mce-content-body img[data-mce-selected] {
    box-shadow: 0 0 0 3px #b4d7ff;
    outline: none;
}These tips (and many more) can be found in our new demo repository on Github – where we showcase the versatility of TinyMCE. Check them out!
If you want to know more about how you can make the css_content work for you more, contact our Sales team.


