


When you’re building the next generation of transformational software products, you want to provide the best possible user experience.
The TinyMCE rich text editor comes with a default set of features and formatting options, but you can customize it to provide just about any UI/UX - check out 9 products you can build with TinyMCE.
In this article, we’ll discuss how to configure the editor with custom fonts for your users to choose from, plus how to set a custom font as the default editor font if required.
We’re assuming you’ve already got an instance of TinyMCE up and running and you already know how to configure the editor by modifying the initialization script.
Add a custom font family to the menu
TinyMCE comes with 17 font options by default. Depending on the editor configuration, users can select a font from the menubar or the toolbar (via the fontselect dropdown).
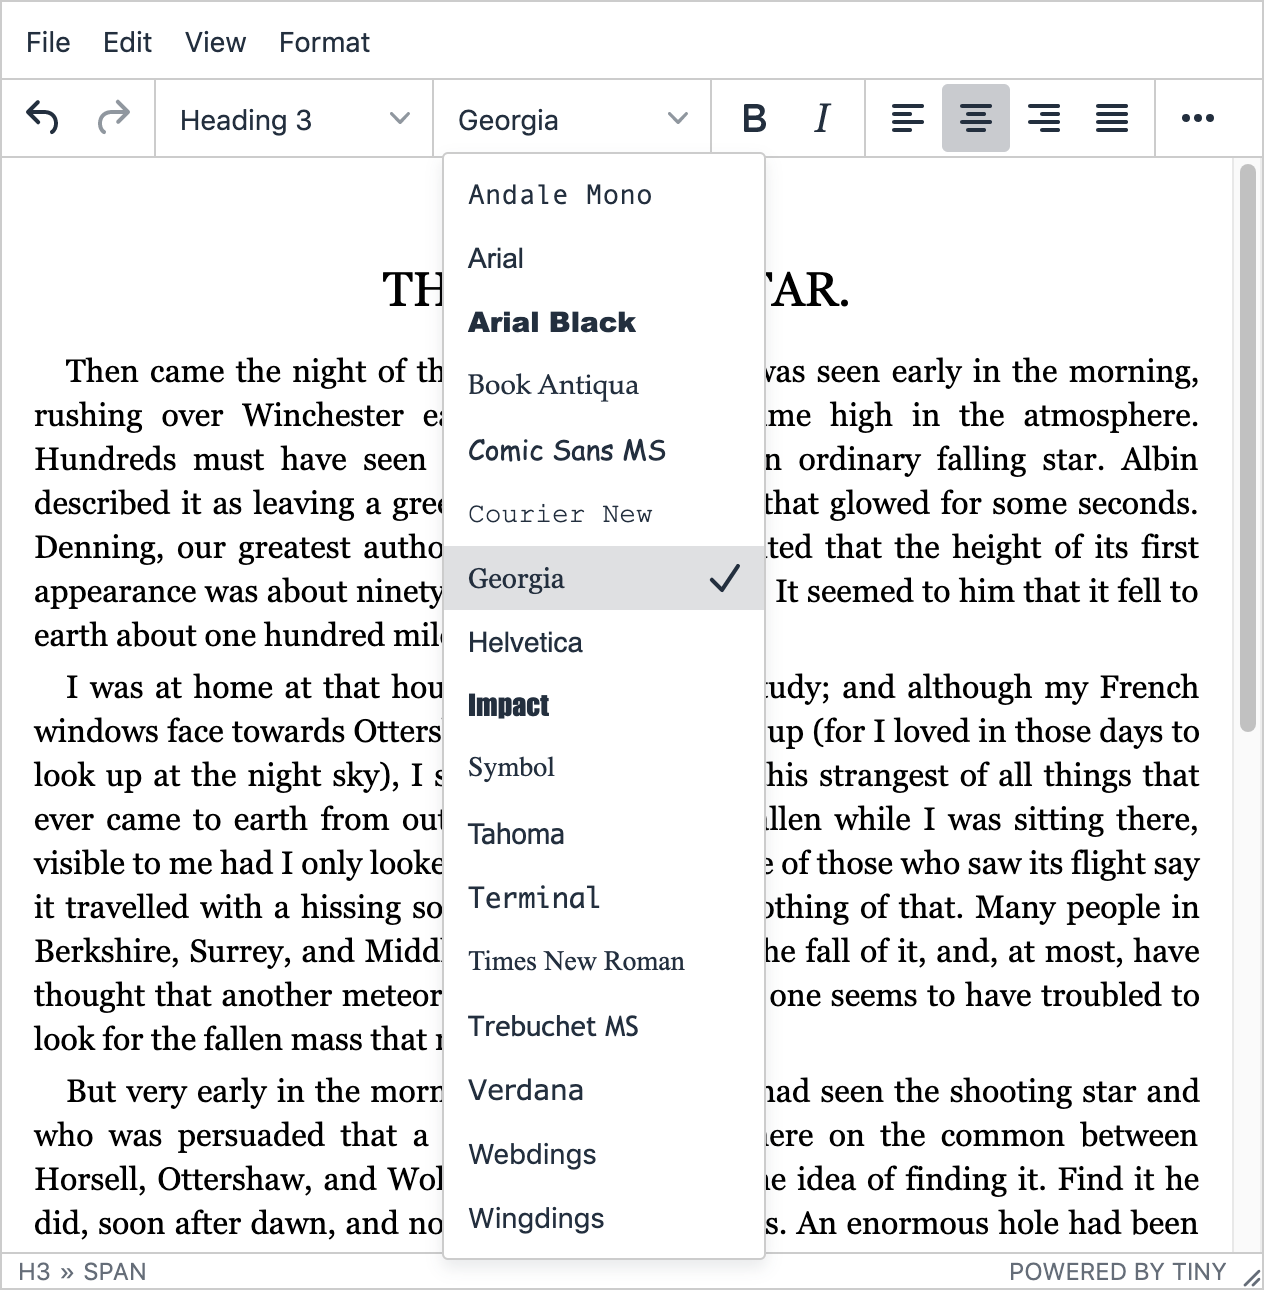
fontselect toolbar menu.NOTE: If the fontselect dropdown is not already on your toolbar, you can add it to the list of toolbar controls in your configuration; for example:
tinymce.init({
  /* ... */
  toolbar:
    "undo redo | styleselect | fontselect | bold italic | alignleft aligncenter alignright alignjustify | outdent indent",
});
To add a custom font family to the list of font options displayed, you’ll need to:
1. Add the font as a menu option
Modify the list of available font options using font_formats - so users have the desired font as an option to choose from.
The default list of font options is:
tinymce.init({
  /* ... */
  font_formats:
    "Andale Mono=andale mono,times; Arial=arial,helvetica,sans-serif; Arial Black=arial black,avant garde; Book Antiqua=book antiqua,palatino; Comic Sans MS=comic sans ms,sans-serif; Courier New=courier new,courier; Georgia=georgia,palatino; Helvetica=helvetica; Impact=impact,chicago; Symbol=symbol; Tahoma=tahoma,arial,helvetica,sans-serif; Terminal=terminal,monaco; Times New Roman=times new roman,times; Trebuchet MS=trebuchet ms,geneva; Verdana=verdana,geneva; Webdings=webdings; Wingdings=wingdings,zapf dingbats",
});
Change the available font options by overriding the default list, either adding to it or creating an entirely new list.
For example, if you wanted to add the Oswald font, you could add it to the default list as follows (alphabetical order is recommended but not necessary):
tinymce.init({
  /* ... */
  font_formats:
    "Andale Mono=andale mono,times; Arial=arial,helvetica,sans-serif; Arial Black=arial black,avant garde; Book Antiqua=book antiqua,palatino; Comic Sans MS=comic sans ms,sans-serif; Courier New=courier new,courier; Georgia=georgia,palatino; Helvetica=helvetica; Impact=impact,chicago; Oswald=oswald; Symbol=symbol; Tahoma=tahoma,arial,helvetica,sans-serif; Terminal=terminal,monaco; Times New Roman=times new roman,times; Trebuchet MS=trebuchet ms,geneva; Verdana=verdana,geneva; Webdings=webdings; Wingdings=wingdings,zapf dingbats",
});
2. Import the font in TinyMCE
Import the font in the TinyMCE CSS using content_css or content_style - so any text written within the editor in that style will render correctly.
Continuing with the same example, you would import the Oswald font as follows:
tinymce.init({
  /* ... */
  content_style:
    "@import url('https://fonts.googleapis.com/css2?family=Oswald&display=swap');",
});
For more information about the use of content_css and content_style, check out our blog post on how to change the default font.
3. Import the font on the page
Import the font on the page in which TinyMCE is embedded - so it will render correctly when displayed in the TinyMCE menus.
For example:
<style>
  @import url('https://fonts.googleapis.com/css2?family=Oswald&display=swap');
</style>4. Import the font on any published pages
Although the steps above will add the custom font to the TinyMCE editor, you’ll also need to make sure it’s imported on any pages where that content is published.
Set the default font
If you also want to set the default font to the custom font, you can set the font family in the editor CSS. For example:
tinymce.init({
  /* ... */
  content_style:
    "@import url('https://fonts.googleapis.com/css2?family=Oswald&display=swap'); body { font-family: Oswald; }",
});
Again, you’ll have to make sure the same style is applied to any published pages to see it rendered there.
Complete example
Once you’ve made these changes, the font family will be available for users to choose from. Check out the complete example on CodePen:
What next?
Also see our related articles:
- Custom font sizes in TinyMCE
- How to change the default font family, size, and color in TinyMCE
- How to use Google Fonts in TinyMCE
- TinyMCE CSS and custom styles
- Neon fonts and glowing text CSS
Not yet using TinyMCE on the cloud? When you’re on the cloud, you’ll always be up to date with the latest build and newest features. Get started with a free API key - you’ll also get a 14-day trial of our premium plugins!


