


To change the default font family, size, or color in the TinyMCE editor, we recommend using content_css or content_style (or a combination of both) depending on your use case.
TinyMCE is shipped with a default CSS that determines what the font and everything else looks like in the editor itself. If you want to change the default font style in the editor, you’ll need to initialize TinyMCE accordingly.
content_css
content_css can be used to load a specific stylesheet, for example, your website’s stylesheet. This can be used to match the styling of your published content for a truer WYSIWYG experience.
For example:
content_css: "/mycontent.css";
content_style
content_style can be used to tweak (or override) parts of whatever stylesheet the editor is using (whether that be the default CSS or one you’ve specified with content_css).
For example:
content_style: "body { font-family: Arial; }";
Examples and use cases
Potential use cases might be:
- You want to override parts of the default CSS used by the editor, for example, so you can edit with a larger font.
- You want the styles in the editor to match those used in your published content for the full WYSIWYG experience.
- You largely want the styles in the editor to match your published content, but you want to override some of the styling used in the editor for easier use while editing.
Read on for more detailed examples of usage and information about how to change the default styling options displayed in the TinyMCE menus and toolbars.
Get Your Free TinyMCE API Key →
Match editor styles to your published content using content_css
If you want the styles in the TinyMCE editor to match the styles on your published page, for a true WYSIWYG experience, the best option is to initialize TinyMCE with the same CSS file that your site uses.
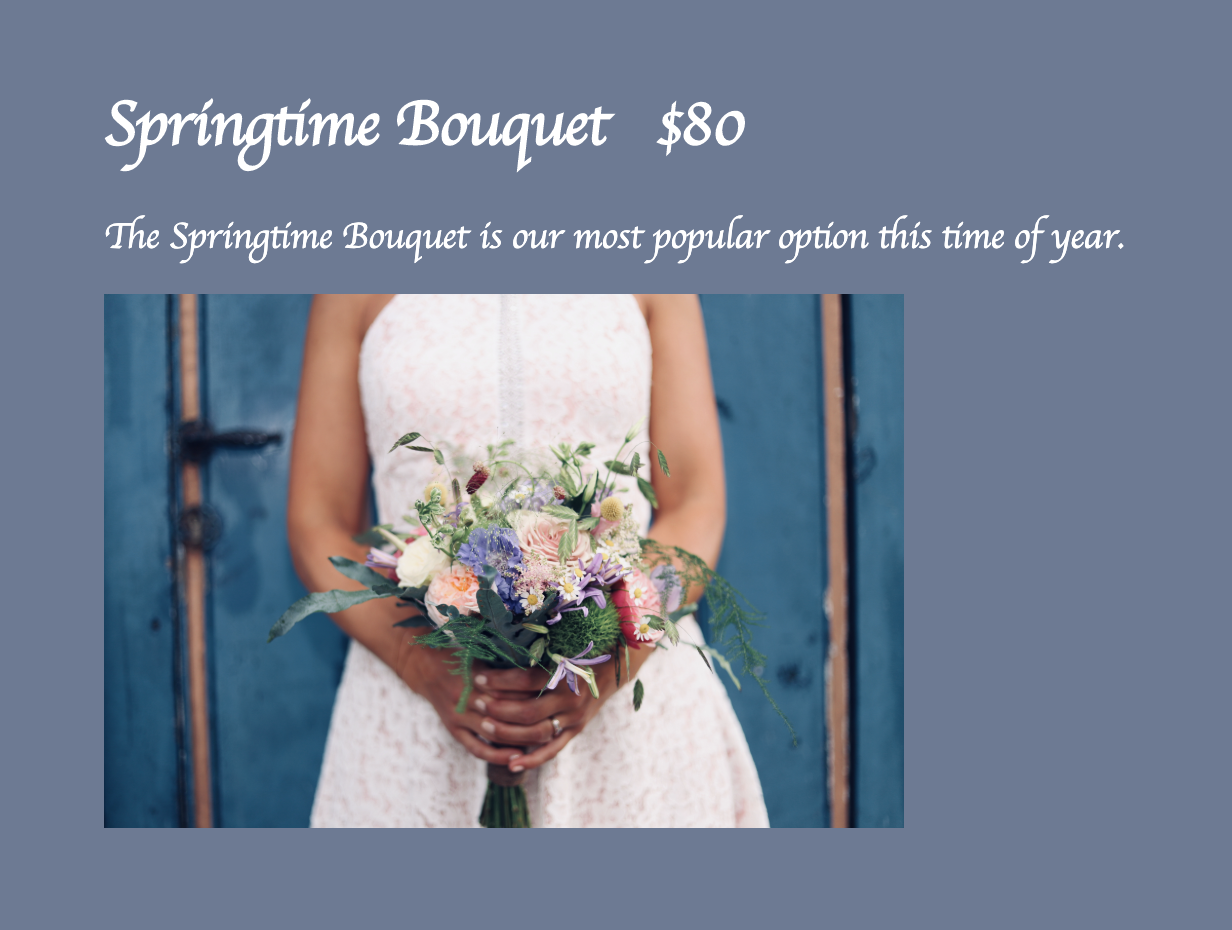
For example, let’s say your website uses white comic sans…no...I can’t quite bring myself to use that example. Okay, let’s say your website uses white cursive text on a darker background.
You have the following style defined in a file called mycontent.css.
body {
  font-family: cursive;
  line-height: 1.4;
  margin: 1rem;
  background: #6A7A95;
  color: white;
}So your published content looks like this:
If you want the full WYSIWYG experience for your users, you can include the same CSS file in the initialization script of the editor.
You can do this with the content_css property.
For example (using an absolute path):
tinyMCE.init({
  selector: "textarea",
  content_css: "/mycontent.css",
});
And - hey presto - the editor CSS matches that of your web page.
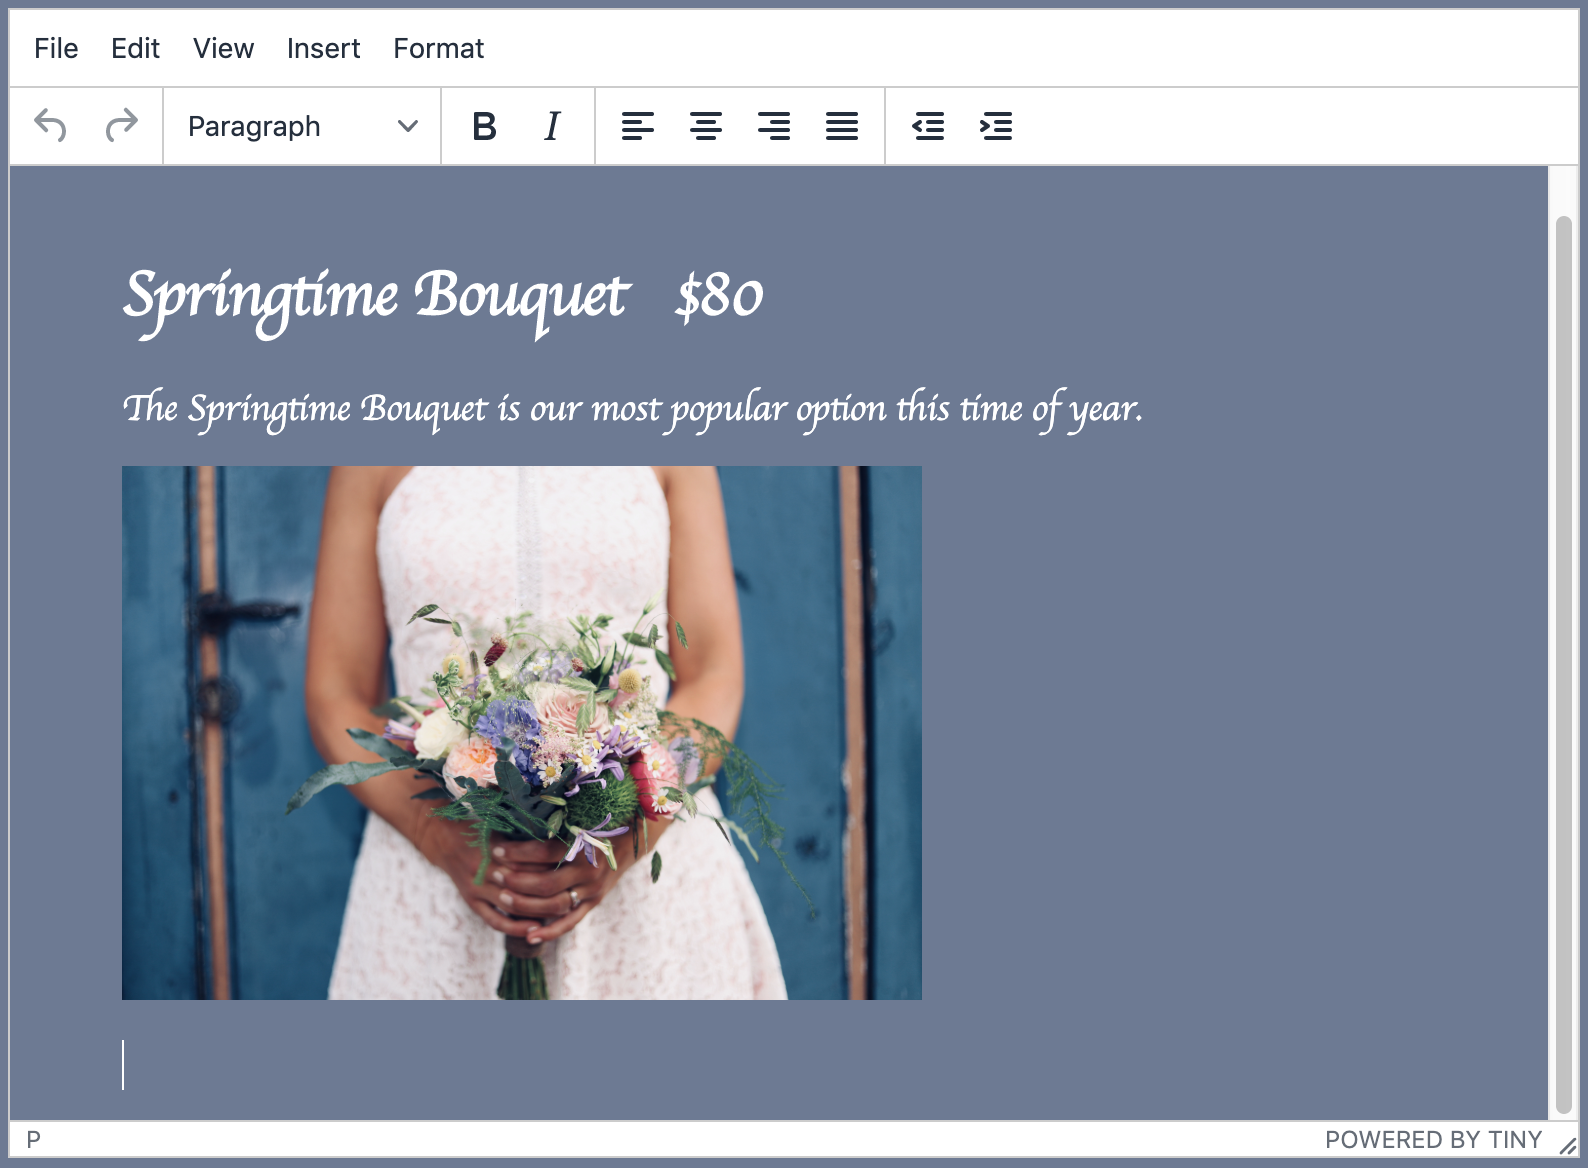
Read more about content_css in our documentation.
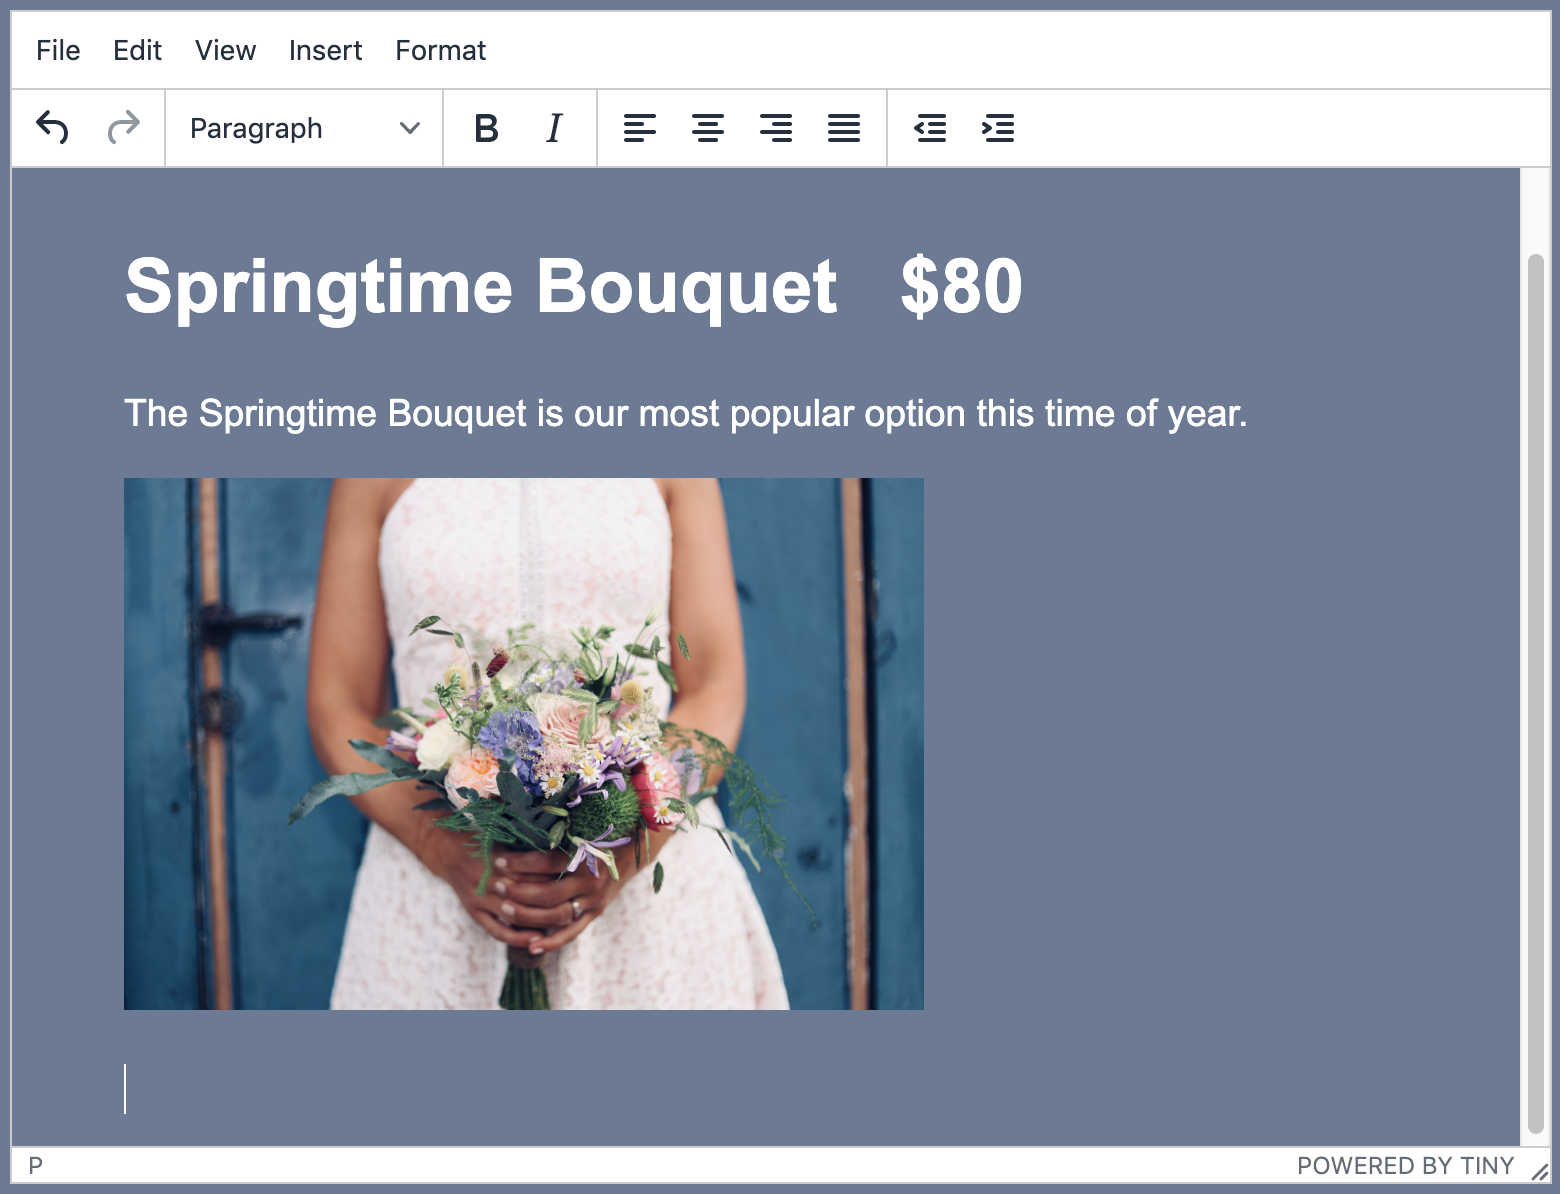
Override editor styles using content_style
Alternatively, there’s a simple way to override the editor CSS, regardless of whether it’s the default CSS or a stylesheet you’ve provided with content_css.
Just remember, when you use this option, what you see in the editor will not necessarily be what you get in your published content.
You might do this to match only some of the editor styling with your page CSS, without pulling in the whole stylesheet. Or, so it deliberately does NOT match your published page styles. For example, if the font on your published page is quite decorative, but it’s easier to write with a more standard font. Or if you want certain coloring, or larger fonts, to assist you through the writing process, but you don’t want them appearing on the published page.
In this case, use the content_style property in your initialization script and specify your desired styles for the editor within that.
For example, you could match the colors of your site, but use a larger, non-cursive font for the editing process:
tinyMCE.init({
  selector: "textarea",
  content_style:
    "body { background: #6A7A95; color: white; font-size: 14pt; font-family: Arial; }",
});
You can achieve a similar result by pulling in your stylesheet using content_css and then using content_style to override it:
tinyMCE.init({
  selector: "textarea",
  content_css: "/mycontent.css",
  content_style: "body { font-size: 14pt; font-family: Arial; }",
});
Read our documentation about content_style for more information.
Updating the default font options in menus and toolbars
If you change the default font styles to values that are not in the TinyMCE menus and toolbars by default, you can add them using the font_formats, font size, and color options. Similarly, you can use these to remove other values for users, so they can only use styles that are on brand.
What next?
Why not take it one step further and customize the skins and icons for an even slicker UX. You can do this using our premium Tiny Skins and Icon Packs.
But also stay tuned for our TinyMCE Skin Tool that makes it even easier for you to match the TinyMCE editor with the look and feel of your website or app. Our Halloween skin demonstrates the skinning capability and includes a sneak peek at the new tool too.
As well learn how to add neon fonts and glowing text effects in two steps.
Don’t yet have a cloud subscription? Get a free API Key. (You’ll even get a free trial of our premium plugins!)


