


Power users can swap between writing in a text editor, and editing the HTML that supports their writing. But are there enough power users out there to justify including the ability to edit their HTML? It may end up costing you too much time to develop.
An alternative: you can rely on the rich text editor in your app to enable source code editing.
Finding and configuring a rich text editor that can provide easy-to-implement source code editing saves you time and energy learning how to seamlessly switch from the WYSIWYG view to the HTML view. Instead, take a look into TinyMCE.
TinyMCE not only provides a great source code editing plugin, but now offers several upgrades. This article explains how to configure the plugins for source code editing.
What is a source code editor?
A source code editor in an application allows you to edit the code that makes up the content. The most common case is manually editing the HTML tags and the tag attributes that the rich text editor translates into the content seen on the screen. Different customers make use of source code editors, like power users editing the HTML behind emails, or Web developers fixing broken code in a CMS.
The term “source code editor” has other definitions that relate to different contexts. For example, a source code editor can also be described as a text editor that specialized for writing software.
How to configure source code editing with TinyMCE
Setting up TinyMCE
To get started configuring a source code editor, you need an API key. Navigate to the Get-tiny sign up page to get your FREE WYSIWYG editor API key, which comes with 14 days access to Premium plugins.
You can use Google or GitHub account details to log into your TinyMCE account, and get an API key.
With that ready, the try out the source code editor:
-
Create an index.html file in your environment, and include HTML to get started:
<!DOCTYPE HTML>
<html lang="en">
<head>
    <meta charset="UTF-8">
    <meta http-equiv="X-UA-Compatible" content="IE=edge">
    <meta name="viewport" content="width=device-width, initial-scale=1.0">
</head>
<body>
</body>
</html>-
Open the index.html file, and in the head section, add script tags, and reference TinyMCE Cloud through a CDN link within the script tags. This is what the link looks like:
<script
  src="https://cdn.tiny.cloud/1/your-api-key/tinymce/6/tinymce.min.js"
  referrerpolicy="origin"
></script>;
Note: For the Tiny Cloud connection, creating an account with TinyMCE gets you a FREE API key. When you use this key, you get access to Premium TinyMCE plugins for 14 days, as well as no warning messages concerning API keys in the text area.
-
Add another pair of script tags, add the following JavaScript, which is the tinymce.init method, which is where the source code editor configurations are set:
<script>
   tinymce.init({
   selector: '#editor',
   plugins: 'powerpaste casechange searchreplace autolink directionality visualblocks visualchars image link media mediaembed codesample table charmap pagebreak nonbreaking anchor tableofcontents insertdatetime advlist lists checklist wordcount tinymcespellchecker editimage help formatpainter permanentpen charmap linkchecker emoticons advtable export autosave',
   toolbar: 'undo redo print spellcheckdialog formatpainter | blocks fontfamily fontsize | bold italic underline forecolor backcolor | link image | alignleft aligncenter alignright alignjustify',
   height: '600px'
       });
</script>-
Add initial HTML content, and the CSS selector class to some textarea tags. The selector is set as an id with the value “editor” in the TinyMCE init script:
<body>
   <h1>TinyMCE Quick Start Guide</h1>
  <form id="post">
       <textarea id="editor">Hello, World!</textarea>
  </form>
</body>;
-
Test run the index.html file by opening it in your browser, or use a local server command with Python or with the PHP command:
Configuring the source code editor
With the TinyMCE init script ready, configure the source code editor by adding the following plugins:
-
Include the advanced plugin, and the fullscreen plugins:
plugins: 'powerpaste casechange searchreplace autolink directionality visualblocks visualchars image link media mediaembed codesample table charmap pagebreak nonbreaking anchor tableofcontents insertdatetime advlist lists checklist wordcount tinymcespellchecker editimage help formatpainter permanentpen charmap linkchecker emoticons advtable export autosave advcode fullscreen',-
Include the Advanced Code inline option, and set it to “true”:
            tinymce.init({
                selector: '#editor',
…
                advcode_inline: true,
});-
Add the Source Code editor button to the TinyMCE toolbar:
toolbar: "undo redo print spellcheckdialog formatpainter | blocks fontfamily fontsize | bold italic underline forecolor backcolor | link image | alignleft aligncenter alignright alignjustify | code",-
With these adjustments made, reload the demo, and press the Source Code button to open the source code editor:
Controlling the source code editor
With the source code editor configured, you can make use of the interface options:
- Change to full screen if needed.
- This requires the Full Screen plugin included along with the Advanced Code plugin.
- You also need to enable the Advanced Code Inline option (set it to “true”) to make use of the full screen option.
- Switch to Dark or Light mode
- Grow or shrink down the font size.
- The font size cannot decrease lower than 5px.
- Copy the code to the clipboard.
Making use of the copy code button
To test out the ability to copy code, the following demo makes use of the TinyMCE DMS solution content:
- Open the Source Code Editor
- Click on the Copy Code button
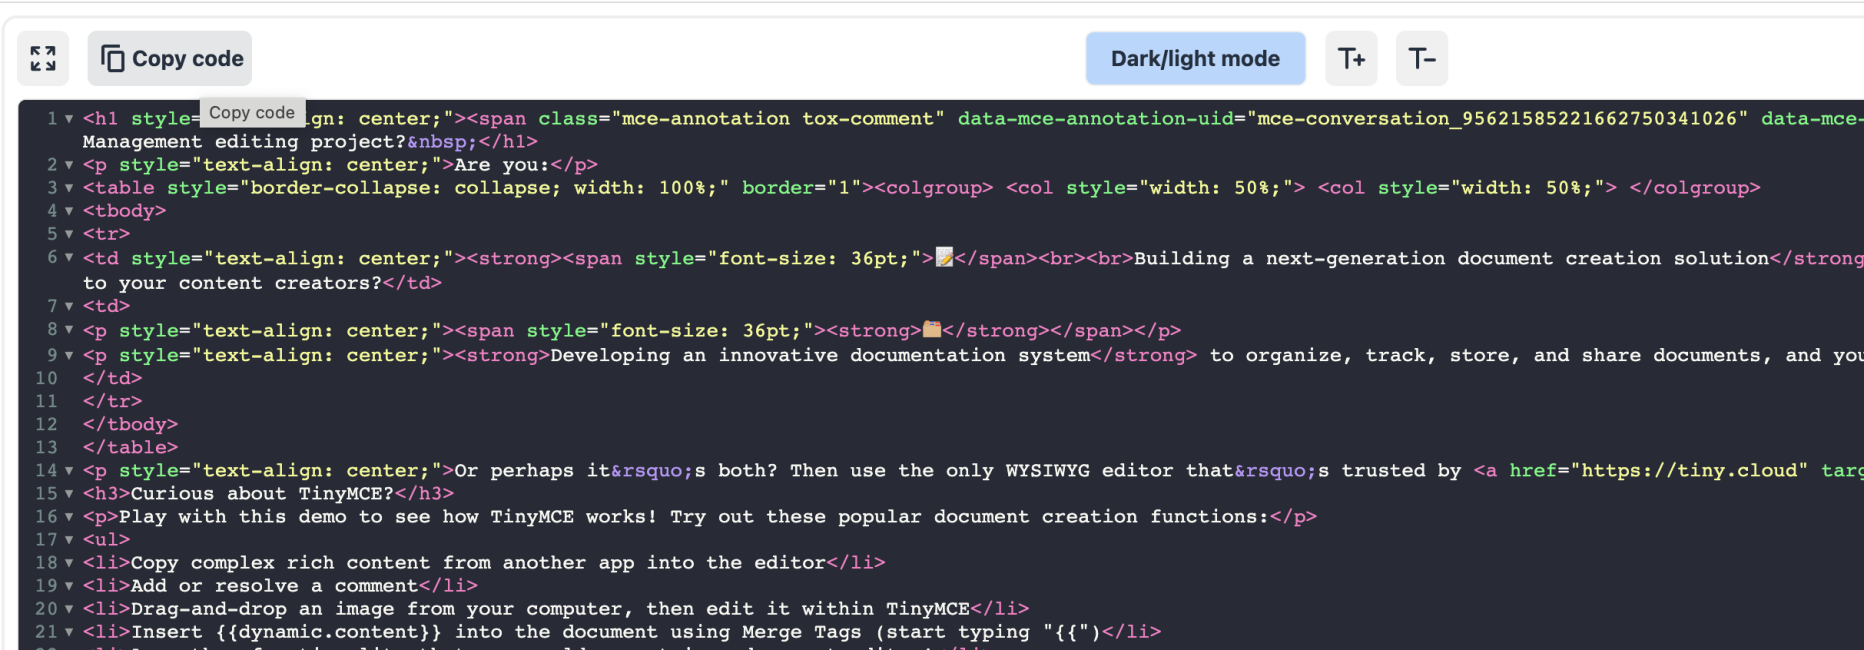
- With the HTML now on your clipboard, paste the HTML code where it is needed
Source code editors support your customers
Different customers bring different experience levels with them when they use your app to write their content. And it shouldn’t be a significant investment of your time to be able to give them control over their content, by modifying the source code (if they want to).
By following this article’s demo, you can configure the TinyMCE Advanced Code plugin and show how an enterprise-grade editor can be set up rapidly.
You can contact us if you need more information on source code editing to support your customers’ needs.


