


If you’re building an app that has large amounts of content passing through it, like an advanced Content Management System (CMS), there’s two clear obstacles to sort out if you’re building URL validation yourself:
- Will the solution be compliant with WHATWG specifications?
- How will the broken links appear to customers?
The first obstacle can be sorted out with research. The second is trickier. It’s more of a user experience question, really, than a JavaScript or Python or other code-based problem. Yes, you can eventually fix it, but how much time do you have available?
Time pressures can close in unexpectedly. So the good news is there’s a solution to URL validation in your app that can save time: your app’s rich text editor can handle URL validation. TinyMCE is a rich text editor that handles URL validation, including the user experience component, through its Link Checker plugin. And it’s easy to configure within the lines of JavaScript that integrate TinyMCE into your application.
That’s what this tutorial covers: the steps involved in setting up and configuring TinyMCE with the Link Checker plugin, for comprehensive URL validation.
What makes a URL valid or not?
Following the standards set by the RFC series documents (RFC 3986 on valid characters) a web address can have any of the following 84 characters in it, disregarding the hypertext transfer protocol (http) or domain (.com):
ABCDEFGHIJKLMNOPQRSTUVWXYZabcdefghijklmnopqrstuvwxyz0123456789-._~:/?#[]@!$&'()*+,;=How to set up URL validation with TinyMCE
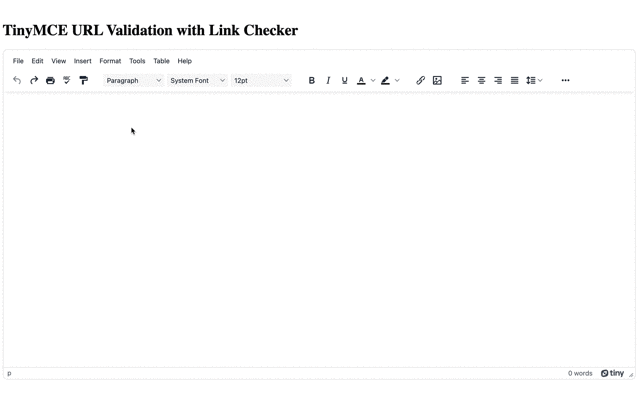
To see how URL validation works, you’ll need to set up a demo TinyMCE instance, and configure the Link Checker plugin.
Setting up TinyMCE for URL validation
A TinyME API key gives you free access to TinyMCE premium plugins for 14 days. Navigate to the Get-tiny sign up page to get your FREE API key. You can sign up with your GitHub account, or with a Google account. To get started:
-
Create an index.html file.
-
With your file open, in the head section, add script tags, and reference TinyMCE Cloud through a CDN link within the script tags. This is what the link looks like:
<script
  src="https://cdn.tiny.cloud/1/your-api-key/tinymce/6/tinymce.min.js"
  referrerpolicy="origin"
></script>;
Note: For the Tiny Cloud connection, creating an account with TinyMCE gets you a FREE API key. When you use this key, you get access to Premium TinyMCE plugins for 14 days, like the Link Checker plugin, as well as no warning messages concerning domains in the text area.
-
Add another pair of script tags, add the following JavaScript. It’s the tinymce.init method, and it’s how you control TinyMCE:
<script>
   tinymce.init({
   selector: '#editor',
   plugins: 'powerpaste casechange searchreplace autolink directionality advcode visualblocks visualchars image link media mediaembed codesample table charmap pagebreak nonbreaking anchor tableofcontents insertdatetime advlist lists checklist wordcount tinymcespellchecker editimage help formatpainter permanentpen charmap emoticons advtable export autosave',
   toolbar: 'undo redo print spellcheckdialog formatpainter | blocks fontfamily fontsize | bold italic underline forecolor backcolor | link image | alignleft aligncenter alignright alignjustify lineheight | checklist bullist numlist indent outdent | removeformat',
   height: '700px'
       });
</script>
-
Add initial HTML content, and the CSS selector class to some textarea tags. The selector is set as an id with the value “editor” in the TinyMCE init script:
<body>
   <h1>TinyMCE Quick Start Guide</h1>
  <form id="post">
       <textarea id="editor">Hello, World!</textarea>
  </form>
</body>;
-
Test run the index.html file by opening it in your browser, or use a local server command with Python or with the PHP command:
Adding URL Validation
-
In the plugins section of the TinyMCE init script, add the link checker plugin:
tinymce.init({
   selector: '#editor',
plugins: 'powerpaste casechange searchreplace autolink directionality advcode visualblocks visualchars image link media mediaembed codesample table charmap pagebreak nonbreaking anchor tableofcontents insertdatetime advlist lists checklist wordcount tinymcespellchecker editimage help formatpainter permanentpen charmap linkchecker…//Link Checker Plugin included in the plugins configuration.-
Save the changes
-
Copy and paste some of these links into the TinyMCE text area, and check on the results:
-
Valid Link: https://www.wikipedia.org/
-
Invalid Link: https://www.google/.com
-
Note: The above Invalid URL contains the ‘\’ character, which has made the URL invalid.
Configuring URL validation UX with TinyMCE
You can change how URL validation looks with some adjustments to the CSS using the Link Checker plugin linkchecker_content_css option.
-
Create a new CSS file called “linkchecker_content.css” in the same directory as your index.html file
-
Open the CSS file in your text editor of choice, and paste in the following content:
a[data-mce-linkchecker-status="invalid"] {
    outline-color: rgba(231, 76, 60, 0.25);
    background-color: rgba(231, 76, 60, 0.25)
}


a[data-mce-linkchecker-focus="true"] {
    outline: 1px solid rgba(231, 76, 60, 0.75)
}-
Adjust the CSS to change the invalid link appearance. For example, changing the text color and font:
a[data-mce-linkchecker-status="invalid"] {
    outline-color: rgba(15, 8, 1);
    background-color: rgba(240, 133, 19);
    font-family: 'Trebuchet MS', 'Lucida Sans Unicode', 'Lucida Grande', 'Lucida Sans', Arial, sans-serif;
}


a[data-mce-linkchecker-focus="true"] {
    outline: 1px solid rgba(231, 76, 60, 0.75)
}-
Save the changes
Self-hosted TinyMCE and URL validation
If you’re using TinyMCE as a self-hosted solution for your app, you’ll need to provide a URL to the link checking service. You can do this with one more option in the TinyMCE init config with the linkchecker_service_url parameter:
-
Add the following option to your TinyMCE init configuration:
  <script>
        tinymce.init({
        selector: '#editor',
        plugins: 'powerpaste casechange searchreplace autolink directionality advcode visualblocks visualchars image link media mediaembed codesample table charmap pagebreak nonbreaking anchor tableofcontents insertdatetime advlist lists checklist wordcount tinymcespellchecker editimage help formatpainter permanentpen charmap linkchecker emoticons advtable export autosave',
        toolbar: 'undo redo print spellcheckdialog formatpainter | blocks fontfamily fontsize | bold italic underline forecolor backcolor | link image | alignleft aligncenter alignright alignjustify lineheight | checklist bullist numlist indent outdent | removeformat | code',
        height: '700px',
        linkchecker_content_css: 'http://localhost:8000/linkchecker_content.css',
linkchecker_service_url: ' '-
Set the domain target to point toward your application:
linkchecker_service_url: "http://mydomain.com/linkchecker";
-
Save the changes.
Saving time with TinyMCE URL validation
The steps needed to set up URL validation, using TinyMCE, are fast when you use the Link Checker plugin. It requires only small JavaScript and CSS configuration to create a UX that helps content creators understand and see where and when their links aren’t valid.
Contact us if you need more support or advice on URL validation in your CMS, or in another specific business case for your application. TinyMCE works well as a CMS solution, and you can find out more in the TinyMCE CMS solution page.


