


When you're building an Angular app, media sits at the intersection of performance, security, UX, and application architecture. Skip the heavy development work and choose a robust rich text editor that handles all the media management for you.
Media Optimizer (powered by Uploadcare) integrates into TinyMCE in minutes and does the heavy lifting: optimizing images for different browsers and operating systems, hosts your files, providing a management dashboard with analytics and settings, and letting users adjust and filter images. No need to spend weeks building custom media systems or patching together libraries.
In this guide, you'll create an Angular app with TinyMCE and Media Optimizer.
How does Angular image upload work?
Angular doesn't provide native image upload functionality out of the box. You need to build it yourself or integrate a solution. The typical flow involves several moving parts: a file input component, validation logic, upload handling, server communication, progress tracking, error management, and finally displaying the uploaded image.
Here's what you're dealing with when building from scratch:
- Client-side components: You need a file picker (usually an
<input type="file">), validation to check file types and sizes, preview generation, and upload progress indicators. - Server communication: Angular's
HttpClienthandles the actual upload via POST requests withFormData, but you'll write interceptors for authentication, retry logic for failed uploads, and error handling for network issues. - State management: Track upload progress, manage multiple simultaneous uploads, handle success and failure states, and update your UI accordingly.
- Image optimization: Resize images before upload (if you're doing client-side optimization), generate thumbnails, handle different formats, and optimize for various screen sizes and resolutions.
Media Optimizer eliminates this complexity. You immediately get a production-ready rich text editor that handles uploads, optimization, storage, and delivery.
How to set up image uploads in Angular with TinyMCE’s Media Optimizer
Create an Angular app with TinyMCE and Media Optimizer in just a few steps.
Prerequisites
You’ll need a few things before you can get started:
- Node.js: If you don’t already have Node you’ll need to download and install it so you can run Node Package Manager (npm) commands.
- A basic understanding of Angular: Since you’ll be creating and working in an Angular project.
- A TinyMCE API key: You can find your TinyMCE API key on the Integrate page under My Account.
- Uploadcare account: If you don’t have an Uploadcare account yet, reach out to your TinyMCE Customer Success Manager, and they’ll help you get started.
⚠️ Note: You will need a working Uploadcare account to complete this demo.
Step one: Install Angular CLI
Angular CLI is a command line tool that lets you create, edit, and deploy Angular projects. Install it via NPM:
npm install -g @angular/cliTo verify that Angular is installed in your environment, run ng version.
Step two: Create your Angular app
Create your demo Angular app with one command and three questions:
ng new media-app-demoThis creates a new project called media-app-demo. Angular will then ask you:
- To choose a CSS style:
- Choose CSS.
- If you want to enable Server-Side Rendering (SSR) and Static Site Generation (SSG/Prerendering):
- Answer No. The app should render client side for a faster render.
- Which AI tools do you want to configure with Angular best practices?
- Answer None, since you don’t need them for this demo.
Now open your project in your favorite IDE and run ng serve in the media-app-demo folder to launch the app to localhost:4200. It’ll build the project dependencies and the app, to look like this:

Step three: Add a rich text editor to your Angular project
Now you’ll add TinyMCE to your Angular project in three steps:
- Install the TinyMCE Angular wrapper via NPM:
npm install @tinymce/tinymce-angular - Add
EditorModuleto app.ts: Bring theEditorModuleinto src/app/app.ts by importing it at the top of the file, and adding it toComponentimports. Once you do this, your app.ts will look like this:
import { Component, signal } from '@angular/core'; import { RouterOutlet } from '@angular/router'; import { EditorModule } from '@tinymce/tinymce-angular'; @Component({ selector: 'app-root', imports: [RouterOutlet, EditorModule], templateUrl: './app.html', styleUrl: './app.css' }) export class App { protected readonly title = signal('angular-tinymce-demo'); } - Add TinyMCE to app.html: To see the editor and upload images in your Angular app, under src/app replace all of the default app.html with the following code:
<style>
.main {
  padding: 2%;
  font-family: Arial, Helvetica, sans-serif;
}
</style>

<main class="main">
  <div class="content">
      <h1>Hello, {{ title() }}</h1>
      <p>Congratulations! Your app is running. 🎉</p>
  </div>
  <div>
    <editor
    class="rte"
    apiKey="no-api-key"
    [init]="{
      height: 500,
      plugins: 'lists link table code help wordcount',
      toolbar: 'undo redo | formatselect | bold italic emoticons | alignleft aligncenter alignright alignjustify | bullist numlist outdent indent'
    }"
  ></editor>
  </div>
</main>

<router-outlet />
Replace the value for apiKey with a real TinyMCE API key, which is in the Integrate section of your TinyMCE dashboard.
The localhost:4200 instance will refresh magically in the browser. Your Angular app is now ready to handle media.
Step four: Add Media Optimizer to your Angular app
Installing Media Optimizer so that your Angular app can handle images and videos takes a couple steps. You will:
- Add the word
uploadcareto thepluginsandtoolbararrays. - Add
uploadcare_public_keyto the TinyMCE init in app.html.- Don’t forget to replace
yourUploadcarePublicKeywith your real Uploadcare public key.
- Don’t forget to replace
After this your app.html should look something like this:
<style>
.main {
  padding: 2%;
  font-family: Arial, Helvetica, sans-serif;
}
</style>

<main class="main">
  <div class="content">
      <h1>Hello, {{ title() }}</h1>
      <p>Congratulations! Your app is running. 🎉</p>
  </div>
  <div>
    <editor
    class="rte"
    apiKey="yourTinymceApiKey"
    [init]="{
      height: 500,
      plugins: 'uploadcare lists link image table code help wordcount',
      toolbar: 'uploadcare | undo redo | formatselect | bold italic emoticons | alignleft aligncenter alignright alignjustify | bullist numlist outdent indent',
      uploadcare_public_key: 'yourUploadcarePublicKey',
    }"
  ></editor>
  </div>
</main>

<router-outlet />You can add multiple optional controls to Media Optimizer, including:
- Add Uploadcare signed uploads with
uploadcare_signed_upload_auth_provide: The option to verify only authorized users from signed upload authorization providers can upload files with your public key. - Set up a custom CDN base URL with
uploadcare_cdn_base_url: Can’t host your images on Uploadcare’s servers? Use the custom CDN option to deliver images from your own domain. - Configure storage type: Control how your images are stored, and for how long.
- Set
uploadcare_srcset_stepsfor responsive images: Generate multiple image resolutions to populatesrcsetand make images responsive for all kinds of browsers.
In the next section, test the Angular app to see the robust, useful, and multifeatured image upload UX you just built into your app.
How to add images to your app in Angular
Upload an image that gets automatically optimized the moment it's uploaded, and make basic image adjustments if you want.
Click the Media Optimizer button in the toolbar and the lightbox will launch. From there, choose an image to upload (here's a free-to-use high-resolution picture of a bird and a capybara from Wikimedia Commons for testing).
You've added images to your Angular app. More than that, you've added a robust image handling system that covers all your app requirements for security, optimization, responsiveness, analytics, and more.
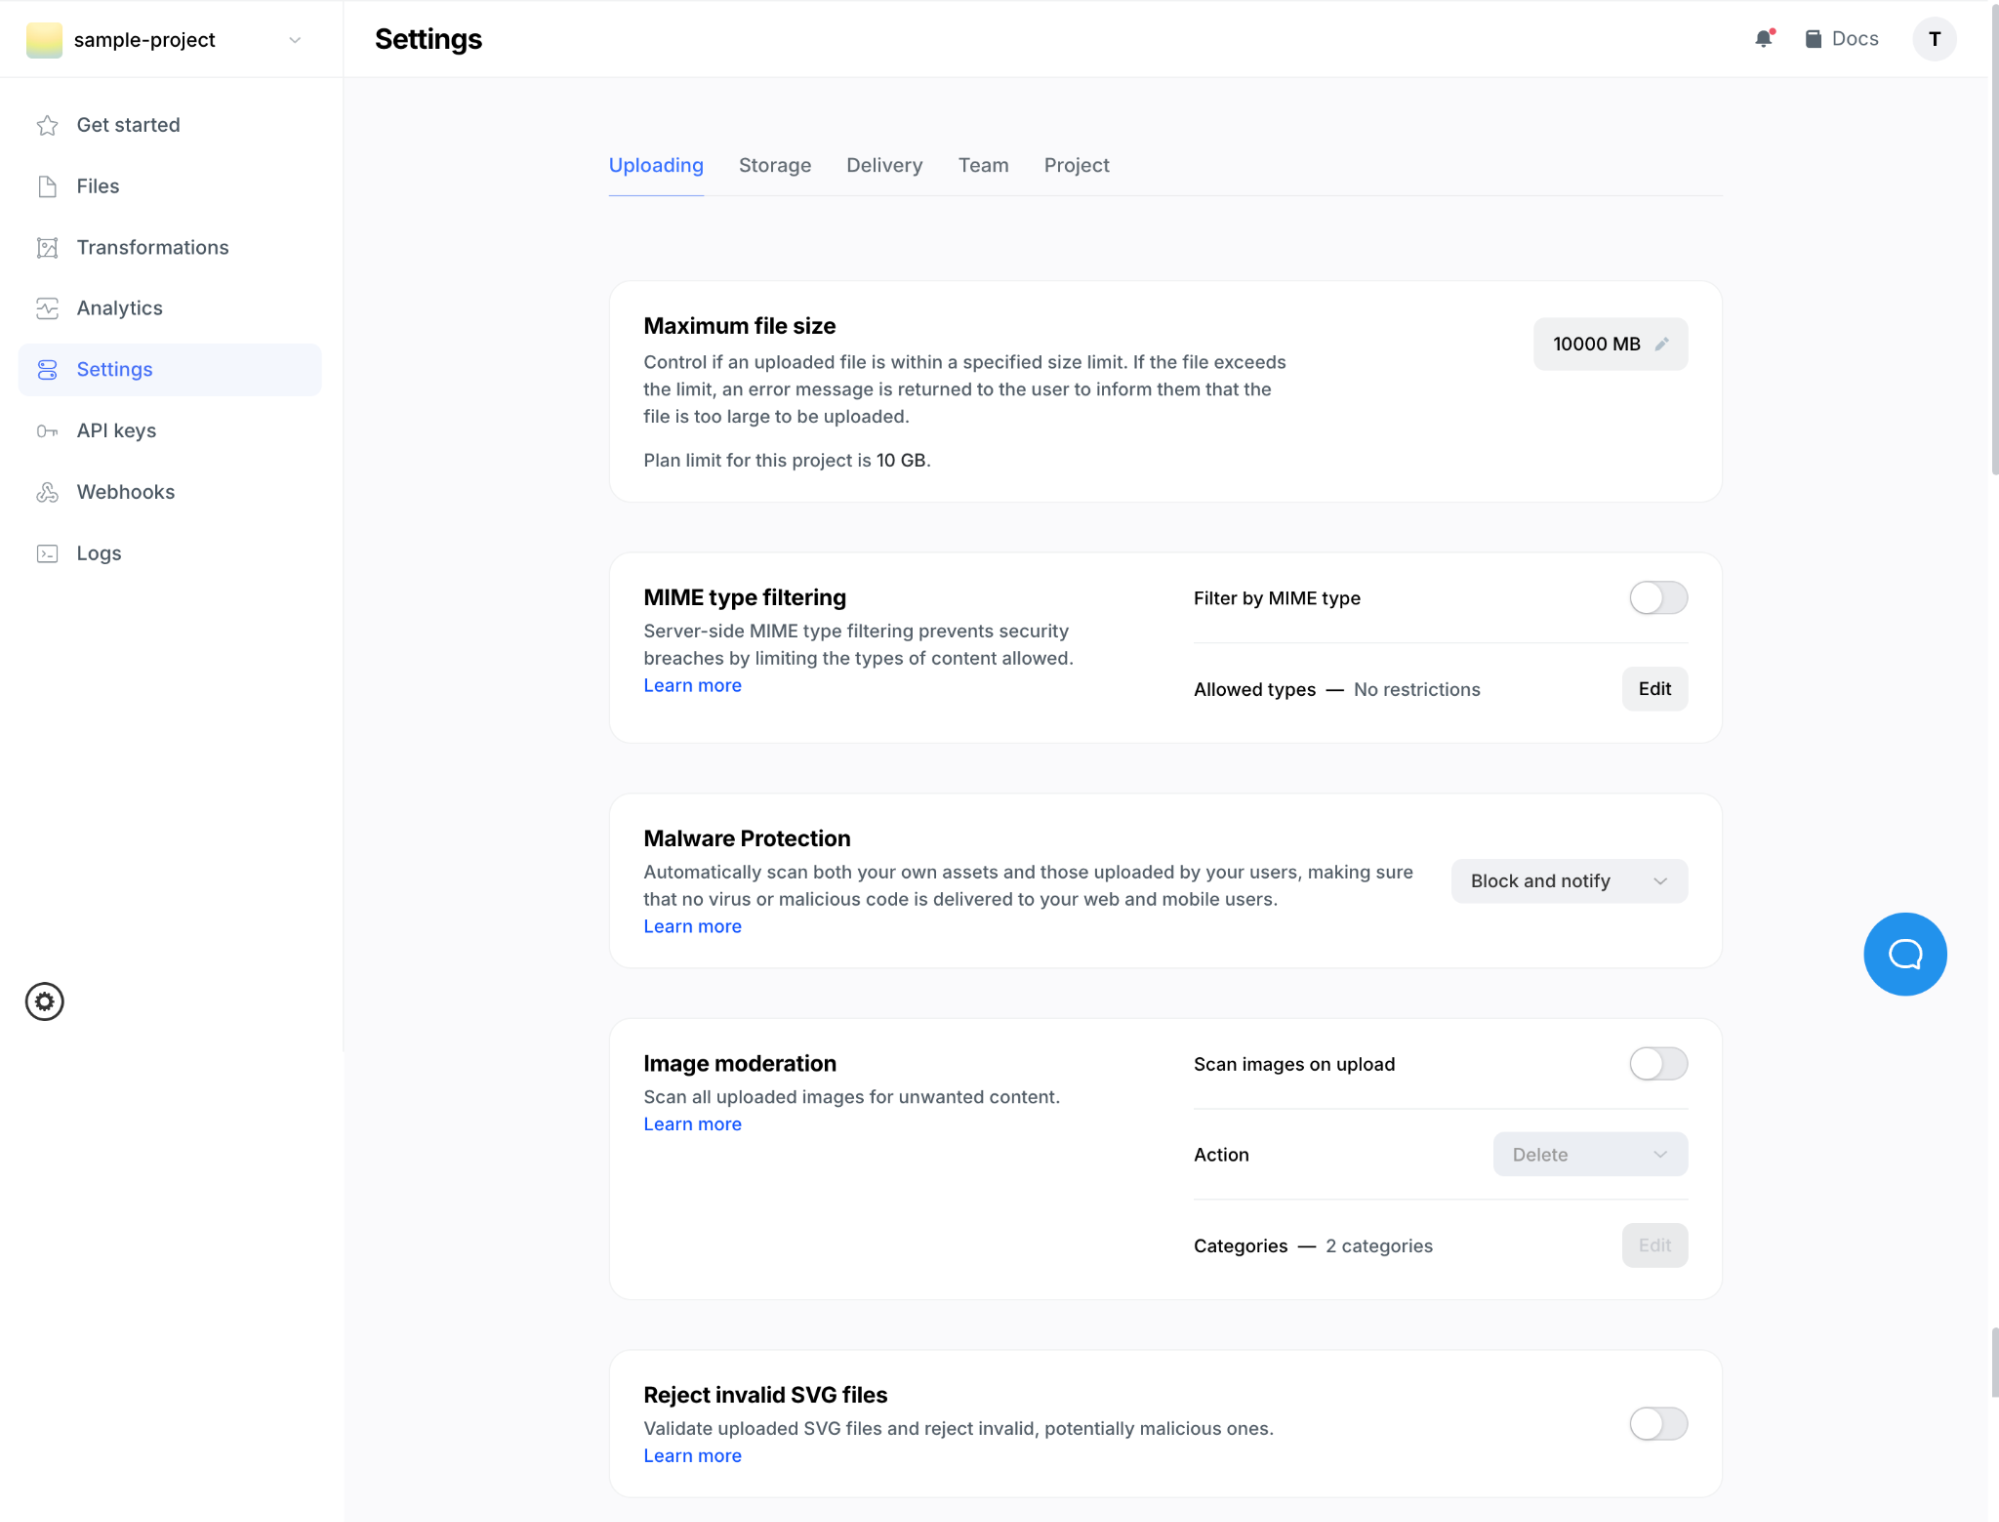
Managing TinyMCE image upload in the Uploadcare dashboard
If you choose to host images with Uploadcare, you’ve got full control over them in the Uploadcare dashboard. From detecting unsafe content to image analytics to transformation control and more, the dashboard lets you lock down your image handling in one place. Read more about the details of what you can do with the Uploadcare dashboard.
Want to see a live demo of the dashboard? Watch the thirty-minute video:
What can go wrong in an Angular image upload?
Image uploads fail not because Angular can't handle files, but because developers treat multi-stage workflows as single requests. Files selected successfully can be rejected later by backend validation, virus scanning, or post-processing, leaving the UI showing "uploaded" when nothing is saved. Network interruptions orphan in-flight uploads unless you persist progress.
Even successful uploads may not be immediately available due to CDN propagation or async resizing, causing broken previews. The mistake? Assuming "HTTP 200" means "done." Image uploads involve deferred success, partial failure, and eventual consistency. Battle-tested integrations like TinyMCE require server-side enforcement and Content Security Policy (CSP) controls rather than trusting client-side confirmation.
SVG security issues
SVG uploads look like images but behave like documents: they can contain inline scripts, external references, event handlers, and embedded CSS that execute depending on how you render them. Angular's template sanitization doesn't protect you once the SVG is served as a static asset or rendered via <object>, <embed>, or unsafe DOM insertion. User-uploaded SVGs can trigger XSS, exfiltrate data, or bypass security policies.
TinyMCE filters dangerous content at the editor level but still requires server-side validation and CSP enforcement. Client-side filtering is only first-layer defense. The fix is enforcing strict server-side SVG policies: strip scripts and metadata during processing or disallow SVG uploads unless you have a documented need and hardened rendering backed by CSP.
Incorrect file pathways
Incorrect paths stem from treating user-generated images like static app assets. Uploaded files don't belong in assets/, aren't bundled at build time, and shouldn't use relative paths. Breakage hits when environments change: dev works, staging breaks, production serves expired signed URLs, or SSR renders non-existent image URLs. The problem is architectural: uploaded images are external resources with lifecycles, not files your app owns. Treat image URLs as backend-provided data: fully qualified, environment-aware, replaceable without redeploying. This matches TinyMCE's expectation that storage, validation, and access control live outside the editor and are governed by origin rules and CSP, not local paths.
What’s next?
You've built an Angular app with production-ready image upload capabilities in under 30 minutes. Here's where to go from here:
- Dive deeper into the official Media Optimizer documentation to set up signed uploads, custom CDN URLs, and responsive image sets.
- TinyMCE offers 50+ plugins and extensive customization options. Check out tutorials that take minutes to complete, like Dark Mode or adding Google Fonts. Read the list of TinyMCE plugins to find the right ones for your app’s needs.
- Discover more Angular tutorials and developer insights under the Angular section of the TinyMCE Developer Center.


