


Building an email messaging system is harder than it looks. To get the most out of your application, you need a rich text editor that handles everything from basic formatting to custom templates, media embedding, and full HTML output. Often, there isn’t time for weeks of custom development. TinyMCE solves this problem with its native, modern integrations so you can build a production-ready email system fast.
In this guide you'll build a demo email messaging system in the popular framework React, with Resend for email delivery and TinyMCE with email templates, merge tags, inline CSS, and full HTML control.
Step one: Clone the project and connect Resend
You’ll need a few things before you get started in addition to a basic familiarity with Git, GitHub, React, and Typescript. Familiarity with GitHub CLI is optional.
- A free TinyMCE API key for WYSIWYG editor integration.
- A free Resend account for email service integration.
Clone the project
First, you’ll want to clone the TinyMCE email messaging system project from GitHub. There are two ways to do this:
- Visit the repository page and click the green Code button.
- Run this GitHub CLI command in your local GitHub folder:
gh repo clone tinymce/blog-ems-demoYou’ll get the blog-ems-demo project, which you can open in any IDE to continue.
To start the project locally, you just need to run:
npm installto install dependencies.npm run devto launch your React app to http://localhost:3000/.
Open localhost to see the React email messaging system in the dev environment. This is where you’ll be able to see changes in the React app as you make them. No refreshes needed.
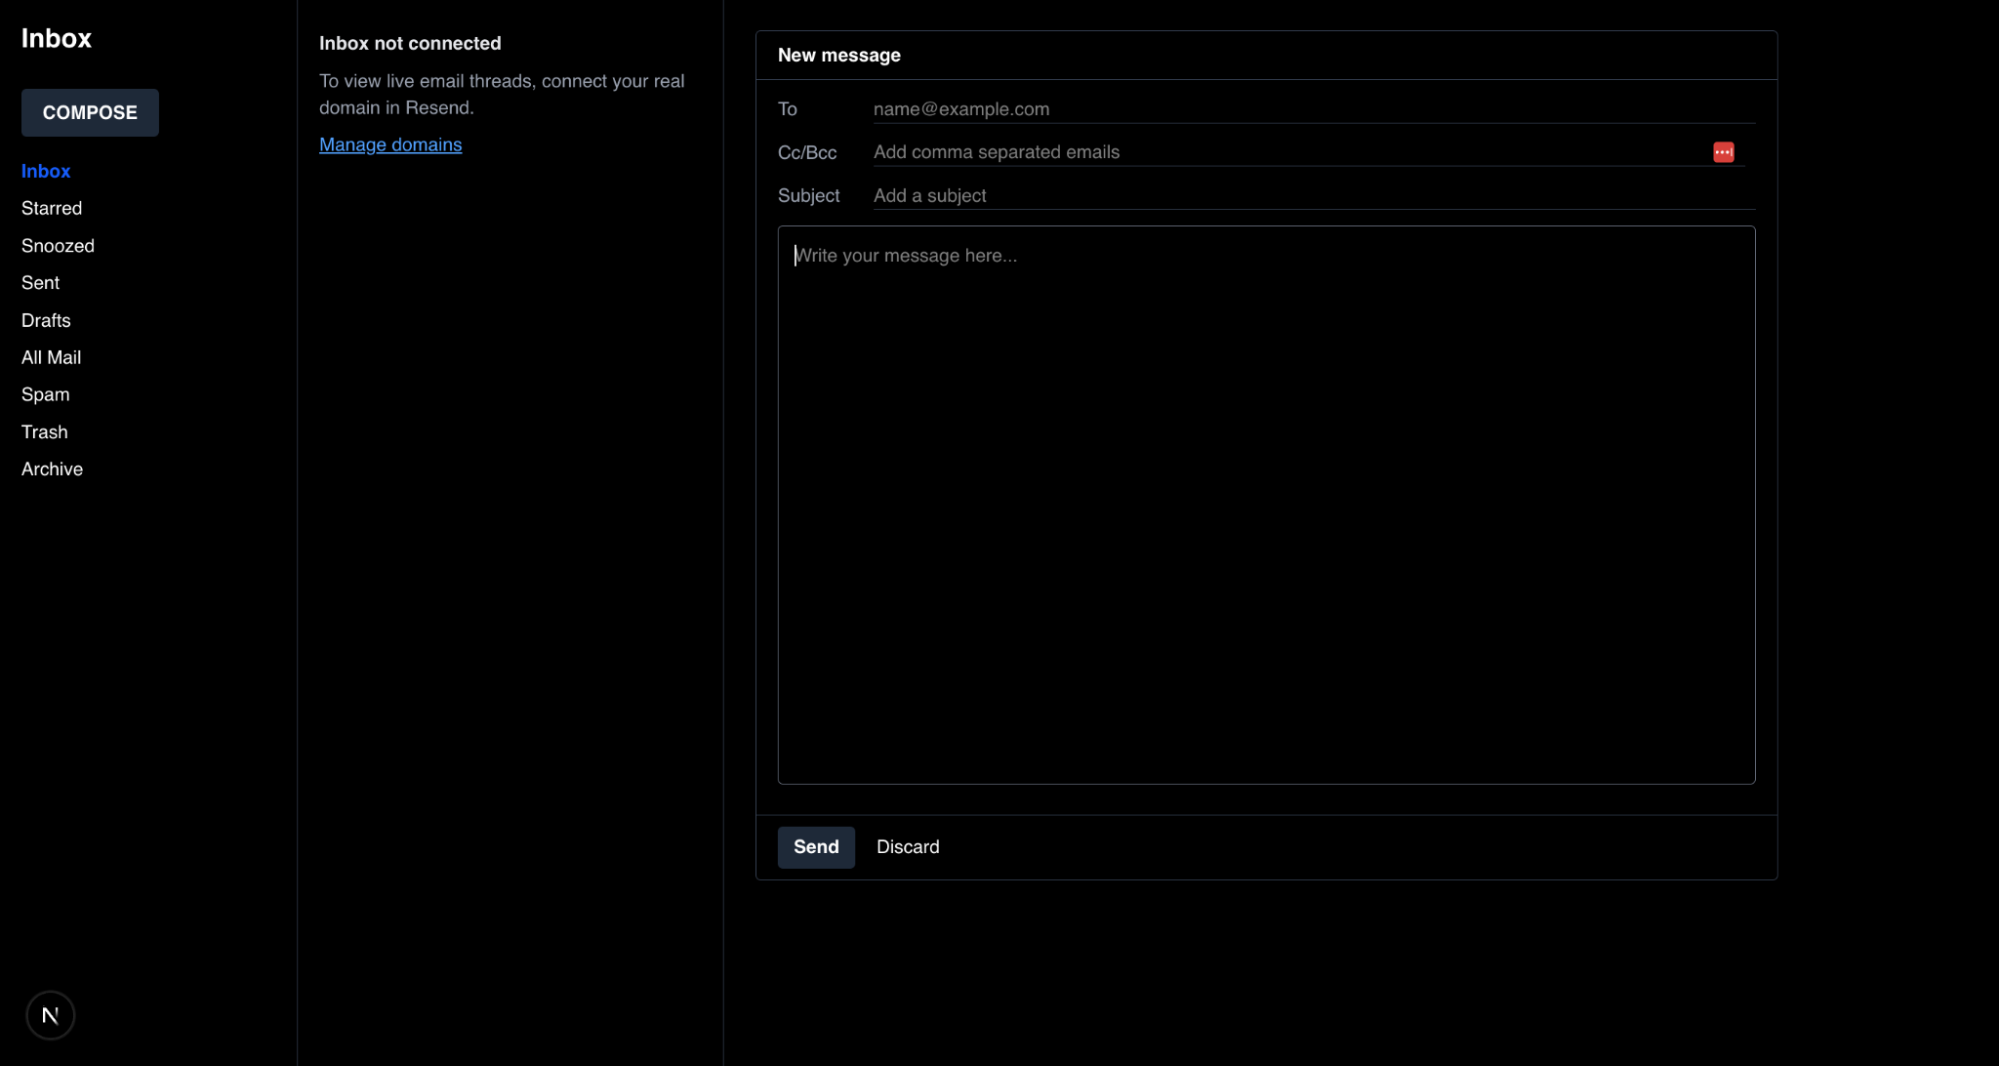
Connect your Resend account and send a test email
All you have to do to send a real email with your React app is:
- Create a Resend account.
- Copy your Resend API key into an .env.local file in your project. Replace no-api-key with your real Resend API key.
RESEND_API_KEY = "no-api-key"; - Save your project, and send yourself an email through the plain React app. That’s it! Your React app is wired into a real email account.
🔥 Hot Tip: If you want to send and receive real email through Resend with this app, you can. You’ll just need to connect a domain on the Resend Domains page. Until then, the app will fall back to sending from onboarding@resend.dev.
Step two: Set up TinyMCE in your email messaging app
TinyMCE doesn’t take long to install in a React email messaging app. First, you’ll add TinyMCE’s native React component to the project with an NPM command in tinymce-ems-demo:
npm install @tinymce/tinymce-reactCreate editorclient.tsx and add it to page.tsx
Now you’ll create an editorclient.tsx file and put it in a new folder called components/ under app/. This is so that your rich text editor is its own component that can be called on other pages.
In editorclient.tsx, paste this code with a basic TinyMCE configuration that includes Dark Mode for TinyMCE:
"use client";

import { Editor } from "@tinymce/tinymce-react";

const tinymceApiKey = process.env.NEXT_PUBLIC_TINYMCE_API_KEY;

type EditorClientProps = {
  initialValue?: string,
  onChange?: (content: string) => void,
};

export default function EditorClient({
  initialValue,
  onChange,
}: EditorClientProps) {
  return (
    <Editor
      apiKey={tinymceApiKey}
      initialValue={initialValue}
      tinymceScriptSrc={`https://cdn.tiny.cloud/1/${tinymceApiKey}/tinymce/8/tinymce.min.js`}
      init={{
        height: 500,
        menubar: false,
        toolbar_location: "bottom",
        plugins: "lists link image table code help wordcount",
        toolbar: [
          "undo redo | formatselect | bold italic emoticons | alignleft aligncenter alignright alignjustify | bullist numlist outdent indent | link image code",
        ],
        skin: "oxide-dark",
        content_css: "dark",
      }}
      onEditorChange={(content) => {
        onChange?.(content);
      }}
    />
  );
}
This step is complete, so you can save editorclient.tsx.
Add NEXT_PUBLIC_TINYMCE_API_KEY to .env.local
Add a new value called NEXT_PUBLIC_TINYMCE_API_KEY to your .env.local file and insert a valid TinyMCE API key.
💅 Tip: If you didn’t get one during the first step, you can get a free TinyMCE API key now.
Add TinyMCE to page.tsx
To add the WYSIWYG editor to the Inbox page, you’ll need to replace the textarea in page.tsx with a reference to editorclient.
First, add import dynamic from "next/dynamic"; to the file, an import from Next.js that will allow us to track the editor’s state.
Next, import the EditorClient at the start of page.tsx as a const, and set Server Side Rendering (SSR) as false. This is to avoid React hydration errors and make your app faster, since there’s no need for the editor to be rendered on the server, just the browser. These changes look like this:
"use client";

import { FormEvent, useEffect, useState } from "react";
import dynamic from "next/dynamic";

const EditorClient = dynamic(() => import("./components/editorclient"), {
  ssr: false,
});
...Next, you’re going to add another const right above the handleSendEmail const to track the content inside the editor and handle its state:
const [messageHtml, setMessageHtml] = useState("");
Then you’ll replace the current message body if/try that starts with if (!message) with this if/try, so the app will read and validate your HTML content before any emails are sent to your form handler:
   if (!messageHtml.trim()) {
      setErrorMessage("Message body cannot be empty.");
      setSending(false);
      return;
    }

    try {
      const response = await fetch("/api/send-email", {
      method: "POST",
      headers: { "Content-Type": "application/json" },
      body: JSON.stringify({
        to,
        cc: ccRaw.length ? ccRaw : undefined,
        subject,
        html: messageHtml,
        message: messageHtml
          .replace(/<[^>]*>/g, " ")
          .replace(/\s+/g, " ")
          .trim(),
      }),
});Last but not least, you’ll need to replace the <div className="px-4 pb-4"> for composing a message with the new EditorClient div:
             <div className="px-4 pb-4">
                <input
                  type="hidden"
                  name="message"
                  value={messageHtml}
                  required
                  aria-hidden="true"
                />
                <label className="sr-only" htmlFor="compose-message">
                  Message body
                </label>
                <div id="compose-message">
                  <EditorClient
                    initialValue="Write your message here..."
                    onChange={(content) => setMessageHtml(content)}
                  />
                </div>
</div>Your React email messaging app will automatically refresh when you save page.tsx, and look like this:
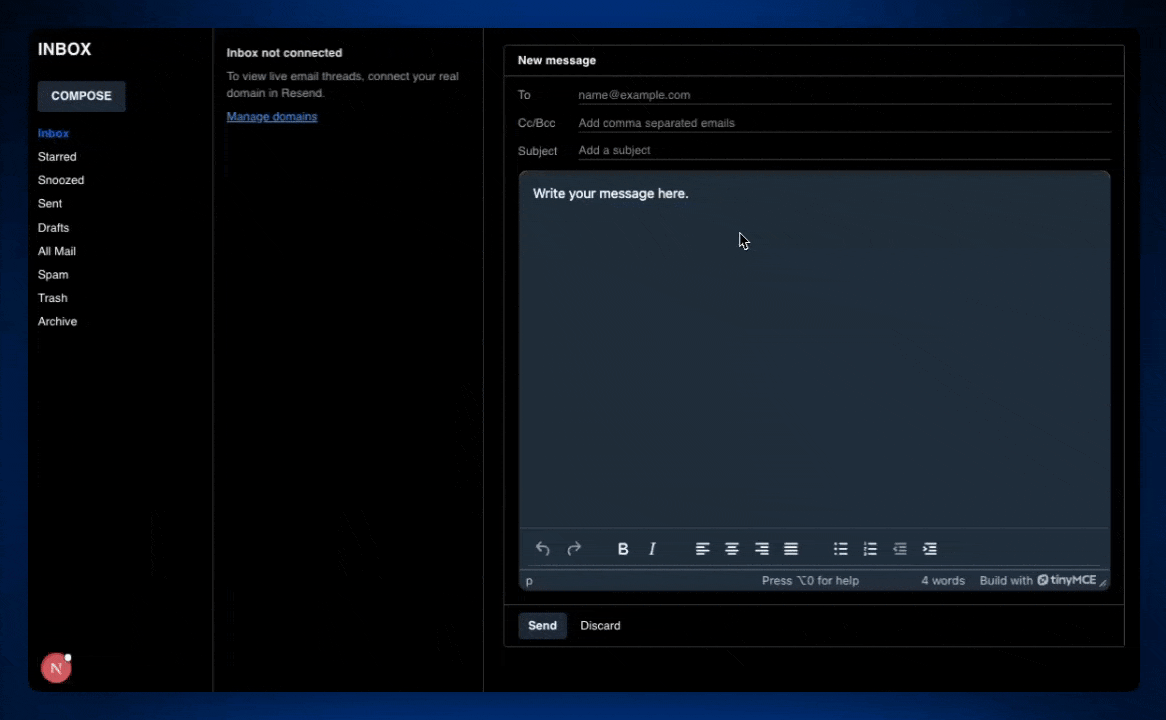
So far, you’ve got a functional React email messaging inbox that uses Resend for email, and TinyMCE for composing a rich message.
Up next? Add some serious messaging features to your EMS with simple setup.
Step three: Add email messaging features to TinyMCE
Now that you’ve integrated and customized the editor, it's time to add built-in email messaging features in just a few minutes. You’ll configure TinyMCE to support templates, merge tags, full page HTML control, and inline CSS–all without complex development or any headaches.
Add Templates
Templates in a messaging system let your users reuse pre-built content blocks instead of writing repetitive messages from scratch. TinyMCE can read and organize JSON or HTML templates that can be inserted into the editor.
Add any standardized templates your users need without a lot of fuss, especially if your templates are already JSON or HTML.
In this demo, you’ll hardcode some sample templates to show how things work, but in the real world you’d create a callback function that grabs your templates from back-end storage.
To add Templates to your React email messaging app, you’ll be changing editorclient.tsx. Here’s how you’ll do it:
- Add
advtemplateto the TinyMCEpluginsarray. - Add
inserttemplateto thetoolbar. - Add a reference to
advtemplate_templatesto TinyMCE. Take a look at all three of these changes in the TinyMCEinit:
... :init="{ plugins: "advtemplate lists link image table code help wordcount", toolbar: [ 'inserttemplate | undo redo | formatselect | bold italic emoticons | alignleft aligncenter alignright alignjustify | bullist numlist outdent indent | link image code' ], height: 500, advtemplate_templates }" ... - In a real world scenario,
advtemplate_templatesmust connect to the callback function mentioned earlier. For this guide, use these hardcoded templates as aconstin editorclient.tsx:
const advtemplate_templates = [
  {
    title: "Customer onboarding",
    items: [
      {
        title: "Welcome new subscriber",
        content:
          '<p dir="ltr"><strong>Welcome to the Brightside community!</strong></p>\n<p dir="ltr">Thanks for joining our list — you’ll be the first to hear about fresh launches, limited offers, and behind-the-scenes updates.</p>\n<ul>\n<li dir="ltr"><strong>Step one:</strong> Add <a href="mailto:hello@brightside.co">hello@brightside.co</a> to your contacts so you never miss an email.</li>\n<li dir="ltr"><strong>Step two:</strong> Tell us what you’re interested in so we can tailor content just for you.</li>\n</ul>\n<p dir="ltr">Talk soon,<br />The Brightside Team 🌞</p>',
      },
      {
        title: "First purchase thank-you",
        content:
          '<p dir="ltr"><strong>You did it — your order is on the way!</strong></p>\n<p dir="ltr">Hi {{ subscriber.first_name | default: "friend" }},</p>\n<p dir="ltr">Thank you for trusting Brightside with your first purchase. We’re already packing it with care.</p>\n<ul>\n<li dir="ltr"><strong>Order number:</strong> {{ order.number }}</li>\n<li dir="ltr"><strong>Estimated arrival:</strong> {{ order.estimated_delivery_date }}</li>\n<li dir="ltr"><strong>Need help?</strong> Reply to this email or text us at (800) 555-0199.</li>\n</ul>\n<p dir="ltr">As a welcome gift, enjoy <strong>15% off</strong> your next order with code <span style="background-color:#fef3c7;padding:2px 6px;border-radius:4px;">HELLOAGAIN</span>.</p>',
      },
    ],
  },
  {
    title: "Promotions & launches",
    items: [
      {
        title: "Product launch spotlight",
        content:
          '<p dir="ltr"><strong>Introducing the Glow Serum</strong></p>\n<p dir="ltr">Meet the newest member of our skincare lineup: a vitamin C powerhouse that brightens, hydrates, and defends your skin in just one pump.</p>\n<ul>\n<li dir="ltr"><strong>Why you’ll love it:</strong> Lightweight texture, clinically proven results, and recyclable packaging.</li>\n<li dir="ltr"><strong>Launch offer:</strong> Save 20% with code <span style="background-color:#dbeafe;padding:2px 6px;border-radius:4px;">GLOWUP</span> through Sunday.</li>\n</ul>\n<p dir="ltr"><a href="https://example.com/glow-serum" style="background-color:#111827;color:#ffffff;padding:10px 18px;border-radius:4px;text-decoration:none;">Shop the Glow Serum →</a></p>',
      },
      {
        title: "48-hour flash sale",
        content:
          '<p dir="ltr"><strong>72-Hour Flash Sale Starts Now!</strong></p>\n<p dir="ltr">Gear up for the season with sitewide savings. From trail runners to breathable layers, everything is <strong>up to 35% off</strong>.</p>\n<ul>\n<li dir="ltr"><strong>Sale dates:</strong> Ends {{ now | plus_days: 3 | date: "%B %d at %I:%M %p" }}.</li>\n<li dir="ltr"><strong>Members-only perks:</strong> Free expedited shipping on orders over $75.</li>\n<li dir="ltr"><strong>Reminder:</strong> Discount applies automatically at checkout.</li>\n</ul>\n<p dir="ltr"><a href="https://example.com/sale" style="background-color:#2563eb;color:#ffffff;padding:10px 18px;border-radius:4px;text-decoration:none;">Grab your favorites →</a></p>',
      },
    ],
  },
  {
    title: "Retention & re-engagement",
    items: [
      {
        title: "Abandoned cart reminder",
        content:
          '<p dir="ltr"><strong>Still thinking it over?</strong></p>\n<p dir="ltr">You left a few things behind — and they’re almost gone. Complete your order before it sells out.</p>\n<table dir="ltr" cellpadding="12" style="border:1px solid #e5e7eb;border-radius:8px;">\n  <tr>\n    <td><img src="https://example.com/cart-item.jpg" alt="Cart item" width="96" style="border-radius:6px;" /></td>\n    <td>\n      <p dir="ltr"><strong>{{ cart.items[0].title }}</strong></p>\n      <p dir="ltr">Color: {{ cart.items[0].variant }}</p>\n      <p dir="ltr">Quantity: {{ cart.items[0].quantity }}</p>\n    </td>\n  </tr>\n</table>\n<p dir="ltr"><a href="{{ cart.url }}" style="background-color:#16a34a;color:#ffffff;padding:10px 18px;border-radius:4px;text-decoration:none;">Return to your cart →</a></p>',
      },
      {
        title: "Win-back campaign",
        content:
          '<p dir="ltr"><strong>We miss you, {{ subscriber.first_name | default: "friend" }}</strong></p>\n<p dir="ltr">It’s been a while since your last visit. We’ve refreshed the shop with new arrivals we think you’ll love.</p>\n<ul>\n<li dir="ltr"><strong>Come back perk:</strong> 20% off your next order with code <span style="background-color:#fee2e2;padding:2px 6px;border-radius:4px;">MISSEDYOU</span>.</li>\n<li dir="ltr"><strong>What’s new:</strong> Handcrafted essentials, member exclusives, and curated bundles.</li>\n<li dir="ltr"><strong>Need styling help?</strong> Book a 15-minute fit consultation with our team.</li>\n</ul>\n<p dir="ltr">See you soon,<br />Team Brightside</p>',
      },
    ],
  },
];
Once you’ve added the templates and saved editorclient.tsx, your Templates implementation is live at http://localhost:3000/! 🎉

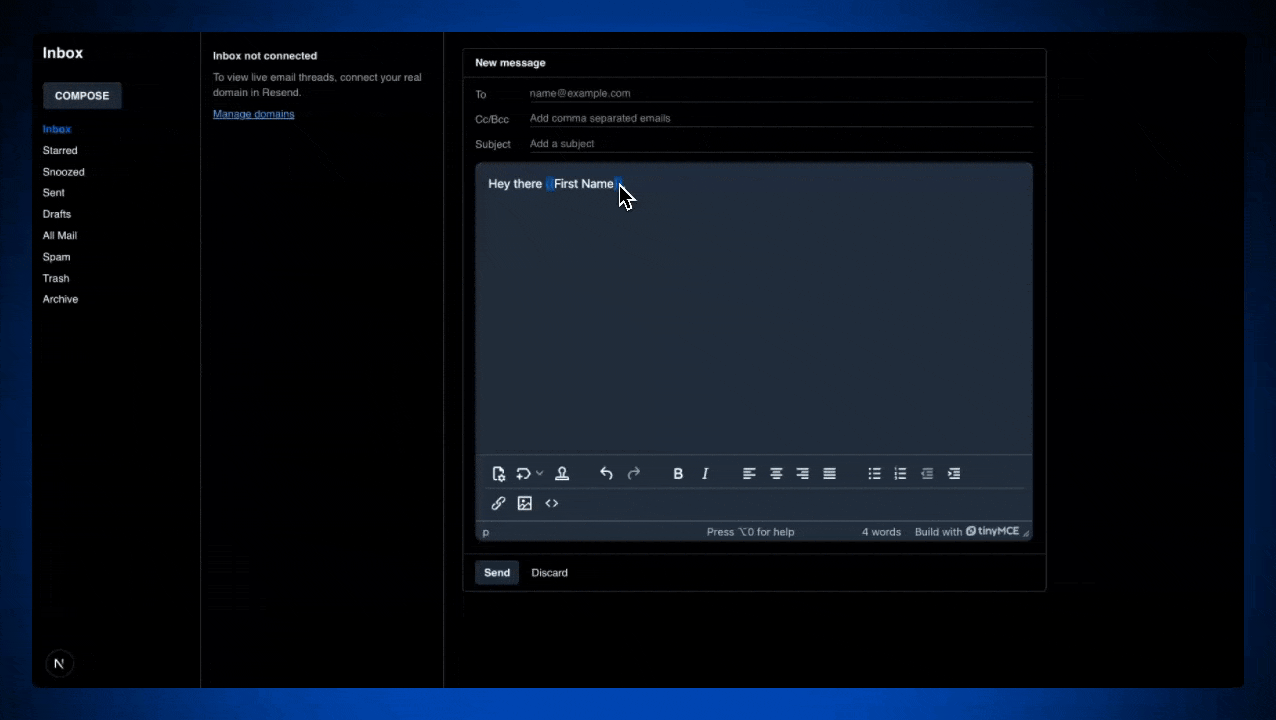
Add Merge Tags
Merge tags let you add dynamic field injection to the RTE without building custom placeholder logic from scratch. Instead of writing your own token parser or string replacement system, you can configure native Merge Tags that TinyMCE recognizes and displays in the editor.
TinyMCE handles the editor UI for merge tags as structured elements, while you control what data they map to, and how they're processed when the message is sent. For this demo, you'll configure a basic merge tag menu and see how TinyMCE keeps those tags distinct from regular content, making it easier to parse and replace them server-side.
Much like Templates, TinyMCE’s Merge Tags just needs to be added to the plugins and toolbar arrays, and then the merge tags themselves need to be defined. Here’s what you’ll do:
- Add
mergetagsto the TinyMCEpluginsarray. - Add
mergetagsto thetoolbar. - Add a
mergetags_listarray defining your merge tags.
Here’s an example of the TinyMCE init code in the editorclient.tsx with Merge Tags implemented:
     init={{
        height: 500,
        menubar: false,
        toolbar_location: "bottom",
        plugins: "mergetags advtemplate lists link image table code help wordcount",
        toolbar: [
          'mergetags inserttemplate | undo redo | formatselect | bold italic emoticons | alignleft aligncenter alignright alignjustify | bullist numlist outdent indent | link image code'
        ],
        skin: "oxide-dark",
        content_css: "dark",
        advtemplate_templates,
        mergetags_list: [
          {
            title: 'Customer',
            menu: [
              {
                value: 'First Name',
                title: 'First Name',
              },
              {
                value: 'Company Name',
                title: 'Company Name',
              },
              {
                value: 'Job Title',
                title: 'Job Title',
              },
              {
                value: 'Email Address',
                title: 'Email Address',
              }
            ]
          },
          {
            title: 'Compliance & Footer',
            menu: [
              {
                value: 'Unsubscribe Link',
                title: 'Unsubscribe',
              },
              {
                value: 'Update Preferences',
                title: 'Update Preferences',
              },
              {
                value: 'Company Address',
                title: 'Company Address',
              }
            ]
          }
        ],
}}Like with the Templates, in real life you would load those dynamically, but for the sake of this demo you can hardcode them. If you use the example code above, your React email app on http://localhost:3000/ will have Merge Tags like this:
Add Full Page HTML
Full page HTML mode exposes the entire document structure in TinyMCE to publication, not just the usual body content. This matters when your EMS needs to let users edit <head> elements like <title>, <meta>, or encoding declarations—things that affect email client rendering, deliverability metadata, or downstream integrations.
Without this mode, you'd need to build a separate interface for document-level tags or risk users manually editing raw HTML. TinyMCE's Full Page HTML gives you a built-in way to surface the complete HTML structure, so your users can manage document metadata without leaving the editor or requiring developer intervention for every change.
To add Full Page HTML to TinyMCE, you’ll just need the typical modifications to your plugins list, and toolbar array.
- Add
fullpagehtmlto the TinyMCEpluginsarray. - Add
fullpagehtmlto thetoolbar.
It will look like this in the TinyMCE init:
       plugins: "fullpagehtml mergetags advtemplate lists link image table code help wordcount",
        toolbar: [
          'fullpagehtml mergetags inserttemplate | undo redo | formatselect | bold italic emoticons | alignleft aligncenter alignright alignjustify | bullist numlist outdent indent | link image code'
],You can test out Full Page HTML in one of two ways:
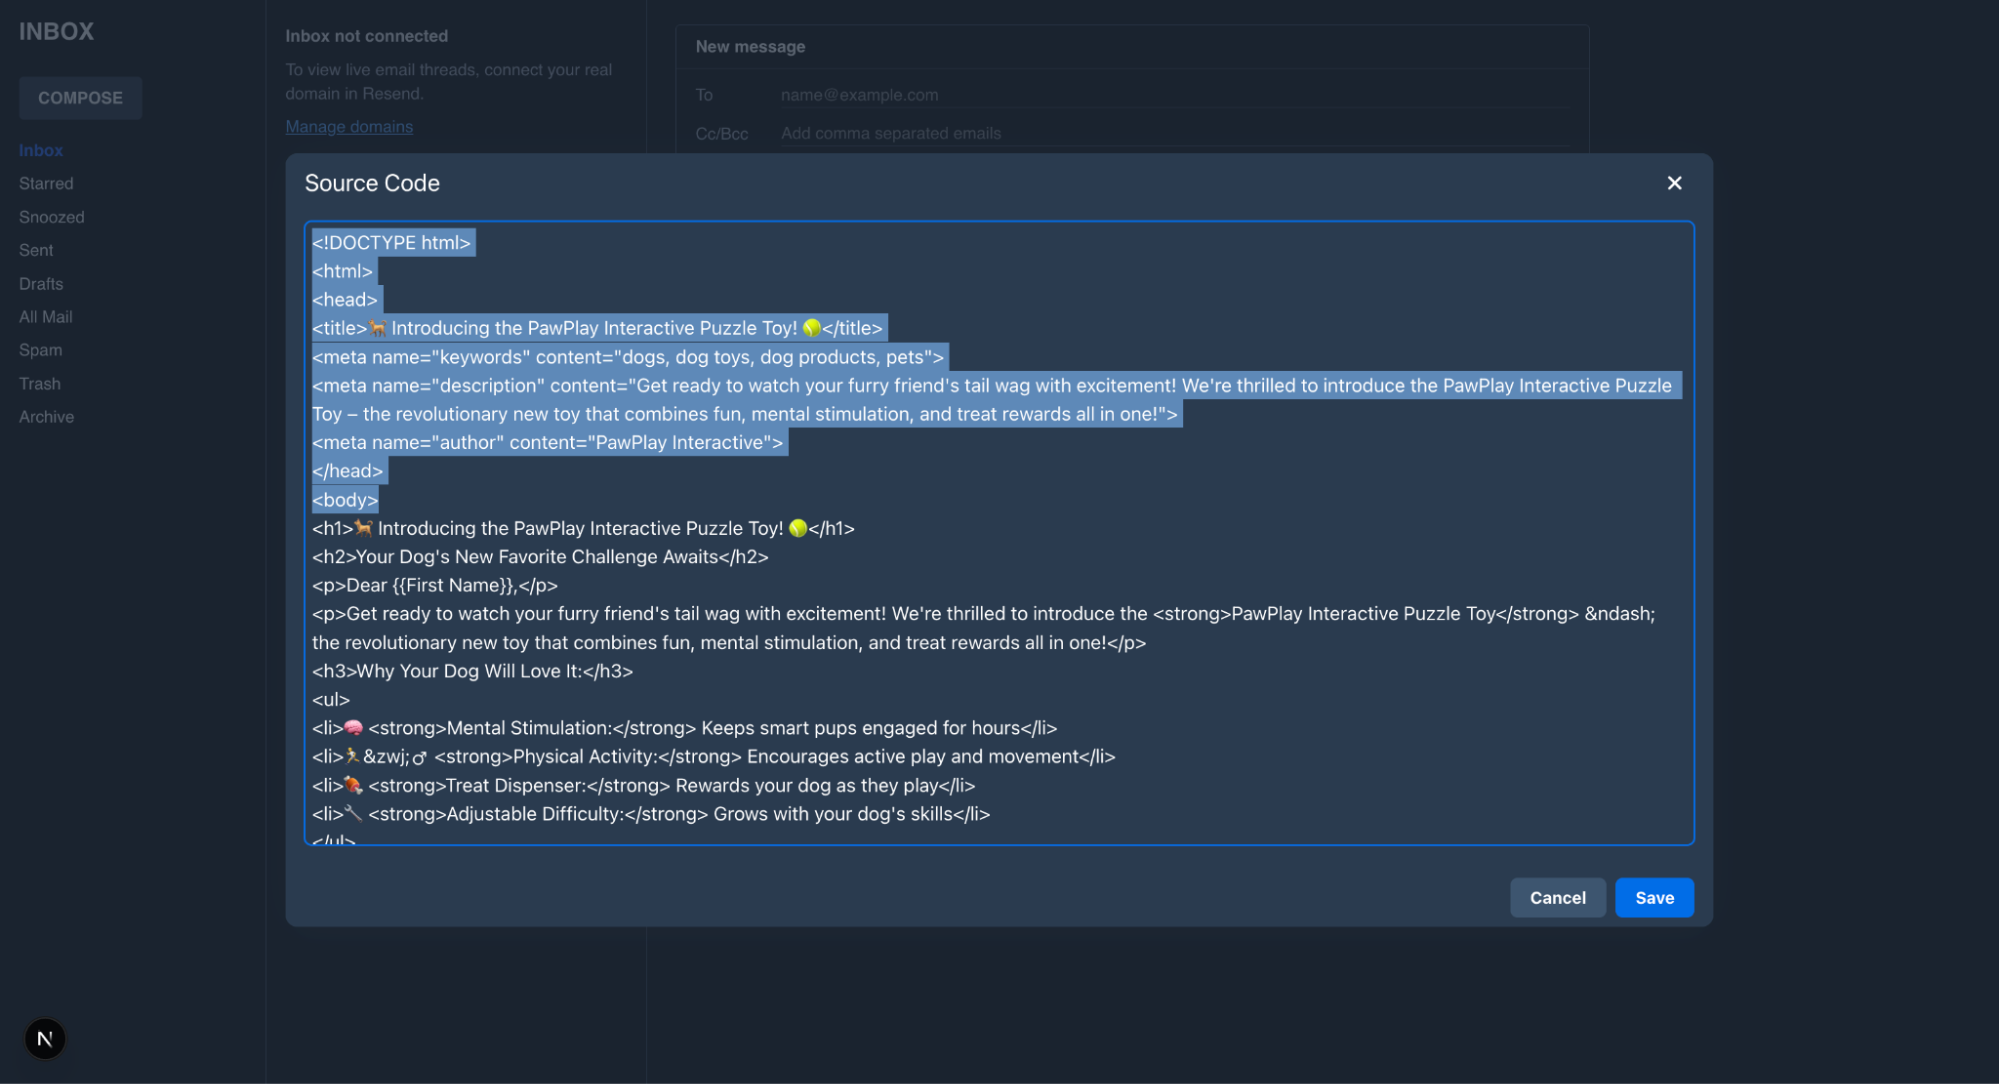
- Click the Full Page HTML button and insert some data into the fields.
- Click the source code button and see the whole HTML doc available.
Now you’ve given your users full page control so they can maximize their HTML output. Play with the new plugin at localhost:3000, no refresh needed.
Add Inline CSS
Inline CSS support is critical for email editors because most email clients strip or ignore <style> blocks and external stylesheets. If styles aren't inlined, your users' formatting breaks in the recipient's inbox, regardless of how it looks in your editor.
TinyMCE’s Inline CSS preserves inline styles so style attributes survive the editing process intact. This means you’re building a WYSIWYG email editor that actually reflects what recipients see, without your users needing to run a separate CSS inlining tool before every send. With Inline CSS, the editor won't strip out inline styles your users apply.
The Inline CSS plugin is very easy to install. You just add the word inlinecss to the TinyMCE plugins array and save your editorclient.tsx.
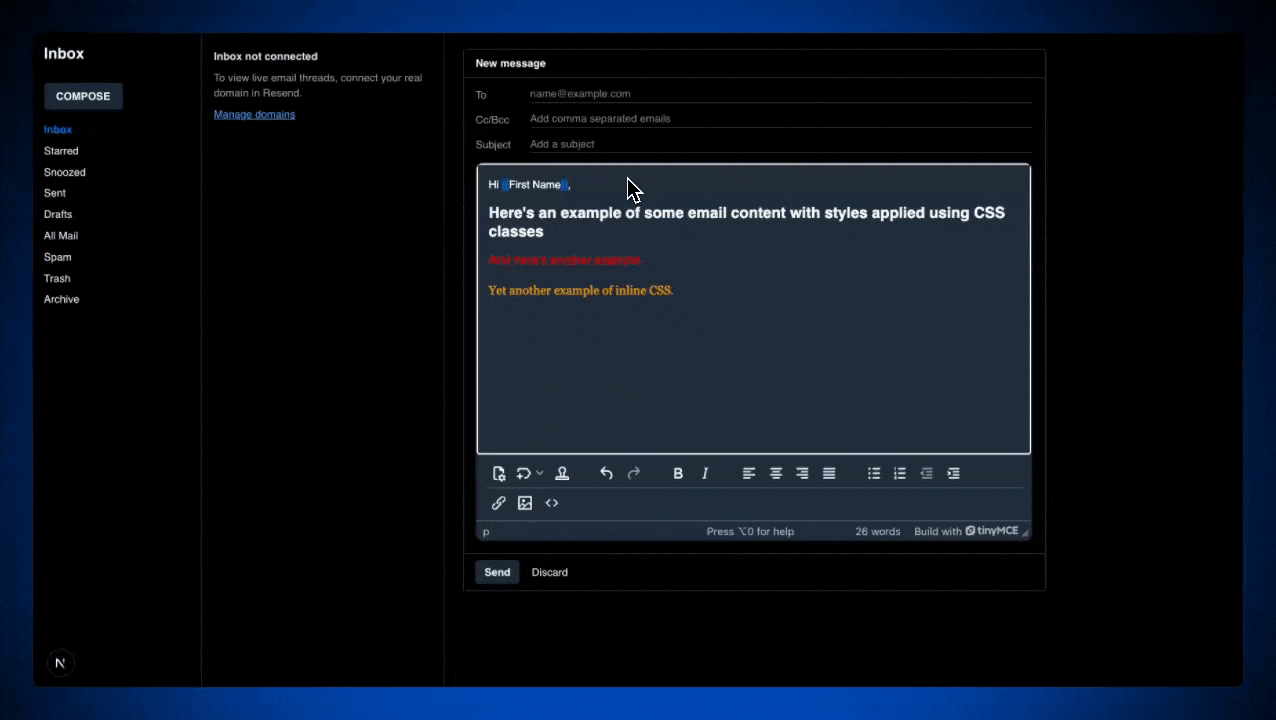
To test out Inline CSS, you can paste the following HTML sample with CSS styles in the source code. The inline styles will appear without being stripped out:
<p style="font-family: -apple-system, Helvetica, Arial, sans-serif; font-size: 14px; line-height: 1.5rem; color: #ffffff; overflow-wrap: break-word;">Hi {{First Name}},</p>
<h1 style="font-size: 20px; font-family: -apple-system, Helvetica, Arial, sans-serif; line-height: 1.5rem; color: #ffffff; overflow-wrap: break-word;">Here's an example of some email content with styles applied using CSS classes</h1>
<h2 style="font-size: 16px; color: red; font-weight: 500; font-family: -apple-system, Helvetica, Arial, sans-serif; line-height: 1.5rem; overflow-wrap: break-word;">And here's another example.</h2>
<p style="font-size: 16px; color: orange; font-weight: 300; font-family: -apple-system, Georgia, serif; line-height: 1.5rem; overflow-wrap: break-word;">Yet another example of inline CSS.</p>If you click the Code button you’ll be able to access the HTML content in the WYSIWYG editor and paste this code. It looks like this:
To read more about how you can use inline CSS in a WYSIWYG editor, check out the TinyMCE Inline CSS documentation.
And here’s what your complete TinyMCE <Editor /> for this guide looks like when you’ve added Inline CSS as the final feature:
<Editor
  apiKey={tinymceApiKey}
  initialValue={initialValue}
  tinymceScriptSrc={`https://cdn.tiny.cloud/1/${tinymceApiKey}/tinymce/8/tinymce.min.js`}
  init={{
    height: 500,
    menubar: false,
    toolbar_location: "bottom",
    plugins:
      "inlinecss fullpagehtml mergetags advtemplate lists link image table code help wordcount",
    toolbar: [
      "fullpagehtml mergetags inserttemplate | undo redo | formatselect | bold italic emoticons | alignleft aligncenter alignright alignjustify | bullist numlist outdent indent | link image code",
    ],
    skin: "oxide-dark",
    content_css: "dark",
    advtemplate_templates,
    mergetags_list: [
      {
        title: "Customer",
        menu: [
          {
            value: "First Name",
            title: "First Name",
          },
          {
            value: "Company Name",
            title: "Company Name",
          },
          {
            value: "Job Title",
            title: "Job Title",
          },
          {
            value: "Email Address",
            title: "Email Address",
          },
        ],
      },
      {
        title: "Compliance & Footer",
        menu: [
          {
            value: "Unsubscribe Link",
            title: "Unsubscribe",
          },
          {
            value: "Update Preferences",
            title: "Update Preferences",
          },
          {
            value: "Company Address",
            title: "Company Address",
          },
        ],
      },
    ],
  }}
  onEditorChange={(content) => {
    onChange?.(content);
  }}
/>;
Nicely done! 🎉 You’ve built a functional email messaging app with Resend email service and TinyMCE, the WYSIWYG editor that has all of the features your users need.
Wrap up
Building an email messaging system with React + TinyMCE is a scalable way to enhance communication in your web app. Integrating TinyMCE as your powerful WYSIWYG editor gives your users the flexibility to craft visually rich emails with merge tags, templates, HTML tags, and inline styles–and they don’t need to write a single line of code.
Whether you're creating an internal tool, a customer communication platform, or something else, TinyMCE’s customizable and React-friendly architecture makes it an ideal RTE for your email messaging app. Want to try something else with React + TinyMCE? Check out our other React + TinyMCE tutorials:


