


When you’re building or extending a CMS, chances are you’ll need to wire in a rich text editor (RTE). From formatting blog posts to editing product copy, it’s one of those features users expect to “just work.” The challenge is making it work with your application without sinking time into custom fixes. TinyMCE was built for exactly this: a powerful editor with straightforward integration paths that let you focus on your app, not on patching together text editing.
In this guide, you’ll use a foundational Angular project as the framework for building a fully featured event CMS web page, where users can create an event right in the RTE and collaborate with one another. By the end of this walkthrough you’ll have a robust, collaborative event CMS editor in Angular using TinyMCE’s user Mentions, Comments, Suggested Edits, and AI Assistant.
Although this guide uses Angular as its foundation, you can use TinyMCE with the JavaScript framework of your choice.
Part one: Set up TinyMCE in an Angular project
Before you get started, you’ll need a few things:
- A basic understanding of Angular: To navigate the demo Angular project.
- A TinyMCE API key: To integrate a rich text editor into the demo event CMS.
- A free Anthropic (Claude) API key: To integrate Anthropic’s AI models into your Angular CMS. (Go to Anthropic Console to sign up.)
If you don’t already have one, it’s quick and easy to get a free TinyMCE API key with all the premium features for 14 days.
Step one: Clone the demo Angular CMS project
The first step you’ll take is to clone the foundational Angular repository. There are two ways to clone the demo Angular CMS project to your machine from the GitHub repo, and either one will work:
- Visit the blog-cms-demo repository page and click the green Code button to clone it your way.
- Use the following GitHub CLI (you’ll need to install it if you don’t have it) command in a shell to clone the code to your local machine:
gh repo clone tinymce/blog-cms-demoOnce you’ve cloned the code to your machine, you can open the blog-cms-demo folder in your preferred IDE. In the project, you’ll see it has a typical Angular structure, but it’s fairly bare bones.
Install dependencies
Run npm install in the shell in the blog-cms-demo folder to install all the project’s dependencies.
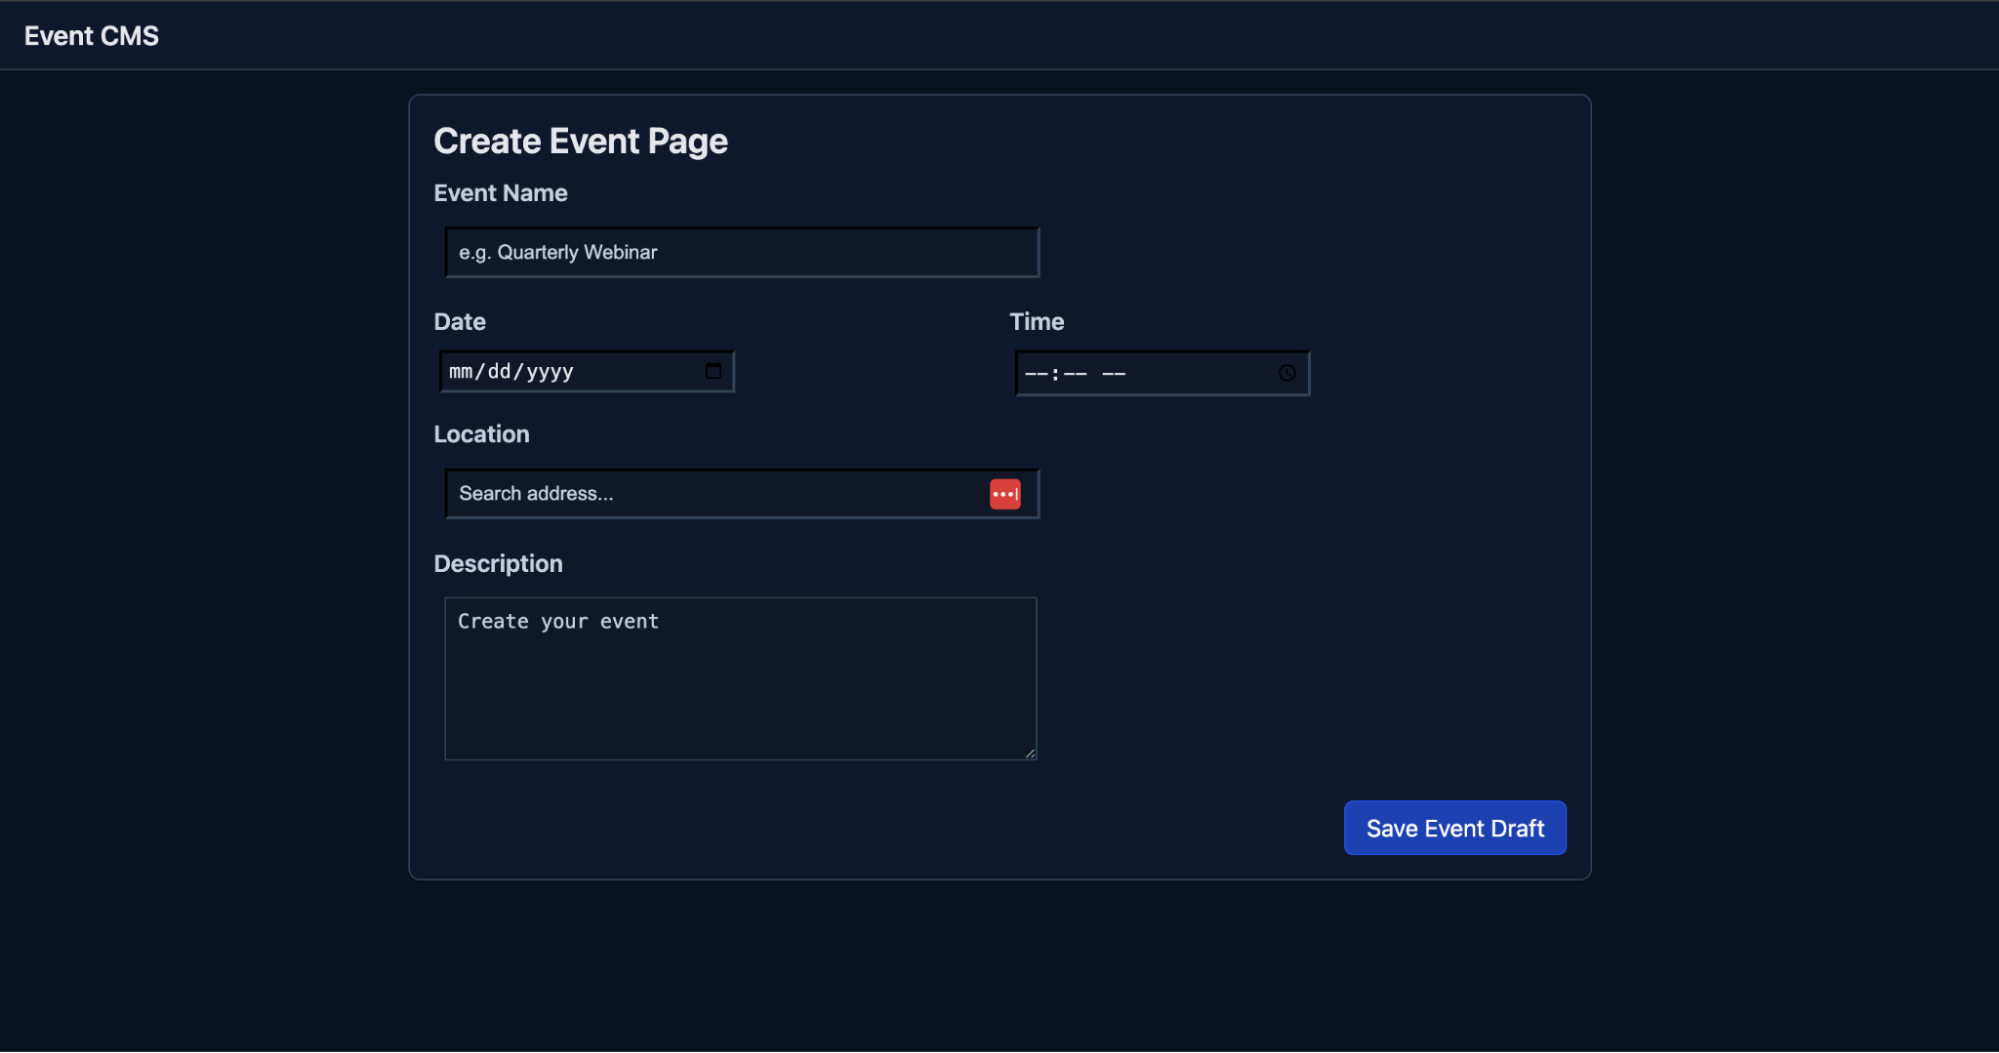
Run the project in your browser
Now you’ll run the project locally to make sure the basic event page form is working. Run ng serve in a shell with Angular CLI. This will launch the app to http://localhost:4200/ where you can see it with its bare textarea.
Step two: Add TinyMCE to your Angular project
There are a few small pieces to integrating TinyMCE into an Angular 20 project. You’ll need to:
- Install the TinyMCE native package for Angular.
- Create a new TinyMCE editor component in the Angular project, which needs two files (one Typescript, one HTML). This is because Angular breaks everything into Components (rightfully so, for better performance).
- Integrate the TinyMCE editor component into the event entry component to replace the bare textarea.
Install the TinyMCE Angular package
Run this command in the blog-cms-demo folder:
npm install --save @tinymce/tinymce-angularCreate a new TinyMCE editor component files
Inside the src/app/ folder, create a new tinymce-editor.component.html file in the src/app folder, and add the following code to it.
<editor
  id="description"
  class="rte"
  initialValue=""
  apiKey="no-api-key"
  [init]="editorInit"
  [formControl]="control"
></editor>⚠️ Note: Don’t forget to replace no-api-key with your real TinyMCE API key.
Once you’ve created the HTML file for the new component, you’ll need to create a new tinymce-editor.component.ts file in the src/app folder. This holds the editor configuration, and will hold all of the Typescript functions related to editor behavior. Put this code inside your tinymce-editor.component.ts file:
import { Component, Input } from '@angular/core';
import { ReactiveFormsModule, FormControl } from '@angular/forms';
import { EditorComponent } from '@tinymce/tinymce-angular';

@Component({
  selector: 'app-tinymce-editor',
  standalone: true,
  imports: [ReactiveFormsModule, EditorComponent],
  templateUrl: './tinymce-editor.component.html',
})
export class TinymceEditorComponent {
  @Input() control!: FormControl<string>;

  editorInit: any = {
    selector: 'textarea',
    height: 500,
    plugins: 'link image table code help wordcount',
    toolbar:
      'undo redo | formatselect | bold italic emoticons | alignleft aligncenter alignright alignjustify | bullist numlist outdent indent',
    content_css: 'dark',
    skin: 'oxide-dark'
  };
}Now you have a functional TinyMCE Angular Component to insert into the Event Entry page.
Import TinyMCE to event-entry.component.ts
Now that you’ve created it, you can import the TinymceEditorComponent into the Event page file event-entry.component.ts. Then put it into the primary Component imports array after ReactiveFormsModule:
import { Component, computed, signal, inject } from '@angular/core';
import { CommonModule } from '@angular/common';
import { ReactiveFormsModule, FormBuilder } from '@angular/forms';
import { toSignal } from '@angular/core/rxjs-interop';
import { TinymceEditorComponent } from './tinymce-editor.component';

@Component({
  selector: 'app-event-entry',
  standalone: true,
  imports: [CommonModule, ReactiveFormsModule, TinymceEditorComponent],
  templateUrl: '././event-entry.component.html',
})
...[rest of the file]There’s no need to change the rest of the event-entry.component.ts file, so you can leave it as is.
Replace the Description <div> with TinyMCE in event-entry.component.html
To complete TinyMCE integration into your Angular web page for event entry, you’ll alter the Description <div> in event-entry.component.html to include the new TinyMCE editor component:
<div class="field">
    <label for="description">Description</label>
    <app-tinymce-editor [control]="form.controls.description"></app-tinymce-editor>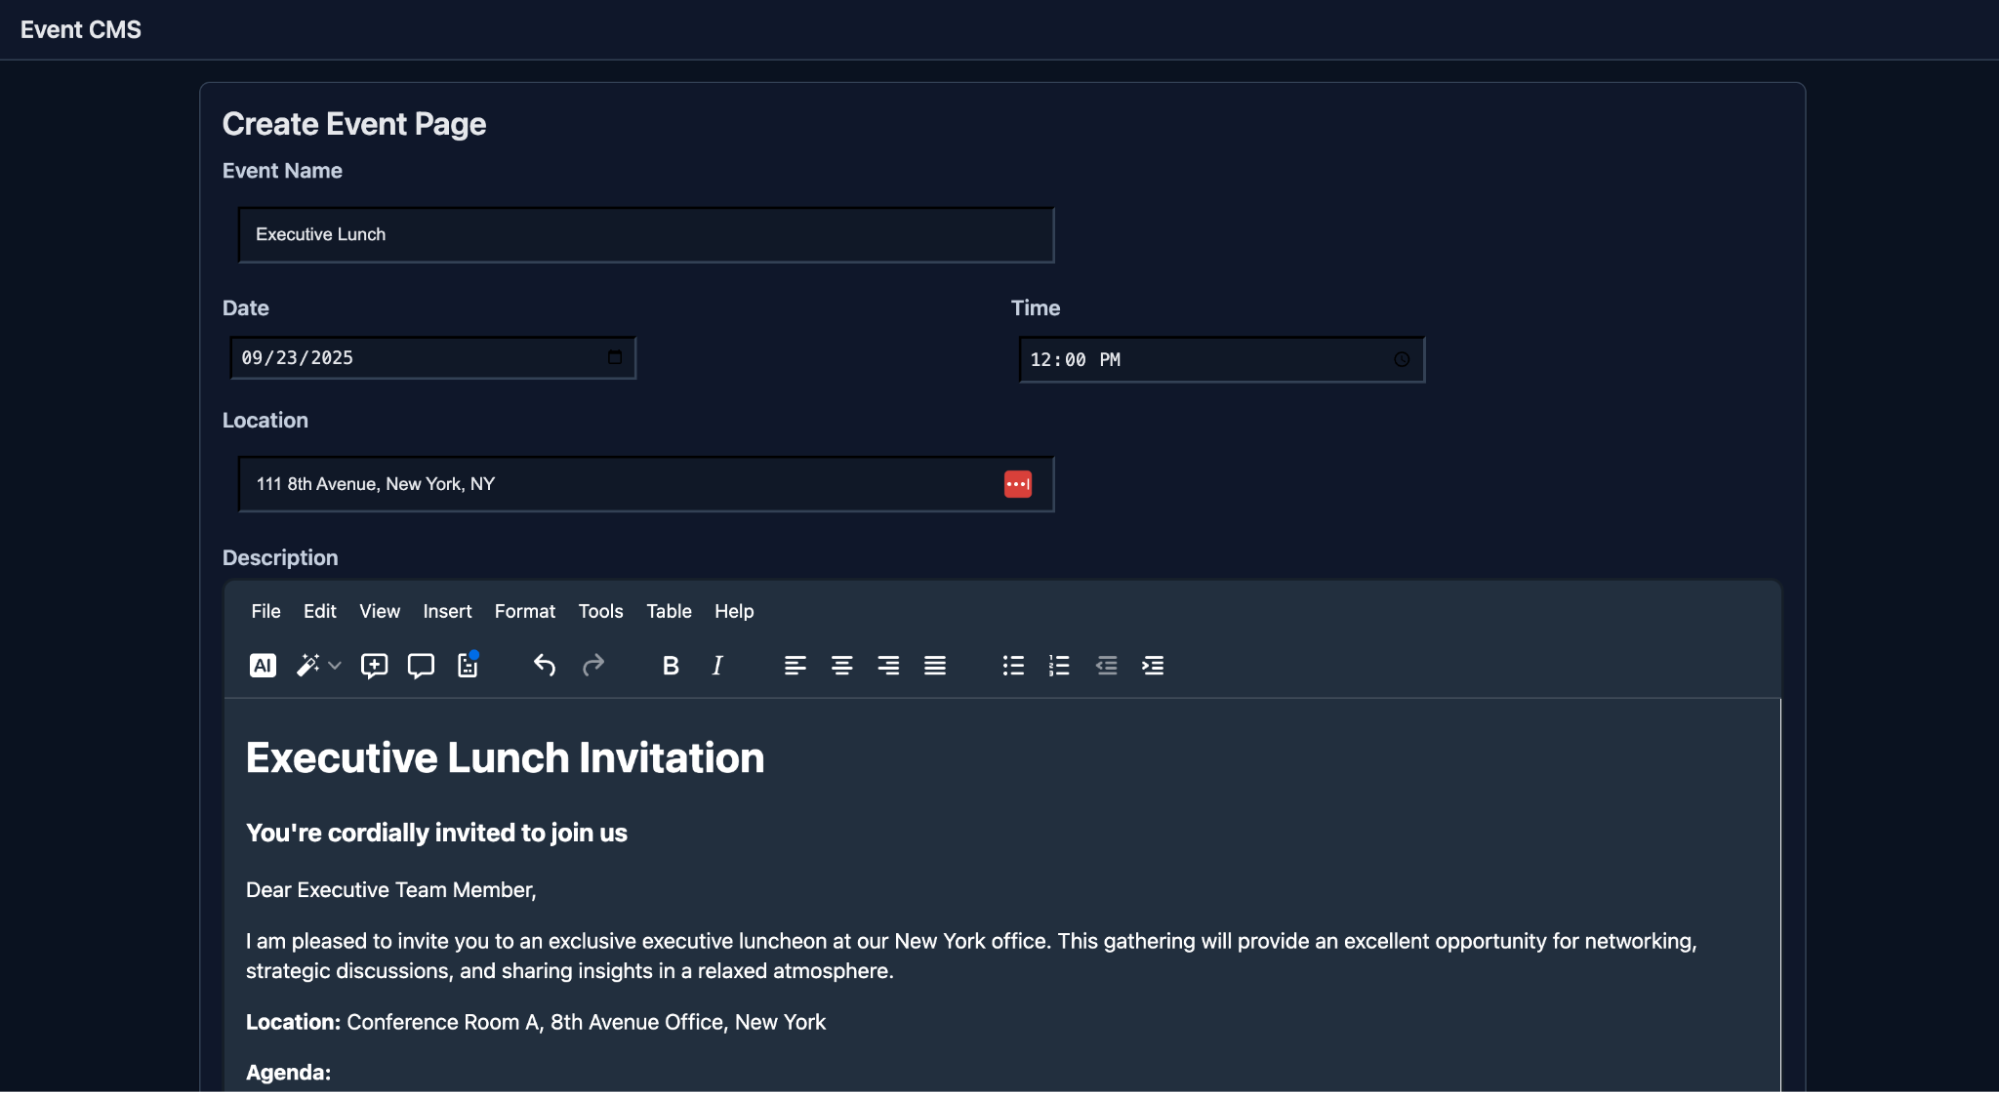
</div>Well done. 🎉 You’ve successfully added TinyMCE to an Angular page in a demo events CMS app. It should look like this now:

Part two: Add collaboration features to TinyMCE
Now that you’ve got a working example of an event creation page with a powerful rich text editor integrated, it’s time to add some collaboration features to your demo. The ones that we’ve included are tailor-made for teams working together on event production in an events management CMS.
Quick note on the new TinyMCE User Lookup API: this small but powerful API fetches user objects containing names, avatars, metadata, and permissions from wherever you store your user list. It works with Suggested Edits, Comments, and Mentions to grab the same list of your users, no matter which TinyMCE feature needs to reference it.
Step one: Add Suggested Edits
Suggested Edits is useful for users tracking changes between one another’s work. In the real world, you’d want to hook up the User Lookup API and be able to log in and out of your app with the right user to test their permissions and content access. For this demo, we’ll just implement the basic Suggested Edits functionality, which uses an Anonymous user by default to track changes in the editor.
To do this, you’ll add suggestededits to both the plugins and the toolbar arrays in the editorInit in tinymce-editor.component.ts.
   [init]="{
      selector: 'textarea',
      height: 500,
      plugins: 'suggestededits lists link image table code help wordcount',
      toolbar: 'suggestededits | undo redo | formatselect | bold italic emoticons | alignleft aligncenter alignright alignjustify | bullist numlist outdent indent',
      content_css: 'dark',
      skin: 'oxide-dark'
}"Any change you make in the editor at that point will appear as an Anonymous change in the Suggested Edits interface. Feel free to try it out in your browser!

If you want to take TinyMCE’s newest feature even further, check out the vanilla JavaScript guide to installing Suggested Edits, and implement a multi-user interface.
Step two: Add Comments
Comments are powerful for teams that need to easily communicate inline on specific content. It’s good to know that there are two different modes for TinyMCE’s Comments: Callback Mode, and Embedded Mode. Embedded Mode is a client-side approach for storing comments. Callback Mode allows you to connect to your own storage system to retrieve Comments information using the TinyMCE Comments API.
For this demo, we’ll add Comments in Embedded Mode since it’s easier and faster. Implementing the Comments functionality in TinyMCE for Embedded Mode involves adding some values to arrays and configuring some custom settings.
To add Comments to TinyMCE, you’ll need to change the editorInit configuration in tinymce-editor.component.ts in the following ways:
- Add
tinycommentsto thepluginsarray. - Add
addcommentandshowcommentsto thetoolbararray, so you can see the buttons in the UI right away. - Add
tinycomments_mode: ‘embedded’to[init]. - Add
tinycomments_author: ‘janesmith’to[init].
Once you’ve made these changes in editorInit, it should look like this:
editorInit: any = {
  selector: "textarea",
  height: 500,
  plugins: "tinycomments suggestededits link image table code help wordcount",
  toolbar:
    "addcomment showcomments | suggestededits | undo redo | formatselect | bold italic emoticons | alignleft aligncenter alignright alignjustify | bullist numlist outdent indent",
  content_css: "dark",
  skin: "oxide-dark",
  tinycomments_mode: "embedded",
  tinycomments_author: "janesmith",
};
And when you try it out in the browser at localhost:4200, you’ve got the ability to comment on any content you create!

If you want to walk through a more thorough example, try out our guide to TinyMCE’s Comments in Embedded Mode.
Step three: Add Mentions
Mentions are a useful way for your users to tag their colleagues right inside TinyMCE using the familiar @ tag. Installing Mentions requires two things to function: the addition of the word mentions in the TinyMCE plugins array, and the creation of a mentions_fetch callback function to fetch your list of users.
To integrate Mentions into your Angular application, you will alter tinymce-editor.component.ts in the following ways:
- Add
mentionsto thepluginsarray insideeditorInit. - Add a list of users and a callback function called
mentionsFetchto retrieve that private list.
Your tinymce-editor.component.ts file should look like this now:
import { Component, Input } from '@angular/core';
import { ReactiveFormsModule, FormControl } from '@angular/forms';
import { EditorComponent } from '@tinymce/tinymce-angular';

@Component({
  selector: 'app-tinymce-editor',
  standalone: true,
  imports: [ReactiveFormsModule, EditorComponent],
  templateUrl: './tinymce-editor.component.html',
})
export class TinymceEditorComponent {
  @Input() control!: FormControl<string>;

  USERS = [
    { id: 'u1', name: 'Ada Lovelace' },
    { id: 'u2', name: 'Alan Turing' },
    { id: 'u3', name: 'Grace Hopper' },
    { id: 'u4', name: 'Katherine Johnson' },
    { id: 'u5', name: 'Donald Knuth' }
  ];

  private mentionsFetch = (query: any, success: (results: any[]) => void) => {
    const q = (query.term ?? '').toString().trim().toLowerCase();
    const results = this.USERS.filter(u => u.name.toLowerCase().includes(q)).slice(0, 10);
    success(results);
  };

  editorInit: any = {
    selector: 'textarea',
    height: 500,
    plugins: 'mentions tinycomments suggestededits link image table code help wordcount',
    toolbar:
      'addcomment showcomments | suggestededits | undo redo | formatselect | bold italic emoticons | alignleft aligncenter alignright alignjustify | bullist numlist outdent indent',
    content_css: 'dark',
    skin: 'oxide-dark',
    tinycomments_mode: 'embedded',
    tinycomments_author: 'janesmith',
    mentions_fetch: this.mentionsFetch,
  };
}Once you have implemented all of this code and created the new files, you can run ng serve once more, and have a working Mentions list in your Angular event creation CMS.
You can take Mentions much further with a host of customization options for the dropdown menu that appears when a user starts tagging a colleague. Some of the options include:
mentions_item_type:A string field that sets whether the UI returns just a user’s name or returns a full user profile with an image and description with name or profile.mentions_min_chars: A number field that sets the minimum number of characters users must type before the list populates. Its default value is 1.
…And there are so many more. To see the rest of the options for customizing the Mentions menu, check out the official TinyMCE Mentions documentation. Don’t forget, Mentions is also compatible with the new User Lookup API, if you want to centralize user fetching for multiple TinyMCE collaboration features.
Step four: Add AI Assistant
Last but certainly not least, it’s time to add the AI Assistant. With an AI assistant in TinyMCE, your users can craft better events and edit their work right inside the Description field.
TinyMCE’s AI Assistant is quick to install, and you can bring your own AI. For this demo, you’ll use an Anthropic model. Don’t forget that you’ll need your Anthropic API key from the Anthropic Console to bring in the AI.
To add AI Assistant with Anthropic’s Claude to TinyMCE, you’ll need to change tinymce-editor.component.ts first. You will:
- Add
aito thepluginsarray. - Add
aidialog aishortcutsto thetoolbararray. - Add a reference in the
editorInitto anai_requestcallback function. - Add an
ai_requestcallback function to theTinymceEditorComponentthat can send and receive requests with Anthropic’s API. You’ll need to add your Anthropic API key to the code for this to work.- ⚠️ Note: Include the JSON header
'anthropic-dangerous-direct-browser-access': 'true'in your POST request to Anthropic. Anthropic naturally blocks direct browser calls with CORS policies, so this will be necessary for Anthropic to work in your localhost instance. - ⚠️ Note: You may need to change the model value depending on what Anthropic has available when you create this demo.
- ⚠️ Note: Include the JSON header
Here’s what a complete tinymce-editor.component.ts looks like when you’ve done all of the above, and added Suggested Edits, Comments, Mentions, and AI Assistant to your event creation CMS.
import { Component, Input } from '@angular/core';
import { ReactiveFormsModule, FormControl } from '@angular/forms';
import { EditorComponent } from '@tinymce/tinymce-angular';

@Component({
  selector: 'app-tinymce-editor',
  standalone: true,
  imports: [ReactiveFormsModule, EditorComponent],
  templateUrl: './tinymce-editor.component.html',
})
export class TinymceEditorComponent {
  @Input() control!: FormControl<string>;

  USERS = [
    { id: 'u1', name: 'Ada Lovelace' },
    { id: 'u2', name: 'Alan Turing' },
    { id: 'u3', name: 'Grace Hopper' },
    { id: 'u4', name: 'Katherine Johnson' },
    { id: 'u5', name: 'Donald Knuth' }
  ];

  private mentionsFetch = (query: any, success: (results: any[]) => void) => {
    const q = (query.term ?? '').toString().trim().toLowerCase();
    const results = this.USERS.filter(u => u.name.toLowerCase().includes(q)).slice(0, 10);
    success(results);
  };

private ai_request = (request: any, respondWith: any) => {
  const anthropic_api_key = 'no-api-key'

  const anthropicOptions = {
    method: 'POST',
    headers: {
      'Content-Type': 'application/json',
      'x-api-key': anthropic_api_key,
      'anthropic-version': '2023-06-01',
      'anthropic-dangerous-direct-browser-access': 'true'
    },
    body: JSON.stringify({
      model: 'claude-sonnet-4-20250514',
      max_tokens: 800,
      temperature: 0.7,
      messages: [
        {
          role: 'user',
          content: request.prompt
        }
      ]
    })
  };

  respondWith.string((signal: any) =>
    // Use dev-server proxy to avoid browser CORS during development
    window.fetch('https://api.anthropic.com/v1/messages', { signal, ...anthropicOptions })
      .then(async (response) => {
        if (response) {
          const data = await response.json();
          if (data.error) {
            throw new Error(`${data.error.type}: ${data.error.message}`);
          } else if (response.ok) {
            // Anthropic returns an array of content blocks
            const contentBlock = data?.content?.[0];
            if (contentBlock?.type === 'text') {
              return contentBlock.text.trim();
            } else {
              return '';
            }
          }
        } else {
          throw new Error('Failed to communicate with the Anthropic API');
        }
      })
  );
};

  editorInit: any = {
    selector: 'textarea',
    height: 500,
    plugins: 'ai mentions tinycomments suggestededits lists link image table code help wordcount',
    toolbar:
      'aidialog aishortcuts addcomment showcomments suggestededits | undo redo | formatselect | bold italic emoticons | alignleft aligncenter alignright alignjustify | bullist numlist outdent indent',
    content_css: 'dark',
    skin: 'oxide-dark',
    tinycomments_mode: 'embedded',
    tinycomments_author: 'defaultuser',
    mentions_fetch: this.mentionsFetch,
    ai_request: this.ai_request
  };
}Congratulations! 🎉 You’ve developed a full CMS editor for event creation in the course of this guide. You can use all of the premium plugins you’ve implemented right inside your demo at http://localhost:4200/.
What’s next? Create the CMS you need
Integrating TinyMCE into your CMS doesn’t just solve the editing problem; it gives you a powerful and flexible foundation you can keep building on. Once the basics are in place, you can make CMS workflows even better for your users with plugins like Templates for quickly dropping in reusable agendas or session outlines or Merge Tags to personalize invitations, reminders, or speaker bios at scale.
Adding the features you need to TinyMCE takes the textarea from just a plain text box to a real productivity tool tailored for your use case. Ready to see how far you can take it? Explore more TinyMCE features today and start developing an editing experience that meets all your requirements faster, with just one little web component.


