


Open up a Slate.js demo, and you’ll find a highly customizable framework for building rich text editors; it’s an endlessly flexible editor. However, it’s important to remember that endless flexibility brings with it, a limitless amount of coding.
The Slate.js website provides a demo of how to implement a rich text editor. It uses a whopping 193 lines of code. You can implement the same rich text functionality, with TinyMCE, in just 21 lines of code.
TinyMCE is the world’s most trusted rich text editor, powering 100+ million products worldwide. The editor is easy to deploy and is highly customizable to suit a broad range of applications and edge cases. Check out 9 examples of the products you can build with TinyMCE.
By using TinyMCE, the amount of time and coding your development team spends on rich text components, greatly reduces, as compared to designing an editor with Slate.js.
In this article we’ll demonstrate how to migrate from Slate.js to TinyMCE using a simple example. Given the Slate.js docs provide ample information about how to get started with Slate.js using React, and the current popularity of React, this example is also based on the React framework using the rich text editor example provided on the Slate.js site.
Slate.js cons: why you may want to migrate
Slate.js is a project that is still in beta development. Having said that, according to the documentation, the project’s core API works for development right now.
While you can use API calls, there may be edge cases that’ll need some discussion on GitHub to resolve. This means that despite the popularity of Slate.js, the ease of implementation is not there yet. If you’re looking for something easier, then migration offers a way out.
Which is better, Slate.js or TinyMCE?
It’s important to note that at TinyMCE, we’re very much enamored with Slate.js. The Real-Time Collaboration plugin built for TinyMCE makes use of Slate.js for the core model. But TinyMCE has some essential differences.
It has a development pathway and vision for the future, as well as resources devoted to ongoing maintenance. It helps that TinyMCE’s two decades-long domain experience also brings with it trust in what TinyMCE can do.
You can find out more about what specific features differentiate Slate and TinyMCE on our comparison page.
Slate.js not working? Problems users face
Slate editor not working in Chrome
Some older versions of Slate can run into issues working with the Chrome browser. If you find that your version of Slate is not working, check on the style on contentEditable. If you find it’s set to WebkitUserModify: 'read-write-plaintext-only', change it to WebkitUserModify: 'read-write' to fix the loading issue.
This is also a sign that your version of Slate is older, and could need to be updated. Rather than update, it might be time to try a new editor, however.
Slate editor not working in Safari
If you’re testing out autocorrect with Slate in Safari, you may find autocorrect not working. This issue comes from the data-slate-editor="true" found in the Editable component. You can manually remove the “true” boolean with developer tools and the editor begins working again.
Migrate from Slate JS text editor to TinyMCE step-by-step
To start the migration, the first step is integration. Slate.js makes use of React, so to get started, install the TinyMCE React integration:
1. Import the TinyMCE libraries
Change into the directory of your React project. Install the tinymce-react component from the command line with your package manager of choice; for example, if using npm:
npm install @tinymce/tinymce-reactOpen the file that implements the Slate editor. You may have named it “Editor.js” and placed it in a /components/Slate/ directory. The Slate editor file contains the ‘import { Slate, Editable, withReact, } from 'slate-react'’ content, or ‘const initialValue’ depending on how the editor is configured.
For example:
const SlateEditor = () => {
  const [editor] = useState(() => withReact(createEditor()));
  // ...

  return (
    <Slate editor={editor} value={value} onChange={(value) => setValue(value)}>
      // ...
    </Slate>
  );
};
Start by adding TinyMCE to the import list at the top of the file. It’ll be referenced in the JavaScript in a moment, so don’t worry about the “Editor is declared but its value is never read” message at this stage.
import React from "react";
import { Editor } from "@tinymce/tinymce-react";
import { createEditor } from "slate";
// …
2. Replace the Slate editor with the TinyMCE editor
In your React code you’ll have a function that defines the editor. For example, the rich text editor implemented on the Slate.js website looks like this:
const App = () => {
  const [value, setValue] = useState<Descendant[]>(initialValue)
  const renderElement = useCallback(props => <Element {...props} />, [])
  const renderLeaf = useCallback(props => <Leaf {...props} />, [])
  const editor = useMemo(() => withHistory(withReact(createEditor())), [])

  return (
    <Slate editor={editor} value={value} onChange={value => setValue(value)}>
      <Toolbar>
        <MarkButton format="bold" icon="format_bold" />
        <MarkButton format="italic" icon="format_italic" />
        <MarkButton format="underline" icon="format_underlined" />
        <MarkButton format="code" icon="code" />
        <BlockButton format="heading-one" icon="looks_one" />
        <BlockButton format="heading-two" icon="looks_two" />
        <BlockButton format="block-quote" icon="format_quote" />
        <BlockButton format="numbered-list" icon="format_list_numbered" />
        <BlockButton format="bulleted-list" icon="format_list_bulleted" />
      </Toolbar>

      <Editable
        renderElement={renderElement}
        renderLeaf={renderLeaf}
        placeholder="Enter some rich text…"
        spellCheck
        autoFocus
        onKeyDown={event => {
          for (const hotkey in HOTKEYS) {
            if (isHotkey(hotkey, event as any)) {
              event.preventDefault()
              const mark = HOTKEYS[hotkey]
              toggleMark(editor, mark)
            }
          }
        }}
      />
    </Slate>
  )
}It could also be in a vanilla JavaScript format:
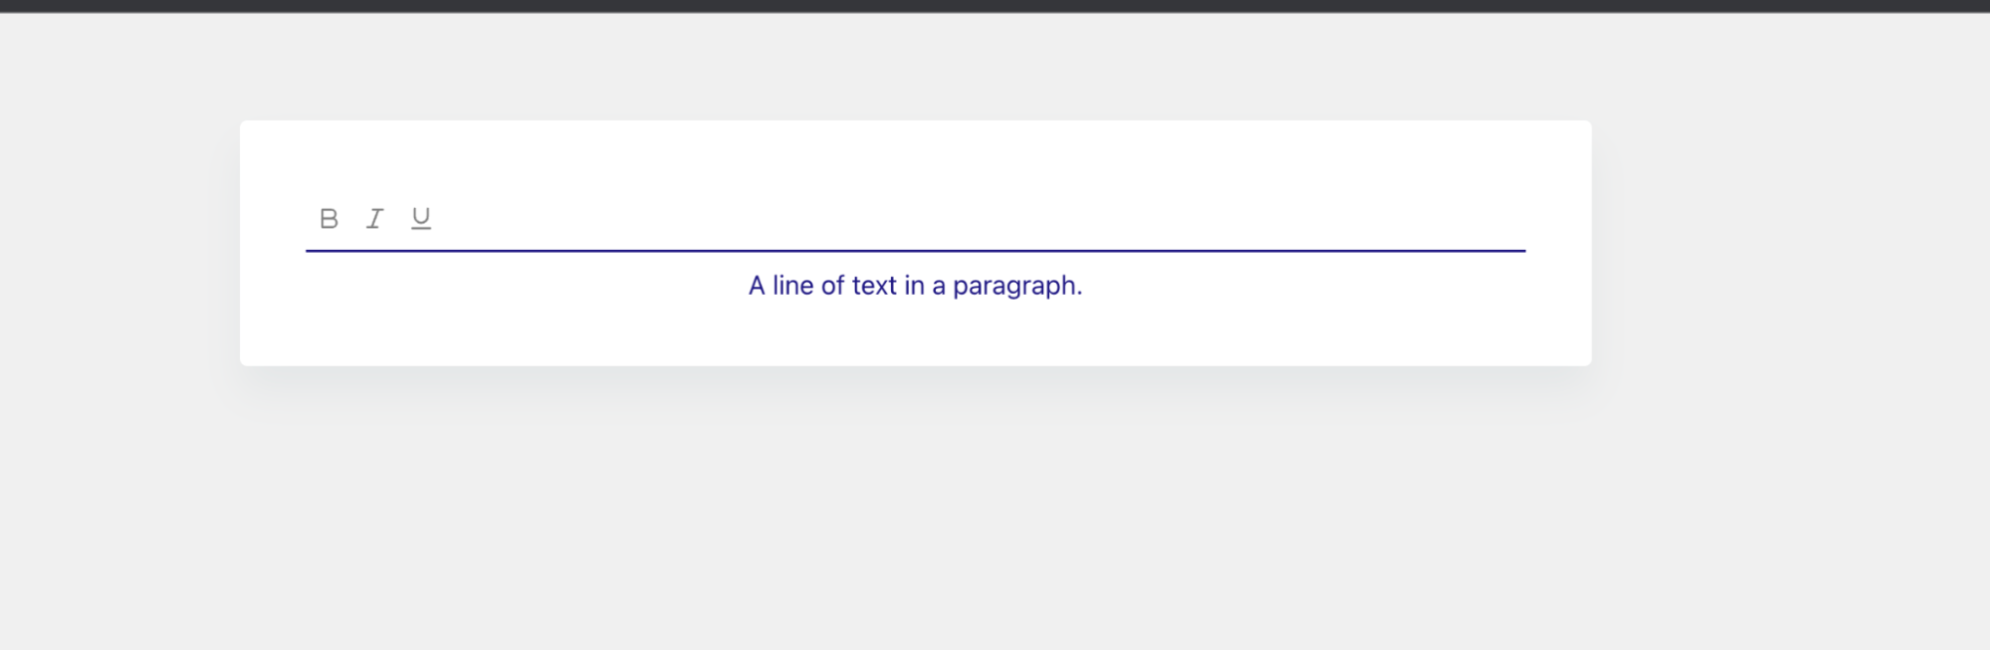
const initialValue = [
  {
    type: "paragraph",
    children: [{ text: "A line of text in a paragraph." }],
  },
];

const SlateEditor = () => {
  const [editor] = useState(() => withReact(createEditor()));
  return (
    <Slate editor={editor} value={initialValue}>
      <Editable />
    </Slate>
  );
};
export default SlateEditor;
Which would create a very basic editor. Configuring basic text modification like bold and italic requires more JavaScript, but it may look something like this for instance:
Replace it with the following code: where the no-api-key statement is printed, replace this string with your own Tiny API key.
Note: If you don’t already have one, you can get a free API key now, which provides 14 days free access to all the standard text formatting options, plus 44 core plugins that you can add or remove as needed.
const App = () => {
  return <Editor apiKey="no-api-key" />;
};
Take away any imports that reference Slate.js at the top of the file. And change the export default to reference the new editor if you have named the editor component something along the lines of “SlateEditor”. For example, “export default TinyEditor”.
Finally, update any references to the Slate editor component in the App or Index JavaScript files, and any CSS files if you had clases set for the Slate Editor.
An alternative is to remove the slate.js file altogether, and modify the react app App.js file, as described in the TinyMCE react component documentation.
3. Customize the user options
Once you have the default editor up and running, TinyMCE is easily customized with a few lines of code. To provide the same functionality provided by the Slate.js example, specify the toolbar options (and any associated plugins) in the editor initialization script.
Rather than create separate, modular files for each component of the Slate.js editor, and referencing specific keystrokes, event listeners, and icon libraries in the React app, TinyMCE manages all these functions with the initialization script key and value pairs.
The following removes the menu bar and sets the editor width:
const App = () => {
  return (
    <Editor
      apiKey="no-api-key"
      init={{
        menubar: false,
        plugins: "lists code",
        toolbar: "bold italic underline code h1 h2 blockquote numlist bullist",
        width: 700,
      }}
    />
  );
};
4. Remove any unused code
When implementing a rich text editor using Slate.js, you need to code a lot of additional “glue” to make it all stick together and work seamlessly, as demonstrated by the 193 lines of code required to implement the example rich text editor.
However, while migrating to TinyMCE, you will most likely end up with a lot of unused code. Remove it for a simplified build. Most of the typical integration headaches have already been thought of and resolved by the TinyMCE engineering team. It’s a rich text editor that has been tried and tested in 100M+ products worldwide.
Complete example
Here’s a complete example of the TinyMCE configuration that you can use as a starting point for your migration from Slate.js.
You can always test this out on its own first. Create a new react app, install the tinymce-react component from the command line as shown above, and replace the code in App.js with the following:
import React from "react";
import { Editor } from "@tinymce/tinymce-react";

const App = () => {
  return (
    <Editor
      apiKey="no-api-key"
      initialValue="<p>Hello, World!</p>"
      init={{
        menubar: false,
        plugins: "lists code",
        toolbar: "bold italic underline code h1 h2 blockquote numlist bullist",
        width: 700,
      }}
    />
  );
};
export default App;
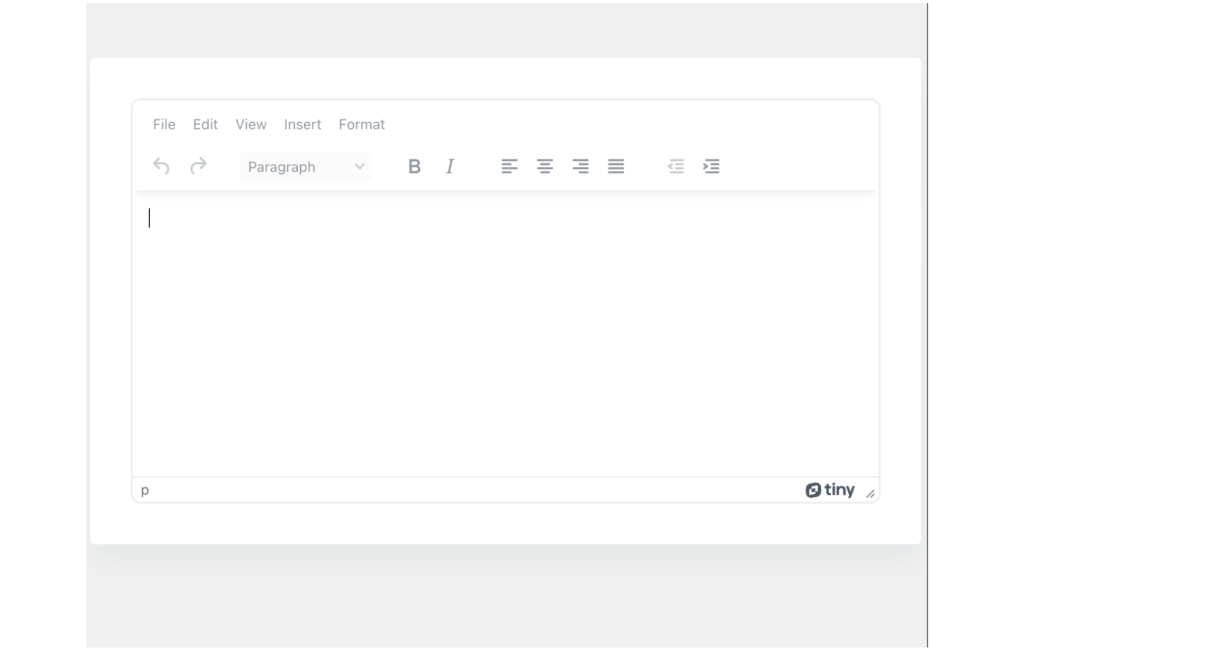
TinyMCE 6 based on the above configuration.
What’s next?
More help with TinyMCE in React – There’s loads more information about integrating TinyMCE with your React applications on our blog.
Customization – Once you’ve migrated to TinyMCE, you have loads of new configuration options and UI customizations available to enhance your application’s user experience. Check out our article about how to customize toolbar options as well as skins and icons.
Additional help and support – For more complex migrations, you can contact our support team at any time for assistance.


