


Help desk UIs push React harder than most applications because they combine workflow variability, dynamic layouts, and shared state that spans drafts, live updates, and user contexts. Most rich text editor (RTE) integrations have all this and more on the list of requirements.
In this guide, you’ll integrate TinyMCE as an out-of-the-box component: predictable boundaries, minimal state leakage, and performance-safe defaults that allow the editor to coexist with your complex UI–without becoming part of the problem.
Why TinyMCE fits React help desk apps without adding state chaos
The usual approach to adding an RTE in React (treating it as a fully controlled component) breaks down fast in help desk UIs. When you're already managing ticket timelines, live updates, side panels, and modal workflows, the last thing you need is an editor that forces you to control every keystroke or to thread draft state through five component layers. The complexity compounds when you add the features help desk agents actually need, like:
- Template insertion.
- Mention autocomplete.
- Attachment tracking.
- Auto-save.
TinyMCE's architecture sidesteps these problems by managing its own internal editing state while exposing the integration points that matter. You avoid prop drilling because editor instances stay scoped to their immediate context. You skip the controlled component trap because TinyMCE handles cursor position, selection state, and revision history internally. And you can support multiple editor workflows without duplicating state management logic across each use case. The result is an RTE that fits your existing React patterns instead of forcing you to rebuild your state architecture around it.
Building a help desk app with TinyMCE starts with setting up the rich text editor. We’ve built a GitHub repository with a templated empty customer messaging page for a help desk app. By the end of this guide, you’ll have a customer messaging page complete with:
- Templates.
- Tables.
- Content conversion with PowerPaste.
- Automatic link conversion with Autolink.
And all of this works natively inside the RTE with React. Let’s get started.
Step one: Clone and run the demo help desk app
To clone the TinyMCE help desk demo project on GitHub, you can either:
- Visit the repository page and click the green Code button to clone the project.
- Run the following GitHub CLI command on your machine:
gh repo clone tinymce/blog-helpdesk-demo⚠️ Note: You’ll need a TinyMCE API key for this demo to work, so if you don’t already have one you can sign up for the 14 day free trial of TinyMCE. If you’re curious about what comes with the free trial, check out What to Expect From the TinyMCE 14 Day Free Trial.
Once you clone the project, open the blog-helpdesk-demo project in your favorite IDE. You’ll see the React help desk app and its structure.
To run the project locally, run three commands:
npm installto install project libraries.npm auditto check for any security vulnerabilities.npm run devto launch the app to http://localhost:3000/.
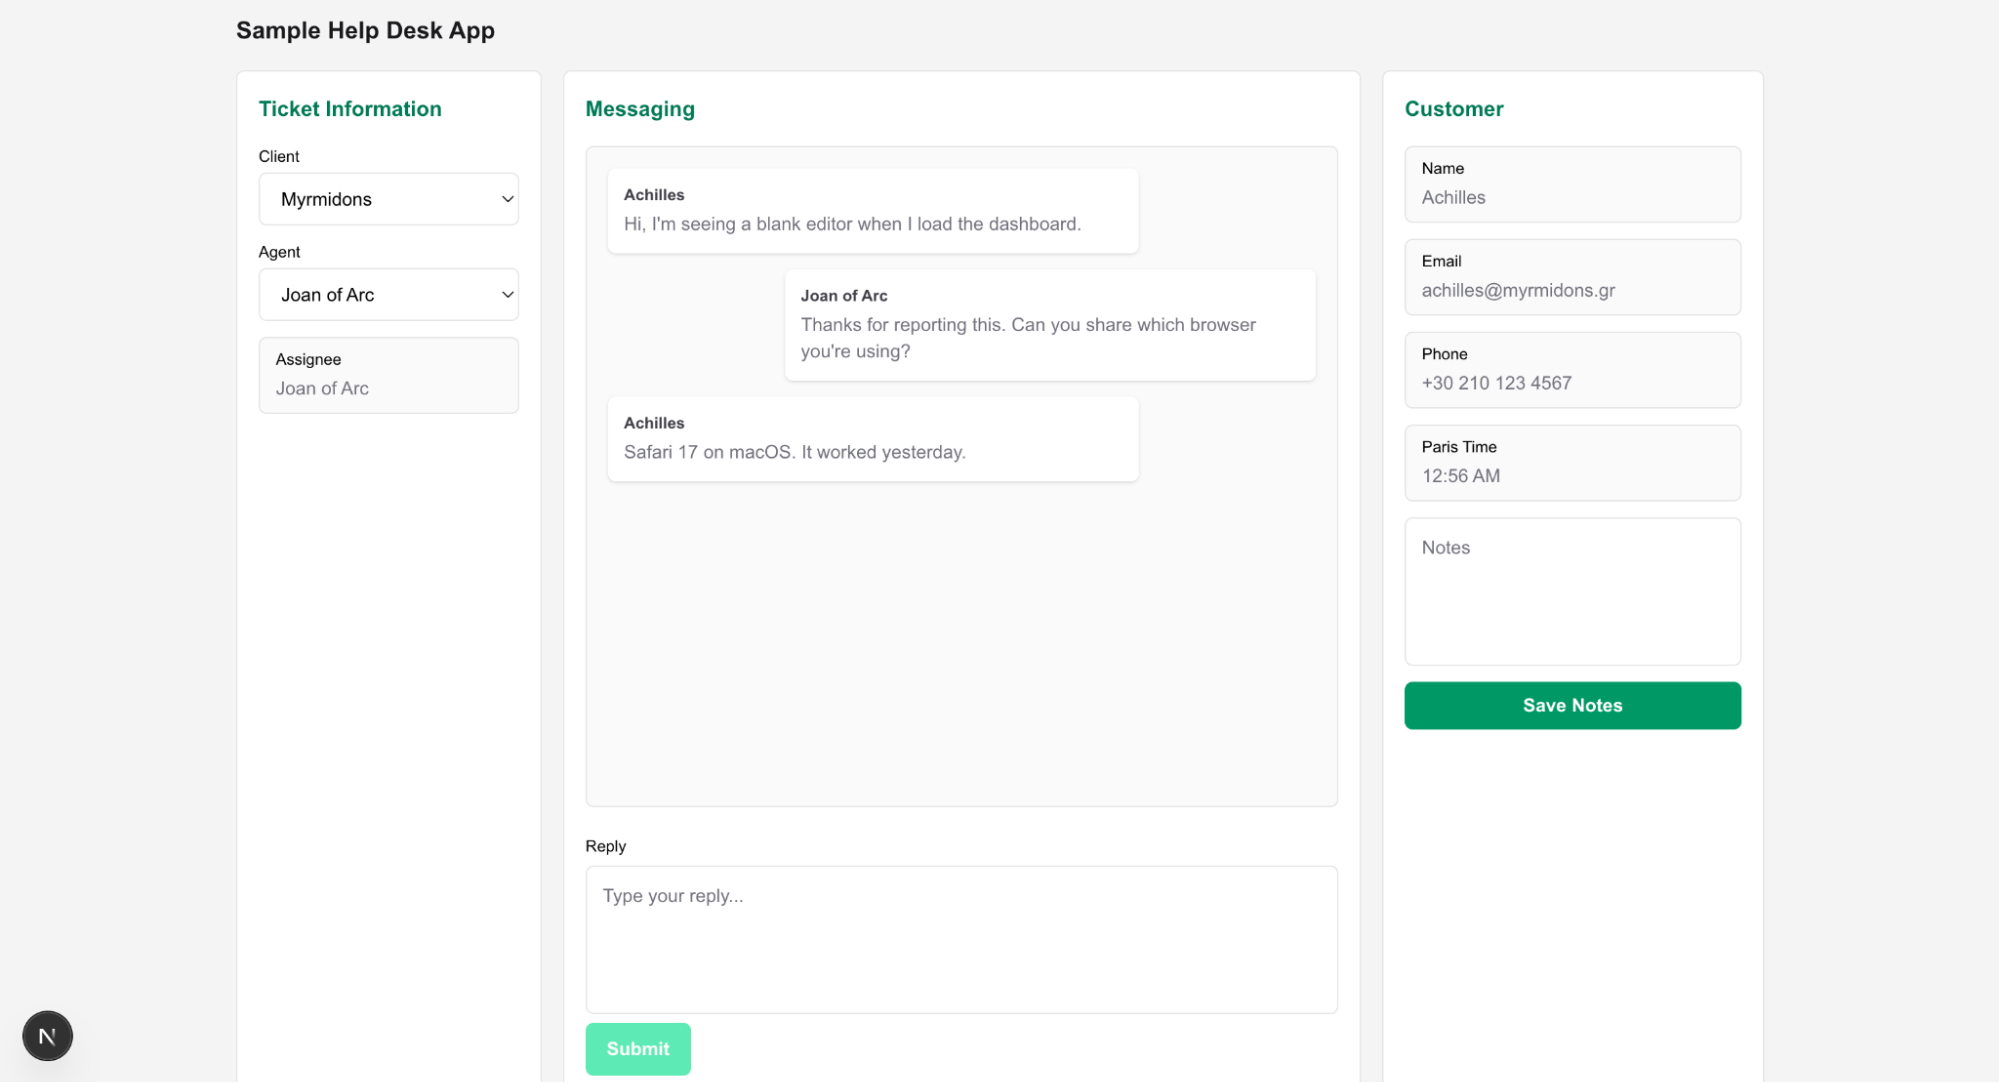
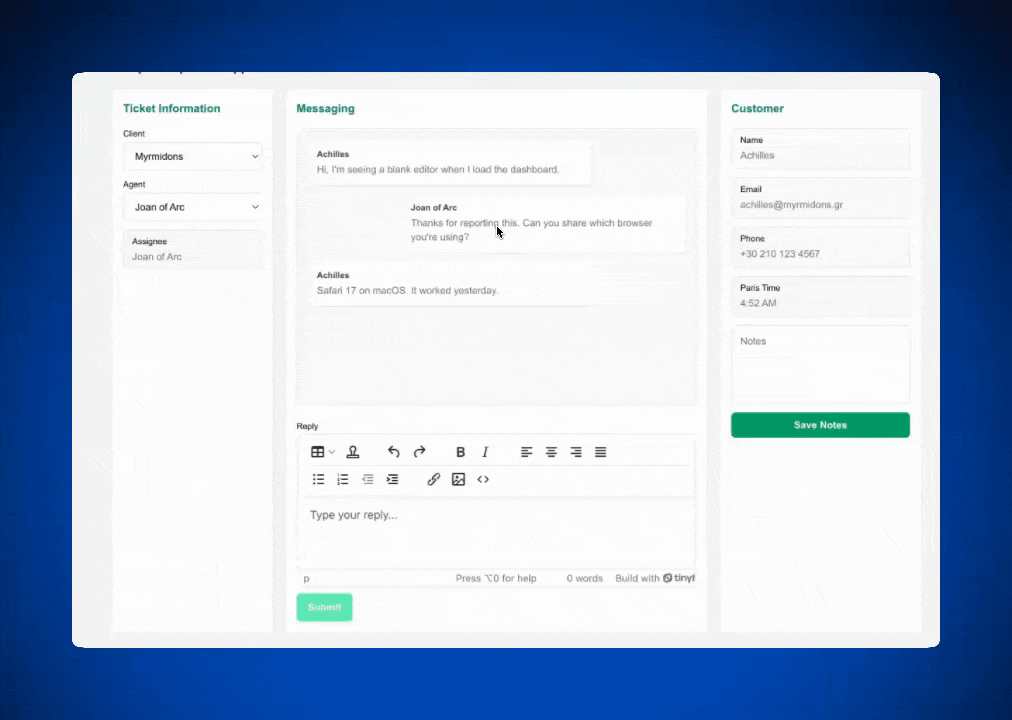
That’s all it takes to fire up the project locally. You can visit the localhost address to see a plain messaging page that includes client information and a messaging system for a help desk agent.
Step two: How to add TinyMCE to the help desk app
You’ll work primarily in app/ClientMessagingEditor.tsx in the project, where you’ll replace the Reply textarea with TinyMCE.
Install and import the native TinyMCE React component
First you’ll need to import the TinyMCE React native component to ClientMessagingEditor.tsx. Installi it with this shell command in the blog-helpdesk-demo directory:
npm install @tinymce/tinymce-reactNext, you’ll import TinyMCE in ClientMessagingEditor.tsx at the top of the file:
"use client";

import { useState } from "react";
import { Editor } from "@tinymce/tinymce-react";
...You’ll notice the line importing TinyMCE is grayed out since the Editor isn’t used anywhere in the file yet.
Replace the Reply textarea with the Editor
Next thing you’ll do is replace the <textarea> for the Reply field with TinyMCE. You can use this Editor code sample to do it quickly:
<Editor
  apiKey={tinymceApiKey}
  value={reply}
  tinymceScriptSrc={`https://cdn.tiny.cloud/1/${tinymceApiKey}/tinymce/8/tinymce.min.js`}
  init={{
    menubar: false,
    placeholder: "Type your reply...",
    plugins: "lists link image table code help wordcount autoresize",
    toolbar: [
      "undo redo | formatselect | bold italic emoticons | alignleft aligncenter alignright alignjustify | bullist numlist outdent indent | link image code",
    ],
  }}
  onEditorChange={setReply}
/>;
What’s this code doing? 🤔 This code replaces a basic textarea with TinyMCE in a way that’s specifically compatible with React. There are a few key elements here:
- TinyMCE API key import.
- The Reply field’s initial value, which is set to match the previous
initialValue. - The
valuefield that defines how the data from the editor is handled in the rest of the app. - The
tinymceScriptSrcthat calls the TinyMCE script, including your TinyMCE API key. Adding this line ensures proper React hydration. - The RTE’s
initscript, where you’ll be able to control theEditor. - An
onEditorChangesetting that tells the rest of the React app that any changes in theEditorshould set the reply value.
Connect your TinyMCE API key
Once you replace the textarea, you’ll notice that the React app throws a 500 error. This is because the Editor needs a free TinyMCE API key to operate. Create an .env.local file to store your TinyMCE API key. It will look like this:
NEXT_PUBLIC_TINYMCE_API_KEY = myApiKey;
Then you’ll bring the API key into ClientMessagingEditor.tsx with a single const line at the top of the file:
const tinymceApiKey = process.env.NEXT_PUBLIC_TINYMCE_API_KEY;
⚠️ Note: You should never store your API keys in the app. Always use a local file and be sure to add it to .gitignore.
Test the new Editor on localhost
Now you’re ready to save all your files and test out your help desk app with TinyMCE locally. Simply open localhost:3000 and you’ll see that the Editor has loaded successfully:
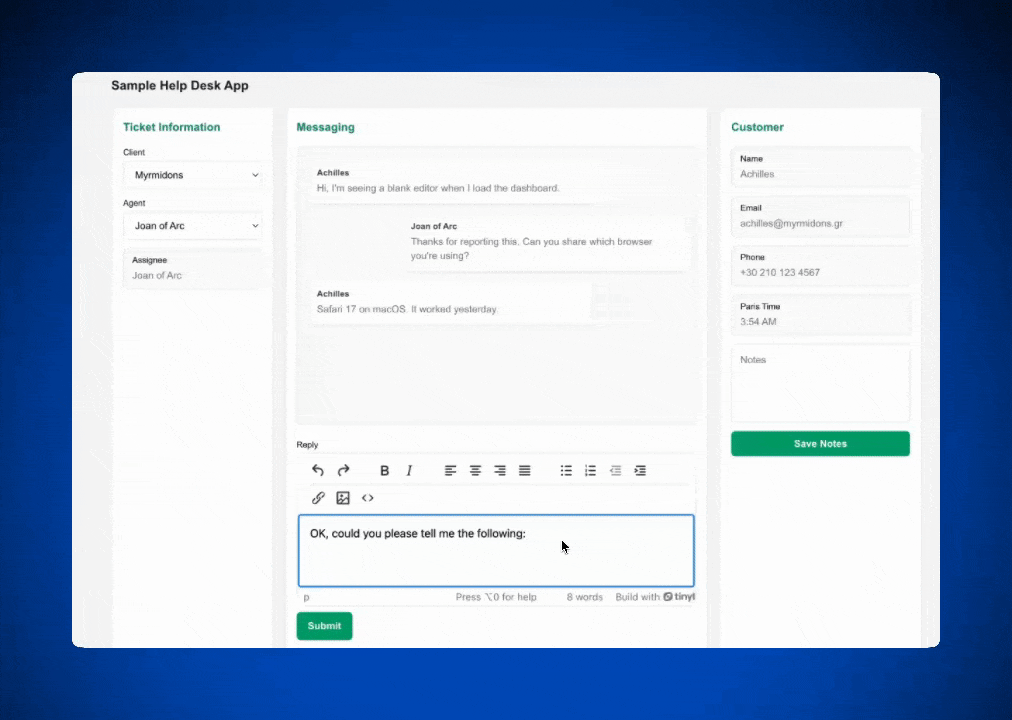
Step three: Add TinyMCE features for help desk apps
Now that you’ve got a rich text editor that can render links, lists, images, and rich text, it’s time to add some more useful features that are foundational to help desk apps.
Add Templates
Templates in a help desk messaging system allow agents to reuse pre-built content blocks instead of creating repetitive messages from scratch. TinyMCE can read and organize JSON or HTML templates for insertion into the editor.
You can add any standardized templates your users require without much complexity, particularly if your templates are already in JSON or HTML format.
In this demo, sample templates will be hardcoded to demonstrate functionality, but in production you would create a callback function to retrieve templates from back-end storage.
To add Templates to your React help desk messaging page, modify ClientMessagingEditor.tsx as follows:
- Add
advtemplateto the TinyMCEpluginsarray. - Add
inserttemplateto thetoolbar. - Add a reference to
advtemplate_templatesto TinyMCE. Review all three changes in the TinyMCE init:
init={{ menubar: false, placeholder: "Type your reply...", plugins: "advtemplate lists link image table code help wordcount autoresize", toolbar: [ "inserttemplate | undo redo | formatselect | bold italic emoticons | alignleft aligncenter alignright alignjustify | bullist numlist outdent indent | link image code"], advtemplate_templates, }} - In a production scenario,
advtemplate_templatesmust connect to the callback function mentioned earlier. For this guide, use these hardcoded templates as aconstin ClientMessagingEditor.tsx:
const advtemplate_templates = [
  {
    title: "Customer support",
    items: [
      {
        title: "Initial response",
        content:
          "Hi there,\n\nThanks for reaching out. I've received your message and I'm looking into this now.\n\nI'll get back to you shortly with more information.",
      },
      {
        title: "Issue resolved",
        content:
          "Good news — I've resolved your issue.\n\nEverything should be working now. Let me know if you run into any other problems or have questions.",
      },
    ],
  },
  {
    title: "Technical troubleshooting",
    items: [
      {
        title: "Password reset instructions",
        content:
          "I've sent a password reset link to your email address.\n\nNext steps:\n- Check your inbox for the reset email (it expires in 24 hours)\n- Click the link and create your new password\n- Log in with your new credentials\n\nIf you don't see the email in a few minutes, check your spam folder. Let me know if you need me to resend it.",
      },
    ],
  },
];
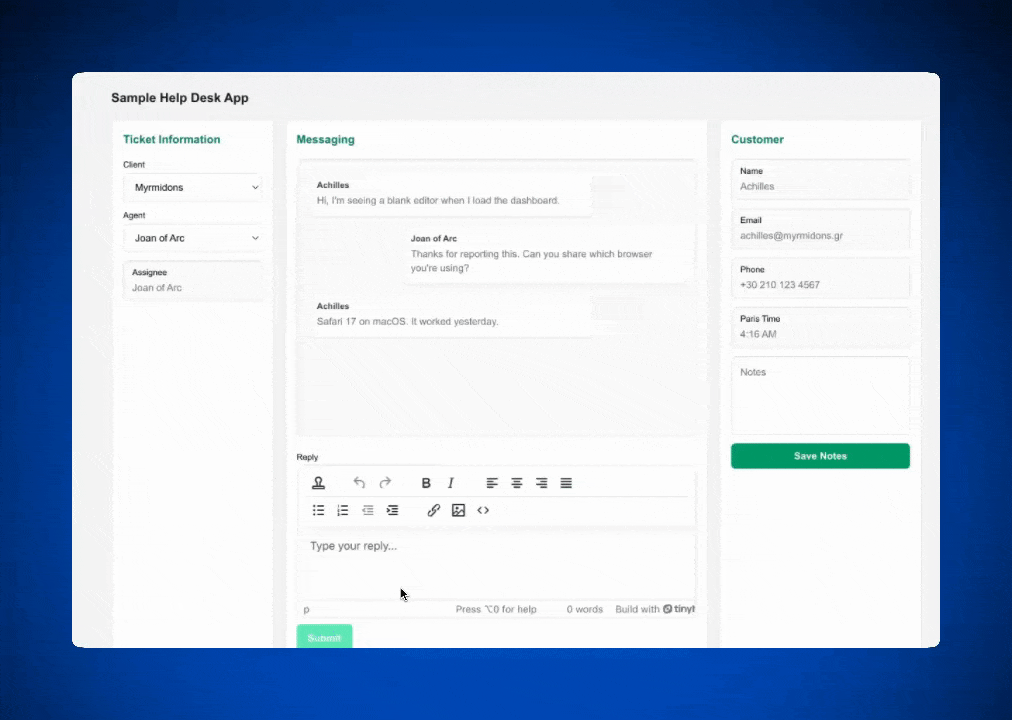
Save ClientMessagingEditor.tsx and head over to localhost:3000 to see Templates in action.
Add Tables
Much like most TinyMCE features, it’s quick to add table functionality to your help desk app so that support staff can organize information visually for their clients.
You will:
- Add
tableto the TinyMCEpluginsarray. - Add
tableto thetoolbar. - Add
table_toolbarto TinyMCE with the following default list:
table_toolbar: "tableprops tabledelete | tableinsertrowbefore tableinsertrowafter tabledeleterow | tableinsertcolbefore tableinsertcolafter tabledeletecol";
Here’s what it looks like in the TinyMCE init:
init={{
            menubar: false,
            placeholder: "Type your reply...",
            plugins: "table advtemplate lists link image table code help wordcount autoresize",
            toolbar: [
              "table inserttemplate | undo redo | formatselect | bold italic emoticons | alignleft aligncenter alignright alignjustify | bullist numlist outdent indent | link image code"],
            advtemplate_templates,
            table_toolbar: 'tableprops tabledelete | tableinsertrowbefore tableinsertrowafter tabledeleterow | tableinsertcolbefore tableinsertcolafter tabledeletecol'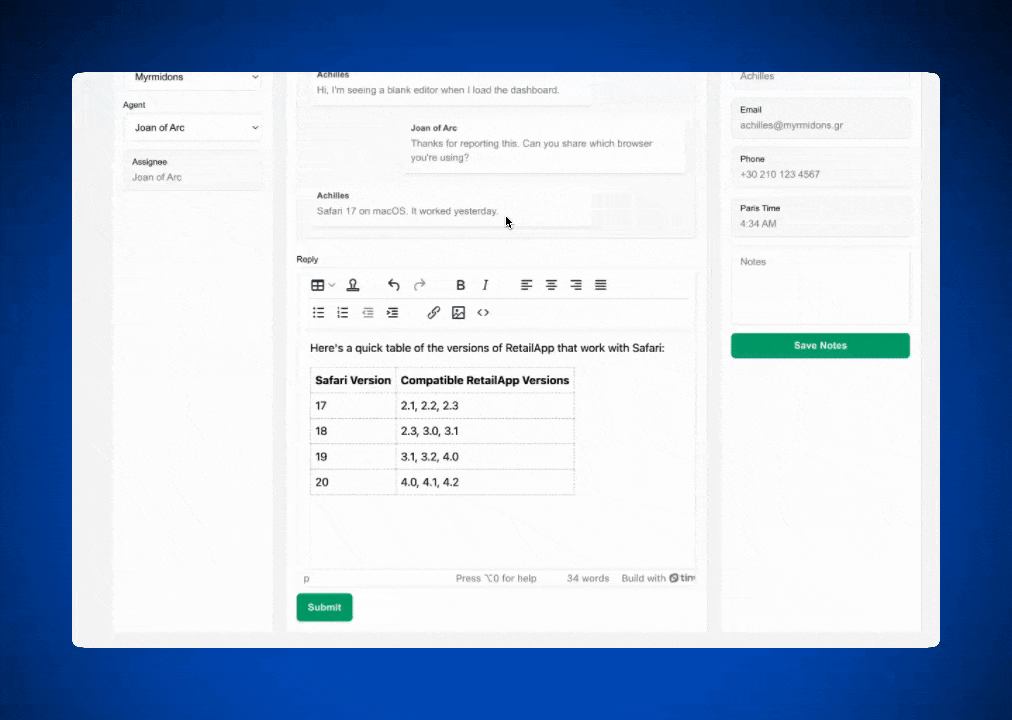
}}Now you can check out how the Table feature renders on localhost:3000!
Add PowerPaste
🤔 What’s PowerPaste? Often, pasting rich content from one platform to another creates styling issues, and users can waste time reformatting their work all over again.
But not with PowerPaste. PowerPaste allows support agents in help desk apps to copy rich messages, links, and images into TinyMCE and convert the content to clean HTML. Agents can paste content from Jira, Slack, or other workflow management systems to their client messages without reworking the content.
Adding the PowerPaste plugin to TinyMCE is even simpler and quicker than the integrations you just did:
-
Simply add
powerpasteto thepluginsarray.
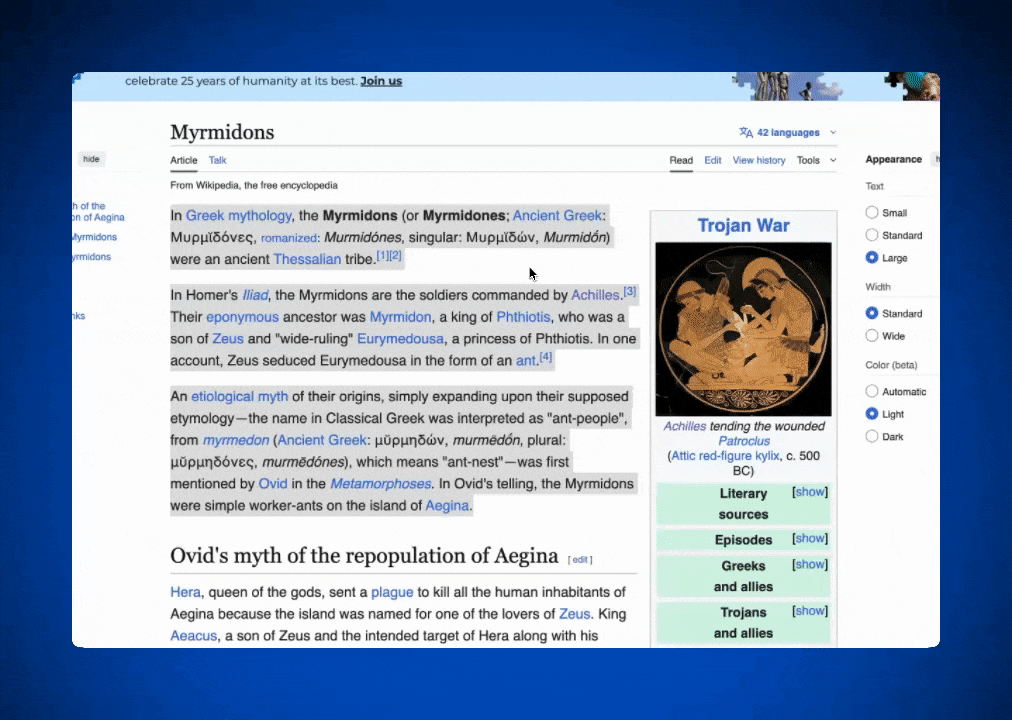
plugins: "powerpaste table advtemplate lists link image table code help wordcount autoresize",Head over to localhost:3000 and paste some sample rich content from Wikipedia to see PowerPaste render pasted links, reference numbers, and Greek in one copy-paste action:
Add Autolink
Last but certainly not least is the Autolink feature. This allows support agents to simply type a valid URL and it automatically becomes a link. This way, any pasted or typed links don’t need to be manually converted.
To integrate this plugin, simply add the word autolink to your plugins array.
plugins: "autolink powerpaste table advtemplate lists link image table code help wordcount autoresize",And that’s it! Check out your Autolink working on your app.
Wrap up: Let TinyMCE do the work
You've built rich text editing and help desk features right into a React app in just a few steps. TinyMCE handles all the heavy lifting when it comes to formatting, links, templated replies, and creating professional-looking responses.
Whether you're building an internal help desk tool or a customer-facing support platform, TinyMCE gives you the flexibility to customize the editor however you need while keeping the RTE integration phase short and sweet. Most plugins need just a single word to add the feature to your editor.
Want to read more about how TinyMCE and React play well together? Check out the React framework page on the TinyMCE Developer Center to get your questions answered.


