


WYSIWYG stands for “What You See Is What You Get”. This means the text you can see in the editor is exactly how the final product looks online. In addition, instead of having to format content for the web with HTML, CSS, or JavaScript, you can be sure that the content won’t change after you hit the ‘Publish’ button.
But… some content creation experiences are “more WYSIWYG” than others. That means the content created in the WYSIWYG editor may change when you publish it – the editor basically gives you less control.
So how do you figure out how WYSIWYG, your editor really is?
This article provides an overview of options to consider when it comes to providing the best WYSIWYG editing experience for your users. It also demonstrates how to get started with the flexible and reliable TinyMCE WYSIWYG HTML editor (that ensures your content doesn’t change when you hit ‘Publish’ 😉).
What is an advanced WYSIWYG HTML editor?
A WYSIWYG HTML editor is a more advanced tool, as compared to just a rich text editor that claims to be a WYSIWYG.
In this case, the WYSIWYG HTML editor works behind the scenes to take words and images that have been added to the text area, and translates them into HTML that a browser can understand. (Browsers are easy to take for granted, but they do understand code.)
The goal that’s evident throughout WYSIWYG’s long history, has always been to streamline the process and improve the outcomes of writing content for the web. That means when you’re using a WYSIWYG HTML editor, it doesn't require you to understand HTML tags, apply them to each heading and word correctly, and then test the final result. It all happens automatically.
Some WYSIWYG HTML editors follow this exact process: you write, they translate, and the published content matches what you intended. Some even have additional features for design, style, and formatting.
Most importantly, advanced WYSIWYG HTML editors provide more than a rich text editor with ‘WYSIWYG’ included as a feature.
What features make advanced WYSIWYG editors useful for web development?
1. Edit and preview HTML code
Having control over your HTML content is a feature that supports web development.
- For writers with some HTML experience, an advanced WYSIWYG HTML editor gives you the option to check the code running behind the scenes.
- A useful additional feature is code preview, where you can check how the content looks before publishing.
Both these are small, but vital features that make WYSIWYG editors useful for web development.
2. Include images, media, and diverse content
An advanced WYSIWYG HTML editor gives you control over:
- Where the image appears on the page
- Image size
- Alt-text (more on that in the next paragraph)
- Colors
- Captions
- And any links inside the images.
Provide accessibility
Accessible web content is a must.
- Advanced WYSIWYG HTML editors that provide support to make sure content is accessible are saving you time and energy. Especially if your content writers aren’t familiar with the accessibility requirements.
- These tools can also take the pressure off website administrators, who may have the time to perform maintenance and checks for accessibility.
Easy integration into projects
The editor shouldn’t get in the way of your project.
- You shouldn’t have to spend excessive time working through installation and upgrades. If a WYSIWYG HTML editor can integrate easily into an app or web page, then the value it’s offering is unmistakable.
What’s the difference between advanced WYSIWYG HTML editors and rich text editors?
If you’re still figuring out what the difference is between the WYSIWYG HTML editor, and a rich text editor, here’s a summary and a extended explanation (with pictures!):
Differences between rich text editors and WYSIWYG HTML editors
|
WYSIWYG HTML editors |
Rich Text Editors |
|
|
Translate text to HTML for websites to parse and publish |
✅ |
✅ |
|
More information |
➕Translate and publish text as HTML |
➕Comparable translation ability to the WYSIWYG HTML editor |
|
Provides checking support for better accessibility and spelling? |
✅ |
❌ |
|
More information |
➕Additional checks for publishing web content |
➕Less options to set up, especially for internal-facing apps |
|
Can reveal the underlying HTML, and allow editing of the code. |
✅ |
❌ |
|
More information |
➕Fine grained control |
➖Not as much control |
|
Control and design choices for images? Including editing? |
✅ |
❌ |
|
More information |
➕Strong image content control |
➖Limited control over how images will appear when published. |
A rich text editor isn’t always an advanced WYSIWYG HTML editor
Rich text editors (RTEs) offer a lot of features. And some RTEs claim to be WYSIWYG, in that they convert the text into HTML behind the scenes. But often the content changes appearance when it’s published.
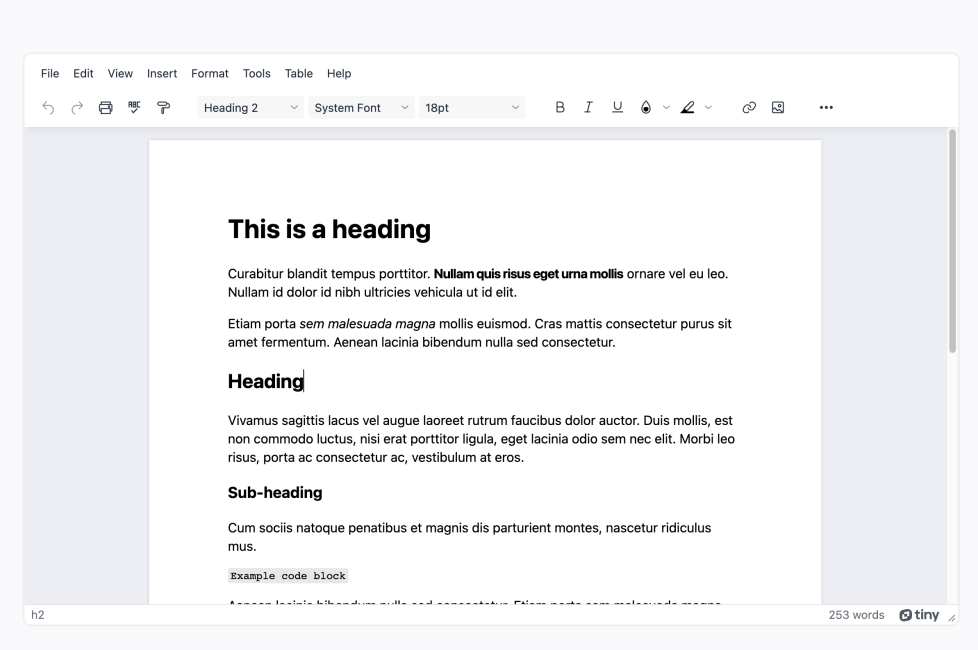
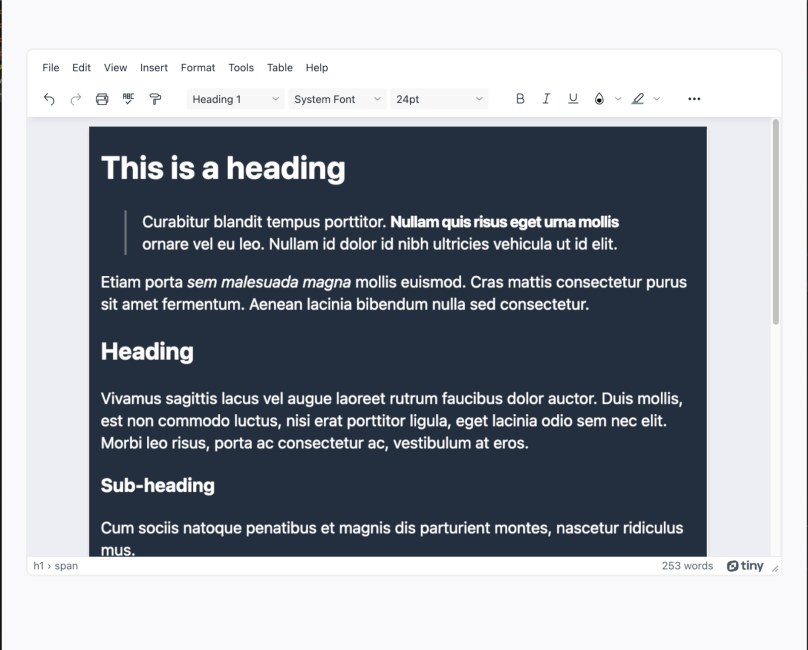
For example, when users create content in a simple (read basic) rich text editor, and they may not have to write any HTML, the styling of the content looks more or less like this:
But, when the content is saved and published to a page, it might look like this:
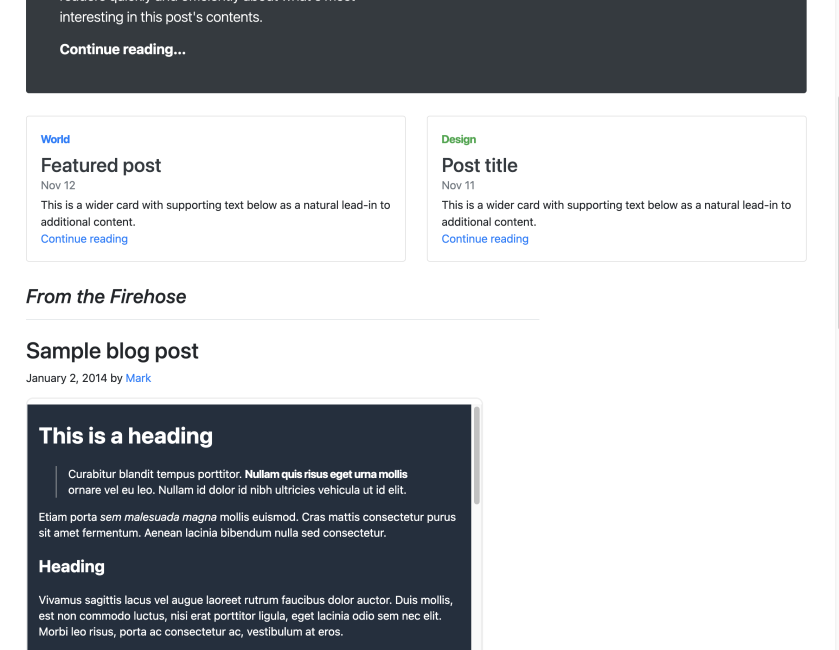
While this is a perfectly reasonable way to depict the content and it is WYSIWYG (to an extent), there’s less control over the outcome (look and feel) as compared to a more advanced WYSIWYG HTML editor.
The best WYSIWYG HTML editors can be configured so the content within the editor more closely reflects the published content, for example:
The key difference between a rich text editor, and an advanced WYSIWYG HTML editor – an advanced WYSIWYG HTML editor can provide more control for web development outcomes.
How to integrate the advanced WYSIWYG HTML editor TinyMCE
TinyMCE is an advanced WYSIWYG HTML editor, supporting all the web development functions mentioned in the previous sections, and more. It’s reliable and provides the much needed ‘control’ that could be missing from some other rich text editors.
Users interact with the editor on all the familiar buttons and shortcut keys, and the corresponding HTML code is generated automatically, behind the scenes, and rendered in your online applications. That content appearance stays exactly the same, from writing through rendering, to being published.
Trusted by millions of developers across the globe, it’s used as the text entry component in over 100M+ products worldwide. Check out examples of 9 products you can build with TinyMCE.
Get started with our WYSIWYG HTML editor
The following sections explain the integration steps, and you can find more information on how to add a WYSIWYG HTML editor to your website on our blog.
The first step is getting a FREE TinyMCE API key.
Once you’ve got an API key, getting your first instance of TinyMCE running is as simple as pasting the following code into an HTML file and opening it up in a browser (replacing no-api-key with the API key from your account.
<!DOCTYPE html>
<html lang="en">
 <head>
   <meta charset="utf-8">
   <meta name="viewport" content="width=device-width, initial-scale=1">
   <script src="https://cdn.tiny.cloud/1/no-api-key/tinymce/6/tinymce.min.js" referrerpolicy="origin"></script>
   <script>
     tinymce.init({
       selector: '#mytextarea'
     });
   </script>
 </head>
 <body>
 <h1>TinyMCE Quick Start Guide</h1>
   <form method="post">
     <textarea id="mytextarea">Hello, World!</textarea>
   </form>
 </body>
</html>NOTE: You will be presented with a warning notification - This domain is not registered with Tiny Cloud - if you are running TinyMCE on your local machine outside of a web server, or if the domain on which you’re running TinyMCE is not registered against your account. To remove the notification, open it on localhost (which is already an approved domain by default), or register your domain as an approved domain in your account.
What next?
Once you’ve got TinyMCE running with the default configuration, you can customize it to suit the specific UX you want to provide in your products.
Enhance the WYSIWYG experience
- Customize styles within the editor to match your published content - check out this article with information about TinyMCE CSS and custom styles
- Or get started with inline editing
Customize user options and features
TinyMCE is extremely powerful and flexible - you can configure it with as many or as few options as you need. Here’s an article with more information about how to customize the TinyMCE toolbar.
Integrate with your favorite frameworks
Once you’ve got TinyMCE up and running, it’s easy to integrate it with any of your favorite frameworks. Here are some guides on how to get started with the most popular frameworks:


